
Printer User Manual
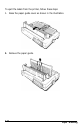
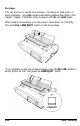
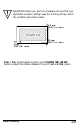


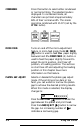
Table Of Contents
- FRONT MATTER
- TABLE OF CONTENTS
- INTRODUCTION
- CHAP 1-SETTING UP THE PRINTER
- CHAP 2-PAPER HANDLING
- CHAP 3-USING THE PRINTER
- CHAP 4-USING SOFTWARE AND GRAPHICS
- Using the LQ-2550 With Application Programs
- Computer-Printer Communication
- Enhancing Your Printing
- Graphics
- User-Defined Characters
- Designing Your Characters
- Design Grids
- Data Numbers
- Sending Information to Your Printer
- Printing User-Defined Characters
- Copying ROM Characters to RAM
- Letter Quality Characters
- Proportional Mode Characters
- Superscripts and Subscripts
- The Graphics Command
- Column Reservation Numbers
- A simple Graphics Program
- Using Hand-Calculated Data to Print Graphics
- Using Software and Graphics
- Mixing Print Styles
- CHAP 5-MAINTENANCE AND TRANSPORTATION
- CHAP 6-TROUBLESHOOTING
- Troubleshooting
- Problems and Solutions
- The Printer Does Not Print
- The Printer Stops Printing
- The Printout is Spaced Incorrectly
- The Printout is Faint or Uneven
- The Printout is Not what You Expect
- Single Sheets Do Not Feed Properly
- Continuous Paper Does Not Feed Properly
- Cut Sheet Feeder Does Not Load Paper Correctly
- The Short Tear-Off Feature Does Not Work Properly
- Color Printing Is Not What You Expect
- Data Dump Mode
- CHAP 7-USING PRINTER OPTIONS
- CHAP 8-COMMAND SUMMARY
- APPENDIX A-TECHNICAL SPECIFICATIONS
- GLOSSARY
- INDEX
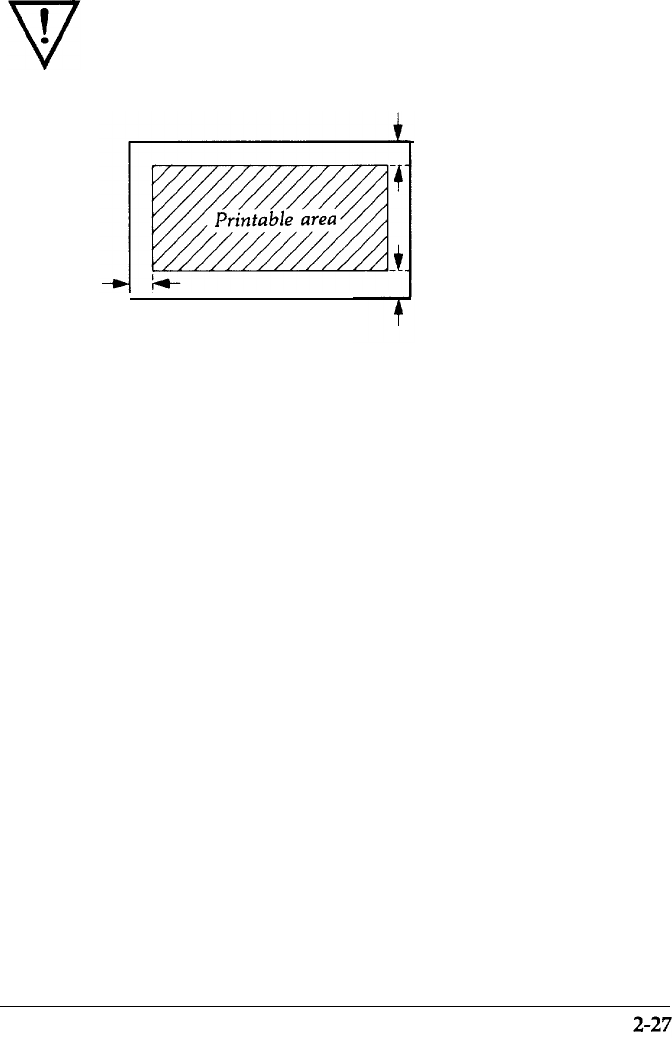
WARNING: When you print on envelopes, be sure that your
application program settings keep the printing entirely within
the printable area shown below.
8.5 mm
(0.33”) or more
22 mm
(0.87”) or more
3mm
(0.22”) or more
Note:
If
the
printed results are faint, use the
PLATEN GAP ADJUST
button to adjust the distance between the print head and
the
platen.
Paper Handling