
Printer User Manual
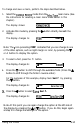
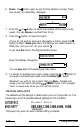
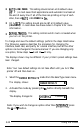
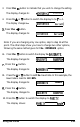
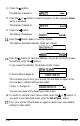
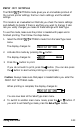
Table Of Contents
- FRONT MATTER
- TABLE OF CONTENTS
- INTRODUCTION
- CHAP 1-SETTING UP THE PRINTER
- CHAP 2-PAPER HANDLING
- CHAP 3-USING THE PRINTER
- CHAP 4-USING SOFTWARE AND GRAPHICS
- Using the LQ-2550 With Application Programs
- Computer-Printer Communication
- Enhancing Your Printing
- Graphics
- User-Defined Characters
- Designing Your Characters
- Design Grids
- Data Numbers
- Sending Information to Your Printer
- Printing User-Defined Characters
- Copying ROM Characters to RAM
- Letter Quality Characters
- Proportional Mode Characters
- Superscripts and Subscripts
- The Graphics Command
- Column Reservation Numbers
- A simple Graphics Program
- Using Hand-Calculated Data to Print Graphics
- Using Software and Graphics
- Mixing Print Styles
- CHAP 5-MAINTENANCE AND TRANSPORTATION
- CHAP 6-TROUBLESHOOTING
- Troubleshooting
- Problems and Solutions
- The Printer Does Not Print
- The Printer Stops Printing
- The Printout is Spaced Incorrectly
- The Printout is Faint or Uneven
- The Printout is Not what You Expect
- Single Sheets Do Not Feed Properly
- Continuous Paper Does Not Feed Properly
- Cut Sheet Feeder Does Not Load Paper Correctly
- The Short Tear-Off Feature Does Not Work Properly
- Color Printing Is Not What You Expect
- Data Dump Mode
- CHAP 7-USING PRINTER OPTIONS
- CHAP 8-COMMAND SUMMARY
- APPENDIX A-TECHNICAL SPECIFICATIONS
- GLOSSARY
- INDEX
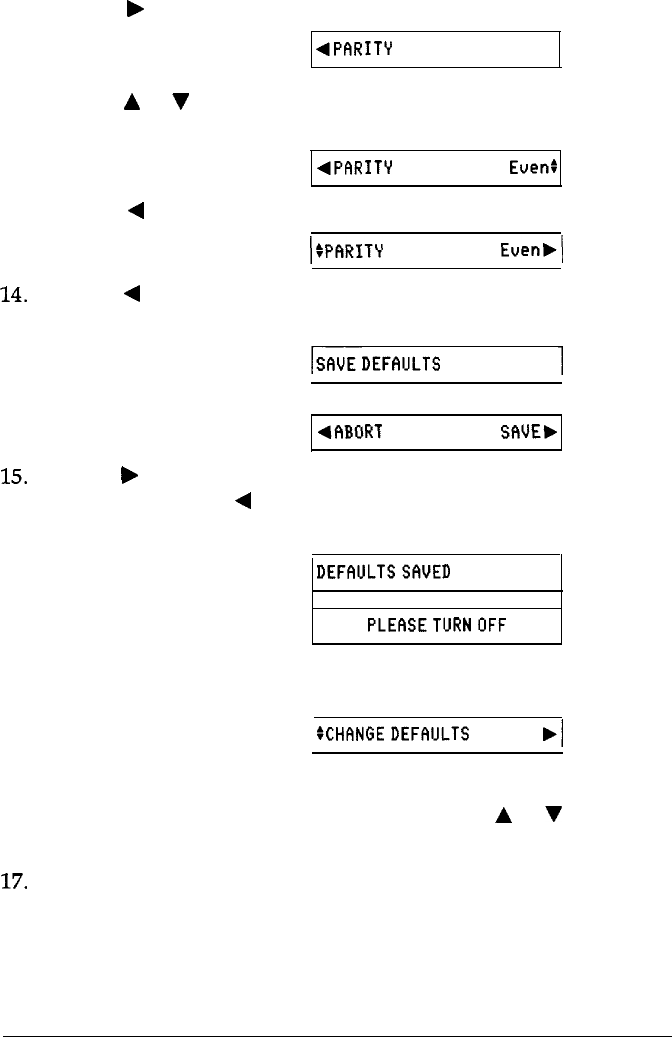
11. Press the
b
button.
The display changes to:
4PFIRITY
None:
12. Press the
A
or
V
button to select the parity. In this example,
Even
parity is selected.
The display changes to:
4PFIRITY
Even:
13. Press the
4
button.
The display changes
to:
ISPF~RITY
Even,\
14.
Press the
4
button again to exit this option.
The display alternates between these two menus:
IwEDEF~~uLTS
1
4flBORT
SfiUEb
15.
Press the
b
button to save the defaults. (If you do not wish to save
the setting, press the
4
button.)
If you saved the defaults, the display briefly shows:
DEFflULTSSAUED
It then briefly changes to:
PLEMETURNOFF
This reminds you to turn your printer off and back on again to let
the changes in default settings take effect.
Finally, it changes to:
:CHflNGEDEFiWLTS
.I
You are now back at the SelecType main menu.
16. To switch to another main menu mode, press the A or
V
button. If
you wish to exit SelecType mode, press the
SelecType
button.
17.
Turn your printer off and back on again to allow your new default
settings to take effect.
3-22
Using the Printer