26" LCD HDTV User Guide MODEL EQ2688
Dear EQD customer, Congratulations on your purchase of an EQD TV display. For maximum benefit of your TV, please read these instructions before any operations. Product Registration For Your Records Product Name: [ ] EQ2688 EQD LCD TV Document Number: [ ] EQ2688F-1M_UG_ENG Rev. 1A 03-27-09 Serial Number: ____________________________________________ Purchase Date: ____________________________________________ Product disposal at end of product life EQD is concerned about the preservation of our environment.
Copyright Information Copyright © EQD®, 2009. All rights reserved. ENERGY STAR® is a registered trademark of the U.S. Environmental Protection Agency (EPA). As an ENERGY STAR® partner, EQD® has determined that this product meets the ENERGY STAR® guidelines for energy efficiency. Disclaimer: EQD® shall not be liable for technical or editorial errors or omissions contained herein; nor for incidental or consequential damages resulting from furnishing this material, or the performance or use of this product.
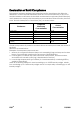
Declaration of RoHS Compliance This product has been designed and manufactured in compliance with Directive 2002/95/EC of the European Parliament and the Council on restriction of the use of certain hazardous substances in electrical and electronic equipment (RoHS Directive) and is deemed to comply with the maximum concentration values issued by the European Technical Adaptation Committee (TAC) as shown below: Substance Lead (Pb) Mercury (Hg) Cadmium (Cd) Hexavalent Chromium (Cr6+) Polybrominated biphenyls
Contents Product Registration ......................................................................................... i Product disposal at end of product life ......................................................................... i Safety Instructions ............................................................................................. i Wet Location .................................................................................................... i Outdoor Use .............................
Important Safety Instructions 1. 2. 3. 4. 5. 6. 7. 8. 9. 10. 11. 12. 13. 14. Read these instructions completely before using the equipment. Keep these instructions in a safe place. Heed all warnings. Follow all instructions. Do not use this apparatus near water. Clean with a soft, dry cloth. Do not block any ventilation openings. Install the equipment in accordance with the manufacturer’s instructions.
BATTERIES • Do not cast away batteries in a fire. • Do not disassembled, overheat, or short-circuit the batteries. • If the battery is replaced in the wrong way, it may cause danger of explosion. Replace only with the same or equivalent type. Dispose used batteries. To preserve our environment, dispose of used batteries according to your local laws or regulations. CLEANING Cleaning the AC power plug Unplug the AC power plug and clean it regularly.
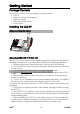
Getting Started Package Contents Check the contents of your package. It should contain: • LCD TV • Remote Control with batteries • EQD User Guide • EQD Quick Start Guide • Power Cord Installing the LCD TV Disconnecting the stand Mounting EQD LCD TV to the wall The LCD TV can be used in a free standing position or wall-mounted. Before installing the product to the wall, please consider the following guidelines: • Read the Important Safety Instructions, at the start of this manual.
• Install the wall mount plate to the LCD TV using screws NO LONGER than 10mm, as longer screws found in universal (non-EQD) wall mount kits may damage the power supply causing the unit to fail. The wall-mount screw type is M4 x L10. • Mount the wall mount bracket to the wall ensuring use of proper screws to support the installation. Ensure there is at least 3cm of space surrounding any air-vents of your LCD TV to allow adequate cooling during operation.
Front View of the product 4 5 6 7 8 1 2 3 Item Description 1 Power ON/OFF button 2 Power LED Indicator 3 4 5 Remote Control Receiver SOURCE MENU 6 Volume Up 7 Volume Down 8 CH Up 9 CH Down EQD® 9 Turn the power on from standby mode or turn the power off to return to the standby mode. Lights up in blue when the TV is turned on. Lights up in orange when the TV is in standby mode. Receives IR signals from the remote control. Select input source. Turn OSD menu ON/OFF.
Rear View of the Product SPDIF OUT AC IN AV SERVICE PORT USB 1 HDMI 2 2 Item Power (AC input) 2 SERVICE PORT USB 3 HDMI 2 Input Terminal 4 HDMI 1 Input Terminal 5 PC AUDIO 6 VGA Signal Input 7 9 YPbPr Signal Input YPbPr/ Audio Input (left/ right) SPDIF OUT 10 S-VIDEO 11 AV 12 13 EQD® 3 PC AUDIO 4 5 S-VIDEO PC / VGA 6 7 8 9 ANT.
Connecting the LCD TV SPDIF OUT AV SERVICE PORT USB HDMI 2 HDMI 1 PC AUDIO Personal Computer Earphone ANT. IN DVD Player/VCD DVD Player/ VHF/ UHF Player/Game VCD Player/ CABLE Game System System DVD Player/VCD Player/Game System Blu-ray Disc Player/ PS3 Digital Cable box S-VIDEO PC / VGA Personal Computer Digital Satellite Receiver DVD Player Audio System *Note: For DVI connection please use DVI-to-HDMI cable/adapter.
Using TV Features Remote Control and TV Controls Inserting Remote Control Batteries 1. Remove the battery cover by pulling then lifting the knob on the cover. 2. Insert the batteries, corresponding to the (+) and (-) markings on the battery compartment. 3. Reattach the battery cover. CAUTION • Only use the specified AAA batteries. • Do not mix new and old batteries. This may result in creaking or leakage, which may pose a risk of fire or lead to personal injury.
Remote Control and TV Controls 4 5 6 7 8 1 2 3 9 Button 1 SLEEP 1 AV 2 SLEEP FAV3 3 TV FAV4 4 5 WIDE CC 6 0~9, number buttons 7 SOURCE POWER 2 TV AV HDMI/PC YPbPr WIDE CC MTS PICTURE Description Press to select source to AV mode Press repeatedly to set the off timer. The function is used to automatically shut off the LCD TV after a preset period of time passed. There are several times for choice – Off, 5 Min, 15 Min, 30 Min, 60 Min, 90 Min, and 120 Min.
SLEEP POWER 8 GUIDE 9 CH 10 HDMI/PC 14 11 POWER 15 12 13 YPbPr PICTURE 14 MTS 15 16 FAV 1-4 LAST 17 EXIT 10 11 TV AV HDMI/PC YPbPr WIDE CC MTS PICTURE 12 FAV1 13 FAV2 FAV3 FAV4 Press to display the Electronic Program Guide (EPG). It contains the program information for the channel you’re watching. Press to change the channels up or down. Press to select source to HDMI/PC mode. Press this button to turn the power on from standby mode.
Operation Turning the TV On and Off ALEEP Press the POWER button on the remote control. You can also use the Power button on the front of the panel. TV POWER AV HDMI/PC YPbPr Changing Channels 1. Using Channel Buttons INFO Press CH button to change channels, and the TV changes channels in sequence. You will see all channels that have been memorized. Channels erased or not memorized will not be shown. 2. Using Number Buttons Using the remote control buttons 0-9, select channel for NTSC/ATSC/CATV.
Using the OSD Function You can use the OSD menus and options to adjust various settings by using your remote control. There are six options on the screen: PICTURE, AUDIO, TV, and SETUP. The basic operation is as following: 1.Press MENU to display OSD Menu. 2.Use or to move the cursor bar up and down, so that you can appoint your desired option while OSD menu is enabled. 3.Use ENTER to enter the submenu. 4.Press or to adjust the condition. 5.Press EXIT to close the recent page. 6.
Audio: 1.Press MENU to display OSD Menu. 2.Use or to move the cursor bar to . 3.Use ENTER to enter the submenu. 4.Press or to adjust the condition. • • • • • Bass: To adjust the bass. Treble: To adjust the treble. Balance: To adjust the left and right audio balance. TV Speaker: To enable or disable the sound output for TV programs. Audio Presets: To select the audio settings between Rock, Pop, Classical, and Flat. • Reset: Reset to factory default. Video Mode: 1.Press MENU to display OSD Menu. 2.
Settings: 1.Press MENU to display OSD Menu. 2.Use or to move the cursor bar to . 3.Use ENTER to enter the submenu. 4.Press or to adjust the condition. • Date and Time: Use or to select the time zone which user is in. There are total eight time zones in the USA, include Hawaii and Alaska. • Closed Caption: Selects the Active Closed Caption Mode to OFF, CC1, CC2, CC3, CC4, T1, T2, T3, T4. • Parental Control: Access the Parental Control menu. See “Using Parental Control Menu” on page 15 for more details.
Using Parental Control Menu Password is required to access the Parental Control menu. The default password is “999999”. To Change Password: 1.Press the MENU button to display the OSD main menu. 2.Use or to select the menu and press Enter to enter the submenu. 3.Use or to select “Parental Control” from the submenu. 4.Input your password. 5.Select “Change Password” to enter the Change Password setting. 6.Input your new password. 7.Enter your new password again to reconfirm. 8.
Other Information Troubleshooting Please contact EQD service team directly if you have questions, service needs, or require technical assistance related on the use of your television. Problem Possible Solution No power • Make sure the power cord is properly connected to the LCD TV AC power socket. • Make sure the AC power cord is properly connected to the wall outlet. • Make sure the DC power button is ON (Blue LED).
Other Information Specifications Model EQ2688 LCD Display 26-inch Screen, LCD Panel OSD Controls Keypad 7 Buttons (Power, Menu, Source, CH+, CH-, VOL+, VOL-) Remote Control 6 Major Buttons (Menu, Ok, Up, Down, Left, Right) OSD Functions Picture Mode: Brightness, Contrast, Sharpness, Colour, Hue, Colour Temp, Backlight Sound Mode: Balance, Treble, Bass [ATV]: Channel Number, Channel Skip, System (CATV/AIR), Auto Search [DTV]: Manual Search, Closed Captioning, V-Chip 2.
Other Information Model EQ2688 Comb Filter Aspect Ratio Control 3D 16:9 4:3 Zoom Wide Noise Reduction Yes Auto Sleep Timer YES No Signal Auto Off NO Teletext NO Child Lock Yes, V-Chip.
Other Information EQD 19 EQ2688