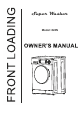
Super Washer Model: 824N
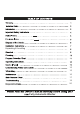
Unpacking & Levelling 15 15 16 17 19 20 Fully Automatic Washer
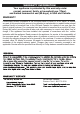
WARRANTY INFORMATION Your appliance is protected by this warranty under normal, personal, family or household use (1Year), and limited commercial use (90 days), in USA and Canada. WARRANTY Consolidated Brands undertakes to the consumer-owner to repair or, at our option, to replace any part of this product which proves to be defective in workmanship or material under normal personal, family or household use, in the USA and Canada, for a period of one year from the date of original purchase.
EXCLUSIONS In no event shall Consolidated Brands be liable for incidental or consequential damages or for damages resulting from external causes such as abuse, operation misuse, neglect, alterations, normal wear and tear, incorrect voltage or acts of God. This warranty does not cover service calls which involve defective workmanship, damage due to other products while combined use with this product or materials covered by this warranty.
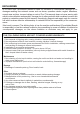
N 13lbs / 6Kg 7.25-145 (psi) / 0.05-1(Mpa) 33.5x23.6x22 (in) / 85x60x55.8 (cms) 152lbs / 68.9Kg Electrical Testing Laboratories Note: All rights reserved.
The washer is a compact size unit that can fit conveniently saving space in your home. The washer’s compact size makes it perfect for placement in any room of your home. This appliance is simple to use with easy to operate controls. Fully digital color coded LED display that makes it easy to understand and operate the machine. This Washer has no agitator to damage your clothes so they look better and last longer. With a high spin speed of 1200 rpm, more water is extracted, allowing improved dry times.
the washer, turn on all hot water faucets and let the water flow from each for several minutes. This will release any accumulated Hydrogen.
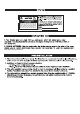
CAUTION: TO REDUCE THE RISK OF ELECTRIC SHOCK, DO NOT REMOVE COVER (OR BACK). NO USER SERVICEABLE PARTS INSIDE. REFER SERVICING TO QUALIFIED SERVICE PROFESSIONALS. AND REDUCE WRINKLES.
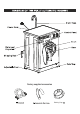
Factory supplied accessories Blanking Caps
Handling Installation area Please handle the machine carefully and use appropriate means while lifting and moving the machine so that it does not get damaged. Do not drag the machine to your floor and, or, to the machine. Do not hold on to protruding parts when lifting Appliance stability is very important otherwise washing machine could “wander” during the spin cycles. Disposing of the packing The shipping package has protected your new washing machine on its way to your home.
The power cord can be accessed by removing the shipping rods (Fig. 2 & 3). with the caps provided (Fig. 4). The screws also need to be reinstalled (Fig. 4). (Fig. 5). Fig.
overheating and burn out. This washer must be connected to an individual circuit identical to the specified on the rating plate of the loading port protected by fuses or circuit breaker conforming to local codes. This appliance must be grounded. In the event of malfunction of breakdown, grounding will reduce the risk of electric shock by providing a path of least resistance for electric current. This appliance is equipped with a power cord having an equipment-grounding conductor and a grounding plug.
Height difference between the installation location of the washing machine and the drainage point: Minimum 24", and Maximum 40". Attach water drain hose to U-Connector. Hook the U-Connector over the side or stand pipe (Fig 7.) When the water is being drained, check that the water flow out of the hose is adequate.
Value by Atul 68 1200 rpm spin 1200 rpm spin Value by Atul 55 1200 rpm spin Quick 20 Quiet 1200 rpm spin Light fabrics Cold water wash 800 rpm spin 20 minutes 35 minutes
Make sure For small items such as socks, children’s garments and small towels please use a Washing Net Bag. Dispenser A: Detergent for main wash Dispenser B: Fabric Softener Dispenser C: Detergent for pre-wash The blue cups are only for liquid detergent. Please do not add powder in these cups.
2 Memory button Press this button to select once of the four positions, then select the additional options for your favorite washing cycles, then press Start/Pause button to run this program, and this program will be memorized. If you want to run the memorized program later, press this button to select one of them, then press Start/Pause button. Turn the dial to align “OFF” to cancel the memory operation. Chime button Press this button to turn on, or off the chime before you start the washing cycle.
Memory Function Door Unlocked / Locked Chimes On/Off Wash settings How to Run a Wash Cycle 1. Rotate knob to one of the wash settings 2.
The wash program can be stopped at any time to add forgotten items to the laundry - Press pause for 5 seconds - Door will open 2 mins after draining water so that it does not overflow. - Load clothes. Close door. - Press START The cycle will continue from the point it stopped How to stop the wash cycle - The wash program can be stopped at any time. - Press pause for 5 seconds - Turn knob to OFF position - To drain water turn knob to DRAIN ONLY on left side.
Pour 2 cups of RV type Antifreeze in soap dispenser. on knob Shut off water at both faucets and disconnect water inlet hoses from faucets and drain Make sure that your machine was installed according to the correct installation procedures mentioned in this Manual. - Switch off the Washer - Open the service flap. (bottom right corner)(Fig.11) - Carefully unscrew the coin-trap cover. Warning: Some residual water will flow out. (Approx. 1 Cup)[Fig.