#3173 IMPORT COMPUTER CODE READER (FRONT COVER)
Table of Contents Chapter 1 2 3 4 5 6 7 i Title Page No. YOU CAN DO IT! . . . . . . . . . . . . . . . . . . . . . . . . . . . . . . ii GENERAL INFORMATION SAFETY PRECAUTIONS . . . . . . . . . . . . . . . . . . . . . . . GENERAL INFORMATION . . . . . . . . . . . . . . . . . . . . . VEHICLES COVERED . . . . . . . . . . . . . . . . . . . . . . . . . BEFORE YOU BEGIN . . . . . . . . . . . . . . . . . . . . . . . . . VEHICLE SERVICE MANUALS . . . . . . . . . . . . . . . . .
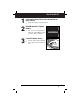
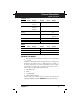
1 2 Look up the Code Retrieval information for your vehicle • Follow the step-by-step instructions. 3 Locate Problem Areas • Look up fault code descriptions o. 3 65 o. 4 N de 6 n li cy de n li o. 5 cy N lt ri 11 gh cy s / 1) t li no si n de m de r al m fu is n fi ct P r re io o m n O ss is s cy fi N h pe ible r 68 re o. li ig n m n 2 O h or C is de pe O s au cy fi N r 71 re o.
General Information SAFETY PRECAUTIONS SAFETY PRECAUTIONS To avoid personal injury, instrument damage and/or damage to equipment under test; do not operate the Import Code Reader before reading this manual. This manual describes common test procedures used by experienced service personnel and technicians. Many test procedures require precautions to avoid accidents that can result in personal injury, and/or vehicle or equipment damage.
General Information GENERAL INFORMATION h. The vehicle’s battery produces highly flammable hydrogen gas. To prevent an explosion, keep all sparks, high temperature items or open flames away from the battery. i. Do not wear loose clothing or jewelry when working on an engine. Loose clothing can get caught on the fan, pulleys, belts, etc. Jewelry is highly conductive, and can cause a severe burn if it makes contact between a power source and ground.
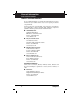
General Information VEHICLES COVERED VEHICLES COVERED HONDA Model Years Engine Model Years Engine Accord 84-95 1.8, 2.0, 2.2, 2.7 Civic/CRX 87-95 1.5, 1.6 Odyssey 95 2.2, 2.3 Model Years Engine Del Sol 93-95 1.5, 1.6 Prelude 85-95 1.8, 2.0, 2.1 2.2, 2.3 Model Years Engine Integra 86-95 1.6, 1.7, 1.8 Legend 86-95 2.5, 2.7, 3.2 NSX 91-95 3.0, 3.2 Vigor 92-94 2.5 Model Years Engine Model Years Engine Altima 93-95 2.4 Axxess 90 2.4 Maxima 86-95 3.
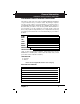
General Information BEFORE YOU BEGIN TOYOTA (cont) Model Years Engine Model Years Engine Celica 86-95 1.6, 1.8, 2.0, 2.2 Corolla 86-95 1.6, 1.8 Cressida 83-89 2.8 w/Super Monitor Display Cressida 86-92 2.8, 3.0 Land Cruiser 88-94 4.0, 4.5 MR2 85-95 1.6, 2.0, 2.2 Paseo 92-95 1.5 Pickup 83-94 2.4 (exc. Diesel), 3.0 Previa 91-95 2.4 (exc. SC) Supra 84-95 2.8, 3.0 T100 Van 93-94 84-89 3.0 2.0,2.2 Tercel 89-94 1.
General Information VEHICLE SERVICE MANUALS VEHICLE SERVICE MANUALS It is recommended that you consult the manufacturer’s service manual for your vehicle before any test or repair procedures are performed. Contact your local car dealership, auto parts store or bookstore for availability of these manuals. The following companies publish valuable repair manuals and information: ■ ALLDATA, LLC 9412 Big Horn Blvd. Elk Grove, California 95758 Phone: 1-916-684-5200 www.alldata.
General Information PRELIMINARY VEHICLE DIAGNOSIS WORKSHEET PRELIMINARY VEHICLE DIAGNOSIS WORKSHEET The purpose of this form is to help you gather preliminary information on your vehicle before you retrieve codes. By having a complete account of your vehicle's current problem(s), you will be able to systematically pinpoint the problem(s) by comparing your answers to the fault codes you retrieve.
General Information PRELIMINARY VEHICLE DIAGNOSIS WORKSHEET WHEN DID YOU FIRST NOTICE THE PROBLEM: ❑ ❑ ❑ ❑ Just Started Started Last Week Started Last Month Other: LIST ANY REPAIRS DONE IN THE PAST SIX MONTHS: PROBLEMS STARTING ❑ No symptoms ❑ Will not crank ❑ Cranks, but will not start ❑ Starts, but takes a long time ENGINE QUITS OR STALLS ❑ No symptoms ❑ Right after starting ❑ When shifting into gear ❑ During steady-speed driving ❑ ❑ ❑ ❑ IDLING CONDITIONS ❑ No symptoms ❑ Is too slow at all times ❑
General Information PRELIMINARY VEHICLE DIAGNOSIS WORKSHEET AUTOMATIC TRANSMISSION PROBLEMS (if applicable) ❑ No symptoms ❑ Vehicle does not move when in ❑ Shifts too early or too late gear ❑ Changes gear incorrectly ❑ Jerks or bucks PROBLEM OCCURS ❑ Morning ❑ Afternoon ❑ Anytime ENGINE TEMPERATURE WHEN PROBLEM OCCURS ❑ Cold ❑ Warm ❑ Hot DRIVING CONDITIONS WHEN PROBLEM OCCURS ❑ Short - less than 2 miles ❑ With headlights on ❑ 2 - 10 miles ❑ During acceleration ❑ Long - more than 10 miles ❑ Mostly dri
About Import Vehicle Diagnostic Systems AUTOMOTIVE COMPUTER CONTROL SYSTEMS AUTOMOTIVE COMPUTER CONTROL SYSTEMS The main purpose of the vehicle’s Computer Control System is to provide maximum engine performance with the least amount of air pollution and the best fuel efficiency possible. The Computer Control System consists of the on-board computer, and several related control devices (sensors, switches, and actuators).
About Import Vehicle Diagnostic Systems ON-BOARD VEHICLE DIAGNOSTICS (OBD I) NOTE: The computer does not make the adjustments or corrections directly. It commands other devices such as the fuel injectors, idle air control, EGR valve or Ignition Module to perform these functions. These devices are called Actuators because they initiate an action in response to the commands of the computer.
About Import Vehicle Diagnostic Systems DIAGNOSTIC TROUBLE CODES • “Hard” Codes. “Hard” codes are stored for problems which are happening now. “Hard” codes cause the “Check Engine” light to turn on. The light remains on as long as the “hard” code is present. • “Intermittent” Codes. “Intermittent” codes are stored for problems, which happened in the past but, are not currently present or detected by the vehicle’s computer.
About Import Vehicle Diagnostic Systems Chapter 2 12
Honda/Acura OVERVIEW OF HONDA/ACURA DIAGNOTIC SYSTEMS OVERVIEW OF HONDA/ACURA DIAGNOSTIC SYSTEMS • Retrieving codes from HONDA Honda/Acura vehicles CONNECTOR requires the use of the two terminal connector of code retrieval tool as shown in Figure H1. H1 • Honda/Acura vehicles use a variety of diagnostic systems which use either the “Check Engine” light or LEDs (Light Emitting Diodes) on the ECM (Engine Control Module) to display diagnostic trouble codes.
Honda/Acura CODE RETRIEVAL PROCEDURE CODE RETRIEVAL PROCEDURE • Always observe safety precautions whenever working on a vehicle. • • • Fix any known mechanical problems before this test. 1. 2. Warm up engine before this test. Have a pencil and paper handy. Locate your vehicle in the appropriate table (see below for “Honda Code Retrieval Procedures”; see page 16 for “Acura Code Retrieval Procedures”). Follow the procedures applicable to your vehicle.
Honda/Acura CODE RETRIEVAL PROCEDURE Honda Code Retrieval Procedures (Cont) Model Years Eng. Accord 86-89 2.0 (F.I. only) Tool Req? Perform the following: N Procedure: Access ECU (located under front driver’s seat) (H4) by moving seat all the way back. Turn ignition on and observe LED on ECU for codes. Codes: Codes blinked out by LED are separated by two second pause, then repeated. For example: 2 blinks - two second pause - 2 blinks = code 2 (H14) Accord 90 Prelude 88-91 2.2 2.0, 2.
Honda/Acura CODE RETRIEVAL PROCEDURE Honda Code Retrieval Procedures (Cont) Model Years Eng. Prelude 85-87 1.8, 2.0 Tool Req? Perform the following: N Procedure: Access ECU (located behind driver’s seat within door pillar assembly) (H8). Turn ignition on and observe LED on ECU for codes. Codes: Codes blinked out by LED are separated by two second pause, then repeated. For example: 2 blinks - two second pause - 2 blinks = code 2 (H14) Prelude 92-95 2.2, 2.
Honda/Acura CODE RETRIEVAL PROCEDURE Acura Code Retrieval Procedures (Cont) Model Years Eng. Integra Integra V-TEC Legend NSX Vigor 92-95 94-95 1.7, 1.8 1.8 91-95 91-95 91-95 2.5, 2.7, 3.2 3.0, 3.2 2.5 Tool Req? Perform the following: Y Procedure: Access service check connector (located under dashboard on passenger side) (H7). Plug Code Reader into service check connector and turn ignition on. Observe “Check Engine” light for codes. Codes: Codes blink out one after the other.
Honda/Acura CODE RETRIEVAL PROCEDURE ECU/Test Connector Locations The physical locations of the ECU or test connector for Honda/Acura vehicles are shown in Figures H4 through H9. Refer to the code retrieval instructions in Table H1 (Honda) or Table H2 (Acura) to determine the correct location for your vehicle.
Honda/Acura CODE RETRIEVAL PROCEDURE Code Examples Examples of Honda/Acura fault codes are shown in Figures H10 through H17. Refer to the code retrieval instructions in Table H1 (Honda) or Table H2 (Acura) to determine the code display for your vehicle.
Honda/Acura ERASING CODES ERASING CODES • Always observe safety precautions whenever working on a vehicle. • Remove Code Reader from vehicle’s test connector before erasing codes. • Erase codes only when all repairs have been completed. Refer to “Honda Erasing Procedures” or “Acura Erasing Procedures” for specific instructions for your year, make and model. • After erasing codes, verify that repairs were successfully completed. Start the engine and warm to normal operating temperature.
Honda/Acura FAULT CODE DEFINITIONS (0 - 20) HONDA/ACURA FAULT CODE DEFINITIONS IMPORTANT: Retrieving and utilizing Diagnostic Trouble Codes (DTCs) for troubleshooting vehicle operation problems is only one part of an overall diagnostic strategy. Never replace a part based solely on the DTC definition. Always consult the vehicle’s service manual for more detailed testing instructions.
Honda/Acura Fault Code Definitions (21 - 59) Code Description Possible Cause 21 Spool Solenoid Valve Open or shorted signal circuit, spool solenoid valve 22 Valve Timing Electronic Oil pressure switch Open or shorted signal circuit, valve timing oil pressure switch 23 Knock sensor circuit Knock sensor or circuit 30 AT / ECU communication signal A AT control unit, ECU 31 AT / ECU communication signal B AT control unit, ECU 35 Traction control / ECU / signal Traction control module, ECU 36
Nissan/Infiniti OVERVIEW OF NISSAN/INFINITI DIAGNOSTIC SYSTEMS OVERVIEW OF NISSAN/INFINITI DIAGNOSTIC SYSTEMS • • Retrieving codes from Nissan/Infiniti vehicles requires the use of the flat end of the code retrieval tool shown in Figure N1. NISSAN TOOL N1 Nissan/Infiniti vehicles use a variety of computer systems which are equipped with either a single-LED (Light Emitting Diode) or a dual-LED display. • To retrieve codes, you need to first locate the LED display on the vehicle’s computer.
Nissan/Infiniti CODE RETRIEVAL PROCEDURE CODE RETRIEVAL PROCEDURE • Always observe safety precautions whenever working on a vehicle. • • • Fix any known mechanical problems before this test. 1. 2. Warm up engine before this test. Have a pencil and paper handy. Locate your vehicle in the appropriate table (see below for “Nissan Code Retrieval Procedures”; see page 29 for “Infiniti Code Retrieval Procedures”). Follow the procedures applicable to your vehicle.
Nissan/Infiniti CODE RETRIEVAL PROCEDURE Nissan Code Retrieval Procedures (Cont) Tool Req? Perform the following: Model Years Eng. Altima Maxima Sentra Stanza 200SX (cont) 93-95 2.4 92-94 3.0 (DOHC) 91-95 2.0 90-92 2.4 95 1.6, 2.0 Y more than one code is stored, the ECU will blink the lowest number code first, pause for two seconds, then display the next highest number code. This continues until all stored codes have been displayed; the cycle then repeats.
Nissan/Infiniti CODE RETRIEVAL PROCEDURE Nissan Code Retrieval Procedures (Cont) Model Years Eng. Maxima 86-94 3.0 (SOHC) Tool Req? Perform the following: Y Procedure: • All except 87, 88 Maxima: Access ECU (located under passenger seat) (N5). • 87, 88 Maxima only: Access ECU (located behind center console) (N3). • Turn ignition on. Using Nissan tool, turn diagnostic mode selector fully clockwise, wait at least two seconds, then turn selector fully counterclockwise.
Nissan/Infiniti CODE RETRIEVAL PROCEDURE Nissan Code Retrieval Procedures (Cont) Model Years Eng. Van 87-88, 2.4 90 Pathfin- 87-95 2.4, 3.0 der Hard87-95 2.4, 3.0 body Pickup Tool Req? Perform the following: Y Procedure: Access ECU (located under passenger seat) (N5). Using Nissan tool, turn diagnostic mode selector fully clockwise and observe LEDs on ECU. When LEDs have blinked three times, turn selector fully counterclockwise. Observe both red and green LEDs on ECU for codes.
Nissan/Infiniti CODE RETRIEVAL PROCEDURE Nissan Code Retrieval Procedures (Cont) Tool Req? Perform the following: Model Years Eng. 300ZX (cont) 86 3.0 Y the second digit (ones). Example: one Red flash and two Green flashes = code 12 (N11). 300ZX 87-89 3.0 (incl. Turbo) Y Procedure: Access ECU (from passenger side front kick panel) (N4). Turn ignition on. Using Nissan tool, turn diagnostic mode selector fully clockwise and observe LEDs on ECU.
Nissan/Infiniti CODE RETRIEVAL PROCEDURE Infiniti Code Retrieval Procedures Model Years Eng. G20 91-95 2.0 Tool Req? Perform the following: Y Procedure: Access ECU (from passenger side kick panel) (N4). Turn ignition on. Using Nissan tool, turn diagnostic mode selector fully clockwise; wait for two seconds, then turn selector fully counterclockwise. Observe LED on ECU (or vehicle’s “Check Engine” light) for codes. Codes: Codes are displayed using both long and short blinks (N8).
Nissan/Infiniti CODE RETRIEVAL PROCEDURE ECU Locations The physical locations of the ECU for Nissan/Infiniti vehicles are shown in Figures N3 through N7. Refer to the code retrieval instructions in Table N1 (Nissan) or Table N2 (Infiniti) to determine the correct location for your vehicle. N3 N4 ECU may need to be accessed from driver or passenger side, depending on model.
Nissan/Infiniti CODE RETRIEVAL PROCEDURE Code Examples Examples of Nissan/Infiniti fault codes are shown in Figures N8 through N11. Refer to the code retrieval instructions in Table N1 (Nissan) or Table N2 (Infiniti) to determine the code display for your vehicle. LONG BLINK SHORT BLINK 0.6 SEC. 0.3 SEC. N8 SHORT PAUSE LONG BLINK BLINK 0.9 SECONDS LONG PAUSE 2 SECONDS BLINK SHORT PAUSE LONG BLINK LONG BLINK 0.
Nissan/Infiniti ERASING CODES ERASING CODES • Always observe safety precautions whenever working on a vehicle. • Erase codes only when all repairs have been completed. Refer to “Nissan Erasing Procedures” or “Infiniti Erasing Procedures” for specific instructions for your year, make and model. • After erasing codes, verify that repairs were successfully completed. Start the engine and warm to normal operating temperature.
Nissan/Infiniti ERASING CODES Nissan Erasing Procedures (Cont) Model Years Procedure Stanza 86 After codes have been retrieved turn selector fully clockwise and wait for two seconds. ECU code memory is now erased. 87-89 After codes have been retrieved turn selector fully clockwise. After the LED’s have blinked four times turn the selector fully counterclockwise. ECU code memory is now erased. 91-92 After codes have been retrieved turn selector fully clockwise and wait for two seconds.
Nissan/Infiniti FAULT CODE DEFINITIONS (11 - 51) NISSAN/INFINITI FAULT CODE DEFINITIONS IMPORTANT: Retrieving and utilizing Diagnostic Trouble Codes (DTCs) for troubleshooting vehicle operation problems is only one part of an overall diagnostic strategy. Never replace a part based solely on the DTC definition. Always consult the vehicle’s service manual for more detailed testing instructions.
Nissan/Infiniti FAULT CODE DEFINITIONS (53 - 111) Code Description Possible Cause 53 Oxygen sensor - right side Open or shorted signal circuit, high O2 signal 54 A/T signal Open signal in trans. Control unit 55 No faults / no malfunctions 63 No. 6 cylinder misfire Wiring, fuel or ignition system, ECM 64 No. 5 cylinder misfire Wiring, fuel or ignition system, ECM 65 No. 4 cylinder misfire Wiring, fuel or ignition system, ECM 66 No.
Nissan/Infiniti FAULT CODE DEFINITIONS (113 - 115) Code Description Possible Cause 113 EVAP canister purge control system EVAP valve 114 Fuel trim - right side - fuel too rich Oxygen sensor or circuit, fuel pressure 115 Fuel trim - right side - fuel too rich Oxygen sensor or circuit, fuel pressure Chapter 4 36
Toyota/Lexus OVERVIEW OF TOYOTA/LEXUS DIAGNOSTIC SYSTEMS OVERVIEW OF TOYOTA/LEXUS DIAGNOSTIC SYSTEMS • Retrieving codes from Toyota/Lexus vehicles requires connecting either the round or square end of code retrieval tool (Figure T1) to vehicle’s test connector. • To retrieve codes, you will need to access your vehicle’s computer test connector. T1 Round Connector (T2): Used on older model cars and vans. Yellow or green in color, located under the hood.
Toyota/Lexus CODE RETRIEVAL PROCEDURE CODE RETRIEVAL PROCEDURE • Always observe safety precautions whenever working on a vehicle. • • • Fix any known mechanical problems before this test. 1. 2. Warm up engine before this test. Have a pencil and paper handy. Locate your vehicle in the appropriate table (see below for “Toyota Code Retrieval Procedures”; see page 40 for “Lexus Code Retrieval Procedures”). Follow the procedures applicable to your vehicle.
Toyota/Lexus CODE RETRIEVAL PROCEDURE Toyota Code Retrieval Procedures (Cont) Model Years Eng. Camry Celica 85-93 2.0, 2.2, 2.5 86-95 1.6, 1.8, 2.0, 2.2 89-95 1.6, 1.8 Corolla Cressida 83-89 All w/ Supra 87-88 “Super Monitor Display” Tool Req? Perform the following: Y Procedure: Locate rectangular diagnostic connector (under hood) (T7). Plug Code Reader into diagnostic connector. Turn ignition on. Observe “Check Engine” light for codes. Codes: Codes are displayed using a series of blinks and pauses.
Toyota/Lexus CODE RETRIEVAL PROCEDURE Toyota Code Retrieval Procedures (Cont) Model Years Eng. Cressida Land Cruiser Paseo Pickup 87-92 88-94 2.8, 3.0 4.0, 4.5 92-95 87-95 Previa Supra T100 Tercel 4 Runner (cont) 91-95 87-95 93-94 89-94 87-95 1.5 2.4, 3.0 (Fl only) 2.4 (exc. SC) 3.0 3.0 1.5 2.4, 3.0 MR2 85-89 91-95 1.6 2.0, 2.2 Tool Req? Perform the following: Y Codes will continue to cycle as long as the ignition is on and the Code Reader is connected.
Toyota/Lexus CODE RETRIEVAL PROCEDURE Lexus Code Retrieval Procedures (Cont) Model Years Eng. ES350 ES300 GS300 LS400 SC300 SC400 (cont) 90-91 92-93 93-95 90-94 92-95 92-95 2.5 3.0 3.0 4.0 3.0 4.0 Tool Req? Perform the following: Y Codes: Codes are displayed using a series of blinks and pauses. Example: blink pause blink, blink, blink = code 13 (T9). If more than one code is stored, codes are separated by a 2.5 second pause. When all codes have been displayed, there is a 4.
Toyota/Lexus CODE RETRIEVAL PROCEDURE Code Examples Examples of Toyota/Lexus fault codes are shown in Figures T8 through T10. Refer to the code retrieval instructions in Table T1 (Toyota) or Table T2 (Lexus) to determine the code display for your vehicle.
Toyota/Lexus ERASING CODES ERASING CODES • Always observe safety precautions whenever working on a vehicle. • Remove Code Reader from vehicle’s test connector before erasing codes. • Erase codes only when all repairs have been completed. Refer to “Toyota Erasing Procedures” or “Lexus Erasing Procedures” for specific instructions for your year, make and model. • After erasing codes, verify that repairs were successfully completed. Start the engine and warm to normal operating temperature.
Toyota/Lexus ERASING CODES Toyota Erasing Procedures (Cont) Model Years Procedure Pickup 85-88 With ignition off, remove 15A “EFI” fuse for 30 seconds. 89 With ignition off, remove 15A “Haz-Horn” fuse for 30 seconds. 90-94 With ignition off, remove 15A “EFI” fuse for 30 seconds. Previa 91-95 With ignition off, remove 15A “EFI” fuse for 30 seconds. Supra 87-88 With Super Monitor Display: With ignition off, remove 15A “EFI” fuse for 30 seconds.
Toyota/Lexus FAULT CODE DEFINITIONS (1 - 16) TOYOTA/LEXUS FAULT CODE DEFINITIONS IMPORTANT: Retrieving and utilizing Diagnostic Trouble Codes (DTCs) for troubleshooting vehicle operation problems is only one part of an overall diagnostic strategy. Never replace a part based solely on the DTC definition. Always consult the vehicle’s service manual for more detailed testing instructions.
Toyota/Lexus FAULT CODE DEFINITIONS (21 - 51) Code Description Possible Cause 21 HO2S front circuit HO2S sensor / heater or circuit, ECU 22 ECT sensor circuit ECT sensor or circuit, ECU 23 IAT sensor circuit IAT sensor or circuit, ECU 24 IAT sensor circuit IAT sensor or circuit, ECU 25 Mixture control continuously lean Loose ground, injector or circuit, oxygen sensor or circuit, fuel pressure, ignition system coolant temperature sensor, air intake system, airflow meter, air leak, ignition sys
Toyota/Lexus FAULT CODE DEFINITIONS (51 - 85) Code Description Possible Cause 51 Park / Neutral position switch not Park / Neutral switch, start switch, in P or N during code retrieval ECU 52 Knock Sensor circuit Knock sensor or circuit, ECU 53 Knock control malfunction Knock sensor or circuit, ECU 54 Turbocharger intercooler control - Intercooler, coolant level sensor or coolant too low circuit, intercooler water pump or circuit, intercooler ECU, ECU 54 Turbocharger intercooler control - Inter
Toyota/Lexus Chapter 5 48
Glossary INTRODUCTION This Glossary contains definitions for abbreviations and terms you may find in this manual or in your vehicle service manual.
Glossary Chapter 6 50
Warranty and Service LIMITED ONE YEAR WARRANTY The Manufacturer warrants to the original purchaser that this unit is free of defects in materials and workmanship for a period of one (1) year from the date of original purchase. If the unit fails within the one (1) year period, it will be repaired or replaced, at the Manufacturer's option, at no charge, when returned prepaid to the Technical Service Center with Proof of Purchase. The sales receipt may be used for this purpose.
Warranty and Service Chapter 7 52
#3173 IMPORT COMPUTER CODE READER (BACK COVER)