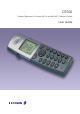
DT590 Cordless Telephone for Ericsson MD110 and MX-ONE™ Telephony Switch User Guide Cover Page Graphic Place the graphic directly on the page, do not care about putting it in the text flow. Select Graphics > Properties and make the following settings: • Width: 15,4 cm (Important!) • Height: 11,2 cm (May be smaller) • Top: 5,3 cm (Important!) • Left: -0,3 cm (Important!) This text should then be hidden.
EN/LZT 103 62 R4A © Ericsson Enterprise AB 2006
Table of Contents Table of Contents Welcome .......................................................... 4 Important User Information ............................... 6 Description ..................................................... 11 Switching On/Off ............................................ 27 Free Seating (optional) .................................... 28 Incoming Calls ............................................... 29 Outgoing Calls ............................................... 33 Phone Book ...
Welcome Welcome Welcome to the user guide for the Ericsson DT590 cordless phone. This guide describes the available features of the telephone when it is connected to Ericsson MD110 or Ericsson MX-ONE™ Telephony Switch. The functions and features available with these telephones are designed for easy use in all different telephone handling situations. The user guide describes the functions and features of the Ericsson DT590 cordless phone as it is programmed at delivery from the factory.
Welcome Copyright All rights reserved. No parts of this publication may be reproduced, stored in retrieval systems, or transmitted in any form or by any means, electronic, mechanical, photocopying, recording or otherwise, without prior written permission of the publisher except in accordance with the following terms.
Important User Information Important User Information Safety instructions Save these instructions. Read these safety instructions before use! Recommendations • • • • • • • 6 Always keep and handle your products with care and keep them in a clean and dust-free place. Proper use and care will prolong the products life. Use a soft absorbent tissue or cloth to remove dust, dirt or moisture.
Important User Information Power supply • • • • • • • • • Connect the AC power adapter of the charging unit only to the designated power sources as marked on the charger. Make sure the cord is positioned so that it will not be subjected to damage or stress. To reduce risk of electrical shock, unplug the chargers from any power source before attempting to clean or move it. The AC power adapters must not be used outdoors or in damp areas. Never modify the cord or plug.
Important User Information Warnings Preventing malfunction Smoke or fumes • Stop operating the products and turn off immediately in case of smoke or fumes. Unplug the mains adapter and remove the batteries from the phone immediately. Continued operation may result in fire or electrical shock. LCD • If the liquid crystal display breaks, avoid injury by not allowing the liquid crystal to come into contact with eyes, skin or mouth. Prevent the liquid crystal from leaking out of the broken glass.
Important User Information Intrinsic safety The DT590 phone is not specified as intrinsically safe, so do not use it in areas with a danger of explosion. Preparing for use Before using your phone for the first time you have to charge and connect the battery, see section “Installation” on page 96. Note: Place the phone in the charger and charge it for at least one hour before using it the first time. Show IPEI code Your phone has an International Portable part Equipment Identity (IPEI) code.
Important User Information Accessibility and voice quality The base network is not always available. If you do not get in contact with your system, contact your system administrator. For best voice quality, avoid positioning near computer, radio or similar euqipment. Operating area You can use your cordless telephone in the area that is covered by the network. Outside this area you will lose contact with the telephone network. The signal strength icon will disappear and No network will be displayed.
Description Description 1 17 2 3 4 16 5 15 14 13 6 12 7 8 11 9 10 DT590 1 Lamp A flashing lamp indicates incoming calls and messages. 2 Volume Up/Down Off hook: raise/lower earpiece and speaker volume. See “Volume control” on page 50.
Description 12 3 Display The display can for example show the battery status, time, system and extension number. See sections “Display information” on page 14 and “Idle menu structure” on page 21. It is possible to adjust the contrast and backlight settings of the display, see section “Settings” on page 85. 4 Loudspeaker The loudspeaker is placed on the rear side of the handset. 5 Yes, Hook off Confirm a menu choice. Answer a call. One short press in idle mode will open the Call list.
Description 13 Menu key Pressing the Menu key in idle mode will open the Phonebook menu. During calls the 3rd Party menu will open. 14 Navigation key Use this key to step in the menu mode and in text mode. Press left or right to select menu tab in idle mode and during calls. Up and down are used for stepping in the menu lists. See sections “Display information” on page 14 and “Idle menu structure” on page 21. 15 No, Hook on, On/Off Disconnect or reject calls. Return to previous menu level.
Description Display information The display gives you visual feedback on all actions that you perform, and also textual warnings. In idle mode the upper row is used for menu tabs. The next four rows are used for information such as the name of the system to which the handset is connected, the user identity (if supported by the network), current time and date in idle mode. The bottom row (info row) is used for icons.
Description System A is the programmed name of your network. On the second row is your name (if available) and extension number. The third and fourth row show current time and date. Icons for key lock and alarm would appear on the fourth row. Fifth row (info row) shows icons for example signal strength, messages and battery status. Follow-me activated: 4321 > 4444 15-Aug-03 08:45am The display shows your own extension number 4321 diverted to extension number 4444.
Description Diverted call: If the dialed number is diverted, the diversion information is shown. For example, the display shows the dialed number 3333 (Smith) diverted to 4444 (Brown): 00:11 4444 >3333 When the diverted call is answered, only the number of the answering position is displayed: 00:18 4444 Incoming call Normal incoming call: If available, the number or the name of the caller is displayed.
Description Diverted call: A diversion indicator before the number or name informs that the call is diverted to your phone. For example, the display shows that number 3333 (Smith) was dialed, but the call was diverted to you: 00:05 4321 >3333 When you have answered the call, the display shows only the caller's number. System connection messages System A No system System indication The phone is in contact with System A. It is also possible for the system to be named something else, e.g. MD110.
Description Loudspeaking (handsfree) Shown when the loudspeaker is activated and when the phone is in loudspeaking operation. See section “During Calls” on page 50. New message Indicates that a new text message has arrived. The icon remains in the display until all new messages in the inbox are read. See section “Messages” on page 71. Voice message Appears when a voice message is waiting. Confirm message Indicates when a received message is to be accepted or declined by the user of the phone.
Description Datacable Visible when a datacable is connected to the headset connector on the phone. Search Phone book This icon is visible when it is possible to press the Navigation key Up and search for a name/number in the Phone book. See section “Phone Book” on page 44. > Diversion indicator When displayed before a name or number it indicates that the phone is diverted to another extension.
Description User busy menu* Callback or Call Waiting on internal calls can be initiated if the called person is busy. Call Waiting menu Not applicable for the MD110 system. Note: *)This menu function requires that the corresponding code has been downloaded to your phone using the PC program Cordless Phone Manager. Please contact your system administrator. Additional display features Depending on which network you are connected to, additional display features are available.
Description Idle menu structure ¾ Ü Û ÚÙ ½ The available phone and network functions can be accessed via the menus. Press to enter the menus. The Phonebook tab is marked. Use the Navigation key (left/right) to choose tab; a heading is shown and the first alternative is marked. Use the Navigation key to make selections. Press to confirm a selection. Press to return to the previous menu. Press to exit the menu structure.
Description Messages tab Voice* Access to your voice mailbox Inbox The 10 last received messages Send* Unsent New Outbox Remove Send Call (Numbers in the text) Read next *Programmed by your system administrator.
Description Toolbox tab Alarm clock (Set, Clear) Calculator Sound & Alerts Ringer volume (Voice, Mail, Alarm) Vibrator alert (On/On when silent/Off) Ring signals Internal External Call Back Alarm signal Message alert Key sound Display Time format Date format Locks Answering mode Any key (On/Off) Auto answer (On/Off) Language (11 languages) DT590 None Click Tone Low 1 Low 2 Medium 1 Medium 2 High 1 High 2 Mix 1 Mix 2 Melody 1 ... Melody 6 User 1 ...
Description Off hook menu structure Menu tabs available when off hook, for example during a call. 3rd Party tab Call 3rd party* Switch call* Transfer* Add to conf.* End new call* *Programmed by your system administrator. Phonebook tab See “Phonebook tab” on page 21.
Description Call Waiting tab Info* (information of the caller if available) Switch* (to answer the call on another line) *Not applicable for the MD110 system.
Description Tones and signals The following different tones and signals are sent from the exchange to your phone. Tone characteristics The tones shown in this section are the most used tones worldwide. Many markets use a differing tone for one or more situations.
Switching On/Off Switching On/Off ÚÙ Switch on Press and hold until the display lights up (about three seconds). If the phone does not switch on, or the Battery icon indicates low level, charge the battery. Notes: If the message No System is displayed you cannot make or answer calls. Depending on system programming, your phone can be automatically locked. To unlock the phone, enter your fourdigit code. Factory default is “0000”. ÚÙ DT590 Switch off Press and hold.
Free Seating (optional) Free Seating (optional) The Free Seating function is used for persons who have an office extension number but no telephone set of their own. For example, flexible office workers, persons mostly outside the office, etc. As a free seating user and working from the office, you logon to any free telephone set that temporarily will be assigned with your extension number and your system authorities. 28 *11* ¿* ¿ # ÜÛ ÚÙ To log on #11# ÜÛ ÚÙ To log off Dial.
Incoming Calls Incoming Calls A ring signal indicates an incoming call. The ring type can tell you whether the call is an internal, External or Callback call and the display indicates an incoming call. The twenty last received/dialed/missed phone numbers are stored in the Call list, see section “Dial number from the Call list” on page 36. Answer calls ÜÛ The caller’s number is displayed: Press to answer. If the number is in the Phone book, the name is shown instead.
Incoming Calls Mute ring signal temporarily ½ ÜÛ If the phone rings at an inconvenient moment: Press to suppress the ringing. All alert signals, including the vibrator, will silence for this specific call. See section “Description” on page 11 for the location of the Mute key. Press to answer the call. Switch ring signal on/off ½ ÜÛ You can set your phone to Silent Ringing, when your phone is in idle mode: Press to switch the ringer on or off When switched off, the Ringer signal muted icon is shown.
Incoming Calls On another extension ¿ ÜÛ 8 You can answer a call to a phone in another room: Call the ringing extension and press Busy tone. Press 4 6 Note: France press ; Sweden press . Parallel Ringing Note: This function is only available in newer versions of the exchange. The Parallel Ringing function makes it possible for an incoming call to ring several phones simultaneously and for the call to be answered on any of the phones.
Incoming Calls *21* ¿ # Ü Û ÚÙ To disable Parallel Ringing temporarily Dial, enter the extension number and press. Note: U.K., dial * 2 * Number #. Press. Wait for the call timer to start in the display. Press to finish the procedure. If you want to disable Parallel Ringing for all phones defined in the list, follow the procedure for disabling the function from the phone with the main extension number and enter the number of the answering position.
Outgoing Calls Outgoing Calls Make calls ¿ ÜÛ You can also make a call via the Phone book, see section “Phone Book” on page 44. Enter the phone number and press. The number is shown in the display. Your phone will go off hook and establish the connection. The number is stored in the Call list. The number may be any of the following: • an extension number, • an external number, preceded by the digit or digits for external call access. Notes: Correct a wrong entry by pressing C.
Outgoing Calls Handsfree ¼ While you are waiting for a connection, dial tone or during the call: ÚÙ End the call Press. You are connected to the caller via the loudspeaker and microphone. The Loudspeaking icon is shown in the display. Press. The display shows the duration of the call. Number Presentation Restriction If you do not want your name and number to be displayed to the person you are calling, use the following procedure.
Outgoing Calls Individual External Line *0* ¿# ¿ ÜÛ To make a call on a specific external line: Dial. Dial the Individual External Line number and press. Dial the digit or digits to get an external line and the external number and press. Last External Number Redial *** ÜÛ When you initiate an external call, the system automatically stores all the dialed digits, irrespective of whether the call was successful or not. Press to redial the last dialed external number.
Outgoing Calls Dial number from the Call list The twenty last received/dialed/missed phone numbers are stored in the Call list. You can dial one of these numbers by selecting the number from the Call list. Ü Û º ÜÛ If the Clock and Date function is set, you can on the same day the call was received/dialed, see the time for the call. The time stamp is changed to a date stamp the following day. See section “Time and date settings” on page 92. Press. The Call list opens, showing the last call first.
Outgoing Calls When you receive a busy tone If you call an extension and receive a busy tone, or get no answer, or all external lines are busy, you can use any of the following methods: Note: Access to the “User Busy” menu tab, requires that the corresponding code has been downloaded to your phone using the PC program Cordless Phone Manager. Please contact your system administrator. Callback ¾º ÜÛ If a called extension is busy or there is no answer: Press and navigate to User Busy and select Call back.
Outgoing Calls 6# Ú Ù ÜÛ If all external lines are busy when the Yes key is pressed after dialing the external number: Press. Note: France, Finland and Sweden, press 5 #. Press to finish the procedure. When an external line becomes free you will be called back (recall ring signal). You have to answer within eight seconds, otherwise the Callback service is cancelled. While waiting for the Callback, you can make and receive calls as usual. Press when you are called back.
Outgoing Calls Activate Call Waiting ¾º ÜÛ If you urgently wish to contact a busy extension or an external line, you can notify by a Call Waiting signal. Press and navigate to User Busy and select Call waiting. Press to confirm. 5 Notes: If the User Busy menu is not enabled, you can also press . 6 4 France and Finland, press ; Sweden, press . Keep your phone off hook When the called extension or the external line becomes free, it will be called automatically.
Outgoing Calls Bypass Ü Û *60* ¿ # If this function is allowed from your extension, you can bypass an; activated Diversion, activated Follow-me or activated Absence Information on a specific extension. Press. Dial and enter the extension number. Press and wait for answer. Speed Dialing Note: You can also make Speed Dialing calls via the Phone book, see section “Phone Book” on page 44.
Outgoing Calls Voice Dialing Your phone is prepared for Voice Activated Assistant. Please refer to separate documentation for Voice Activated Assistant, available at http://www.ericsson.com/enterprise/library/manuals.shtml. ÜÛ When your phone is in idle mode: Press and hold for two seconds. You are connected to the Voice Activated Assistant. Note: This function requires that the corresponding code has been downloaded to your phone using the PC program Cordless Phone Manager.
Outgoing Calls #73* ¿ # ÜÛ ÚÙ To open an extension for some calls: *73* ¿ # ÜÛ ÚÙ To lock an extension Dial. Enter Authorization Code and press. Verification tone. Press to finish the procedure. Dial. Enter Authorization Code and press. Verification tone. Press to finish the procedure. Authorization Code, individual (optional) If you are assigned to an individual Authorization Code (1 to 7 digits, assigned to your own extension) you can lock your own extension to a common authority level, e.g.
Outgoing Calls *75* ¿ # ÜÛ ¿ To make calls with your authority level when your phone is locked: #76* ¿ # ÜÛ ÚÙ To open your phone: *75* ¿* ¿ # ÜÛ ¿ To assign your own authority level to another phone: *74* ¿* ¿ # ÜÛ ÚÙ To change your individual Authorization Code: DT590 Dial. Enter Authorization Code and press. Verification tone. Dial the digit or digits to get an external line and the external number. Dial. Enter Authorization Code and press. Verification tone. Press to finish the procedure.
Phone Book Phone Book Your phone is equipped with a Phone book, including: • A local, personal, Phone book • A company Phone book (optional) • Access to a central Phone book (optional) In the local Phone book you can make up to 100 entries (names and numbers). Notes: Phone book numbers have a maximum of 24 digits and Phone book names have a maximum of 12 characters. An indication that the Phone book is full (indicated with a beep), means that you have to delete an entry before you can add a new one.
Phone Book Write text and numbers Below is explained how to write text and numbers, which is useful when you add a new entry in the Phone book, and when sending text messages. Example (to write SMITH): 7777 6 444 8 44 ÜÛ The marked character is selected after a time out or when another key is pressed. Press for S. Press for M. Press for I. Press for T. Press for H. Press when the name is complete.
Phone Book Special characters Use the keypad to enter letters and characters. Press a key once for the first letter or character, twice for the second, three times for the third, etc. The most common letters are printed above each key on the phone. All the available letters and characters are shown in the following table: Number of times to press the key Phone key 1 1 2 3 4 5 6 7 8 9 10 11 12 Space - ? ! , .
Phone Book Make a quick call by name in the Phone book ¿ º ÜÛ Quickly access the Phone book by using the number keypad. Press and hold the key that holds the first character in the name. The Phone book opens with the closest matching list of names. You can step to another character by short presses on the same key. Navigate to the desired name. Press. The number is dialed. Example (to find the name Eva): 3 Press and hold key (DEF). A list appears with names starting with D.
Phone Book Add a name and a number to the Phone book º º ¿ ÜÛ ¿ ÜÛ When you have accessed the Phone book: Navigate to select Add contact (see display). Navigate to select New. Write the name of the contact and press. How to write text, see section “Write text and numbers” on page 45. Enter the phone number and press. The name and number are stored in the Phone book.
Phone Book Change a name and a number in the Phone book º ¿ ÜÛ ¿ ÜÛ When you have accessed the Phone book: Navigate to select Edit contact (see display). The Phone book opens, showing the names in alphabetical order. Use the keypad to enter the first characters in the name. Navigate to the desired name and select it. Edit the name or number of the contact and confirm. How to write text, see section “Write text and numbers” on page 45. The name and number are changed.
During Calls During Calls Volume control Use the volume keys to adjust the volume in the earpiece. See section “Description” on page 11 for the location of volume controls. To turn the microphone on or off during a call, see section “Mute microphone” on page 51. Earpiece volume During a call, the volume keys affect the earpiece volume. Press the volume controls to adjust the earpiece volume. The volume level is set and maintained until you adjust the volume again.
During Calls Loudspeaking (Handsfree) This function is extremely useful in situations when you need to have a conversation over the phone while having your hands free for other tasks (handsfree). ¼ ¼ To activate Loudspeaking during a call: Press to activate handsfree speaking mode. You are connected to the caller via the loudspeaker and microphone. The Loudspeaking icon is shown in the display. Note: You can adjust the volume, see section “Volume control” on page 50.
During Calls Inquiry You have an ongoing conversation and want to make an Inquiry to an internal or external party. ¾º ¿ ¾º Ü Û ÜÛ ¾º Note: Access to the “3rd Party” menu tab, requires that the corresponding code has been downloaded to your phone using the PC program Cordless Phone Manager. Please contact your system administrator. Press and navigate to 3rd Party and select Call 3rd party. Note: If the 3rd Party menu is not enabled, you can also press » Call the third party.
During Calls Transfer You have an ongoing call and you want to transfer the call to another extension. ¾º ¿ Ú Ù Note: Access to the “3rd Party” menu tab, requires that the corresponding code has been downloaded to your phone using the PC program Cordless Phone Manager. Please contact your system administrator. Press and navigate to 3rd Party and select Call 3rd party, Note: If the 3rd Party menu is not enabled, you can also press » Call the third party.
During Calls Conference With this procedure you can include up to seven parties in a conference. Only the conference leader (i.e. the person initiating the conference) can admit participants. During the conference a tone will be heard every 15 seconds. Notes: The conference tone might be disabled for your system. Access to the “3rd Party” menu tab, requires that the corresponding code has been downloaded to your phone using the PC program Cordless Phone Manager. Please contact your system administrator.
During Calls On hold » ÚÙ ÜÛ ¿ ÜÛ 8 You can temporarily put the ongoing call on hold. Calls put on hold can be resumed on your own or on another phone. Press. Dial tone. Press. To resume the call Press within 30 seconds. If not resumed within 30 seconds you will be called back. An unanswered external call will be re-routed to the operator after another 30 seconds. To resume on another extension Call the extension where the call was put on hold and press. Busy tone. Press.
Call Forwarding Call Forwarding Diversion All calls to your extension are diverted to an internal or external answering position of your choice. You can either select it from a list of predefined answering positions, or you can set the answering position manually. You can modify the list of predefined answering positions. Note: This feature is programmed by your system administrator.
Call Forwarding Order by setting the answering position manually º ÜÛ ÜÛ ¿ ÜÛ ÚÙ DT590 Navigate to Manual. If needed, use the Navigate key to select Internal or External and press. Press. Enter the number to the answering position. You can dial the number, or use the Phone book or the Call list. Press and wait for the call timer to start in the display. Press to finish the procedure. ¾ º º ÜÛ ÚÙ Cancel ¾ º º ÜÛ ÜÛ ¿ ÜÛ Add a new predefined answering position to the list Press.
Call Forwarding 58 ¾ º ÜÛ º ÜÛ ¿ ÜÛ Edit a predefined answering position ¾ º º ÜÛ ÜÛ Delete a predefined answering position Press. The Phonebook tab is marked. Navigate to Call service. Use Navigate key to select Divert and then Edit. Press. Navigate to the desired answering position and press. Edit the answering position as desired. Press to save the changes. Press. The Phonebook tab is marked. Navigate to Call service. Use Navigate key to select Divert and then Remove.
Call Forwarding Internal Follow-me All calls to your extension are diverted to an extension of your choice (within the private network). During Follow-me, the display shows a > after your number. On the next row, the answering position number is shown. A special dial tone will be heard. During Follow-me, your phone can still be used for outgoing calls. See also “Diversion” on page 56 and “In charger mode” on page 95. *21* ¿ # ÜÛ ÚÙ #21# ÜÛ ÚÙ DT590 Order Dial and enter the answering position number.
Call Forwarding External Follow-me If external Follow-me is allowed, you can have all calls to your extension diverted to an external number of your choice. During Follow-me, the display shows a > after your number. A special dial tone will be heard. During Follow-me, your phone can still be used for outgoing calls. See also “Diversion” on page 56 and “In charger mode” on page 95. 60 *22# ¿ # ÜÛ ÚÙ Order #22# ÜÛ ÚÙ Cancel Dial. Dial the digit or digits to get a line and enter the external number.
Call Forwarding Personal Number With this feature you can be reached on your normal office phone number even if you are out of the office, at home, etc. Depending on the functionality of your office exchange, you can have either one individual single search profile (standard) or you can choose between five individual search profiles (optional). A search profile can be designed to fit the situation, i.e. in the office, traveling, at home, etc.
Call Forwarding *10* (1–5) # ÜÛ ÚÙ #10# ÜÛ ÚÙ 62 To activate or change to another profile from your office phone Dial. Press the search profile digit. Press. Wait for the call timer to start in the display. Press to finish the procedure. Note: When another party is included in the activated profile, a colleague or an operator, etc., always remember to inform about your absence. If Voice Mail is included in the activated profile, always update your greeting with Absence Information.
Call Forwarding To activate or change to another profile from an external phone z *75* z* z# *10* z* (1–5) #d DT590 # * The external phone must be of push button type provided with pound key ( ) and star key ( ) or a mobile phone adapted for dial tone pulses (DTMF). Call the DISA function at your office. Dial tone. Dial. Enter the Authorization Code and press. Dial your own extension number and press. Dial tone. Dial. Dial your own extension number and press. Press the search profile digit.
Call Forwarding To cancel from an external phone z *75* z* z# #10* z# d # * The external phone must be of push button type provided with pound key ( ) and star key ( ) or a mobile phone adapted for dial tone pulses (DTMF). Call the DISA function at your office. Dial tone. Dial. Dial the Authorization Code and press. Dial your own extension number and press. Dial tone. Dial. Dial your own extension number and press. Replace the handset.
Call Forwarding Important notes when designing your search profiles: • Avoid ring times longer than 45 seconds for your profiles. Usually the caller hangs up after 3–6 ring signals. If you need a longer ring time, the maximum time is 60 sec. • Consider the time you need to react and answer on each answering position in your profile. You might need up to 15 seconds to react and answer a call on a desk or cordless phone and 20–25 seconds for a mobile phone.
Call Forwarding Example: How to fill in your setting form for search profiles: Profile 1 In office Search order Type of telephone or Answering position* 1 Desk 1234 10 2 Cordless 5234 15 3 Voice Mail Telephone number Ring time (seconds) *Examples: Desk, Cordless, Mobile, External, Voice Mail, Operator, etc.
Call Forwarding Setting form for search profiles Name: Department: Telephone No: Account: Profile 1 .......................... Search order Type of telephone or Answering position* Telephone number Ring time (seconds) 1 2 3 4 *Examples: Desk, Cordless, Mobile, External, Voice Mail, Operator, etc. Profile 2 ..........................
Absence Information (optional) Absence Information (optional) The Absence Information is used to inform callers why you are absent and when you return. If you are authorized, you can also enter Absence Information for another extension from your own extension. A special dial tone will be heard. During Absence Information, your phone can still be used for outgoing calls.
Absence Information (optional) 0915 # ÜÛ ÚÙ When a return time or date is requested: Enter the date (MMDD) or time (HHMM) of your return. (Example shows “Back on September 15”). Note: The order in which the date is stated is system dependent. Press and wait for the call timer to start in the display. Press to finish the procedure. The display shows the selected reason, the time or date of return, and diversion information.
Absence Information (optional) *230* ¿* (0–9) *0915 # ÜÛ ÚÙ #230* ¿ # ÜÛ Order for another extension Dial. Dial the extension number and press. Enter the absence code. Press and enter the date or time of the other person's return. Press. Wait for the call timer to start in the display. Press to finish the procedure. The display on the other person's extension shows the reason, and if entered, time or date of return. Cancel for another extension Dial. Press.
Messages Messages When you receive a new message, the flashing lamp, accompanied by a message tone or beep or vibrating alert, give you notice of a message, and the New message or Voice message icon appears in the display. The message icon will remain until the message is marked as read or heard. The message tone can be silenced by a press on the Mute key. Voice message, see “Voice Mail (optional)” on page 75. Text message, see “Text messages” on page 73.
Messages Manual Message Waiting (MMW) If the called extension does not answer you can initiate a message waiting indication on that extension (if this function is allowed). If there is a message waiting for you, you will hear a special dial tone. ÜÛ Answer MMW Press. A call is initiated to the extension that requested the MMW. Order MMW to another extension 72 *31* ¿ # ÜÛ ÚÙ In idle mode: #31* ¿ # ÜÛ ÚÙ Cancel MMW to another extension Dial and enter the extension number. Press.
Messages Text messages You can send and receive text messages, also known as SMS (Short Message Service), to and from other phones in your system. Note: This function is system dependent and is only available in newer versions of the telephone exchange. Receive text messages (SMS) ¾ º The ten last received text messages are stored in the message list. Press. The Phonebook tab is marked. Navigate to Messages. Note: During calls, a short cut to the “Messages” menu is available in the “Ongoing Call” menu.
Messages ¾ º ¿ ÜÛ ¿ ÜÛ 74 Send a text message (SMS) Press. The Phonebook tab is marked. Navigate to Messages. Use Navigate key to select Send and then New. Write the text and press. How to write text, see section “Write text and numbers” on page 45 Enter the destination number and press. You can dial the number, or use the Phone book. The message is sent.
Messages Voice Mail (optional) The Voice Mail application allows you to leave a voice message to the caller when you are unable to answer calls, e.g. when out of office, in a meeting, etc. The caller can then leave a message in your mailbox. When back in your office you can enter your mailbox and listen to the messages received. You can choose to divert all incoming calls to your mailbox, or calls when there is no answer, or calls when your phone is busy.
Messages To access your mailbox from your office phone ¾ º ¿ ÜÛ ¿ When you want to listen to messages, change your security code or change your greeting. Press. The Phonebook tab is marked. Navigate to Messages. Use Navigate key to select Voice, or dial the number to the Voice Mail system and press. If you are asked to enter your security code: Enter your security code. Code at delivery = your extension number.
Messages ¿ # ¿ ¿ ¿ ÜÛ # ¿ ¿ DT590 To access your mailbox from another phone Dial the number to the Voice Mail system. If you are asked to enter your security code (if the phone you are using has a mailbox of its own): Press. Dial your mailbox number. (normally your office extension number) Enter your security code (if required). To access someone else’s mailbox Dial the number to the Voice Mail system and press.
Messages To handle the mailbox Recorded information on the line tells you the number of new and stored messages. If you have too many messages stored, you will first be asked to delete saved messages. Recorded instructions ask you to press different digits in order to listen to caller's messages, record your own greetings, change your password or exit your mailbox, etc. The following diagram gives an overview of the mailbox system and the digits to be used.
Group Features Group Features Group Call-pick-up People working in a team can have their phones programmed by the system administrator to form Call-pick-up groups. *8# ÜÛ In a Call-pick-up group, any member can answer any individual call to group members. Dial and press to answer. Notes: One Call-pick-up group can serve as an alternative to another group. Calls to the alternative group can only be answered when there are no calls to your own group. Finland and Sweden, press * 0 #.
Group Features Group Hunting An internal Group Hunting number is a common directory number for a group of extensions. Calls to the group will be indicated at a free extension in the group. When you leave the group temporarily, you make your phone unavailable for incoming calls. *21* ¿ # ÜÛ ÚÙ #21# ÜÛ ÚÙ 80 To leave the group temporarily Dial and enter your own extension number. Note: U.K., dial * 2 * No. Press. Wait for the call timer to start in the display. Press to finish the procedure.
Other Useful Features Other Useful Features Account Code (optional) *61* ¿ # ÜÛ ¿ This function is used to charge a call to an account number or to prevent unauthorised calls from your phone. The Account Code can have 1 to 15 digits. Dial. Note: Norway and Finland, dial * 7 1 *. Dial the Account Code and press. Dial tone. Dial the digit or digits to get an external line and the external number.
Other Useful Features General Deactivation The following features can be simultaneously cancelled: #001# ÜÛ ÚÙ • Callback (all Callbacks are cancelled). • Internal and External Follow-me. • Manual Message Waiting/Message Diversion. Order Dial and press. Wait for the call timer to start in the display. Press to finish the procedure. Night Service When the exchange is in Night Service mode, all your incoming calls to the operator are transferred to a selected extension or group of extensions.
Other Useful Features Emergency mode In the event of an emergency, the operator can set the exchange into Emergency mode, during which only preprogrammed extensions are permitted to make calls. If your extension is not assigned with this category and you try to make a call, you will not receive a dial tone. Malicious Call Tracing If you are disturbed by bothersome or malicious external incoming calls, you can request number tracing from the network provider.
Other Useful Features DISA = Direct Inward System Access (optional) If you are assigned to use this function and you are working externally, you can call your office and get access to an external line in order to make business calls. The business call will be charged your office extension number or an account number. You will just be charged for the call to the office.
Settings Settings In order to satisfy your personal needs, your phone is equipped with many options to set and adjust its behaviour. These settings are available in the Toolbox menu. DT590 ¾ º To enter the Toolbox menu ¾ Navigate to find the required setting. Press. The Phonebook tab is marked. Navigate to Toolbox. A list with all available settings is shown. Press to leave the Toolbox menu.
Settings Alarm clock Set an alarm º ¿ ÜÛ When you have entered the Toolbox menu: Navigate to Alarm clock and then Set. Enter the time for the alarm. Use Navigate key to select AM or PM. Press to activate. The Alarm clock icon in the display indicates that the alarm clock is activated. When the alarm sounds ÜÛ The alarm sounds, and the question Cancel alarm? is shown in the display. Press to acknowledge and cancel the alarm. The Alarm clock icon disappears.
Settings Calculator º¿ # ¿ ÜÛ When you have entered the Toolbox menu: Navigate to Calculator and enter the first number. Press repeatedly to select arithmetic function. You can add, subtract, multiply or divide the numbers. Enter the next number. Press to calculate. The result is displayed. Sound and alert settings Adjust the ringer volume º º ÜÛ When you have entered the Toolbox menu: Navigate to Sound & Alerts and then Ringer volume. Use the Navigate key to select which signal to adjust.
Settings Ring signals You can select different ring signals in order to easily distinguish between internal calls, external calls and callback calls. º º ÜÛ When you have entered the Toolbox menu: Navigate to Sound & Alerts and then Ring signals. Use the Navigate key to select which call type to set. Internal, External or Call Back. Use the Navigate key to select the desired ring signal. By default there are 14 different signals in your phone, and 10 additional signals can be downloaded to your phone.
Settings Key sound º ÜÛ When you have entered the Toolbox menu: Navigate to Sound & Alerts and then Key sound. Use the Navigate key to select None, Click or Tone. Press to confirm. The selected key sound will be heard when a key is pressed. Display settings Backlight setting º ÜÛ When you have entered the Toolbox menu: Navigate to Display and then Backlight. Use Navigate key to select On, Off or Automatic.
Settings Enable/disable popup info The phone can display information in a popup window during a call. For example, if you are using the menus to search for a number in the Phone book, during a call, and the other part ends the call, the text Hung up will pop up in a separate window. º ÜÛ When you have entered the Toolbox menu: Navigate to Display and then Popup info. Use Navigate key to select Enable or Disable. Press to confirm.
Settings Select system º Ü Û ÜÛ When you have entered the Toolbox menu: Navigate to Network and then Select. Use Navigate key to select Automatic or a specific system from the list. If your phone is set to Automatic it selects a system according to the priority list, see “Priority for the systems” on page 91. Note: The normal setting is Automatic. This setting makes the phone automatically look for and connect to a system. Press. Connect to XXX? appears. Press again.
Settings Time and date settings Select time format º ÜÛ When you have entered the Toolbox menu: Navigate to Time & Date and then Time format. Use Navigate key to select 24 hour or 12 hour viewing. Press to confirm. Select date format º ÜÛ When you have entered the Toolbox menu: Navigate to Time & Date and then Date format. Use Navigate key to select DD-MMM-YY, MM/DD/YY, DD-MM-YY or YYMMDD. Press to confirm.
Settings Activate the manual key lock * ÜÛ The following procedure describes how to manually lock/unlock the keypad, but it is recommended to always have the automatic lock on. Press to lock/unlock the keypad. The Key icon indicates when your keypad is locked. Activate the phone lock You can protect your phone from being used by others by locking it automatically when switched off. The phone can only be unlocked with a four digit code (PIN code).
Settings Change answering method When your phone is in idle mode, you can enable or disable Any key or Auto. • Auto On; the call is automatically connected (call is not connected with Loudspeaking function). Note: The auto answer mode is only relevant when a headset is connected. ¾ º º ÜÛ • Any key On; press any key to answer the call. Press. The Phonebook tab is marked. Navigate to Toolbox. Use Navigate key to select Answering mode. Use Navigate key to select the required answering method.
Settings In charger mode You can set your phone to automatically redirect calls and messages when placed in the charger. The In charger mode is activated when the phone is placed in the charger and deactivated when removed, it cannot be manually selected. To enable diversion when placed in charger º ÜÛ When you have entered the Toolbox menu: Navigate to In charger mode. Use Navigate key to select Redirect. Press. When your phone is placed in the charger, calls and messages will be redirected.
Installation Installation Battery The battery compartment with the Li-Ion battery is placed on the rear side of the handset. Important! Only use the equipment designed for the DT590 phone, see below.
Installation Replace the battery If the standby time for the cordless phone becomes too low, the battery should be replaced by a new one. Please contact your system administrator or your certified Ericsson Sales partner for more information. After replacing the battery with a new one, the Battery icon can indicate an empty battery even though it is fully charged. Placing the phone in the charger for a while will remove the problem.
Installation Chargers Important! Only use the equipment designed for the DT590 phone, see below. Product description Identification on product Power adapter for DT590, EU * BMLNB 101 17/1 Power adapter for DT590, UK * BMLNB 101 17/2 Power adapter for DT590, AU * BMLNB 101 17/3 Power adapter 110V for DT590 BMLNB 101 17/6 Power Supply for Rack charger DT590 BMLNB 101 55/1 * EU=European union, UK=United Kingdom, AU=Australia.
Installation Charging rack Note: See also separate Installation Guide, supplied together with your phone. The charging rack is used for charging your phone. The wall mounted charging rack and its power supply are modular systems, which enables a number of installation configurations. 022 LED Each power supply module can support three charging racks with four positions for phones in each rack (see technical specifications for the charging rack).
Installation Belt clip The clip on the back of the phone helps you fasten it to a belt or similar. To attach or remove the clip: Spread the clip slightly. The ends of the clip fit into holes on the side of your phone.
Installation Cordless Phone Manager The Cordless Phone Manager (CPM) is a PC program, which makes it possible to adjust settings of your DT590 cordless telephone. The CPM cable connects to the headset connector on your phone. Cordless Phone Manager (CPM) Settings Depending on user rights, the CPM Service Tool makes it possible to download new software, ringing melodies, start-up screen, a 12th language, company phone book etc.
Troubleshooting Troubleshooting This section contains information on how to solve common operational problems, and warnings you may receive. Go through the following lists if you encounter any problems. If this checklist does not solve the problem, contact your system administrator. If others have similar problems, there may be a system error. Fault Probable cause No display The battery level is low or the phone is defective. The Ringer off icon is on or the phone is defective.
Troubleshooting DT590 Battery low The battery level is low. Charge the battery. Enter IPEI The phone is blocked, i.e. if you have entered the wrong PIN code more than three times. Enter the IPEI code and press the Yes key.
Glossary Glossary 104 Ac Authentication code. DECT Digital Enhanced Cordless Telephony. Exchange Switch. Your telephone switching system. GAP Generic Access Profile, a standard for cordless telephone systems. Idle mode The state your phone is in when nothing is activated; not calling, not ringing, not diverted etc. IPEI International Portable part Equipment Identity, unique identity assigned to your phone by the manufacturer.
Index Index A Absence Information 68 Accessibility and voice quality 10 Account Code 81 Add a name and a number to the Phone book 48 Alarm clock 86 Answer calls 29 Audible Adjustments Volume control 50 Authority 41 Authorization Code, common 41 Authorization Code, individual 42 B Battery 96 Belt clip 100 Bypass 40 C Calculator 87 Call Forwarding 56 Diversion 56 External follow-me 60 Internal follow-me 59 Personal Number 61 Call Waiting 39, 53 Callback 37 Change a name and a number in the Phone book 49 Cha
Index G General deactivation 82 Glossary 104 Group Call-pick-up 79 Group Facilities Common Bell Group 79 Group Features 79 Group Call-pick-up 79 Group Hunting 80 Group Hunting 80 I Icons 17 Idle menu structure 21 Important information to the user Accessibility and voice quality 10 Intrinsic safety 9 Preparing for use 9 Show IPEI code 9 Important user information 6 In charger mode 95 Incoming Calls 29 Answer calls 29 Incoming calls Handsfree 30 Parallel Ringing 31 Individual External Line 35 Inquiry 52 Inst
Index S Safety instructions 6 Save a number from the Call list to the Phone book 48 Select system 91 Setting form for search profiles 67 Settings 85 Alarm clock 86 Calculator 87 Change answering method 94 Display language 94 Display settings 89 In charger mode 95 Master reset 95 Network settings 90 Phone locks 92 Sound and alert settings 87 Time and date settings 92 Show IPEI code 9 Sound and alert settings 87 DT590 Switch on/off 27 System connection messages 17 T Text messages 73 Time and date settings
Ericsson Enterprise AB All rights reserved. For questions regarding the product, please contact your Ericsson Enterprise Certified Sales Partner. Also visit us on http://www.ericsson.com/enterprise © Ericsson Enterprise AB 2006 EN/LZT 103 62 R4A Subject to alteration without prior notice. Ericsson is shaping the future of Mobile and Broadband Internet communications through its continuous technology leadership.