
User's Manual


65
Printing With Epson Drivers for Windows | 65
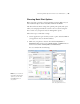
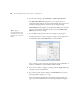
Use the Speed/Quality slider to set the desired quality level. Select from
the following additional options and click
OK:
• High Speed for fast, bidirectional printing at lower quality.
• Edge Smoothing to improve the quality of low-resolution images.
• Finest Detail for sharper edges on vector-based data including text,
graphics, and line art. (This setting does not affect photographs and
is not recommended for large files.)
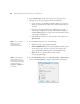
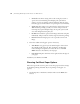
6. Set the
Mode option as follows:
• Click Automatic to have the printer driver analyze the contents of
your image or file and make the appropriate printing adjustments.
If you’ve selected
Color as your Color setting, you can choose one
of these settings in the drop-down menu:
Charts and Graphs intensifies colors and lightens the midtones
and highlights of an image. Use this setting for presentation
graphics.
EPSON Standard (sRGB) increases the contrast in images. Use
this setting for color photographs.
Adobe RGB matches image colors to the Adobe RGB color
standard.
If you’ve selected
Advanced B&W Photo as your Color setting,
you can choose
Neutral, Cool, Warm, or Sepia. To choose more
detailed settings for advanced black and white photo printing, see
page 79.
• Click Custom, then follow the instructions on page 67 to select
color management options
.
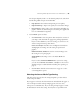
Selecting the Correct Media Type Setting
The table on the next page lists the settings designed to produce the best
results on Epson media.
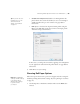
If your paper is not listed, check the instructions included with the paper, or
look on the Epson website www.proimaging.epson.com (U.S. sales),
www.epson.ca (Canadian sales). If you are using non-Epson paper, consult
the manufacturer for the best setting. You may have to experiment with