ESET SMART SECURITY 8 User Guide (intended for product version 8.0 and higher) Microsoft Windows 8.
ESET SMART SECURITY Copyright 2015 by ESET, spol. s r. o. ESET Sma rt Securi ty wa s devel oped by ESET, s pol . s r. o. For more i nforma ti on vi s i t www.es et.com. Al l ri ghts res erved. No pa rt of thi s documenta ti on ma y be reproduced, s tored i n a retri eva l s ys tem or tra ns mi tted i n a ny form or by a ny mea ns , el ectroni c, mecha ni ca l , photocopyi ng, recordi ng, s ca nni ng, or otherwi s e wi thout permi s s i on i n wri ti ng from the a uthor. ESET, s pol . s r. o.
Contents 4.1.3.2 Adding ..................................................................................35 Device control rules 1. ESET Smart .......................................................5 Security 4.1.4 HIPS ..............................................................................36 1.1 What's ....................................................................................................6 new in version 8 4.1.5 Gamer .............................................................
.5.2 Update ..............................................................................74 rollback 5.7.2 How..............................................................................107 to create rescue CD 4.5.3 How ..............................................................................75 to create update tasks 5.7.3 Target ..............................................................................107 selection 4.6 Tools .............................................................
1. ESET Smart Security ESET Smart Security represents a new approach to truly integrated computer security. The most recent version of the ThreatSense® scanning engine, combined with our custom Personal firewall and Antispam modules, utilizes speed and precision to keep your computer safe. The result is an intelligent system that is constantly on alert for attacks and malicious software that might endanger your computer.
1.1 What's new in version 8 ESET Smart Security version 8 features many small improvements: A new Smart mode for HIPS – is placed between Automatic and Interactive mode. Ability to identify suspicious activities and malicious processes in the system. A new Botnet protection – helps discover malware through analyzing its network communication patterns and protocols.
1.3 Prevention When you work with your computer, and especially when you browse the Internet, please keep in mind that no antivirus system in the world can completely eliminate the risk of infiltrations and attacks.
2. Installation There are several methods for installing ESET Smart Security on your computer. Installation methods may vary depending on country and means of distribution: Live installer can be downloaded from the ESET website. The installation package is universal for all languages (choose a desired language). Live installer itself is a small file; additional files required to install ESET Smart Security will be downloaded automatically.
2.2 Offline installation Once you launch the offline installation (.msi) package, the installation wizard will guide you through the setup process. First, the program checks to see if a newer version of ESET Smart Security is available. If a newer version is found you will be notified in the first step of the installation process. If you select Download and install new version, the new version will be downloaded and installation will continue.
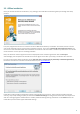
2.2.1 Advanced settings After selecting Advanced settings, you will be prompted to select a location for the installation. By default, the program installs to the following directory: C:\Program Files\ESET\ESET Smart Security\ Click Browse… to change this location (not recommended). Click Next to configure your Internet connection. If you use a proxy server, it must be correctly configured for virus signature updates to work.
If you would like to evaluate ESET Smart Security before making a purchase, select Activate Trial License. Fill in your email address and country to activate ESET Smart Security for a limited time. Your test license will be emailed to you. Trial licenses can only be activated once per customer. If you do not have a license and would like to buy one, click Purchase License. This will redirect you to the website of your local ESET distributor.
2.6 First scan after installation After installing ESET Smart Security, a computer scan will start 20 minutes after installation or computer restart in order to check for malicious code. You can also start a computer scan manually from the main program window by clicking Computer scan > Smart scan. For more information about computer scans, see the section Computer scan.
3. Beginner's guide This chapter provides an initial overview of ESET Smart Security and its basic settings. 3.1 The main program window The main program window of ESET Smart Security is divided into two main sections. The primary window on the right displays information that corresponds to the option selected from the main menu on the left. The following is a description of options within the main menu: Home – Provides information about the protection status of ESET Smart Security.
What to do if the program doesn't work properly? If the modules enabled are working properly, the Protection status icon will be green. A red exclamation point or orange notification indicates that maximum protection is not ensured. Additional information about the protection status of each module, as well as suggested solutions for restoring full protection, will be displayed under Home. To change the status of individual modules, click Setup and select the desired module.
Phantom account does not exist initially, but is a security feature that is triggered automatically when you mark a device as missing. You may need to create a Phantom account using the Optimization feature in the ESET Anti-Theft web interface. Gamer mode enabled – Enabling Gamer mode is a potential security risk. By enabling this feature, all popup windows are disabled and the activity of the scheduler will be completely stopped.
The Advanced setup window (click Setup in the main menu and then click Enter advanced setup..., or press F5 on your keyboard) contains additional update options. Click Update > Settings in the Advanced setup tree to the left. To configure advanced update options such as update mode, proxy server access and LAN connections, click Setup... in the Update window. 3.3 Trusted zone setup It is necessary to configure the Trusted zone to protect your computer in a network environment.
NOTE: By default, workstations from a Trusted zone are granted access to shared files and printers, have incoming RPC communication enabled and have remote desktop sharing available. For more details about this feature please read the following ESET Knowledgebase article: New network connection detected in ESET Smart Security 3.4 Anti-Theft To protect your computer in case of a loss or theft, choose from the following options to register your computer with the ESET Anti-Theft system. 1.
4. Work with ESET Smart Security The ESET Smart Security setup options allow you to adjust the protection levels of your computer and network. The Setup menu contains following: Computer Network Web and Email Parental control Click any component to adjust the advanced settings of the corresponding protection module.
Web and Email protection setup allows you to enable or disable the following components: Web access protection – If enabled, all traffic through HTTP or HTTPS is scanned for malicious software. Email client protection – Monitors communication received through POP3 and IMAP protocol. Anti-Phishing protection – Filters websites suspected of distributing content intended to manipulate users into submitting confidential information. Antispam protection – Scans unsolicited email, i.e., spam.
Computer scan setup... – Click to adjust the parameters of the on-demand scanner (manually executed scan). 4.1.1 Antivirus and antispyware Antivirus and antispyware protection guards against malicious system attacks by controlling file, email and Internet communication. If a threat with malicious code is detected, the Antivirus module can eliminate it by first blocking it and then cleaning, deleting or moving it to quarantine. Scanner options for all protection modules (e.g.
Media to scan By default, all types of media are scanned for potential threats: Local drives – Controls all system hard drives. Device control – Disk Storage, CD/DVDs, etc. Network drives – Scans all mapped drives. We recommend that you keep the default settings and only modify them in specific cases, such as when scanning certain media significantly slows data transfers. Scan on (Event-triggered scanning) By default, all files are scanned upon opening, creation or execution.
Additional ThreatSense parameters for executed files Advanced heuristics on file execution – By default, Advanced heuristics is used when files are executed. When enabled, we strongly recommend keeping Smart optimization and ESET Live Grid enabled to mitigate impact on system performance. Advanced heuristics on executing files from removable media – If you wish to exclude some removable media (USB) ports from being scanned by advanced heuristics on file execution, click Exceptions...
4.1.1.1.3 When to modify real-time protection configuration Real-time protection is the most essential component of maintaining a secure system. Always be careful when modifying its parameters. We recommend that you only modify its parameters in specific cases. After installing ESET Smart Security, all settings are optimized to provide the maximum level of system security for users.
Smart scan Smart scan allows you to quickly launch a computer scan and clean infected files with no need for user intervention. The advantage of Smart scan is it is easy to operate and does not require detailed scanning configuration. Smart scan checks all files on local drives and automatically cleans or deletes detected infiltrations. The cleaning level is automatically set to the default value. For more detailed information on types of cleaning, see Cleaning.
Infected items are not cleaned automatically. Scanning without cleaning can be used to obtain an overview of the current protection status. If you are only interested in scanning the system without additional cleaning actions, select Scan without cleaning. Furthermore, you can choose from three cleaning levels by clicking Setup... > Cleaning. Information about scanning is saved to a scan log. You can choose a profile from the Scan profile drop-down menu to be used for scanning chosen targets.
After all scans computer takes no action – Triggers a scheduled shutdown or reboot when the computer scan finishes. Once the scan has finished, a shutdown confirmation dialog window will open with a 60 second timeout. Click this option again to deactivate the selected action. 4.1.1.2.3 Scan profiles Your preferred scan parameters can be saved for future scanning. We recommend that you create a different profile (with various scan targets, scan methods and other parameters) for each regularly used scan.
4.1.1.3.1 Automatic startup file check When creating a System startup file check scheduled task, you have several options to adjust the following parameters: The Scan level drop-down menu specifies the scan depth for files run at system startup.
an asterisk (*) represents a variable string of zero or more characters. Examples If you wish to exclude all files in a folder, type the path to the folder and use the mask “*.*”. To exclude an entire drive including all files and subfolders, use the mask "D:\*". If you want to exclude doc files only, use the mask “*.doc“. If the name of an executable file has a certain number of characters (and characters vary) and you only know the first one for sure (say “D”), use the following format: “D????.exe”.
4.1.1.6 ThreatSense engine parameters setup ThreatSense is technology comprised of many complex threat detection methods. This technology is proactive, which means it also provides protection during the early spread of a new threat. It uses a combination of code analysis, code emulation, generic signatures and virus signatures which work in concert to significantly enhance system security.
writers. Its latest version introduces a completely new way of code emulation based on binary translation. This new binary translator helps to bypass anti-emulation tricks used by malware writers. In addition to these improvements, DNA-based scanning has been significantly updated to allow for better generic detections and address current malware more accurately.
4.1.1.6.6 Other You can configure the following options in the Other section: Log all objects – If this option is selected, the log file will show all the scanned files, even those not infected. For example, if an infiltration is found within an archive, the log will list also clean files contained within the archive.
Cleaning and deleting If there is no predefined action to take for Real-time file system protection, you will be prompted to select an option in the alert window. Usually the options Clean, Delete and No action are available. Selecting No action is not recommended, as this will leave infected files uncleaned. The exception to this is when you are sure that a file is harmless and has been detected by mistake. Apply cleaning if a file has been attacked by a virus that has attached malicious code to the file.
4.1.1.8 Document protection The Document protection feature scans Microsoft Office documents before they are opened, as well as files downloaded automatically by Internet Explorer such as Microsoft ActiveX elements. Document protection provides a layer of protection in addition to Real-time file system protection, and can be disabled to enhance performance on systems that are not exposed to a high volume of Microsoft Office documents. Integrate into system activates the protection system.
pop-up in the lower right corner and access to the device will not be granted. 4.1.3.1 Device control rules The Device control rules editor window displays existing rules and allows for precise control of external devices that users connect to the computer. Particular devices can be allowed or blocked per user or user group and based on additional device parameters that can be specified in the rule configuration.
4.1.3.2 Adding Device control rules A Device control rule defines the action that will be taken when a device meeting the rule criteria is connected to the computer. Enter a description of the rule into the Name field for better identification. Selecting the check box next to Enabled disables or enables this rule; this can be useful if you don't wish to delete the rule permanently. Device type Choose the external device type from the drop-down menu (Disk Storage / CD/DVD...).
as delivered by the vendor. Tip: In order to figure out the parameters of a device, create an allowing rule for the appropriate type of devices, connect the device to your computer and then check the device details in the Device control log. Rules can be limited to certain users or user groups by adding them to the User list: Add – Opens the Object type: Users or Groups dialog window that allows you to select desired users. Delete – Removes the selected user from the filter.
1. Name the rule and select Block from the Action drop-down menu. 2. Open the Target applications tab. Leave the Source applications tab blank to apply your new rule to all applications attempting to perform any of the selected operations in the Operations list on applications in the Over these applications list. 3. Select Modify state of another application (all operations are described in product help, which can be accessed by pressing F1). 4. Add one or several applications you wish to protect. 5.
manually, so a rule created from a dialog window can be less specific than the rule that triggered that dialog window. This means that after creating such a rule, the same operation can trigger another dialog window if the parameters that your previous rule set do not apply to the situation. Temporarily remember this action for this process causes an action (Allow / Deny) to be used until a change of rules or filtering modes, a HIPS module update or a system restart.
4.2 Network The Personal firewall controls all network traffic to and from the system. This is accomplished by allowing or denying individual network connections based on specified filtering rules. It provides protection against attacks from remote computers and enables blocking of some services. It also provides antivirus protection for HTTP, POP3 and IMAP protocols. This functionality represents a very important element of computer security.
Network attack protection (IDS) – Analyses the content of network traffic and protects from network attacks. Any traffic which is considered harmful will be blocked. View temporary IP address blacklist... – View a list of IP addresses that have been detected as the source of attacks and added to the blacklist to block connection for a certain period of time. For more information, click this option and then press F1. Botnet protection – Quickly and accurately spots malware on the system.
Firewall user profiles Profiles are a tool to control the behavior of the ESET Smart Security Personal firewall. Advanced protection features Enable Network attack protection (IDS) – Allows you to activate a functionality from IDS and advanced options (Incoming RPC communication over SMB and Intrusion detection settings) independently from Personal firewall. Enable Botnet protection – Selected check box activates this feature in order to protect your computer from this type of attacks.
Notify about learning mode expiration in X days – Specifies the number of days after which ESET Smart Security will notify the user that Learning mode is still active. This option is intended to prevent the user from operating the Personal firewall in Learning mode for an extended period of time. We recommend switching the Personal firewall to Learning mode only for a short time, while the user initiates typical connections.
Display information about application allows you to define how applications will be displayed in the list of rules. The following options are available: Full path – Full path to the application’s executable. Description – Description of the application. Name – Name of the application's executable. Select what type of rules will be displayed in the Rules setup section using the Rules to display list: Only user defined rules – Displays only those rules created by the user.
4.2.3.1.1 Detailed view of all rules To see the following information in the Zone and rule setup window, click Toggle detailed view of all rules. Name – Name of rule, check box must be selected to activate the rule. Action – Shows the direction of communication and action.
4.2.3.2 Editing rules Modification is required each time any of the monitored parameters are changed. In this case, the rule cannot fulfill the conditions and the specified action cannot be applied. If parameters have changed, the given connection may be refused, which can result in problems with operation of the application in question. An example is a change of network address or port number for the remote side.
4.2.4.1 Network authentication For mobile computers, it is recommended that you verify the network credibility of the network that you are connecting to. The Trusted zone is identified by the local IP address of the network adapter. Mobile computers often enter networks with IP addresses that are similar to the trusted network. If the Trusted zone settings are not manually switched to Public network, the Personal firewall will continue to use the Home/work network mode.
authenticate the server. The authentication process is repeated for each network your computer connects to. Click Setup... and specify a server name, server listening port and a public key that corresponds to the private server key (see section Zone authentication – Server configuration). The server name can be entered in the form of an IP address, DNS or NetBios name. The server name can be followed by a path specifying the location of the key on the server (e.g.
4.2.4.1.2 Zone authentication - Server configuration The authentication process can be executed by any computer/server connected to the network that is to be authenticated. The ESET Authentication Server application needs to be installed on a computer/server that is always accessible for authentication whenever a client attempts to connect to the network. The installation file for the ESET Authentication Server application is available for download on ESET’s website.
4.2.5 Establishing connection - detection The Personal firewall detects each newly-created network connection. The active firewall mode determines which actions are performed for the new rule. If Automatic mode or Policy-based mode is activated, the Personal firewall will perform predefined actions with no user interaction. Interactive mode displays an informational window that reports detection of a new network connection, supplemented with detailed information about the connection.
4.2.6 Logging The ESET Smart Security Personal firewall saves all important events in a log file, which can be viewed directly from the main menu. Click Tools > Log files and then select Personal firewall from the Log drop-down menu. The log files can be used to detect errors and reveal intrusions into your system.
4.3 Web and email Web and email configuration can be found in the Setup pane by clicking on Web and email. From here you can access more detailed settings of the program. Internet connectivity is a standard feature for personal computers. Unfortunately, the Internet has become the primary medium for distributing malicious code. For this reason it is essential that you carefully consider your Web access protection settings.
4.3.1 Email client protection Email protection provides control of email communication received through the POP3 and IMAP protocols. Using the plug-in for Microsoft Outlook and other e-mail clients, ESET Smart Security provides control of all communications from the email client (POP3, MAPI, IMAP, HTTP). When examining incoming messages, the program uses all the advanced scanning methods included in the ThreatSense scanning engine.
4.3.1.1.1 Email client protection configuration The Email client protection module supports the following email clients: Microsoft Outlook, Outlook Express, Windows Mail, Windows Live Mail. Email protection works as a plug-in for these programs. The main advantage of the plug-in is that it is independent of the protocol used. When the email client receives an encrypted message, it is decrypted and sent to the virus scanner. Email to scan Received email – Toggles checking of received messages.
4.3.1.3 POP3, POP3S filter The POP3 protocol is the most widespread protocol used to receive email communication in an email client application. ESET Smart Security provides protection for this protocol regardless of the email client used. The protection module providing this control is automatically initiated at system startup and is then active in memory.
4.3.1.4 Antispam protection Unsolicited email, called spam, ranks among the greatest problems of electronic communication. Spam represents up to 80 percent of all email communication. Antispam protection serves to protect against this problem. Combining several email security principles, the Antispam module provides superior filtering to keep your inbox clean.
Spam score logging The ESET Smart Security Antispam engine assigns a spam score to every scanned message. The message will be recorded in the antispam log (ESET Smart Security > Tools > Log files > Antispam protection). Do not write – The Score cell in the Antispam protection log will be empty. Write only reclassified messages and messages marked as SPAM – Select this if you want to record a spam score for messages marked as SPAM.
4.3.2 Web access protection Internet connectivity is a standard feature in a personal computer. Unfortunately, it has also become the main medium for transferring malicious code. Web access protection works by monitoring communication between web browsers and remote servers, and complies with HTTP (Hypertext Transfer Protocol) and HTTPS (encrypted communication) rules. We strongly recommend that Web access protection is enabled.
4.3.2.2 URL address management The URL address management section enables you to specify HTTP addresses to block, allow or exclude from checking. Add, Edit, Remove and Export are used to manage the lists of addresses. Websites in the list of blocked addresses will not be accessible. Websites in the list of excluded addresses are accessed without being scanned for malicious code.
4.3.3 Protocol filtering Antivirus protection for the application protocols is provided by the ThreatSense scanning engine, which seamlessly integrates all advanced malware scanning techniques. The control works automatically, regardless of the Internet browser or email client used. For encrypted (SSL) communication see Protocol filtering > SSL. Enable application protocol content filtering – If enabled, all HTTP(S), POP3(S) and IMAP(S) traffic will be checked by the antivirus scanner.
4.3.3.2 Excluded applications To exclude communication of specific network-aware applications from content filtering, select them in the list. HTTP/POP3/IMAP communication of the selected applications will not be checked for threats. We recommend using this option only for applications that do not work properly with their communication being checked. Running applications and services will be available here automatically. Click Add...
4.3.3.3 Excluded IP addresses The entries in the list will be excluded from protocol content filtering. HTTP/POP3/IMAP communication from/to the selected addresses will not be checked for threats. We recommend that you only use this option for addresses that are known to be trustworthy. Add IPv4/IPv6 address – Click to add an IP address/address range/subnet of a remote point to which a rule is applied. Remove – Remove selected entries from the list. 4.3.3.3.
4.3.3.4 SSL protocol checking ESET Smart Security enables you to check protocols encapsulated in SSL protocol. You can use various scanning modes for SSL protected communications using trusted certificates, unknown certificates, or certificates that are excluded from SSL-protected communication checking. Always scan SSL protocol – Select this option to scan all SSL protected communications except communications protected by certificates excluded from checking.
4.3.3.4.1.2 Excluded certificates The Excluded certificates section contains certificates that are considered safe. The content of encrypted communications utilizing the certificates in the list will not be checked for threats. We recommend only excluding web certificates that are guaranteed to be safe and where communication utilizing the certificates does not need to be checked. To delete selected items from the list, click Remove.
NOTE: Potential phishing websites that have been whitelisted will expire after several hours by default. To allow a website permanently, you can use the URL address management tool. From Advanced setup (F5) click Web and email > Web access protection > URL address management and from the URL address management drop-down menu select List of allowed addresses and add your website to this list.
2. Click Setup > Parental control from the main program window. Even though Enabled appears next to Parental control, you must configure Parental control for the desired account by clicking Not defined. In the Account setup window enter an age to determine the level of access and recommended age-appropriate web pages. Parental control will now be enabled for the specified user account. Click Setup under an account name to customize categories you want to allow or block in the Web page content filtering tab.
will toggle Parental control for the account. Under an active account, click Setup... to see the list of allowed categories of web pages for this account and blocked and allowed web pages. Important: To create a new account (for example, for a child), use the following step-by-step instructions for Windows 7 or Windows Vista: 1. Open User Accounts by clicking the Start button (located at the bottom left side of your desktop), clicking Control Panel and then clicking User Accounts. 2.
4.4.1 Web page content filtering If the check box next to a category is selected, it is allowed. Deselect the check box next to a specific category to block it for the selected account. Moving the mouse over a category will show you a list of web pages that fall into that category. Here are some examples of categories (groups) that users might not be familiar with: Miscellaneous – Usually private (local) IP addresses such as intranet, 127.0.0.0/8, 192.168.0.0/16, etc.
4.4.2 Blocked and allowed web pages Enter a URL address into the blank field under the list, select Allow or Block and click Add to add it to the list. To delete an URL address from the list, click the remove button . In the URL address list, the special symbols * (asterisk) and ? (question mark) cannot be used. For example, web page addresses with multiple TLDs must be entered manually (examplepage.com, examplepage.sk, etc.).
Last successful update – The date of the last update. If you do not see a recent date, your virus signature database may not be current. Virus signature database version – The virus signature database number, which is also an active link to the ESET website. Click it to view a list of all signatures added within the given update. Click Check for updates to detect the latest available version of ESET Smart Security. Update process After clicking Update now, the download process begins.
Important: Under normal circumstances, when updates are downloaded properly the message Update is not necessary – the virus signature database is up to date will appear in the Update window. If this is not the case, the program is out of date and more vulnerable to infection. Please update the virus signature database as soon as possible.
4.5.1 Update settings Update setup options are available from the Advanced setup tree (F5 key) by clicking Update > Settings. This section specifies update source information, such as the update servers and authentication data for these servers. In the home version of ESET products you are not able to choose own update server. Update files will automatically be downloaded from the ESET server with the least network traffic.
Authentication for update servers is based on the Username and Password generated and sent to you after purchase. By default, no verification is required and the Username and Password fields are left empty. Pre-release updates (the Pre-release update option) are updates that have gone through thorough internal testing and will be available to the general public soon. You can benefit from enabling pre-release updates by having access to the most recent detection methods and fixes.
NOTE: Selecting the most appropriate option depends on the workstation where the settings will be applied. Please be aware that there are differences between workstations and servers. For example, restarting the server automatically after a program upgrade could cause serious damage. If the Ask before downloading update option is selected, a notification will display when a new update is available.
and download updates. Warning: When either Current user or Specified user is selected, an error may occur when changing the identity of the program to the desired user. We recommend entering the LAN authentication data in the main update setup section. In this update setup section, the authentication data should be entered as follows: domain_name\user (if it is a workgroup, enter workgroup_name\name) and password. When updating from the HTTP version of the local server, no authentication is required.
Example: Let the number 6871 be the most recent version of virus signature database. 6870 and 6868 are stored as a virus signature database snapshots. Note that 6869 is not available because, for example, the computer was turned off and a more recent update was made available before 6869 was downloaded. If the Number of locally stored snapshots field is set to 2 and you click Roll back, the virus signature database (including program modules) will be restored to version number 6868.
4.6 Tools The Tools menu includes modules that help simplify program administration and offers additional options for advanced users.
4.6.1 Log files Log files contain information about all important program events that have occurred and provide an overview of detected threats. Logging is an essential part of system analysis, threat detection and troubleshooting. Logging is performed actively in the background with no user interaction. Information is recorded based on the current log verbosity settings. It is possible to view text messages and logs directly from the ESET Smart Security environment, as well as to archive logs.
You can show the context menu by right-clicking a specific entry. The following options are available in the context menu: Filter records of the same type – After activating this filter, you will only see records of the same type (diagnostics, warnings, ...). Filter.../Find... – When enabled, a Log filtering window will pop up where you can define the filtering criteria. Clear filter – Clears all filter settings (as described above). Copy all – Copies information about all the records in the window.
By default, the following scheduled tasks are displayed in Scheduler: Log maintenance Regular automatic update Automatic update after dial-up connection Automatic update after user logon Regular checking for latest product version (see Update mode) Automatic startup file check (after user logon) Automatic startup file check (after successful update of the virus signature database) Automatic first scan To edit the configuration of an existing scheduled task (both default and user-defined), right-click the ta
4.6.3 Protection statistics To view a graph of statistical data related to ESET Smart Security's protection modules, click Tools > Protection statistics. Select the desired protection module from the Statistics drop-down menu to see the corresponding graph and legend. If you mouse over an item in the legend, only the data for that item will display in the graph. The following statistic graphs are available: Antivirus and Antispyware protection – Displays the number of infected and cleaned objects.
given in KB (kilobytes)/MB/GB. If you mouse over either read data or written data in the legend below the graph, the graph will only display data for that activity type. You can also select Network activity from the Activity drop-down menu. The graph display and options for File system activity and Network activity are the same except that the latter displays received data (red) and sent data (blue). 4.6.
The ESET Live Grid setup menu provides several options for enabling / disabling ESET Live Grid, which serves to submit suspicious files and anonymous statistical information to ESET labs. It is accessible from the Advanced setup tree by clicking Tools > ESET Live Grid. Participate in ESET Live Grid (recommended) – Enables / disables ESET Live Grid, which serves to submit suspicious files and anonymous statistical information to ESET labs.
4.6.7 Running processes Running processes displays the running programs or processes on your computer and keeps ESET immediately and continuously informed about new infiltrations. ESET Smart Security provides detailed information on running processes to protect users with ESET Live Grid technology. Process – Image name of the program or process that is currently running on your computer. You can also use the Windows Task Manager to see all running processes on your computer.
By clicking a given application at the bottom, the following information will appear at the bottom of the window: File – Location of an application on your computer. File size – File size in B (bytes). File description – File characteristics based on the description from the operating system. Company name – Name of the vendor or application process. File version – Information from the application publisher. Product name – Application name and/or business name.
Sent/Received – Amount of data exchanged within the connection. Open in a new window – Displays information in a separate window. The Configure connection view... option in the Network connections screen enters the advanced setup structure for this section, enabling you to modify connection view options: Resolve host names – If possible, all network addresses are displayed in DNS format, not in the numeral IP address format.
4.6.9 Quarantine The main function of the quarantine is to safely store infected files. Files should be quarantined if they cannot be cleaned, if it is not safe or advisable to delete them or if they are being falsely detected by ESET Smart Security. You can choose to quarantine any file. This is advisable if a file behaves suspiciously but is not detected by the antivirus scanner. Quarantined files can be submitted for analysis to the ESET Virus Lab.
infected incorrectly (for example, by heuristic analysis of the code) and subsequently quarantined, please send the file to the ESET Virus Lab. To submit a file from quarantine, right-click the file and select Submit for analysis from the context menu. 4.6.10 Proxy server setup In large LAN networks, the connection of your computer to the Internet can be mediated by a proxy server. If this is the case, the following settings need to be defined.
SMTP server requires authentication – If the SMTP server requires authentication, these fields should be filled in with a valid username and password granting access to the SMTP server. Sender address – This field specifies the sender address which will be displayed in the header of notification emails. Recipient address – This field specifies the recipient address which will be displayed in the header of notification emails.
4.6.12 Submission of samples for analysis The file submission dialog enables you to send a file or a site to ESET for analysis and can be found in Tools > Submit sample for analysis. If you find a suspiciously behaving file on your computer or suspicious site on the Internet, you can submit it to the ESET Virus Lab for analysis. If the file turns out to be a malicious application or website, its detection will be added to an upcoming update. Alternatively, you can submit the file by email.
The Context menu is displayed after right-clicking an object. Use this tool to integrate ESET Smart Security control elements into the context menu. 4.7.1 Graphics User interface configuration options in ESET Smart Security allow you to adjust the working environment to fit your needs. These configuration options are accessible in the Advanced setup tree by expanding User interface and clicking Graphics.
would be a system or network administrator. This option is especially useful for terminal servers, provided that all system notifications are sent to the administrator. 4.7.3 Hidden notification windows If Do not show this message again is selected for any notification window (alert) that was previously displayed that notification, it will appear in the list of hidden notification windows. Actions that are now executed automatically are displayed in the Confirm column.
Block network – Personal firewall will block all outgoing / incoming network and internet traffic. Temporarily disable firewall – Switches the firewall to an inactive state. See the chapter System integration of Personal firewall for more information. Advanced setup... – Select this option to enter the Advanced setup tree. There are also other ways to open Advanced setup, such as pressing the F5 key or navigating to Setup > Enter advanced setup....
5. Advanced user 5.1 Profile manager Profile manager is used in two places within ESET Smart Security – in the On-demand computer scan section and in the Update section. Computer scan Your preferred scan parameters can be saved for future scanning. We recommend that you create a different profile (with various scan targets, scan methods and other parameters) for each regularly used scan.
TAB Esc moves the cursor in a window closes the active dialog window 5.3 Diagnostics Diagnostics provides application crash dumps of ESET processes (for example, ekrn). If an application crashes, a dump will be generated. This can help developers to debug and fix various ESET Smart Security problems. Two dump types are available: Complete memory dump – Records all the contents of system memory when the application stops unexpectedly.
5.5 Idle state detection Idle state detection settings can be configured in Advanced setup under Tools > Idle state detection. These settings specify a trigger for Idle-state scanning, when: the screen saver is running, the computer is locked, a user logs off. Use the check boxes for each respective state to enable or disable the different idle state detection triggers. 5.6 ESET SysInspector 5.6.
5.6.2 User Interface and application usage For clarity the main program window is divided into four major sections – Program Controls located on the top of the main program window, Navigation window to the left, the Description window to the right and the Details window at the bottom of the main program window. The Log Status section lists the basic parameters of a log (filter used, filter type, is the log a result of a comparison etc.). 5.6.2.
Help Contains information about the application and its functions. Detail This setting influences the information displayed in the main program window to make the information easier to work with. In "Basic" mode, you have access to information used to find solutions for common problems in your system. In the "Medium" mode, the program displays less used details. In "Full" mode, ESET SysInspector displays all the information needed to solve very specific problems.
Description window you may find additional details for each process such as dynamic libraries used by the process and their location in the system, the name of the application's vendor and the risk level of the file. The Detail window contains additional information for items selected in the Description window such as the file size or its hash. NOTE: An operating system is comprised of several important kernel components running constantly that provide basic and vital functions for other user applications.
5.6.2.2.
Ctrl+Alt+R Ctrl+Alt+1 Ctrl+Alt+2 Ctrl+Alt+3 Ctrl+Alt+4 Ctrl+Alt+5 Ctrl+Alt+C Ctrl+Alt+N Ctrl+Alt+P cancels comparison displays all items displays only added items, log will show items present in current log displays only removed items, log will show items present in previous log displays only replaced items (files inclusive) displays only differences between logs displays comparison displays current log opens previous log Miscellaneous F1 Alt+F4 Alt+Shift+F4 Ctrl+I view help close program close program w
Example Generate and save a log, recording original information about the system, to a file named previous.xml. After changes to the system have been made, open ESET SysInspector and allow it to generate a new log. Save it to a file named current.xml. In order to track changes between those two logs, click File > Compare logs. The program will create a comparative log showing differences between the logs. The same result can be achieved if you use the following command line option: SysIsnpector.exe current.
5.6.4.1 Generating Service script To generate a script, right-click any item from the menu tree (in the left pane) in the ESET SysInspector main window. From the context menu, select either Export All Sections To Service Script or Export Selected Sections To Service Script. NOTE: It is not possible to export the service script when two logs are being compared. 5.6.4.
04) UDP endpoints This section contains information about existing UDP endpoints. Example: 04) UDP endpoints: - 0.0.0.0, port 123 (ntp) + 0.0.0.0, port 3702 - 0.0.0.0, port 4500 (ipsec-msft) - 0.0.0.0, port 500 (isakmp) [...] When the script runs, it will isolate the owner of the socket at the marked UDP endpoints and stop the socket. 05) DNS server entries This section contains information about the current DNS server configuration. Example: 05) DNS server entries: + 204.74.105.85 - 172.16.152.2 [...
Example: 08) Drivers: - Name: Microsoft ACPI Driver, exe path: c:\windows\system32\drivers\acpi.sys, state: Running, startup: Boot - Name: ADI UAA Function Driver for High Definition Audio Service, exe path: c:\windows\system32 \drivers\adihdaud.sys, state: Running, startup: Manual [...] When you execute the script, the drivers selected will be stopped. Note that some drivers won't allow themselves to be stopped.
5.6.5 FAQ Does ESET SysInspector require Administrator privileges to run ? While ESET SysInspector does not require Administrator privileges to run, some of the information it collects can only be accessed from an Administrator account. Running it as a Standard User or a Restricted User will result in it collecting less information about your operating environment. Does ESET SysInspector create a log file ? ESET SysInspector can create a log file of your computer's configuration.
the digital signature of that CAT file will be applied in the validation process of the executable. This is why there are sometimes files marked as "Signed by MS", but having a different "CompanyName" entry. Example: Windows 2000 includes the HyperTerminal application located in C:\Program Files\Windows NT. The main application executable file is not digitally signed, but ESET SysInspector marks it as a file signed by Microsoft.
Windows ADK supports: Windows 8 Windows 7 Windows Vista Windows Vista Service Pack 1 Windows Vista Service Pack 2 Note: ESET SysRescue may not be available for Windows 8 in older versions of ESET security products. In this case we recommend that you upgrade your product or create an ESET SysRescue disk on another version of Microsoft Windows. Windows AIK supports: Windows 7 Windows Vista Windows XP Service Pack 2 with KB926044 Windows XP Service Pack 3 5.7.
The Create option is inactive if no MSI installation package is specified, or if no ESET Security solution is installed on the computer. To select an installation package, click Change and click the ESET Antivirus tab. Also, if you do not fill in username and password (Change > ESET Antivirus), the Create option is greyed out. 5.7.4.1 Folders Temporary folder is a working directory for files required during ESET SysRescue compilation.
5.7.4.4 Internet protocol This section allows you to configure basic network information and set up predefined connections after running ESET SysRescue. Select Automatic private IP address to obtain the IP address automatically from DHCP (Dynamic Host Configuration Protocol) server. Alternatively, this network connection can use a manually specified IP address (also known as a static IP address). Select Custom to configure the appropriate IP settings.
5.7.5.1 Using ESET SysRescue Suppose that computers in the network have been infected by a virus which modifies executable (.exe) files. ESET Security solution is capable of cleaning all infected files except for explorer.exe, which cannot be cleaned, even in Safe mode. This is because explorer.exe, as one of the essential Windows processes, is launched in Safe mode as well. ESET Security solution would not be able to perform any action with the file and it would remain infected.
/sfx /no-sfx /rtp /no-rtp /unsafe /no-unsafe /unwanted /no-unwanted /suspicious /no-suspicious /pattern /no-pattern /heur /no-heur /adv-heur /no-adv-heur /ext=EXTENSIONS /ext-exclude=EXTENSIONS /clean-mode=MODE scan self-extracting archives (default) do not scan self-extracting archives scan runtime packers (default) do not scan runtime packers scan for potentially unsafe applications do not scan for potentially unsafe applications (default) scan for potentially unwanted applications do not scan for potent
6. Glossary 6.1 Types of infiltration An Infiltration is a piece of malicious software trying to enter and/or damage a user’s computer. 6.1.1 Viruses A computer virus is a piece of malicious code that is pre-pended or appended to existing files on your computer. Viruses are named after biological viruses because they use similar techniques to spread from one computer to another. As for the term “virus”, it is often used incorrectly to mean any type of a threat.
If a file on your computer is detected as a Trojan, it is advisable to delete it, since it most likely contains nothing but malicious code. 6.1.4 Rootkits Rootkits are malicious programs that grant Internet attackers unlimited access to a system, while concealing their presence. Rootkits, after accessing a system (usually exploiting a system vulnerability), use functions in the operating system to avoid detection by antivirus software: they conceal processes, files and Windows registry data.
6.1.7 Packers Packer is a runtime self-extracting executable that rolls up several kinds of malware into a single package. The most common packers are UPX, PE_Compact, PKLite and ASPack. The same malware may be detected differently when compressed using a different packer. Packers also have the ability to make their "signatures" mutate over time, making malware more difficult to detect and remove. 6.1.
6.2.1 DoS attacks DoS, or Denial of Service, is an attempt to make a computer or network unavailable for its intended users. The communication between afflicted users is obstructed and can no longer continue in a functional way. Computers exposed to DoS attacks usually need to be restarted in order to work properly. In most cases, the targets are web servers and the aim is to make them unavailable to users for a certain period of time. 6.2.
6.2.6 SMB Relay SMB Relay and SMB Relay 2 are special programs that are capable of carrying out attacks against remote computers. The programs take advantage of the Server Message Block file sharing protocol, which is layered onto NetBIOS. A user sharing any folder or directory within the LAN most likely uses this file sharing protocol. Within local network communication, password hashes are exchanged.
6.3.3 Vulnerability Shield Vulnerability shield is an extension of the Personal firewall that improves the detection of known vulnerabilities on the network level. By implementing detections for common vulnerabilities in widely used protocols such as SMB, RPC and RDP, it constitutes another important layer of protection against spreading malware, network-conducted attacks and exploitations of vulnerabilities for which a patch has yet not been released or deployed. 6.3.4 ESET Live Grid Built on ThreatSense.
6.4 Email Email, or electronic mail, is a modern form of communication with many advantages. It is flexible, fast and direct, and played a crucial role in the proliferation of the Internet in the early 1990‘s. Unfortunately, with a high level of anonymity, email and the Internet leave room for illegal activities such as spamming. Spam includes unsolicited advertisements, hoaxes and proliferation of malicious software – malware.
6.4.3 Phishing The term phishing defines a criminal activity which uses techniques of social engineering (manipulating users in order to obtain confidential information). Its aim is to gain access to sensitive data such as bank account numbers, PIN codes, etc. Access is usually achieved by sending email masquerading as a trustworthy person or business (e.g., financial institution, insurance company).
6.4.4.2 Whitelist In general, a whitelist is a list of items or persons who are accepted, or have been granted permission. The term “email whitelist“ defines a list of contacts from whom the user wishes to receive messages. Such whitelists are based on keywords searched for in email addresses, domain names, or IP addresses. If a whitelist works in “exclusivity mode“, then messages from any other address, domain, or IP address will not be received.