High-End 192 kHz Reference HiFi Audio Interface User’s Guide
AUDIOTRAK - Copyright © 2007 Revision 1, July 2007 www.audiotrak.
AUDIOTRAK Prodigy HD2 INDEX 1. Introduction.................................................................................................................................. 4 2. System Requirements .................................................................................................................. 4 Minimum System Requirements................................................................................................ 4 3. Connectors ......................................................
AUDIOTRAK Prodigy HD2 1. Introduction Thank you for choosing the AUDIOTRAK Prodigy HD2. Prodigy HD2 shows the latest technology in high end audio playback for audiophile users. The hardware supports 192 kHz at 24-bit with a sensational dynamic range of 120dB(a) for playback no other hardware in this price range provides this high level of output quality. Even better: the hardware is equipped with 3 OpAmps on sockets, this makes it possible to swap and exchange the OpAmps based on specific requirements.
AUDIOTRAK Prodigy HD2 3. Connectors 1) Stereo Line Output (left / right), provides the main output signal via RCA connectors 2) Headphone Output (stereo 1/8") 3) Line In, analog input connector (stereo 1/8"), the main input 4) S/PDIF Digital Output, via Toslink connector 5) internal Aux Input (stereo, 4 pin) 4. Hardware Installation Prodigy HD2 and other components in the computer could easily be damaged by electrical shocks.
AUDIOTRAK Prodigy HD2 Figure 1. Disconnecting the Power Cord 2. Refer to your computer user’s manual and remove the computer cover. Make sure that you have an available PCI slot on your motherboard to install the Prodigy HD2. Figure 2. Removing the computer cover To avoid possible static shock damage to the computer parts, discharge it by touching the computer case or something grounded. We recommend you use an anti-static device such as an anti-static wristband.
AUDIOTRAK Prodigy HD2 Figure 4. Removing the PCI Slot faceplate If the PCI slot is covered by a faceplate, you can remove it by removing the screw holding it in place or by prying it off with a screwdriver. Insert the Prodigy HD2 card into the PCI slot, firmly pushing the card into the slot until it is seated securely. Replace the screw, and tighten it. Figure 5. Prodigy HD2 installed in a PCI slot 4. Close the computer case. 5.
AUDIOTRAK Prodigy HD2 Note: Please make sure that you have installed a recent version of the chipset drivers and patches provided by your mainboard manufacturer for your mainboard. It is important that this is done before you install the Prodigy HD2 drivers. One way to check this is to see if there are any unknown devices listed in Device Manager before you install the Prodigy HD2 hardware. 1. Turn on your computer.
AUDIOTRAK Prodigy HD2 4. After that, follow instructions on screen. Sometimes Windows requests you to reboot the system, if so, please confirm it. Also typically several devices are installed after each other – just keep going until new messages from Windows appear no longer. 5. Once the installation is finished (typically after Windows has been restarted), you will see the Prodigy HD2 control panel icon in your system tray (lower right corner of your desktop). Click on the icon to open it. 6.
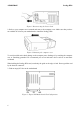
AUDIOTRAK Prodigy HD2 You can choose each stereo device or multi channel device for your use as Default device on Sound playback or Sound recording which will be used as default in your audio applications. 6. Prodigy HD2 Control Panel The Prodigy HD2 driver software provides a simple yet powerful interface with your computer. The Prodigy HD2 driver provides two operation modes. The normal Prodigy HD2 operation is used for digital recording and normal audio output.
AUDIOTRAK Prodigy HD2 The Prodigy HD2 control panel features a menu area for configuration: 1. Main / QSound panel You can control input and output on the MAIN / QSound panel. It is also the default screen you see when you first launch the panel. Basic functions of Prodigy HD2 are controlled from this screen. 1) The QXpander™ functions provides virtual mono-to-3D and stereo-to-3D stereo sound stage synthesis and enhancement. 2) QSizzle™ and QRumble™ provide dynamic spectral emphasis.
AUDIOTRAK Prodigy HD2 9) S.R: Shows the sampling rate. When you click “AUTO” then the setting changes to “LOCK” for fixed sample rate. The sample rates will be converted during playback when the “LOCK” setting is active. 2. QEM panel QSound Environmental Modeling (QEM™) is an acoustic environment simulation. a) QSound Environmental Modeling: You can select your acoustic environment simulation from the choices b) Intensity: The intensity control for QEM™ 3. Equalizer panel The QSound Equalizer.
AUDIOTRAK Prodigy HD2 5. QSizzle™ switch QSizzle™ on/off. 6. QRumble™ switch QRumble™ on/off. 7. Normalizer switch Turns the Normalize function on/off. 8. 3D effect switch QMSS and QXpander, QRumble™ on/off. 9. Equalizer switch Turns the Equalizer function on/off. 10. DirectWIRE panel Clicking this menu will open the DirectWIRE 3.0 screen. DirectWIRE 3.0 is a unique feature of the EWDM driver that transfers digital audio data internally within different applications.
AUDIOTRAK Prodigy HD2 1) Mouse Wheel: Configures the mouse wheel for volume change adjustment. Default value is ±1.5dB per step. You can configure the steps to your preference. 2) Latency: Configures the latency setting for Prodigy HD2 which is especially important when you use the hardware with music production software. Generally, for multi-track recording we recommend higher latency for stability. For software synthesizers, we recommend lower latency.
AUDIOTRAK Prodigy HD2 2. DirectWIRE Control Panel Click on DirectWIRE on the Prodigy HD2 control panel. The DirectWIRE panel window as shown below will appear. a) the INPUT column is a new feature of DirectWIRE 3.0. It's used to route signals from the card's hardware inputs. On Prodigy HD2, the inputs 1 to 8 are identical to the left and right channels of the analog input signal.
AUDIOTRAK Prodigy HD2 If you set up DirectWIRE like shown, you can record a mix between a microphone signal and music (e.g. MP3) playback from WinAmp. If you want to record/broadcast only the MP3-Playback, disconnect the input lines. 2) internal recording: you can record all WDM playback signals from your PC 3) recording of WDM signals from ASIO input 4) recording ASIO playback in a WDM application 5) recording from GigaStudio (GSIF) to Cubase (ASIO) 8.
AUDIOTRAK Prodigy HD2 9.
AUDIOTRAK Prodigy HD2 Disclaimer All features and specifications subject to change without notice. Parts of this manual are continually being updated. Please check our web site www.audiotrak.net occasionally for the most recent update information.