
User Manual


ESI U86 XT
9
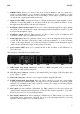
Once you see the window on the left, click Finish. In many cases, the window on the right appears
then. We strongly suggest to select Yes, restart the computer now and then click Finish.
You can connect U86 XT to your computer anytime if not done yet and switch it on. Windows will
automatically setup the system so you can use the device.
To confirm the completion of the installation after rebooting the system, please check if the orange
color ESI icon is displayed in the taskbar notification area as shown below.
If you can see it, the driver installation has been completed successfully.
2.3.2 Installation under Mac OS X
To use U86 XT under Mac OS X, you need to install the driver from the included Installation DVD
from the Mac OS X folder or from newer driver download from our website, which is
recommended.
The driver and control panel gets installed by double clicking on the .dmg file and then in the
window that opens again double clicking on the installer. After that follow the instructions on your
screen. At the end of the installation, we recommend to reboot your system.
If the installer does not launch via a double click, click on it with the right mouse button (or hold
the ctrl-key on your keyboard while clicking with the left mouse button) and then choose Open and
then Open again.
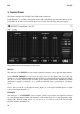
Controlling some of the basic options of U86 XT under Mac OS X can also be done via the Audio
MIDI Setup utility from Mac OS X (from the folder Applications > Utilities).