D00864200A DVD/DVD-A/SACD/CD Player Owner’s Manual
IMPORTANT SAFETY INSTRUCTIONS 1) Read these instructions. 2) Keep these instructions. CAUTION: TO REDUCE THE RISK OF ELECTRIC SHOCK, DO NOT REMOVE COVER (OR BACK). NO USERSERVICEABLE PARTS INSIDE. REFER SERVICING TO QUALIFIED SERVICE PERSONNEL. 3) Heed all warnings. 4) Follow all instructions.
WARNING : TO PREVENT FIRE OR SHOCK HAZARD, DO NOT EXPOSE THIS APPLIANCE TO RAIN OR MOISTURE. CAUTION < DO NOT REMOVE THE EXTERNAL CASES OR CABINETS TO EXPOSE THE ELECTRONICS. NO USER SERVICEABLE PARTS ARE WITHIN! This product has been designed and manufactured according to FDA regulations “title 21, CFR, chapter 1, subchapter J, based on the Radiation Control for Health and Safety Act of 1968“, and is classified as class 1 laser product.
Contents Thank you for choosing Esoteric. Read this manual carefully to get the best performance from this unit. Contents . . . . . . . . . . . . . . . . . . . . . . . . . . . . . . . . . . . . . . . . . 4 Digital output formats . . . . . . . . . . . . . . . . . . . . . . . . . . . . 37 Features . . . . . . . . . . . . . . . . . . . . . . . . . . . . . . . . . . . . . . . . . . 5 Test tone length . . . . . . . . . . . . . . . . . . . . . . . . . . . . . . . . . 37 Before Use . . . . . . . . . . . . . .
Features VRDS mechanism for DVD and SACD players, incorporating a duralumin turntable and a SS400 bridge The VDRS mechanism completely eliminates any vibration caused by the disc itself, thanks to the full-diameter clamp that clamps the disc securely to the turntable. Additionally, warping and other defects of the disc are eliminated.
Before Use What’s in the box Please confirm that the following accessories are in the box when you open it. Remote control unit x 1 Batteries (AA, R6, SUM-3) x 2 Screwdriver x 1 Felt sheet x 3 Power cord x 1 Owner’s manual x 1 Warranty card x 1 DO NOT MOVE THE UNIT DURING PLAYBACK During playback, the disc rotates at high speed. Do NOT lift or move the unit during playback. Doing so may damage the disc or the unit.
Restoring factory settings If you have made a lot of changes to the setup, and want to restart from a known set of options, restore the unit to the factory settings as follows: “DTS” and “DTS 96/24” are trademarks of Digital Theater Systems, Inc. Manufactured under license from Dolby Laboratories. “Dolby”, “Pro Logic” and the double-D symbol are trademarks of Dolby Laboratories. “Super Audio CD” is a registered trademark. 1. With the unit turned off, press and hold down the STOP button. 2.
Discs Type of Discs That Can be Played on This System This player can playback discs bearing any of the following logos: DVD Video: • Single-sided or double-sided discs • Single layer or dual layer discs • Dolby Digital, DTS, MPEG or Linear PCM digital audio • MPEG-2 digital video • This unit can play DVD-R discs recorded in DVD video format. • This unit can play DVD-RW discs recorded in DVD video format or DVD video recording format. Discs are generally divided into one or more titles.
Following discs cannot be played with this unit: • CD-G, Data part of CD-EXTRA, PHOTO CD, CD-ROM and DVD-ROM discs • discs recorded in a color system other than PAL or NTSC • illegally produced discs • scratched or damaged discs • discs that are dusty, soiled or marked with fingerprints Warning: If you attempt to play back such discs, there is a risk that sudden loud noise can blast over the speakers at full volume and cause damage to the speakers and your hearing.
Connection to a TV CAUTION: < Switch off the power to all equipment before making connections. < Read the instructions of each component you intend to use with this unit. < Be sure to insert each plug securely. To prevent hum and noise, avoid bundling the signal interconnection cables together with the AC power cord or speaker cables.
< Adjust the video aspect ratio to match that of the television (see page 38) . < If the component video terminals or the D1/D2 terminal are used to connect the unit to a television with progressive scan capabilities, the output can be set to match this (see page 39). < This unit adopts analog copy protection features. If the unit is connected to a TV through a VCR (video cassette recorder), the resulting playback may be affected. Connect the unit directly to the television.
Connections to an amplifier, etc. CAUTION: < Switch off the power to all equipment before making connections. < Read the instructions of each component you intend to use with this unit. < Be sure to insert each plug securely. To prevent hum and noise, avoid bundling the signal interconnection cables together with the AC power cord or speaker cables.
F Analog audio output terminals Use either the XLR or RCA (pin) terminals for analog stereo output. XLR: Use balanced XLR audio cable RCA: Use RCA (pin) audio cable < When using these terminals, set “Analog Output” to “2 ch” (or select “2 ch” using the 2CH/MULTI button of the remote control unit) to downmix the multi-channel material to two channels. Note that if “Analog Output” is set to “Multi ch”, only the front L/R sound of the multi-channel material will be output from these terminals.
Front panel features A B C D E F G H I J A POWER Use this to turn the unit on and off. When the unit is on, the ring surrounding the button lights up. The equipment draws nominal non-operating power from the AC outlet with its POWER switch in the OFF position. B CLOCK MODE Use this to select an external word sync source connected to the WORD SYNC connector on the rear panel. Also use this to select the 4% DOWN mode. C Remote control sensor Receives signals from the remote control unit.
Front panel display a s b c d e r q p o f g n a Disc type indicator Shows the type of disc currently loaded. h m i l k j m GUI indicator Lights to show that the GUI is being displayed through the video outputs. b GROUP indicator Indicates that the group number of a DVD audio disc is being shown. n Message area Alphanumeric display to show times, titles, status messages, etc. c TITLE indicator Indicates that the title of a DVD disc is being shown.
Understanding the remote control unit A Number buttons Use these for selecting tracks by number, etc. B DVI ON/OFF Use this to turn DVI video output on and off. C VIDEO ON/OFF Use this to turn all video on and off. D 2CH/MULTI Use this to switch between two-channel (stereo) and multichannel surround audio output. E PLAY AREA O A F SLOW ( / ) Use these for slow motion video playback. P B D C R E T Q W I X J G SCAN (m/,) Use these for fast scanning during playback.
Q DISPLAY Use this button to change the display mode. R FL DIMMER button Use this button to change the brightness of the front panel display. How to insert the batteries Remove the cover of the remote control unit with a screwdriver. After checking the polarity (+/_) of two AA batteries, insert the batteries, replace the cover and replace the screws. S REPEAT Use this button to set the repeat playback mode. T PROGRAM Use this button when programming playback order.
DVD VCD CD SACD DVD-A Playback 3 2 4 1 5 5 Press the PLAY button to start playback if playback has not started automatically. If a menu is shown on screen (some DVD or video discs may show such a menu), see the next section. 1 Turn on the power using the POWER button on the main unit. On-screen menu The button and the display light. An on-screen menu is shown when a DVD or video CD with playback control (PBC) content is loaded. The way in which the menu works may differ from disc to disc.
Playback control (with PBC enabled) video CDs With these discs, the number buttons can sometimes be used to select menu items. Jump between pages of multi-page menus (on some video CDs) with the SKIP buttons (.//). < Pressing RETURN during playback returns to the menu of a PBC video CD. < Note that the DISPLAY, REPEAT and PROGRAM buttons do not work during PBC playback. Playback without PBC In the stop mode press the number buttons or SKIP buttons (.
DVD DVD-A DVD Selecting groups and titles Use the remote control unit’s GROUP/TITLE buttons ( / ) to change titles and groups on DVD media. If pressed during playback, these buttons start playback at the selected group/title. If pressed during pause or stop mode, playback is paused at the start of the selected group/title. Note that some discs may start playback when a group or title is selected, regardless of the pause or stop status.
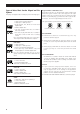
DVD VCD CD SACD DVD-A Fast scanning DVD VCD CD SACD DVD-A Repeat mode When playing back, use the SCAN button (m or ,) to move backwards and forwards (sound is muted for DVD video and video CD discs). Press PLAY to restart playback at normal speed at the desired location. Repeated presses of the SCAN buttons changes the scanning speeds. There are three speeds: Use the REPEAT button to select the repeat mode for playback.
CD SACD DVD-A Programmed playback Programmed playback allows up to 30 tracks to be played back in the order you decide. Note that programmed playback is not possible for DVD video and video CD discs. When selecting tracks from a DVD audio disc: Program running time PROGRAM 1 Press the PROGRAM button (either when playing back or stopped). The program screen appears.
DVD Changing camera angle Clearing the last track from the list Push the CLEAR button to clear the last track from the list. Adding tracks to the list When a scene recorded with multiple angles is played, the angle icon appears on the screen. Each time you press the ANGLE button while the angle icon is displayed, the camera angle changes. :01/04 :02/04 :04/04 :03/04 Use the number buttons to add tracks to the list. < When no other angle is recorded, the prohibit icon “A” will be displayed.
DVD VCD DVD Slow motion/frame advance / ) Pressing PLAY resumes normal speed playback. Repeated presses of the SLOW buttons change the slow playback speed: : 1/8 q 1/4 q 1/2 q normal speed :1/20 q 1/16 q 1/12 q playback at normal speed Frame advance If you press the SLOW buttons when playback is paused, you can advance or go back a frame at a time. Pressing PLAY restarts playback at normal speed. < Sound is muted while slow playback or frame advance is taking place.
DVD DVD Selecting subtitles Use the SUBTITLE button to select DVD subtitles. Repeated presses of this button cycle through available languages on a disc until OFF is reached (no subtitle). < Subtitles do not always appear immediately after the language has been selected. It may be necessary to wait a few seconds until the subtitles appear. < Some captions on some discs cannot be removed or changed using this button.
DVD VCD DVI output DVI level The DVI ON/OFF button turns output from the DVI output on and off. In order to use this output, a DVI/HDCP-compliant television must be used. When DVI output is enabled, the black areas shown on the monitor may not appear dark enough. In this case, it is necessary to select the EXPAND option. When the DVI output is selected and the format is visible on the front panel’s display, use the right cursor button to select between EXPAND or NORMAL.
DVD VCD CD SACD DVD-A DVD VCD Turning video on and off Use the VIDEO ON/OFF button to turn video output to the television (monitor) on and off. It is not necessary to turn video off, but you may notice a slight improvement in audio quality if you turn off the video when playing back SACD discs and CDs without video images. Note that this setting is not memorized when the power is turned off.
DVD VCD CD SACD DVD-A Changing the display mode DVD video playback (on-screen display) (no display) Currently-playing title Elapsed time of current title Title Chapter 01 03/37 Currently-playing chapter Total Elapsed 10:53 Number of chapters in current title During playback, it is possible to change the display as shown here. The display on both the main unit, and the on-screen display (when the video output is on) changes.
DVD audio playback (on-screen display) (no display) Current group Group 01 SACD/CD/video CD (stopped, main unit display) Elapsed time of current track Track 02/10 Elapsed 01:50 Remain 04:41 Number of tracks on disc Total disc running time Time remaining for current track Currently-playing track Total number of tracks on disc SACD/CD/video CD playback (on-screen display) Elapsed time of current group Group 01 Track 02/10 Total Elapsed 05:50 Time remaining for current group Audio format Sampl
Settings (introduction) 1 Turn on the main unit, and the television (monitor). If no cursor is visible on the screen, using the left and right buttons changes between the top tabbed menus. Use the up and down buttons to highlight menu items within these tabbed menus. RETURN returns to the top level. 4 Enter the menu item with the right cursor button. 2 Press the SETUP button.
Settings (Audio) Analog output settings Digital output settings [AUDIO q Analog Out] [AUDIO q Digital Out] Analog Out Digital Out CD Digital Direct Audio DRC Group Playback 2ch Down Mix Move Return 2ch * Multi Channel Select Analog Out Digital Out CD Digital Direct Audio DRC Group Playback 2ch Down Mix Exit 2ch * Outputs 2-channel audio from the the i.LINK (AUDIO) and the AUDIO OUT terminals.
Settings (Audio) Audio DRC (Dynamic Range Controlling) Downmix [AUDIO q Audio DRC] [AUDIO q 2ch Down Mix] Analog Out Digital Out CD Digital Direct Audio DRC Group Playback 2ch Down Mix Move Analog Out Digital Out CD Digital Direct Audio DRC Group Playback 2ch Down Mix ON OFF * Return Select Exit ON Applies dynamic range control to Dolby Digital material, reducing the volume of loud sounds, and increasing the volume of quiet ones. This is useful for spoken word material, etc.
Settings (Video) Video adjustment 4 Press RETURN when done, to return to the memory [VIDEO q Video Adjust] selection screen, or SETUP to exit the setup menu completely. 1 Highlight the Video Adjust menu item and press the ENTER button.
Settings (Language) To select a language other than English or Japanese, move the cursor to Other and press ENTER. Audio language selection [LANGUAGE q Audio Language] Audio Language Subtitle Language Subtitle Display OSD Language Move Return If you select the List of Language field, you see a list of ten relatively common languages. Select from this list by moving the cursor and pressing ENTER.
Language Code List Language Code Language Code Language Japanese (ja) 1001 Guarani (gn) 0714 Pashto, Pushto (ps) 1619 Code English (en) 0514 Gujarati (gu) 0721 Quechua (qu) French (fr) 0618 Hausa (ha) 0801 Rhaeto-Romance (rm) 1813 German (de) 0405 Hindi (hi) 0809 Kirundi (rn) 1814 Italian (it) 0920 Croatian (hr) 0818 Romanian (ro) 1815 Spanish (es) 0519 Hungarian (hu) 0821 Kinyarwanda (rw) 1823 Chinese (zh) 2608 Armenian (hy) 0825 Sanskrit (sa) 1901 Dutch (nl)
Settings (General/Speaker setup) Use these speaker setup menus when the i.LINK (AUDIO) terminal is connected to a surround sound amplifier with a decoder, and when you don’t use the speaker menus of the amplifier. There is no need for this setup when not using the i.LINK (AUDIO) terminal, or when you use the speaker menus of the amplifier. In this case, leave this setup as it is (factory settings). < This setup has an effect on the sound output from the i.
Settings (General) 1. When you are ready to start, highlight the “Test Start” and press the ENTER button. Speaker Setting Audio Digital Out Video Out Display Setting Parental Lock Move Return Size Distance (m) L/R Level (dB) C Test Tone SR SL SW Test Start Select 0.0 0.0 0.0 0.0 0.0 Digital output formats [GENERAL q Audio Digital Out] Speaker Setting Audio Digital Out Video Out Display Setting Parental Lock Move < Test tone at very high levels may not be good for your speakers.
Settings (General/Video Out) Speaker Setting Audio Digital Out Video Out Display Setting Parental Lock 16:9 * Use with a 16:9 wide television. TV Screen S-Video Out Comp. Video PL-NT Conv. Caption Still Mode 16 : 9 * S2 * Interlace * OFF * OFF * Auto * 4:3 picture Move Return Select 16:9 picture Exit This menu item contains a number of different options, all concerned with the video output from the unit. 4:3LB (Letterbox) This mode is used with 4:3 televisions. 4:3 images are displayed normally.
Component video output Closed captioning [GENERAL q Video Out q Comp. Video] [GENERAL q Video Out q Caption] This setting allows the selection of interlaced (Interlace*) or progressive-scan (Progressive) video from the component video outputs. Progressive-scan video provides a better, clearer picture. However, it is not supported by every television or monitor, and you should ensure that this is supported fully before turning on this option.
Settings (General/Display) Speaker Setting Audio Digital Out Video Out Display Setting On Screen Display Parental Lock Angle Indicator Background Move Return Select ON * ON * Black * Exit On-screen display [GENERAL q Video Out q On Screen Display] When a button is pressed and this setting is ON* , the screen shows that button’s name and/or icon, etc. Turn this OFF if you do not need this kind of on-screen display.
Setting the level of control Country [GENERAL q Parental Lock q Level] Speaker Setting Audio Digital Out Video Out Password Set/Change Display Setting Level OFF Parental Lock Country Code us Level Move 1 2 Return 3 4 5 6 7 8 OFF Select Exit Once a password has been entered, you can enter a control level, ranging from 1 (strict control) through 8 (much less strict) to OFF* (no control at all). When Level is selected, you must make the selection within 30 seconds.
i.LINK (AUDIO) Output Setting When the i.LINK (AUDIO) terminal is connected to an amplifier or a D/A converter, select proper i.LINK output setting. When playback is stopped, hold down the STOP button for more than 2 seconds and release it when “i.60958”, “i.PCM” or “i.OFF” appears on the display. Each time the STOP button is pressed for 2 seconds, the output setting changes. When using the i.LINK terminal, select “i.60958” or “i.PCM”, and set the Digital Output setting to “ON”. i.
i.LINK (IEEE 1394) The i.LINK is also known as IEEE 1394, an international specification. This unit is ready for i.LINK (AUDIO). By connecting an i.LINK (AUDIO)-capable device to the IEEE 1394 (or i.LINK (AUDIO) terminal on this unit using an i.
Troubleshooting In case you experience any problem with this unit, please take the time to look through this chart and see if you can solve the problem yourself before you call your dealer. No power e Check the connection to the AC power supply. Check and make sure the AC source is not a switched outlet and that, if it is, the switch is turned on. Make sure there is power to the AC outlet by plugging another item such as a lamp or fan. e Press the POWER switch of the main unit to turn it on.
Cannot output 96kHz or 88.2kHz digital audio. e Check that the Audio Digital Out setting is set to “Down Sample OFF” (see page 37). e Some copy protected discs do not output high sampling rate digital audio. No DTS audio output. e When your amplifier is not equipped with DTS decoder, set the DTS setting to “PCM”. Or press the AUDIO button to select any other audio (see page 37, 24). e When playing back a DTS-CD, set the CD Digital Direct setting to “Normal” (see page 31).
Specifications General System . . . . . . . . . . . . . . DVD-Video, DVD-Audio, DVD-R/RW, Video-CD, SACD, and CD Power supply Europe model . . . . . . . . . . . . . . . . . . . . . AC 230 V, 50 Hz U.S.A./Canada model. . . . . . . . . . . . . . . . AC 120 V, 60 Hz Korea model . . . . . . . . . . . . . . . . . . . . . . AC 220 V, 60 Hz Power consumption . . . . . . . . . . . . . . . . . . . . . . . . . . . . 40 W Weight . . . . . . . . . . . . . . . . . . . . . . . . . . . 23.
Block Diagram Spindle Motor SACD CD・VCD DVD 1394 Transmitter Optical Pickup i.
TEAC ESOTERIC COMPANY 3-7-3, Nakacho, Musashino-shi, Tokyo 180-8550, Japan Phone: (0422) 52-5132 e-mail: eso-os@tec.teac.co.jp TEAC AMERICA, INC. 7733 Telegraph Road, Montebello, California 90640 Phone: (323) 726-0303 TEAC CANADA LTD. 5939 Wallace Street, Mississauga, Ontario L4Z 1Z8, Canada Phone: (905) 890-8008 TEAC MEXICO, S.A. De C.