D00918000C Universal Player OWNER’S MANUAL . . . . . . . . . . . . . . . 2 MANUEL DU PROPRIÉTAIRE . . .
CAUTION: TO REDUCE THE RISK OF ELECTRIC SHOCK, DO NOT REMOVE COVER (OR BACK). NO USERSERVICEABLE PARTS INSIDE. REFER SERVICING TO QUALIFIED SERVICE PERSONNEL. The lightning flash with arrowhead symbol, within an equilateral triangle, is intended to alert the user to the presence of uninsulated “dangerous voltage” within the product’s enclosure that may be of sufficient magnitude to constitute a risk of electric shock to persons.
Before Use What’s in the box Please confirm that the following accessories are in the box when you open it. Remote control unit x 1 Batteries (AA, R6, SUM-3) x 2 Felt sheet x 3 Power cord x 1 Owner’s manual x 1 Warranty card x 1 DO NOT MOVE THE UNIT DURING PLAYBACK During playback, the disc rotates at high speed. Do NOT lift or move the unit during playback. Doing so may damage the disc or the unit.
Restoring factory settings If you have made a lot of changes to the setup, and want to restart from a known set of options, restore the unit to the factory settings as follows: “DTS” and “DTS 96/24” are trademarks of Digital Theater Systems, Inc. Manufactured under license from Dolby Laboratories. Dolby, Pro Logic and the double-D symbol are trademarks of Dolby Laboratories. “Super Audio CD” is a registered trademark. “DSD” is a registered trademark.
Discs Type of discs that can be played on this system This player can playback discs bearing any of the following logos: DVD Video: • Single-sided or double-sided discs • Single layer or dual layer discs • Dolby Digital, DTS, MPEG or Linear PCM digital audio • MPEG-2 digital video • This unit can play DVD-R discs recorded in DVD video format. • This unit can play DVD-RW discs recorded in DVD video format or DVD video recording format. Discs are generally divided into one or more titles.
Following discs cannot be played with this unit: • CD-G, Data part of CD-EXTRA, PHOTO CD, CD-ROM and DVD-ROM discs • discs recorded in a color system other than PAL or NTSC • illegally produced discs • scratched or damaged discs • discs that are dusty, soiled or marked with fingerprints Warning: If you attempt to play back such discs, there is a risk that sudden loud noise can blast over the speakers at full volume and cause damage to the speakers and your hearing.
Connection to a TV CAUTION: < Switch off the power to all equipment before making connections. < Read the instructions of each component you intend to use with this unit. < Be sure to insert each plug securely. To prevent hum and noise, avoid bundling the signal interconnection cables together with the AC power cord or speaker cables.
< Adjust the video aspect ratio to match that of the television (see page 40) . < If the component video terminals or the D1/D2 terminal are used to connect the unit to a television with progressive scan capabilities, the output can be set to match this (see page 41). < This unit adopts analog copy protection features. If the unit is connected to a TV through a VCR (video cassette recorder), the resulting playback may be affected. Connect the unit directly to the television.
F Digital audio output terminals Digital audio from DVD-Video, DVD-Audio (2ch only), CD and video CD is output from these terminals. The unit may be connected using either coaxial or optical (TOS) commercially available cables to amplifiers including a decoder, or to digital audio devices such as CD recorders, etc. COAXIAL: Use RCA (pin) digital audio cable OPTICAL: Use optical digital audio cable (TOS) < The optical terminal is covered by a shutter.
Connections to an amplifier, etc. (2) L M N I Master clock generator (G-0s, AZ-1, etc.
I Word sync connector This allows the use of an externally-generated word clock connection, using a commercially available BNC coaxial cable. Devices producing such a suitable clock signal include external D-A converters or dedicated word clock generators. Connect the SYNC OUT (or WORD OUT) of such a device to the unit. J SIGNAL GND connection Use a commercially available PVC-covered cord to connect the signal ground terminal on the unit to the amplifier signal ground.
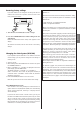
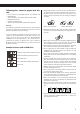
Front panel features A B K J I H C D G F A STANDBY/ON Use this button to turn the unit on and standby. The ring surrounding the button is red in the standby mode. It turns blue when the unit is turned on. The equipment draws nominal non-operating power from the AC outlet with its STANDBY/ON in the standby position. B Disc tray C OPEN/CLOSE Use this to open and close the disc tray. D SKIP (.//) Use these for skip operations.
Front panel display ENGLISH 15
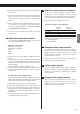
Understanding the remote control unit A ON/STANDBY Use the ON button to turn the unit on. Use the STANDBY button to turn it standby. When you press the ON button, white buttons on the remote control unit light for several seconds. B Number buttons Use these for selecting tracks by number, etc. C HDMI P A Use this to turn HDMI output on and off. D VIDEO OFF B Use this to turn all video on and off.
O WORD How to insert the batteries Use this to turn on or off the word sync function. When the word sync is on, the unit will synchronize with an external word sync source. P OPEN/CLOSE Remove the cover of the remote control unit with a screwdriver. After checking the polarity (+/_) of two AA batteries, insert the batteries, replace the cover and replace the screws. < Use this button to open and close the disc tray. Q CLEAR Use this button to clear entry errors, etc.
DVD VCD CD SA-CD DVD-A Playback On-screen menu An on-screen menu is shown when a DVD or video CD with playback control (PBC) content is loaded. The way in which the menu works may differ from disc to disc. DVD menus Use the cursor buttons to select the menu item from a DVD, and confirm the selection using the ENTER button. 2 Press the OPEN/CLOSE button (L) to open the tray. 3 Insert the disc label side up.
Playback without PBC In the stop mode press the number buttons or SKIP buttons (.//) and PLAY button to playback video CDs without using the PBC facility. DVD audio discs with picture stills Use the SLOW buttons ( / ) to change between still images that are shown when some DVD audio discs are played back. When the STOP button is pressed with a video DVD or video CD, playback is stopped, and the display shows “RESUME”. Pressing PLAY continues playback.
DVD DVD-A SA-CD Selecting groups and titles Use the remote control unit’s GROUP/TITLE buttons ( / ) to change titles and groups on DVD media. If pressed during playback, these buttons start playback at the selected group/title. If pressed during pause or stop mode, playback is paused at the start of the selected group/title. Note that some discs may start playback when a group or title is selected, regardless of the pause or stop status.
DVD VCD CD SA-CD DVD-A Fast scanning DVD VCD CD SA-CD DVD-A Repeat mode When playing back, use the SCAN button (m or ,) to move backwards and forwards (sound is muted for DVD video and video CD discs). Press PLAY to restart playback at normal speed at the desired location. Repeated presses of the SCAN buttons changes the scanning speeds. There are three speeds: Use the REPEAT button to select the repeat mode for playback.
DVD DVD Changing camera angle VCD Slow motion/frame advance When a scene recorded with multiple angles is played, the angle icon appears on the screen. Each time you press the ANGLE button while the angle icon is displayed, the camera angle changes. Slow motion During playback, press either of the SLOW buttons ( to slow playback in either direction. / ) Pressing PLAY resumes normal speed playback.
DVD VCD DVD-A DVD Selecting audio < Sometimes the picture playback will appear to freeze momentarily when the audio is changed. < It may be necessary to change the audio on some discs using the on-screen disc menu. < Some discs cannot have their audio changed in the way described here, as well as some discs which only have one audio stream. If you attempt to select different audio with these discs, the “prohibit” mark is shown on screen. Use the SUBTITLE button to select DVD subtitles.
DVD VCD CD SA-CD DVD-A Display dimming The display on the main unit can be dimmed to suit the environment in which you listen to music or watch video. Use the FL DIMMER button to cycle between these settings. FL Dimmer3: Full brightness FL Dimmer2: Medium brightness FL Dimmer1: Minimum brightness DVD Lip sync This function allows you to adjust the synchronization of the video and audio portions of a DVD. Press the LIP SYNC button to display the current lip sync value (default is 0).
DVD VCD CD SA-CD DVD-A Word sync DVD VCD CD DVD-A Up convert This feature is used when you want to get your whole system locked to a single sync signal (clock) by connecting this unit to the Esoteric AZ-1, G-0/G-0s or other devices that are capable of outputting a sync signal (word clock). The main unit can accept and synchronize to the following frequencies received from external devices: 44.1kHz, 48kHz, 88.2kHz, 96kHz, 176.
DVD VCD CD SA-CD DVD-A Changing the display mode 26
ENGLISH 27
Setting HDMI, Digital Filter, etc.
HDMI Output Setting HDMI level When HDMI output is enabled, the black areas shown on the monitor may not appear dark enough. In this case, it is necessary to select the EXPAND option. When the HDMI output is selected and the format is visible on the front panel’s display, use the right cursor button to select between EXP (EXPAND) or NORM (NORMAL). The HDMI button turns output from the HDMI output on and off. In order to use this output, a HDMI-compliant television must be used.
Settings (introduction) 1 Turn on the main unit, and the television (monitor). If no cursor is visible on the screen, using the left and right buttons changes between the top tabbed menus. Use the up and down buttons to highlight menu items within these tabbed menus. RETURN returns to the top level. 4 Enter the menu item with the right cursor button. 2 Press the SETUP button. The following appears on screen. Factory settings are marked with an asterisk “*”.
Settings (Audio) ENGLISH 31
Settings (Audio) Audio DRC (Dynamic Range Controlling) Downmix [AUDIO q Audio DRC] [AUDIO q 2ch Down Mix] Analog Out Digital Out CD Digital Direct Audio DRC Group Playback 2ch Down Mix Move Analog Out Digital Out CD Digital Direct Audio DRC Group Playback 2ch Down Mix ON OFF * Return Select Exit ON Applies dynamic range control to Dolby Digital material, reducing the volume of loud sounds, and increasing the volume of quiet ones. This is useful for spoken word material, etc.
Settings (Video) 3 Use the up and down buttons to select the parameter, Video adjustment and the left and right buttons to change the value. [VIDEO q Video Adjust] 1 Highlight the Video Adjust menu item and press the ENTER button. Sharpness Adjusts the sharpness of the picture shown on the monitor.
Audio language selection [LANGUAGE q Audio Language] Audio Language Subtitle Language Subtitle Display OSD Language Move Return English * Japanese Other Select Exit This provides an alternative to the AUDIO button for selecting alternative soundtracks. The default setting is English but you can also select Japanese, or a number of other different languages as the audio track to be played from a multi-lingual disc.
Subtitle language selection Displaying subtitles [LANGUAGE q Subtitle Language] [LANGUAGE q Subtitle Display] Audio Language Subtitle Language Subtitle Display OSD Language Move Return Audio Language Subtitle Language Subtitle Display OSD Language English * Japanese Other Select Exit To select a language other than English or Japanese, move the cursor to Other and press ENTER. Return Select Exit This turns subtitling ON or OFF. Note that the captions on some disks cannot be turned off.
Settings (Language) Language Code List 36 Language Code Language Code Language Japanese (ja) 1001 Guarani (gn) 0714 Pashto, Pushto (ps) 1619 Code English (en) 0514 Gujarati (gu) 0721 Quechua (qu) French (fr) 0618 Hausa (ha) 0801 Rhaeto-Romance (rm) 1813 German (de) 0405 Hindi (hi) 0809 Kirundi (rn) 1814 Italian (it) 0920 Croatian (hr) 0818 Romanian (ro) 1815 Spanish (es) 0519 Hungarian (hu) 0821 Kinyarwanda (rw) 1823 Chinese (zh) 2608 Armenian (hy) 0825 Sanskrit
Settings (Speaker setup for 5.1-channel AUDIO OUT terminals and HDMI terminal) Use these speaker setup menus in the following cases only: • When the 5.1-channel AUDIO OUT terminals are connected to a surround sound amplifier. • When the HDMI terminal is connected to a surround sound amplifier with a decoder, and when you don’t use the speaker menus of the amplifier. There is no need for this setup when not using the 5.
Settings (Speaker setup for 5.1-channel AUDIO OUT terminals and HDMI terminal) Speaker distance Speaker levels [GENERAL q Speaker Setting q Distance] [GENERAL q Speaker Setting q Level] Ideally, the speakers should be placed so that they are all the same distance from the listening position. If this is not possible, you should use this method described here to adjust them individually. It is also possible to adjust all distances together.
Settings (General) Test tone length Digital output formats [GENERAL q Speaker Setting q Test Tone] [GENERAL q Audio Digital Out] Speaker Setting Audio Digital Out Video Out Display Setting Parental Lock Move Return Size Distance (m) Level (dB) Test Tone Select Speaker Setting Audio Digital Out Video Out Display Setting Parental Lock 2sec 5sec * 10sec Exit Return Select Stream * Stream * Stream * ON * Exit This setting has an effect on the digital signal output from the DIGITAL OUT terminals
Settings (General/Video Out) Speaker Setting Audio Digital Out Video Out Display Setting Parental Lock 16:9 Use with a 16:9 wide television. TV Screen S-Video Out Comp. Video PL-NT Conv. Caption Still Mode 16 : 9 * S2 * Interlace * OFF * OFF * Auto * 4:3 picture Move Return Select 16:9 picture Exit This menu item contains a number of different options, all concerned with the video output from the unit. 4:3LB (Letterbox) This mode is used with 4:3 televisions. 4:3 images are displayed normally.
Component video output Closed captioning [GENERAL q Video Out q Comp. Video] [GENERAL q Video Out q Caption] This setting allows the selection of interlaced (Interlace) or progressive-scan (Progressive) video from the component video outputs. Progressive-scan video provides a better, clearer picture. However, it is not supported by every television or monitor, and you should ensure that this is supported fully before turning on this option.
Settings (General/Display) On-screen display [GENERAL q Display Setting q On Screen Display] When a button is pressed and this setting is ON, the screen shows that button’s name and/or icon, etc. Turn this OFF if you do not need this kind of on-screen display.
Setting the level of control Country [GENERAL q Parental Lock q Level] Speaker Setting Audio Digital Out Video Out Password Set/Change Display Setting Level OFF Parental Lock Country Code us Level Move 1 2 Return 3 4 5 6 Select 7 8 OFF Exit As well as the level, you can change the country to which the level applies. Select the Country code option, enter the 4-digit country code and press ENTER. The two-letter country code changes.
Troubleshooting In case you experience any problem with this unit, please take the time to look through this chart and see if you can solve the problem yourself before you call your dealer. No power e Check the connection to the AC power supply. Check and make sure the AC source is not a switched outlet and that, if it is, the switch is turned on. Make sure there is power to the AC outlet by plugging another item such as a lamp or fan.
Cannot output 96kHz or 88.2kHz digital audio. e Check that the Audio Digital Out setting is set to “Down Sample OFF” (see page 39). e Some copy protected discs do not output high sampling rate digital audio. No DTS audio output. e When your amplifier is not equipped with DTS decoder, set the DTS setting to “PCM”. Or press the AUDIO button to select any other audio (see page 39, 23). e When playing back a DTS-CD, set the CD Digital Direct setting to “Normal” (see page 31).
Specifications General System . . . . . . . . . . . . . . DVD-Video, DVD-Audio, DVD-R/RW, Video-CD, Super Audio CD, and CD Power supply Europe model . . . . . . . . . . . . . . . . . . . . . AC 230 V, 50 Hz U.S.A./Canada model. . . . . . . . . . . . . . . . AC 120 V, 60 Hz Korea model . . . . . . . . . . . . . . . . . . . . . . AC 220 V, 60 Hz Power consumption . . . . . . . . . 28 W (in standby mode: 2 W) Weight . . . . . . . . . . . . . . . . . . . . . . . . . . . . .
Sommaire Nous vous remercions pour l’achat d’un appareil Esoteric. Lire ce manuel avec attention pour obtenir les meilleures performances possibles de cet appareil. Avant utilisation . . . . . . . . . . . . . . . . . . . . . . . . . . . . . . . . . . . 48 Ecran du téléviseur . . . . . . . . . . . . . . . . . . . . . . . . . . . . . . 84 Disques. . . . . . . . . . . . . . . . . . . . . . . . . . . . . . . . . . . . . . . . . . 50 Sortie S-Vidéo . . . . . . . . . . . . . . . . . . . . . . . . . . . . . . .
Avant utilisation Contenu de l’emballage Veuillez vérifier que les accessoires suivants se trouvent dans l’emballage après l’avoir ouvert. Télécommande x 1 Piles (AA, R6, SUM-3) x 2 Feutrines x 3 Cordon d’alimentation x 1 Mode d’emploi x 1 Carte de garantie x 1 Conventions employées dans ce manuel < Les instructions de ce manuel décrivent les commandes de la télécommande.
Restauration des réglages d’usine Si vous avez apporté beaucoup de changements à la configuration, et si vous désirez revenir à des réglages connus, ramenez l’appareil aux réglages d’usine comme suit : “DTS” et “DTS 96/24” sont des marques commerciales de Digital Theater Systems, Inc. Fabriqué sous licence Dolby Laboratories. Dolby, Pro Logic et le symbole à double D sont des marques commerciales de Dolby Laboratories. “Super Audio CD” est une marque déposée. “DSD” est une marque déposée.
Disques Types de disques lisibles par ce système Ce lecteur peut lire les disques portant n’importe lequel des logos suivants : DVD vidéo : • Disques simple face ou double face • Disques simple couche ou double couche • Audio numérique Dolby Digital, DTS, MPEG ou PCM linéaire • Vidéo numérique MPEG-2 • Cet appareil peut lire les DVD-R enregistrés au format DVD vidéo. • Cet appareil peut lire les DVD-RW enregistrés au format DVD vidéo ou au format DVD VR (“video recording”).
Les disques suivants ne peuvent pas être lus par cet appareil • CD-G, partie contenant des données des CD-EXTRA, PHOTO CD, CD-ROM et DVD-ROM • Disques enregistrés dans un système couleur autre que PAL ou NTSC • Disques produits illégalement • Disques rayés ou endommagés • Disques poussiéreux, sales ou portant des empreintes de doigt Avertissement Si vous essayez de lire de tels disques, il existe un risque qu’un fort bruit soudain survienne dans les enceintes à haut volume et endommage les haut-parleurs et
Connexion à un téléviseur ATTENTION < Eteignez tous vos équipements avant de faire des connexions. < Lisez les instructions accompagnant chaque élément que vous désirez utilisez avec cet appareil. < Veillez à bien insérer chaque fiche. Pour éviter le bruit et les ronflements, ne regroupez pas les câbles de signaux et les câbles d’alimentation électrique ou les câbles d’enceintes.
< Réglez le format (rapport) d’image vidéo comme celui du téléviseur (voir page 84). B Prises de sortie vidéo D1/D2 (composantes) < Si l’appareil est branché à un téléviseur à balayage progressif par les sorties vidéo composantes ou la prise D1/D2, la sortie peut être réglée de façon correspondante (voir page 85).
Connexions à un amplificateur, etc. (1) ATTENTION < Eteignez tous vos équipements avant de faire des connexions. < Lisez les instructions accompagnant chaque élément que vous désirez utilisez avec cet appareil. < Veillez à bien insérer chaque fiche. Pour éviter le bruit et les ronflements, ne regroupez pas les câbles de signaux et les câbles d’alimentation électrique ou les câbles d’enceintes. Amplificateur Surround R L SURROUND CENTER SUBWOOFER FRONT 5.
F Prises de sortie audio numérique L’audio numérique des DVD vidéo, DVD audio (2 canaux seulement), CD et CD vidéo est produit par ces prises. L’appareil peut être branché, à l’aide de câbles coaxiaux ou optiques (TOS) du commerce, à des amplificateurs incorporant un décodeur, ou à des appareils audio numériques comme des enregistreurs de CD, etc.
I Connecteur de synchronisation Word Clock Il permet l’emploi d’une connexion à une référence word clock externe, au moyen d’un câble coaxial BNC du commerce. Les appareils produisant un tel signal d’horloge sont des convertisseurs N/A externes ou des générateurs word clock dédiés. Reliez leur sortie de synchronisation (SYNC OUT ou WORD OUT) à l’appareil. J Bornier SIGNAL GND (masse du signal) Utilisez un cordon à gaine PVC du commerce pour relier ce bornier de masse du signal à celui de l’amplificateur.
Caractéristiques de la face avant A B K J I H C D G F E A STANDBY/ON Utilisez cette touche pour allumer l’appareil et le mettre en veille. L’anneau entourant la touche est rouge en mode de veille et bleu quand l’appareil est allumé. L’équipement tire un courant nominal de veille de la prise secteur quand STANDBY/ON est en position de veille. B Tiroir de disque C OPEN/CLOSE (OUVRIR/FERMER) Utilisez cette touche pour ouvrir et fermer le tiroir de disque. D SKIP (SAUT) (.
Afficheur de la face avant a b c j i d e f g h a Indicateur de type de disque Affiche le type de disque actuellement chargé. FRANÇAIS b Indicateur de lecture en boucle (REPEAT) S’allume quand la lecture en boucle est sélectionnée. c Indicateur de configuration (SETUP) S’allume pour signaler que l’interface graphique utilisateur est affichée par les sorties vidéo. d Zone de message Affichage alphanumérique pour donner les temps, titres, messages de statut, etc.
Comprendre la télécommande A ON/STANDBY Utilisez la touche ON pour allumer l’appareil. Utilisez la touche STANDBY pour le mettre en veille. Quand vous appuyez sur la touche ON, les touches blanches de la télécommande s’allume pendant plusieurs secondes. B Touches numériques Utilisez-les pour sélectionner les plages par numéro, etc. C HDMI P A Utilisez cette touche pour activer/couper la sortie HDMI. D VIDEO OFF B Utilisez cette touche pour activer/couper toute la vidéo.
O WORD Utilisez cette touche pour activer/désactiver la synchronisation word clock. Quand elle est activée, l’appareil se synchronise sur une source word clock externe. P OPEN/CLOSE Comment insérer les piles Retirez le capuchon de la télécommande avec un tournevis. Après avoir vérifié la polarité (+/_) des deux piles AA, insérez-les, replacez le capuchon et ses vis. < Faites attention de ne pas pincer les câbles avec le berceau des piles. Utilisez cette touche pour ouvrir et fermer le tiroir du disque.
DVD VCD CD SA-CD DVD-A Lecture 3 2 4 Menu à l’écran Un menu s’affiche à l’écran quand le DVD ou CD vidéo chargé contient des éléments de contrôle de lecture (PBC). La façon dont fonctionne le menu peut varier d’un disque à l’autre. 1 5 1 Appuyez sur la touche STANDBY/ON pour allumer Menus de DVD Utilisez les touches de curseur pour sélectionner un élément du menu de DVD, et confirmez la sélection avec la touche ENTER. l’appareil.
Lecture sans contrôle de lecture (PBC) A l’arrêt, appuyez sur les touches numériques ou sur les touches de saut (.//) et sur la touche PLAY pour lire des CD vidéo sans utiliser le contrôle de lecture (PBC). Mode de reprise DVD audio avec images fixes Utilisez les touches SLOW ( / ) pour changer les images fixes qui s’affichent quand certains DVD audio sont lus. Quand on appuie sur la touche STOP avec un DVD vidéo ou un CD vidéo, la lecture est interrompue et l’écran affiche “RESUME” (REPRISE).
DVD DVD-A Sélection des groupes et des titres 64
DVD VCD CD SA-CD DVD-A Recherche accélérée Lors de la lecture, utilisez les touches SCAN (m ou ,) pour reculer ou avancer (le son est coupé pour les DVD vidéo et CD vidéo). Appuyez sur PLAY pour relancer la lecture à vitesse normale depuis la position désirée. Appuyer répétitivement sur les touches SCAN change la vitesse de recherche. Il y a trois vitesses : Rapide (1) q Rapide (2) q Rapide (3) q Lecture (vitesse normale) La vitesse de recherche s’affiche brièvement.
DVD DVD VCD Changement d’angle de caméra Ralenti/image par image Quand une scène enregistrée sous plusieurs angles est lue, l’icône d’angle apparaît à l’écran. Chaque fois que vous appuyez sur la touche ANGLE alors que l’icône d’angle est affiché, l’angle de prise de vue change. Ralenti Durant la lecture, appuyez sur l’une des touches SLOW ( / ) pour ralentir la lecture dans l’une ou l’autre des directions. Appuyer sur PLAY fait reprendre la lecture à vitesse normale.
DVD VCD DVD-A DVD Sélection du son De nombreux DVD comprennent des pistes audio en différentes langues, ainsi que des versions stéréo et surround multicanal de la bande son. Les CD vidéo permettent de sélectionner les canaux gauche, droit ou stéréo. Cette possibilité n’existe pas pour les CD audio et les Super Audio CD. Appuyer sur la touche AUDIO fait changer la piste audio parmi les différentes pistes disponibles, et le résultat s’affiche à l’écran.
DVD VCD CD SA-CD DVD-A Atténuation de l’afficheur La luminosité de l’afficheur du lecteur peut être atténuée en fonction de l’environnement dans lequel vous écoutez de la musique ou regardez de la vidéo. Utilisez la touche FL DIMMER pour passer en revue ces réglages. FL Dimmer3 : Luminosité totale FL Dimmer2 : Luminosité moyenne FL Dimmer1 : Luminosité minimale OFF : L’afficheur et les indicateurs sont éteints.
DVD VCD CD SA-CD DVD-A Synchronisation Word Clock Cette caractéristique sert quand vous voulez que la totalité de votre système soit verrouillé sur un même signal de synchronisation (horloge ou “clock”) en connectant cet appareil à un AZ-1, G-0/G-0 Esoteric ou à un autre appareil capable de produire un signal de synchronisation (word clock). Utilisez la touche WORD pour alterner entre Word ON et Word OFF.
DVD VCD CD SA-CD DVD-A Changement du mode d’affichage 70
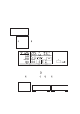
(pas d’affichage) Nombre de plages Temps écoulé de la plage en cours sur le disque Track 02/36 Elapsed 00:09 Plage en cours de lecture Remain 03:51 Temps restant pour les plages en cours Temps total écoulé FRANÇAIS Track Total Elapsed Total Remain 02/36 03:09 56:51 Temps total restant (disque) Track 02/36 Total Elapsed 03:09 Total Time 60:00 Durée totale du disque Plage en cours de lecture Temps écoulé de la plage en cours Temps restant de la plage en cours Temps écoulé total (disque) Temps r
Réglage de l’HDMI, du filtre numérique, etc. Paramètres de menu et options disponibles WORD PLAY AREA / 1 Quand la lecture est arrêtée, appuyez sur la touche PLAY AREA durant plus de 2 secondes. L’appareil passe en mode de configuration, et “WORD>***” s’affiche (*** dépend de votre réglage). Dans les cas suivants, le mode de configuration sera annulé : • L’appareil n’est pas touché durant 10 secondes. • La touche PLAY AREA est à nouveau maintenue durant plus de 2 secondes.
Réglage de la sortie HDMI Niveau HDMI Quand la sortie HDMI est activée, les zones noires qui s’affichent sur le moniteur peuvent ne pas sembler suffisamment noires. Dans ce cas, il est nécessaire de sélectionner l’option EXPAND. Quand la sortie HDMI est activée et que le format est visible dans l’afficheur de la face avant, utilisez la touche de curseur droite pour choisir entre EXP (EXPAND) et NORM (NORMAL). La touche HDMI active/coupe la sortie HDMI.
Réglages (introduction) 1 Allumez l’appareil et le téléviseur (moniteur). Si aucun curseur n’est visible à l’écran, l’emploi des touches gauche et droite permet de changer de menu (les onglets situés en haut de l’écran). Utilisez les touches Haut et Bas pour surligner les paramètres des menus affichés dans les onglets. La touche RETURN vous ramène au niveau supérieur. 4 Accédez au paramètre de menu avec la touche de curseur droite. 2 Appuyez sur la touche SETUP (configuration). L’écran suivant apparaît.
Réglages (audio) Réglages de sortie analogique Réglages de sortie numérique [AUDIO q Sortie analogique] [AUDIO q Sortie numérique] 2ch (2 canaux) Produit de l’audio sur 2 canaux par les prises de sortie audio (AUDIO OUT) et la prise HDMI. Si un programme multicanal est lu, l’audio multicanal est réduit à deux canaux et l’indicateur DOWN MIX s’allume dans l’afficheur. Voir page 76 pour savoir comment régler le mode de réduction à 2 canaux.
Réglages (audio) Contrôle de dynamique audio Réduction à 2 canaux [AUDIO q DRC audio] [AUDIO q Réduction 2 canaux] Analog Out Digital Out CD Digital Direct Audio DRC Group Playback 2ch Down Mix Move Analog Out Digital Out CD Digital Direct Audio DRC Group Playback 2ch Down Mix ON OFF * Return Select Exit ON Applique un contrôle de la dynamique sur l’audio Dolby Digital, réduisant le volume des sons forts, et augmentant le volume des sons calmes. C’est utile pour l’écoute de paroles, etc.
Réglages (Vidéo) 3 Utilisez les touches haut et bas pour sélectionner le Réglage vidéo paramètre, et les touches gauche et droite pour changer sa valeur. [VIDÉO q Réglage vidéo] 1 Surlignez le paramètre Réglage vidéo et appuyez sur la t ouche ENTER. Sharpness Règle la netteté de l’image affichée par le moniteur. Contrast Règle le contraste de l’image. Video Adjust Progressive Setting Brightness Règle la luminosité de l’image.
Réglages (Vidéo) Réglages (Langue) Réglage de balayage progressif Sélection de langue pour l’audio [VIDÉO q Réglage progressif q Mode progressif] [LANGUE q Langue audio] Video Adjust Progressive Setting Move Return Audio Language Subtitle Language Subtitle Display OSD Language Progressive Mode DCDi Select Exit Dans le mode progressif, il existe deux réglages : Auto et Video. Utilisez les touches de curseur gauche et droite pour sélectionner ces choix, puis appuyez sur la touche ENTER.
Sélection de la langue des sous-titres Affichage des sous-titres [LANGUE q Langue des sous-titres] [LANGUE q Affichage des sous-titres] Cela offre une alternative à la touche SUBTITLE pour sélectionner des sous-titres en d’autres langues. Le réglage par défaut est English (Anglais) mais vous pouvez aussi sélectionner Japanese (Japonais) ou un certain nombre d’autres langues pour les sous-titres à afficher.
Réglages (Langue) Liste des codes de langue Langue 80 Code Langue Code Langue Code Japanese (ja) 1001 Guarani (gn) 0714 Pashto, Pushto (ps) 1619 English (en) 0514 Gujarati (gu) 0721 Quechua (qu) French (fr) 0618 Hausa (ha) 0801 Rhaeto-Romance (rm) 1813 German (de) 0405 Hindi (hi) 0809 Kirundi (rn) 1814 Italian (it) 0920 Croatian (hr) 0818 Romanian (ro) 1815 Spanish (es) 0519 Hungarian (hu) 0821 Kinyarwanda (rw) 1823 Chinese (zh) 2608 Armenian (hy) 0825 Sanskrit (
Réglages (configuration d’enceintes pour prises AUDIO OUT 5.1 et prise HDMI) Utilisez ces menus de configuration d’enceintes seulement dans les cas suivants: • Quand les prises de sortie audio (AUDIO OUT) 5.1 sont connectées à un amplificateur de son surround. • Quand la prise HDMI est connectée à un amplificateur de son surround avec décodeur, et quand vous n’utilisez pas les menus d’enceintes de l’amplificateur.
Réglages (configuration d’enceintes pour prises AUDIO OUT 5.1 et prise HDMI) Distance des enceintes Niveau des enceintes [GÉNÉRAL q Réglage Speaker q Distance] [GÉNÉRAL q Réglage Speaker q Niveau] Idéalement, les enceintes doivent être placées de façon à être toutes à la même distance de la position d’écoute. Si cela n’est pas possible, vous devez utiliser la méthode décrite ici pour les régler individuellement. Il est aussi possible de régler toutes les distances ensemble.
Réglages (Général) Durée de la tonalité de test Formats de sortie numérique [GÉNÉRAL q Réglage Speaker q Test Tone] [GÉNÉRAL q Sortie audio num] Speaker Setting Audio Digital Out Video Out Display Setting Parental Lock Move Return Size Distance (m) Level (dB) Test Tone Select Speaker Setting Audio Digital Out Video Out Display Setting Parental Lock 2sec 5sec * 10sec Exit Sélectionnez le paramètre de menu Test Tone, et faites votre choix entre 2, 5 et 10 secondes.
Réglages (Général/sortie vidéo) Speaker Setting Audio Digital Out Video Out Display Setting Parental Lock 16:9 A employer avec un téléviseur à écran large 16:9. TV Screen S-Video Out Comp. Video PL-NT Conv. Caption Still Mode 16 : 9 * S2 * Interlace * OFF * OFF * Auto * Image en 4:3 Move Return Select Image en 16:9 Exit Ce paramètre de menu contient différentes options, toutes ayant trait à la sortie vidéo de l’appareil. 4:3LB (Letterbox) Ce mode sert avec les téléviseurs en 4:3.
Sortie vidéo composantes [GÉNÉRAL q Sortie vidéo q Comp. Video] Sous-titres pour malentendants (Closed caption) [GÉNÉRAL q Sortie vidéo q Sous-titre] Ce réglage permet la sélection de la vidéo entrelacée (Interlace) ou à balayage progressif (Progressive) pour les sorties vidéo composantes. La vidéo à balayage progressif donne une meilleure image, plus nette.
Réglages (Général/écran) Speaker Setting Audio Digital Out Video Out Display Setting On Screen Display Parental Lock Angle Indicator Background Move Return Select ON * ON * Black * Exit Affichage à l’écran [GÉNÉRAL q Réglage Display q Affichage ecran] Quand on appuie sur une touche alors que ce réglage est sur ON, l’écran affiche le nom et/ou l’icône de cette touche, etc. Réglez ce paramètre sur OFF si vous n’avez pas besoin de ce type d’affichage à l’écran.
Réglage du niveau de protection Pays [GÉNÉRAL q Verrou parental q Niveau] ARGENTINA 0118 ar AUSTRALIA 0121 au AUSTRIA 0120 at BELGIUM 0205 be BRAZIL 0218 br CANADA 0301 ca CHILE 0312 cl CHINA 0314 cn DENMARK 0411 dk Speaker Setting Audio Digital Out Video Out Password Set/Change Display Setting Level OFF Parental Lock Country Code us Level Move 1 2 Return 3 4 5 6 7 8 OFF Select Exit Une fois qu’un mot de passe a été programmé, vous pouvez programmer un niveau de pr
Guide de dépannage Si vous avez des problèmes avec cet appareil, veuillez lire ce qui suit et voyez si vous pouvez résoudre le problème vous-même avant d’appeler votre revendeur. Pas d’alimentation e Vérifiez la connexion au secteur. Contrôlez et assurez-vous que la prise secteur n’a pas d’interrupteur et, si elle en a un, qu’elle est en service. Vérifiez qu’il y a du courant dans la prise en y branchant un autre appareil comme une lampe ou un ventilateur.
L’enregistrement audio numérique n’est pas possible sur un autre appareil. e Vérifiez que la sortie audio numérique est réglée sur “ON”. Et que le format de sortie numérique est bien réglé sur “PCM” (voir pages 75, 83). Réglez la sortie analogique sur “2ch”. e Les programmes protégés contre la copie ne peuvent pas être copiés numériquement. Impossible de produire un signal audio numérique à 96 kHz ou 88,2 kHz. e Vérifiez que la sortie audio numérique est bien réglée sur “Down Sample OFF” (voir page 83).
Caractéristiques Généralités Système . . . . . . . . . . . . . . DVD vidéo, DVD audio, DVD-R/RW, Vidéo-CD, Super Audio CD et CD Alimentation Modèle Europe . . . . . . . . . . . . . . . . . . . . . . 230 Vca 50 Hz Modèle Etats-Unis/Canada . . . . . . . . . . . . . 120 Vca 60 Hz Modèle Corée . . . . . . . . . . . . . . . . . . . . . . . 220 Vca 60 Hz Puissance absorbée . . . . . . . . . . . 28 W (en mode veille: 2 W) Poids . . . . . . . . . . . . . . . . . . . . . . . . . . . . . . . . . . . . . . .
TEAC ESOTERIC COMPANY 3-7-3, Nakacho, Musashino-shi, Tokyo 180-8550, Japan Phone: (0422) 52-5132 e-mail: eso-os@tec.teac.co.jp TEAC AMERICA, INC. 7733 Telegraph Road, Montebello, California 90640 Phone: (323) 726-0303 TEAC CANADA LTD. 5939 Wallace Street, Mississauga, Ontario L4Z 1Z8, Canada Phone: (905) 890-8008 TEAC MEXICO, S.A. De C.