MODEL/MODELO/MODÈLE BG135Y20006 Assembly Instructions Instrucciones De Ensamblaje Instructions D'Assemblage 877-472-4296 www.medalsports.
English Español Français LIMITED 90 DAYS WARRANTY GARANTÍA LIMITA DE 90 DIAS GARANTIE LIMITEE DE 90 JOURS This product is covered by a limited warranty that is effective for 90 days from the date of purchase. If, during the limited warranty period, a part is found to be defective or breaks, we will offer replacement parts at no cost to you, the customer. The only exceptions to the warranty include mainframes, table tops, playing surfaces, batteries or tools.
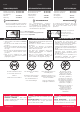
English Español TOOLS REQUIRED Phillips Screwdriver Standard (Flat Head Screwdriver) Wrench Allen Key Français HERRAMIENTAS NECESARIAS - Not Included - Not Included Destornillador Phillips Destornillador de Cabeza Plana Llave Inglesa Llave Allen - Included - Included RECOMMENDED - No incluido - No incluido - Incluido - Incluido OUTILS REQUIS Tournevis cruciforme Tournevis standard (Tête plate) Clé anglaise Clé hexagonale RECOMENDADO Electric Screwdrivers may be helpful during assembly; however,
English Español PARTS IDENTIFIER Français IDENTIFICADOR DE PIEZAS 1 PART NUMBER NÚMERO DE PIEZA NUMÉRO D'ARTICLE Tube - 1 3 Tubo - 1 Tubo - 2 5L Tube - 2 FOR FIG. 10 Tube - 3 Tubo - 3 5R FOR FIG. 9 Tube - 3 11 FOR FIG. 15 Tubo - 11 15 Tube - 11 FOR FIG. 4 Pata 9 Tubo - 8 12 Tube - 9 Tubo - 9 13 16 Tube - 9 FOR FIG. 5 7L FOR FIG. 9 x1 10 FOR FIG. 13 x1 Tube - 10 Tubo - 10 Tube - 10 14 FOR FIG.
English Español ACCESSORIES Français Español ACCESORIOS 22 23 ACCESSOIRES 23 Needle / Aiguille / Aguja x6 Basketball Balón de baloncesto Ballon de basketball x1 Air Pump Bomba de aire Pompe à air HARDWARE HARDWARE A1 FOR FIG. 1, 3 A2 FOR FIG. 8, 13 x10 M8x50mm Bolt Perno M8x50mm Boulon M8x50mm A5 FOR FIG. 2 Perno M6x10mm A9 Boulon M6x10mm FOR FIG. 5, 12 Perno M8x60mm A6 FOR FIG. 5 Tuerca M6 A13 Écrou M6 FOR FIG. 16 Perno M6x25mm Écrou à ailettes - A A17 A10 FOR FIG.
English Español BEFORE ASSEMBLY Français Español ANTES DE ENSAMBLAR AVANT L’ASSEMBLAGE 1. Find a clean, level place to begin 1. Encuentre un lugar limpio y nivelado 1. Trouvez un endroit propre et plat pour commencer à assembler para comenzar el ensamblaje del the assembly of your product. votre produit. producto. 2. Verify that you have all listed parts 2. Compruebe que tenga todas las piezas 2. Vérifiez que vous avez toutes les pièces énumérées comme que se muestran en la lista de piezas.
English Español ASSEMBLY Français ASSEMBLAGE MONTAJE FIG. 1 1 The Hole / Orificio / L’ orifice x4 Pre-installed P1 2 3 A1 A3 A17 x4 1 x2 x2 x8 x8 2 x1 A3 P1 The Hole / Orificio / L’ orifice A1 1 1 The Hole / Orificio / L’ orifice 2 1 3 A1 A3 1 2 3 A3 A1 BG135Y20006 6 www.medalsports.
English Español ASSEMBLY Français ASSEMBLAGE MONTAJE FIG. 2 P2 4L x1 4R The Hole / Orificio / L’ orifice x1 Pre-installed P2 A5 A8 A17 x2 The Hole / Orificio / L’ orifice 4L x4 x4 4R x1 A5 A8 1 1 3 2 FIG. 3 2 21 A1 A3 A19 A17 x1 x1 A19 21 x2 4L x2 x1 2 4R x1 A3 BG135Y20006 7 A1 www.medalsports.
English Español ASSEMBLY Français ASSEMBLAGE MONTAJE FIG. 4 A11 12 x1 15 15 x1 TIME 16 HOME VISITOR x1 A11 x4 12 TIME R VISITO 16 HOME FIG. 5 13 x2 14 x2 A6 A9 A8 12 14 x8 E TIM A8 R TO VISI x16 A9 ME HO 13 x8 A17 A8 x1 A18 A6 x1 Note: Ensure that washers are used on both sides of the backboard as shown in FIG. 5. Nota: Asegúrese de utilizar las arandelas en ambos lados del tablero como se muestra en la FIG. 5. Note: DO NOT over tighten bolts.
English Español ASSEMBLY Français ASSEMBLAGE MONTAJE Rear View / Vista trasera / Vue arrière FIG. 6 17 x4 A10 x8 12 17 A10 17 17 15 CONTROL BOX CAJA DE CONTROL BOÎTIER DE COMMANDE TOP ARRIBA HAUT TOP ARRIBA HAUT BOTTOM ABAJO BAS BOTTOM ABAJO BAS Note: Connect Scoring Sensor Wire (17) to the backboard. Scoring Sensor Wire / Cable del sensor del marcador / Câble du capteur du marqueur de points 17 Nota: Conecte la Cable del Sensor del marcador (17) al tablero.
English Español ASSEMBLY Français ASSEMBLAGE MONTAJE FIG. 8 A2 A3 A4 A17 A18 WARNING x2 Two Adults Required ADVERTENCIA x4 Se requiere de 2 adultos ATTENTION x2 Deux adultes requis x1 x1 Note: DO NOT over tighten bolts. Nota: NO apriete demasiado los pernos. Note: NE PAS serrer à fond les écrous. 12 A3 A4 A2 A3 Note: Please do not use any bolt on the Backboard during this step. The Bolts will be added later for the Tube - 9.
English Español ASSEMBLY 7R A12 ASSEMBLAGE MONTAJE FIG. 9 7L Français 7L & 7R x1 x1 7L & 7R x6 7L The Hole / Orificio / L’ orifice 4L 7L A12 7L 7R BG135Y20006 11 www.medalsports.
English Español ASSEMBLY Français ASSEMBLAGE MONTAJE FIG. 10 5L x1 5R 6 5R 5L x1 x2 Pre-installed P3 x2 A7 x4 A8 6 6 x4 A17 x1 A8 P3 P3 A7 FIG. 11 A12 x6 The Hole / Orificio / L’ orifice 5R 7R 5L 5R 5R A12 BG135Y20006 12 www.medalsports.
English Español ASSEMBLY Français ASSEMBLAGE MONTAJE FIG. 12 8 A7 A8 A9 A17 A18 x1 x4 x8 x4 x1 x1 8 A9 BG135Y20006 13 A8 A7 www.medalsports.
English Español ASSEMBLY Français ASSEMBLAGE MONTAJE FIG. 13 9 10 19 A2 A3 A4 A16 A17 A18 Rear View / Vista trasera / Vue arrière x1 12 x1 x1 9 19 x2 x4 19 x2 x2 x1 9 12 x1 A4 A3 A3 A2 19 19 10 10 A16 BG135Y20006 14 www.medalsports.
English Español ASSEMBLY MONTAJE Français ASSEMBLAGE FIG. 14 A14 A15 A14 A15 BG135Y20006 x2 x2 19 15 www.medalsports.
English Español ASSEMBLY Français ASSEMBLAGE MONTAJE FIG. 15 11 A12 x4 11 x8 11 A12 19 11 11 A12 19 BG135Y20006 16 www.medalsports.
English Español ASSEMBLY Français ASSEMBLAGE MONTAJE FIG. 16 18 A13 Note: Run the rest of the Control Wire through the loops on the Ball return fabric (19). x1 Nota: Gire el resto del Cable de Control por las curvas de la Red de Retorno de bola de tela (19). x1 Note: Faites passer le reste du Câble de Contrôle à travers les boucles du Tissu de retour de balle (19). 18 Control Wire / Cable de control / Fil de commande A13 4R Control Wire / Cable de control / Fil de commande FIG.
English Español CATCHING MODE MODO DE CAPTURA Français MODE DE CAPTURE MODE 1 Note: Fasten up flap to hold balls. Nota: Sujete la solapa para sujetar las bolas. Note: Le rabat attaché pour tenir les balles. A16 MODE 2 Note: Hang down flap to let balls bounce out. Nota: Cuelgue la solapa para que las bolas reboten. Note: Le rabat suspendu pour laisser les balles rebondir. A16 BG135Y20006 A16 18 www.medalsports.
English Español HOW TO FOLD THE GAME FOR STORAGE CÓMO PLEGAR EL JUEGO PARA GUARDARLO Français COMMENT REPLIER LE JEU POUR LE RANGER STEP 1 Note: Press the Safety lock down till it can be pushed up, and then push it in place with both hands till it clicks. Nota: Presion de botón de presión en la seguridad hacia abajo hasta que se pueda empujar hacia arriba, y luego empújela a su lugar con ambas manos hasta que haga clic.
English HOW TO UNFOLD GAME TO REPLAY Español Français CÓMO DESPLEGAR EL JUEGO PARA VOLVER A JUGAR COMMENT DÉPLIER LE JEU POUR REJOUER STEP 1 Note: Press the Safety lock down to unlock. Nota: Presion de botón de presión en la seguridad hacia abajo para desbloquearla. Note: Appuyez sur la boucle de sécurité vers le bas pour la déverrouiller. Safety lock / Botón de presión / Verrou de sécurité STEP 2 Note: Pull it down till the Safety lock locks in place with a click.
English Español ELECTRONIC SCORER OPERATION OPERACIÓN DEL MARCADOR ELECTRÓNICO BATTERY INSTALLATION INSTALACIÓN DE LAS PILAS Battery Box: Unscrew the bolt using a screwdriver and open the battery box. Insert 3x1.5V “AA” batteries ( not included) in the sequence of polarity as shown on the inside cover. Then close the cover using a screwdriver. Compartimento de pilas: Desatornille el perno utilizando un destornillador y abra el compartimento de pilas. Inserte 3 pilas "AA" de 1.
English CONTROL BOX OPERATION Press "ON/OFF" to activate the scorer. Español OPERACIÓN DE LA CAJA DE CONTROL Français MISE EN MARCHE DE LA BOITEDE CONTRÔLE Presione "ON/OFF" (ENCENDIDO/APAGADO) para activar el marcador. Appuyez sur "ON/OFF" (MARCHE/ARRÊT) pour activer le marqueur de points. El marcador "HOME" indicará "01" (juego predeterminado 1). Le tableau de score "HOME" affiche "01" (jeu préprogrammé 1).
English Español GAME OPTIONS 1. BEAT THE TIME CLOCK OPCIONES DE JUEGO 1. CONTRA RELOJ Français OPTIONS DE JEU 1. BATTRE L’HORLOGE • Jugador: 1P 2P (modo de un jugador / dos jugadores). • Joueurs : 1 joueur ou 2 joueurs (mode de jeu simple ou double). 30/45/60 • Seleccione el tiempo de juego 30/45/60 segundos. • Sélectionnez un temps de jeu (30, 45 ou 60 secondes).
English GAME OPTIONS 4. HORSE Español OPCIONES DE JUEGO 4. CABALLO • Player: 2P 3P 4P. • Jugador: 2P 3P 4P. • Only the left basket can score goals. The players are lined up in the left basket according to PLY1 PLY2 PLY3 PLY4 sequence. The left side shows the players, and the right side starts shooting to show the "PK stage" which is divided into five stages (1, 2, 3, 4, 5). Each player has one shooting opportunity in each stage.
English Español Français OPCIONES DE JUEGO 6. ALREDEDOR DEL MUNDO GAME OPTIONS 6. AROUND THE WORLD OPTIONS DE JEU 6. AUTOUR DU MONDE • Player: Select 1 to 4 players. • Jugador: Seleccione de 1 a 4 jugadores. • Joueurs : de 1 à 4 joueurs. • All shots are worth 2 points. • Todos las anotaciones valen 2 puntos. • Tous les tirs valent 2 points. • After the number of players selected, the players can shoot one by one. • Después de seleccionar el número de jugadores, éstos deberán tirar uno por uno.
English Español DISCLAIMER WARNING Français CLÁUSULA DE EXENCIÓN DE RESPONSABILIDAD ADVERTENCIA CLAUSE DE NON-RESPONSABILITÉ ATTENTION Changes or modifications not expressly approved by the party responsible for compliance could void the user’s authority to operate the equipment. Los cambios o modificaciones no expresamente aprobado por la parte responsable del cumplimiento podrían anular la autoridad del usuario para operar el equipo.
www.medalsports.