AUDIO DECK 1 2 AES WORD MADI INTERNAL Audio Deck Manual Version 2.0 Part# 840-06267-02 Rev b Publish date: August 1999 Euphonix Inc. 220 Portage Avenue Palo Alto , CA 94306 Tel: (650)855-0400 Fax: (650) 855-0410 Web Page: www.euphonix.com In the interest of continued product development, Euphonix reserves the right to make improvements in this manual and the product it describes at any time, without notice or obligation. R-1, Audio Deck, Studio Hub are trademarks of Euphonix Inc. ©1999 Euphonix Inc.
This page intentionally left blank R-1 Audio Deck Manual ©1999 Euphonix, Inc.
TABLE OF CONTENTS AUDIO DECK ............................................................................................ 4 Component Overview ................................................................................................ 4 Physical Specifications ............................................................................................. 5 Physical Specifications ............................................................................................. 6 Front Panel .................
AUDIO DECK Component Overview The Audio Deck is a processing sub-system that moves digital audio data between SCSI storage devices and MADI (Multi-channel Audio Digital Interface) signal ports. In essence, this R-1 module converts data transmitted and received in bursts (packets) from storage devices into evenly clocked synchronized streams of digital audio. The Audio Deck uses a control processor to know when and what to record or play.
Audio Deck Functional Block Diagram 1394 DSP Transport Engine SCSI MADI R-1 Audio Deck Manual ©1999 Euphonix, Inc.
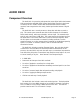
Physical Specifications Front Panel AUDIO DECK 1 2 AES WORD MADI INTERNAL AD 801 Dimensions Height 3 ½ inches , Width 19 inches Depth 17 inches D (18.5 inches including connector depth). Front Panel Indicators AES - Locked to AES Input for Sample Rate Word - Locked to Word Clock Input for Sample Rate MADI - Locked to MADI Input for Sample Rate Internal Locked to its own internal crystal for Sample Rate This order of LEDs is the same order in which signals are tested for their presence.
Rear Panel Connectors EXTERNAL SCSI AD801 IN OUT 1 OUT 2 MADI I/O IN WORD OUT AES SYNC IEEE1394 IEEE 1394 ports (3) (IEEE 1394) The 1394 high speed communication protocol allows that any port from any module can be connected to any port on any other module and that the cables can “star” from one device, or can be daisy chained from device to device.
External SCSI (68 pin Wide SCSI Dsub) External connector to internal Audio Deck SCSI chain. Exabyte back up tape drive connects here. Do not connect additional SCSI drives here. Active SCSI terminator must be connected at this port if Exabyte is not connected. Technical Specifications Performance Specifications 16 or 24-bit recording to disk and/or 16 or 24-bit playback from disk 24 channel recording or playback @ 48kHz 40 bit floating point DSP Environmental Requirements 5 to 35 degrees Centigrade.
Synchronization Sample Rate The Sample Rate of the Audio Deck is set by one of three external source signals or internally by means of crystals and associated circuitry. The Sample Rate source is determined automatically by the presence of signals at the time the Audio Deck is powered on or by settings in the R-1 software application.
MADI The MADI input channels 1-54 can be mapped under software control to the available 1-24 channels of recording (and input monitoring) of the Audio Deck. See the R-1 Operation Manual section on Input Routing. MADI input channels 55 and 56 are used within the R-1 system (when a Audio Deck and Studio Hub are both present) to convey time code position data. The MADI output channels 1-28 are hard-mapped as follows. 1-24 Playback / input monitoring channels 25-26 Monitor mix (for ancillary analog outputs).
SCSI The Audio Deck uses SCSI 3 Ultra Wide storage technology. However, the addressing scheme is SCSI 2 as the Audio Deck is designed and optimized for seven devices in addition to the Audio Deck controller. Each Audio Deck is built to include two Kingston drive trays (receptacles for the Kingston drive carrier). Only two real-time (random access) drives can be installed – one each for the corresponding Kingston trays.
Drive Tray Configuration with IBM Drives White Molex power connector Do not connect ID lines to these connectors Yellow ribbon cable connector Serial Number tag IBM drive configuration Diagram R 101 Orange = Id 3 Ident wires must run under the Hard drive and connect to the Ident pins of the terminal block.
Back up & Drive Expansion The Audio Deck includes a rear panel SCSI connector for adding an Exabyte Mammoth drive to the SCSI chain. The Mammoth can be purchased from Euphonix or elsewhere as an externally enclosed desktop unit, or from Euphonix as a rack mount unit. The following SCSI configurations are typical. Audio Deck One or two 9 gig SCSI hard drives only. Uses SCSI ID# 1 and SCSI ID# 2 of a single SCSI chain. IDs do not travel with the drives.
SPECIAL OPERATING PRECAUTIONS Do Not Remove Drives without Closing Media To preserve data integrity in your R-1 system, DO NOT REMOVE AUDIO DRIVES while the R-1 has a Title loaded, and particularly not when the transport is in Play. Removing drives while stopped, but without first closing the Title will cause the R-1 to try to access drives that are not there.
Do Not Change Drive Addresses The small screwdriver packaged with the software and documentation is for the Kingston drive receiver frame on your R-1 Audio Deck. With this screwdriver it is possible to change the SCSI addresses for the drives loaded into that frame. However, the changing of SCSI addresses is NOT RECOMMENDED. R-1 Audio Deck Manual ©1999 Euphonix, Inc.
Setup (Standard R-1 Configuration) The Audio Deck is recommended for the third position in the rack after the Studio Hub (top of rack) and Pilot Computer (second in rack - below Studio Hub). • Attach the provided IEC compatible power cable to the IEC inlet. Attach other end to wall outlet with appropriate plug adapter if necessary. The Audio Deck power supply will automatically set itself to work with the voltage in your country (110, 220, or 240). DO NOT POWER up unit at this time.