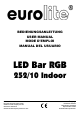
BEDIENUNGSANLEITUNG USER MANUAL MODE D'EMPLOI MANUAL DEL USUARIO LED Bar RGB 252/10 Indoor Für weiteren Gebrauch aufbewahren! Keep this manual for future needs! Gardez ce mode d’emploi pour des utilisations ultérieures! Guarde este manual para posteriores usos. © Copyright Nachdruck verboten! Reproduction prohibited! Réproduction interdit! Prohibida toda reproducción.
MULTI-LANGUAGE-INSTRUCTIONS Inhaltsverzeichnis Table of contents Sommaire Contenido EINFÜHRUNG................................................................................................................................................... 4 SICHERHEITSHINWEISE................................................................................................................................. 4 BESTIMMUNGSGEMÄßE VERWENDUNG........................................................................................
INTRODUCTION ............................................................................................................................................. 21 INSTRUCTIONS DE SÉCURITÉ .................................................................................................................... 21 EMPLOI SELON LES PRESCRIPTIONS ....................................................................................................... 23 INSTALLATION ..........................................................
BEDIENUNGSANLEITUNG LED Bar RGB 252/10 Indoor Lesen Sie vor der ersten Inbetriebnahme zur eigenen Sicherheit diese Bedienungsanleitung sorgfältig durch! Alle Personen, die mit der Aufstellung, Inbetriebnahme, Bedienung, Wartung und Instandhaltung dieses Gerätes zu tun haben, müssen - entsprechend qualifiziert sein - diese Bedienungsanleitung genau beachten - die Bedienungsanleitung als Teil des Produkts betrachten - die Bedienungsanleitung während der Lebensdauer des Produkts behalten - die Bedienungsanle
Das Gerät darf nicht in Betrieb genommen werden, nachdem es von einem kalten in einen warmen Raum gebracht wurde. Das dabei entstehende Kondenswasser kann unter Umständen Ihr Gerät zerstören. Lassen Sie das Gerät solange uneingeschaltet, bis es Zimmertemperatur erreicht hat! Bitte überprüfen Sie vor der ersten Inbetriebnahme, ob kein offensichtlicher Transportschaden vorliegt.
Kinder und Laien vom Gerät fern halten! Das Gerät darf niemals unbeaufsichtigt betrieben werden! BESTIMMUNGSGEMÄßE VERWENDUNG Bei diesem Gerät handelt es sich um einen Effektstrahler, mit dem sich dekorative Lichteffekte erzeugen lassen. Dieses Produkt ist nur für den Anschluss an 230 V, 50 Hz Wechselspannung zugelassen und wurde ausschließlich zur Verwendung in Innenräumen konzipiert. Dieses Gerät ist für professionelle Anwendungen, z. B. auf Bühnen, in Diskotheken, Theatern etc. vorgesehen.
Soll das Gerät transportiert werden, verwenden Sie bitte die Originalverpackung, um Transportschäden zu vermeiden. Achten Sie bitte unbedingt darauf, dass das Gerät im Lieferzustand verpackt wird. Beachten Sie bitte, dass eigenmächtige Veränderungen an dem Gerät aus Sicherheitsgründen verboten sind. Der Serienbarcode darf niemals vom Gerät entfernt werden, da ansonsten der Garantieanspruch erlischt.
Achtung: Hängend installierte Geräte können beim Herabstürzen erhebliche Verletzungen verursachen! Wenn Sie Zweifel an der Sicherheit einer möglichen Installationsform haben, installieren Sie das Gerät NICHT! Vergewissern Sie sich vor der Montage, dass die Montagefläche mindestens die 10-fache Punktbelastung des Eigengewichtes des Gerätes aushalten kann. BRANDGEFAHR! Achten Sie bei der Installation des Gerätes bitte darauf, dass sich im Abstand von mind.
Aufbau einer seriellen DMX-Kette: Schließen Sie den DMX-Ausgang des ersten Gerätes der Kette an den DMX-Eingang des nächsten Gerätes an. Verbinden Sie immer einen Ausgang mit dem Eingang des nächsten Gerätes bis alle Geräte angeschlossen sind. Achtung: Am letzten Gerät muss die DMX-Leitung durch einen Abschlusswiderstand abgeschlossen werden. Dazu wird ein 120 Ω Widerstand in einen XLR-Stecker zwischen Signal (–) und Signal (+) eingelötet und in den DMX-Ausgang am letzten Gerät gesteckt.
STAND-ALONE BETRIEB Steuerung über DIP Schalter Um die Empfindlichkeit während Musikgetakteter Strobe und Musikgetakteter Farbwechsel einzustellen, drehen Sie am Drehregler auf der Geräterückseite. DMX-GESTEUERTER BETRIEB Über Ihren DMX-Controller können Sie die einzelnen Geräte individuell ansteuern. Dabei hat jeder DMXKanal eine andere Belegung mit verschiedenen Eigenschaften. Adressierung des Geräts Stellen Sie DIP-Schalter 10 auf an (1).
Bitte beachten Sie: Schalten Sie die LED Bar RGB 252/10 Indoor ein. Das Gerät prüft, ob DMX-512 Daten empfangen werden oder nicht. Wenn Daten empfangen werden, blinkt die Kontroll-LED. Werden keine Daten empfangen, leuchtet die Kontroll-LED permanent. Die Meldung erscheint -wenn kein 3-poliges XLR-Kabel (DMX Signalkabel vom Controller) in die DMX-Eingangsbuchse der LED WMB-8 RBG Leiste gesteckt wurde. -wenn der Controller ausgeschaltet oder defekt ist.
Vor dem Sicherungswechsel ist das Gerät allpolig von der Netzspannung zu trennen (Netzstecker ziehen). Vorgehensweise: Schritt 1: Drehen Sie den Sicherungshalter mit einem passenden Schraubendreher aus dem Gehäuse (gegen den Uhrzeigersinn). Schritt 2: Entfernen Sie die defekte Sicherung aus dem Sicherungshalter. Schritt 3: Setzen Sie die neue Sicherung in den Sicherungshalter ein. Schritt 4: Setzen Sie den Sicherungshalter wieder im Gehäuse ein und drehen Sie ihn fest.
USER MANUAL LED Bar RGB 252/10 Indoor CAUTION! Keep this device away from rain and moisture! Unplug mains lead before opening the housing! For your own safety, please read this user manual carefully before you initially start-up.
Please make sure that there are no obvious transport damages. Should you notice any damages on the A/C connection cable or on the casing, do not take the device into operation and immediately consult your local dealer. This device falls under protection-class I. The power plug must only be plugged into a protection class I outlet. The voltage and frequency must exactly be the same as stated on the device.
This device is designed for professional use, e.g. on stages, in discotheques, theatres etc. Lighting effects are not designed for permanent operation. Consistent operation breaks will ensure that the device will serve you for a long time without defects. Do not shake the device. Avoid brute force when installing or operating the device. When choosing the installation-spot, please make sure that the device is not exposed to extreme heat, moisture or dust. There should not be any cables lying around.
INSTALLATION Overhead rigging The installation of the device has to be built and constructed in a way that it can hold 10 times the weight for 1 hour without any harming deformation. The installation must always be secured with a secondary safety attachment, e.g. an appropriate catch net. This secondary safety attachment must be constructed in a way that no part of the installation can fall down if the main attachment fails.
The maximum drop distance must never exceed 20 cm. A safety rope which already held the strain of a crash or which is defective must not be used again. Adjust the desired inclination-angle via the mounting-bracket and tighten the fixation screws.
Connection with the mains Connect the device to the mains with the power-plug. The occupation of the connection-cables is as follows: Cable Brown Blue Yellow/Green Pin Live Neutral Earth International L N The earth has to be connected! If the device will be directly connected with the local power supply network, a disconnection switch with a minimum opening of 3 mm at every pole has to be included in the permanent electrical installation.
DMX-CONTROLLED OPERATION You can control the projectors individually via your DMX-controller. Every DMX-channel has a different occupation with different features. Addressing the Projector Set the dipswitch 10 to ON. The Control Board on your DMX-controller allows you to assign the DMX fixture address, which is defined as the first channel from which the LED Bar RGB 252/10 Indoor will respond to the controller.
CLEANING AND MAINTENANCE DANGER TO LIFE! Disconnect from mains before starting maintenance operation! We recommend a frequent cleaning of the device. Please use a soft lint-free and moistened cloth. Never use alcohol or solvents! There are no servicable parts inside the device except for the fuse. Maintenance and service operations are only to be carried out by authorized dealers. Replacing the fuse If the fine-wire fuse of the device fuses, only replace the fuse by a fuse of same type and rating.
MODE D'EMPLOI Bande DEL RGB 252/10 Indoor ATTENTION! Protéger de l'humidité. Débrancher avant d’ouvrier le boîtier! Pour votre propre sécurité, veuillez lire ce mode d'emploi avec attention avant la première mise en service.
L'appareil ne devrait pas être mis en service lorsqu'il à été transporté d'un endroit froid à un endroit chaud. Il se forme de la condensation qui pourrait endommager l'appareil. Laissez celui-ci atteindre la température ambiante avant de le mettre en service. Avant tout, assurez-vous que l'appareil n'a pas subi de dommage lors de son transport. Si l'appareil ou le câble d'alimentation est endommagé, ne jamais mettre l'appareil en service. Contactez immédiatement votre revendeur.
RISQUE DE MAL! Ne jamais regarder directement à la source de lumière, parce que des personnes sensibles peuvent subir une attaque épileptique (surtout valable pour des épileptiques)! Tenir les enfants et les novices éloignés de l'appareil. Ne jamais faire marcher sans surveillance. EMPLOI SELON LES PRESCRIPTIONS Cet appareil est un effet lumineux pour créer des effets décoratifs.
N'utilisez l'appareil qu'après avoir pris connaissance de ses fonctions et possibilités. Ne laissez pas des personnes incompétentes utiliser cet appareil. La plupart des pannes survenant sur cet appareil sont dues à une utilisation inappropriée par des personnes incompétentes. Si vous deviez transporter l'appareil, utilisez l'emballage d'origine pour éviter tout dommage. Assurez-vous que vous enviez l’appareil dans l’etat original.
Si l'appareil doit être décroché du plafond ou de poutres élevées, il faut toujours utiliser des systèmes de traverses pour les travaux. Ne jamais installer l'appareil de manière qu’il puisse osciller librement dans l‘espace.
Connecter une chaîne DMX serielle: Connectez la sortie DMX du premièr appareil de la chaîne avec l'entrée DMX de l'appareil prochaine. Toujours connectez une sortie avec une entrée de l'appareil prochaine jusqu'à tous appareil soient connectés. Attention: À l‘appareil ulterieur, le câble DMX doit être obturé par une résistance de termination. Braser une résistance de 120 Ω sur la prise XLR entre Data (-) et Data (+) et l’attacher dans la sortie DMX d‘appareil ultérieur.
CONTRÔLE STAND ALONE Contrôle par les interrupteurs dip Le potentiomêtre au dos de l’appareil permettant le réglage de la sensibilité pendant les modes Strobe contrôlé par le son et Changement de couleurs contrôlé par le son. CONTRÔLE PAR DMX Vous pouvez contrôler les projecteurs individuels grâce à votre contrôleurs DMX. Chaque canal DMX a une ocupation différente avec des caractéristiques différentes. Codage du projecteur Mettez l‘interrupteur dip 10 à ON.
-le contrôleur est mis hors tension ou défectueux -le câble ou le connecteur es défectueux ou le câble de signal n'est pas connecté correctement avec l'entrée Attention: Au projecteur ulterieur, le câble DMX doit être obturé par une résistance de 120 Ω. La résistance est nécéssaire pour un fonctionement correcte des projecteur.
Si des pièces de rechange sont nécéssaires, toujours utiliser des pièces d'origine. Quand le câble secteur de cet appareil est endommagé, il doit être remplacé par un installateur agrée pour éviter des dangers. Pour tout renseignement complémentaire, votre revendeur se tient à votre entière disposition.
MANUAL DEL USUARIO Listón LED RGB 252/10 Indoor ¡PRECAUCIÓN! ¡Evite el contacto de este aparato con la lluvia y la humedad! ¡Desconectar de la corriente antes de abrir la caja! Por su propia seguridad, por favor lea este manual del usuario detenidamente antes de la conexión inicial! Toda persona implicada en la instalación, manejo y mantenimiento de este aparato tiene que -estar cualificada -seguir las instrucciones de este manual -tratar el manual como parte del producto -mantener el manual durante la vi
Si el aparato ha estado expuesto a grandes cambios de temperatura (p.e. tras el transporte), no lo enchufe inmediatamente. La condensación de agua producida podría dañar su aparato. Deje el aparato desconectado hasta que llegue a la temperatura ambiente. Antes de la puesta en marcha inicial, por favor asegúrese de que no hay daños causados durante el transporte. Si el aparato u el cable están estropeado, consulte a su proveedor y no use el aparato. Este aparato pertenece a la clase de protección I.
No agite el aparato. Evite hacer excésiva fuerza durante la instalación y el manejo del aparato. Cuando buscar el sitio de instalación, por favor asegúrese de que el aparato no está expuesto a calor extremo, humedad o polvo. No debe haber cables mal instalados o no fijados correctamente. ¡Se pone usted en peligro y pone en peligro a otros! Nunca operar o almacenar el aparato en un ambiente con agua proyectada, lluvia, humedad o humo.
INSTALACIÓN Montaje por encima de la cabeza La suspensión del aparato debe ser fabricado de una manera que puede llevar 10 vezes la carga por una hora sin sufrir deformaciones dañosas permanentes. La instalación siempre debe ser efectuada con una segunda suspensión independiente, por ejemplo una red de anclaje apropriada. Esta segunda suspensión debe ser fabricado y fijado de una manera que no parte de la instalación puede cairse en el caso de defecto de la suspensión principal.
Para el uso por encima de la cabeza, siempre segure el proyector con un cable de anclaje, que puede llevar 12 veces más del peso del aparato. Sólo debe utilisar un cable de anclaje con un eslabón de conexión roscado. Insere el cable de anclaje en el ojete de seguridad y en el trussing u un lugar de fijación seguro. Insere el final en el eslabón de conexión roscado y fije el tornillo de seguridad. La distancia máxima de caida es 20 cm.
Seleccione el aparto responsable para el control de los efectos. Este aparato funciona como aparato "Master" y controla todos los demas aparatos "Slave" conectados con él mediante con un cable de dos polos con blindaje. Conecta su cable de dos polos con blindaje en el casquillo OUT y conecta el cable con la clavija IN del próximo aparato. Vd. puede seleccionar aparato Slave en colocar los interruptores dip 1 y 10 en la posición ON (1).
En modo Ajuste de strobe controlado por el sonido y Ajuste de colores controlado por el sonido Vd. puede ajustar la sensibilidad con el regulador. CONTROL POR DMX Vd. puede controlar los aparatoes individuales mediante su controlador DMX. Cada canal DMX tiene otra ocupación con caracteristicas diferentes. Direccionamiento del aparato Vd. puede colocar el interruptor dip 10 en la posición ON. Vd. puede ajustar la dirección de comienzo mediante la unidad de control de su controlador DMX.
LIMPIEZA Y MANTENIMIENTO ¡PELIGRO DE MUERTE! ¡Siempre desenchufe el aparato antes de comenzar con el mantenimiento! Recomendamos una limpieza frecuente del aparato. Por favor utilice un paño suave que no suelte pelusa humedecido. ¡No utilizar nunca alcohol o disolventes! No hay piezas que necesiten de servicio dentro del aparato excepto el fusible. Las operaciones de mantenimiento y servicio deben ser llevadas a cabo únicamente por distribuidores autorizados.