User Manual 7KG Heat Pump Dryer HPD7KG HPD7KG 7KG Heat Pump Dryer Page i
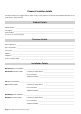
Product / Installer details For future reference we suggest that you staple a copy of your purchase receipt here and complete the below so the information is always at hand.
Dear Customer, Congratulations on the purchase of your new product from Home Appliances Pty Ltd. We recommend you please take some time to read the instruction manual thoroughly to familiarise yourself with the functionality and operations to ensure optimum performance of your new appliance. After reading the manual, please store it in a safe and accessible location for future reference.
Please read this user manual first! Dear Customer, Thank you for prefering a Euromed product. We hope that your product which has been manufactured with high quality and technology will give you the best results. We advise you to read through this manual and the other accompanying documentation carefully before using your product and keep it for future reference. If you transfer the product to someone else, give its manual as well.
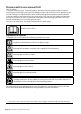
1 Important instructions for safety and environment This section contains safety instructions that will help protect from risk of personal injury or property damage. Failure to follow these instructions shall void any warranty. 1.
Important instructions for safety and environment • Before putting laundry in a steam program, stains on it should be removed. • You may only put laundry that is not dirty or stained but permeated with unpleasant odour in steam (odour removal) program. • Do not use any dry cleaning sets or additional materials in a steam program or in any program. 1.1.1 Electrical safety Electrical safety instructions should be followed while electrical connection is made during the installation.
Important instructions for safety and environment • Power cable plug must be easily accessible after installation. Damaged mains cable should be changed notifying the Authorized Service. If the dryer is faulty, it must not be operated unless it is repaired by an authorized service agent! There is the risk of electric shock! 1.1.
Important instructions for safety and environment Below specified laundry or items must not be dried in the dryer due to the fire hazard: • Garments or pillows bolstered with rubber foam (latex foam), shower bonnets, water resistant textiles, materials with rubber reinforcement and rubber foam pads. • Clothing cleaned with industrial chemicals. Items such as lighter, match, coins, metal parts, needle etc. may damage the drum set or may lead to functional problems.
Important instructions for safety and environment Underwear that contains metal reinforcements should not be dried in the dryer. Dryer may be damaged if metal reinforcements come loose and break off during drying. Use softeners and similar products in accordance with the instructions of their manufacturers. Always clean the lint filter before or after each loading. Never operate the dryer without the lint filter installed. • Never attempt to repair the dryer by yourself.
Important instructions for safety and environment • Exhaust air must not be discharged into a flue which is used for exhausting fumes from appliances burning gas or other fuels. • The final step of the drying cycle (cool-down cycle) occurs without applying heat to ensure that the items are left at a temperature that will not damage them. 1.2 Mounting over a washing machine • A fixing device should be used between the two machines when installing the dryer above a washing machine.
Important instructions for safety and environment 1.3 Intended use • Dryer has been designed for domestic use. It is not suitable for commercial use and it must not be used out of its intended use. • Use the dryer only for drying laundry that are marked accordingly. • The manufacturer waives any responsibility arisen from incorrect usage or transportation. • The service life of the dryer that you purchased is 10 years.
Important instructions for safety and environment 1.5 Compliance with the WEEE regulation and disposing of the waste product This product complies with EU WEEE Directive (2012/19/EU). This product bears a classification symbol for waste electrical and electronic equipment (WEEE). This product has been manufactured with high quality parts and materials which can be reused and are suitable for recycling. Do not dispose of the waste product with normal domestic and other wastes at the end of its service life.
Important instructions for safety and environment 1.8 Technical Specifications EN Height (Min. / Max.) Width Depth Capacity (max.) Net weight (± 4 kg) Width Voltage Rated power input 84,6 cm / 86,6 cm* 59,5 cm 54 cm 7 kg** 46 kg See type label*** * Min. height: Height with adjustable feet are closed. Max. height: Height with adjustable feet are opened maximum. ** Dry laundry weight before washing. *** Type label is located behind the loading door.
2 Your Dryer 2.1 Overview 11 1 2 10 3 9 8 1. Top panel 2. Control panel 3. Loading door 4. Kick plate opening button 5. Ventilation grids 6. Adjustable legs 7. Kick plate 8. Type label 9. Lint filter 10. Water tank drawer 11. Power cord 4 5 7 6 2.2 Package Contents 1 6 2 7 3 4 5 8 1. Water drain hose * 2. Filter drawer spare sponge* 3. User Manual 4. Drying basket* 5. Drying basket user manual* 6. Water Filling Container* 7. Pure Water* 8.
3 Installation Before the calling the nearest Authorized Service for the installation of the dryer, ensure that electrical installation and water drain is appropriate referring to the user’s manual. If they are not suitable, contact a qualified electrician and technician to make necessary arrangements. C A A Preparation of the dryer's location as well as the electrical and waste water installations is under customer's responsibility.
Installation 1 2 3 3.6 Warnings about sounds C It is normal to hear a metallic noise from the compressor sometimes during operation. C Water collected during operation is pumped to water tank. It is normal to hear pumping noise during this process. 4 C C C Water drain hose should be attached to a height of maximum 80 cm. Make sure that the water drain hose is not stepped on and it is not folded between the drain and the machine.
4 Preparation 4.1 Laundry suitable for drying in the dryer Always obey the instructions given on the garment tags. Dry only the laundry having a label stating that they are suitable for drying in a dryer and make sure that you select the appropriate programme. Do not dry with dryer At high temperature At medium temperature At low temperature 4.
Preparation Following weights are given as examples. Laundry Approximate weights (g)* Cotton quilt covers (double) Cotton quilt covers (single) Bed sheets (double) Bed sheets (single) Large tablecloths Small tablecloths Tea napkins Bath towels Hand towels Blouses Cotton shirts Shirts Cotton dresses Dresses Jeans Handkerchiefs (10 pieces) T-Shirts 1500 1000 500 350 700 250 100 700 350 150 300 250 500 350 700 100 125 *Dry laundry weight before washing.
5 Operating the product 5.1 Control Panel 1 1. 2. 3. 4. 5. 5 5.2 Symbols Tank full End/anticreasing Filter cleaning On/Off Cleaning the Child-proof filter drawer / lock Condenser Timer Delay Dryness Level Mute Cupboard Dry 4 3 2 Volume up Express 14’ Delicates Iron Dry Jeans BabyProtect 5.3. Preparation of drying machine • • • • Plug the drying machine. Open the loading door. Place the laundry to the drying machine without jamming them. Push and close the loading door.
Operating the product 5.4 Program selection and consumption chart Capacity (kg) Spin speed in washing machine (rpm) Drying Time (minutes) EN 7 1000 139 You may dry all your cotton laundry in this programme.(T-shirt, pants, pyjamas, baby clothes, underwear,linen, etc.) You can put your laundry in the wardrobe without ironing. 7 / 3,5 1000 174 / 107 Cotton Extra Dry You may dry your thick cotton laundry in this programme such as towels, bathrobe, etc.
Operating the product Mix Use this programme to dry non-pigmenting synthetic and cotton laundry items together. 4 1000 120 Babyprotect Program used for baby clothing with can be dried approval on the label. 3 1200 90 Jeans You may dry denim pants, skirts, shirts or jackets in this programme. 4 1200 125 Gentle Care / Shirts It dries the shirts in a more sensitive manner, and causes less creasing and easier ironing.
Operating the product 5.5 Auxiliary functions Buzzer / time Drying machine makes an audible warning when the program is completed. If you don’t want the machine to make an audible warning, press the “Buzzer / Time” button. When you press the Buzzer/Time button, a light will illuminate and no audible warning will be made when the program ends. C You can select this function before or after the program starts.
Operating the product 5.8 Child Lock The drying machine has a child lock which prevents the program flow from being interrupted when the buttons are pressed during a program. When the child lock is activated, all buttons on the panel except the On/Off/Program selection knob are deactivated. Press the Drying Level and Buzzer buttons simultaneously for 3 buttons to activate the child lock.
Operating the product 5.10 Cancelling the program If you want to cancel the program and terminate the drying operation for any reason after the drying machine starts running, turn the On/Off/Cancel knob, the program will be cancelled. A The inside of the drying machine shall be extremely hot when you cancel the program during machine operation, so run the refresh program to allow it to cool down. 5.
6 Maintenance and cleaning Service life of product extends and frequently experienced problems will be reduced if it is cleaned at regular intervals. 6.1 Cleaning Lint Filter / Loading Door Inner Surface Lint and fiber released from the laundry to the air during the drying cycle are collected in the Lint Filter. C A C Such fiber and lint are generally formed during wearing and washing. Always clean the lint filter and the inner surfaces of the loading door after each drying process.
Maintenance and cleaning C C A Clean metal surfaces of the sensors 4 times a year. Do not use metal tools when cleaning metal surfaces of the sensors. Never use solvents, cleaning agents or similar substances for cleaning due to the risk of fire and explosion! 6.3 Draining the water tank Dampness of the laundry is removed and condensed during drying process and the water that arise accumulates in the water tank. Drain the water tank after each drying cycle. A A To drain the water tank: 1.
Maintenance and cleaning • Open the filter drawer cap turning the cap lock on it and pull it out.. • Open the filter drawer by pressing the red button. • Take out the filter drawer sponge. • • • If you observe a layer over the filter which can block the filter, remove the layer washing with a water and then cleaning it. Dry the filter cloth properly before replacing the filter drawer. C There may be no cloth in the filter cassette of your drying machine, depending on its model.
Maintenance and cleaning • Close the kick plate cover. A C Drying without the filter drawer sponge in place will damage the machine! A dirty lint filter and filter drawer will cause longer drying periods and higher energy consumption. 6.5 Cleaning the evaporator Clean the lint accumulated on the fins of the evaporator located behind the filter drawer with a vacuum cleaner. A You can also clean by hand provided that you wear protective gloves. Do not attempt to clean with bare hands.
7 Troubleshooting Drying operation takes too long. • Fibre filter pores might be clogged. >>> Wash the filter with warm water. • Filter drawer might be clogged. >>> Clean the sponge and filter cloth (if any) in the filter drawer. (for the products with a heat pump) • The condenser might be blocked. >>> Wash the condenser.(for the products with a condenser ) • The ventilation grills in front of the machine may be closed. >>> Remove any objects in front of the ventilation grills that blocks air.
Troubleshooting Clothes have shrunk, hardened or spoiled. • A program not suitable with the laundry type might have been used. >>> Check the maintenance labels on the clothes and select a program suitable for the clothes. The lighting inside the drying machine does not turn on. (For models with a lamp) • Drying machine might not be turned on with the On/Off button or program might not be selected for machines without an On/Off button. >>> Make sure that the drying machine is turned on.
For all product enquiries (including warranty support), please contact our Customer Care team on 1800 444 357 or via email: customercare@hapl.com.