
User manual


Picture 4 (Fixing Plate Installation 2)
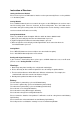
3. There are 2 expansion screws for installation. If you have electric drill, you can install
the fixing plate by the 2 expansion screws (see Picture 3). Also you can install the
fixing plate by the EVA sticker (see Picture 4), but before sticking the EVA sticker,
please make sure the surface is clean and smooth.
Instruction of RCC Wall Clock:
Getting the clock started
Insert a battery (LR6, 1,5 V, Alkaline, Type AA) according correctly polarized into the battery
compartment.
The movement will start initalizing procedure and make the hands running to 12 :00 (or 4:00,8:00)
position.
Setting the Time Automatically
1. Once the battery is installed properly, the clock automatically sets itself to 12:00 ( or
4:00,8:00) position and then receiving the signal, and if it has received the radio signal
and processed it accordingly(this takes 3 to maximum 10 minutes), the movement
(clock) automatically displays the correct time. We recommend that you do not pick up
or hang the clock anywhere during this process.
2. If the movement (clock) still has not set itself after 8 minutes, reception is faulty or
impossible at the chosen location. Try a new start at a different location.
If the signal is still weak and the clock is unable to receive the signal, the clock will start
searching for the radio signal every one hour.
Receiving the Radio Controlled Signal
The radio–controlled clock will automatically receive the radio signal 3-8 times every
day :If the signal is strong ,receiving will occur at 2 :00, 3 :00 and 14 :00 (3 times in
total).If the signal is weak , the clock will search for the radio signal at most 8 times
( 2 :00, 3 :00 ,4 :00, 5 :00 and 14 :00,at,15 :00, 16 :00 17 :00 ). It will take 3-8 minutes to
receive the radio signal every time.