
Instruction manual

Instruction Manual αlpha CON 2000
17
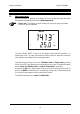
5.2 Calibration
This transmitter features a one-point calibration.
Note: The calibration is always carried out in the specific range selected.
SETUP
CAL
CAL
HOLD
4
HOLD
HOLD
HOLD
µs
AT C
°C
HOLD
4
4
4
4
CAL
HOLD
4
MEAS
A
TC
°C
4
ENT
ENT ENT
ENT
CAL
µs
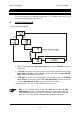
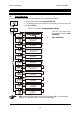
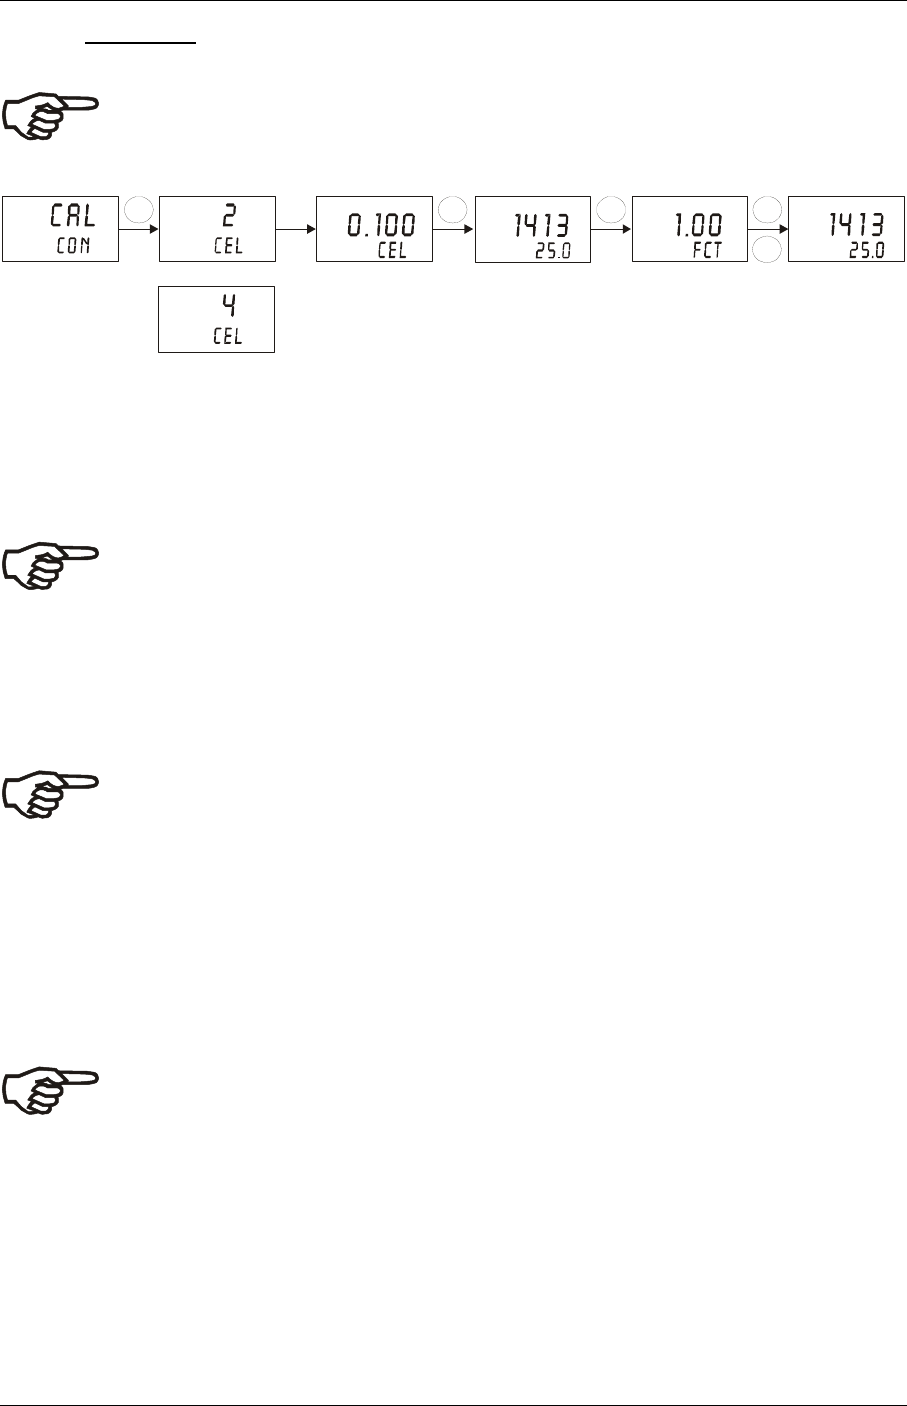
1. Enter Calibration mode as described in section 5.1. The display shows “CAL CON”.
2. Press the ENT key to start calibration. The display momentarily shows the cell type (“2
CELL” or “4 CELL”) to which the transmitter is configured before displaying the last set
cell constant (k)
Important: If set for a 2 cell operation, make sure that the outer and inner electrode
points are shorted on the connector (pins 15 and 16 shorted and pins 17 and 18
shorted).
3. Immerse the sensor in a suitable standard solution, whose value is within the
measurement range selected in the transmitter. Agitate the cell in the solution to remove
any trapped air-bubbles.
Note: The calibration standard must have a value that is 10% to 100% of full scale
of the range selected. For example, if the range in the controller is selected to be
2000 µS (range 4), then the calibration standard value should be 200 µS to 2000
µS.
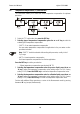
4. Use ▲ or ▼ keys to adjust the cell constant if necessary.
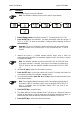
5. Press the ENT key to confirm the selected cell constant. The display then shows the
current measured value of the calibration standard solution.
6. Once the reading stabilises press the ▲ or ▼ key to adjust the measured value to that
of the standard solution.
Note: The acceptable calibration window is ±40% of the displayed (default) value. If
the display is 1000 µS, the values to which it can be adjusted is 600 to 1400 µS. If
there is a calibration error the transmitter displays “ERR” and return to the
measurement mode.
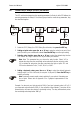
7. Press the ENT key to accept the value.
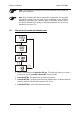
8. The display will then show the calibration factor. This serves as a diagnostic feature to
indicate the effectiveness of the electrode which will degrade with time and usage. An
effective electrode should be within the calibration factor window of 0.60 to 1.40.
9. Press the ENT key to return to the Measurement mode.