
Operating instructions


20
5) Proceed to 7.3.5 step 3, or return to Measurement mode by pressing
the ∆
∆∆
∆ and ∇
∇∇
∇ keys simultaneously (escape).
NOTE: Please refer to Appendix 3 for a graphical representation of the
Hysteresis.
7.3.5 Setting an on-delay time lag
You can set as time delay for each relay, which stops the relay from
switching on the moment the set point is exceeded. This controller lets you
set a 0 to 2000 second time delay before the relay activates.
1) Follow directions in 7.3.1 to enter Control
Relay mode.
2) Press the ENTER key. Scroll with the ∆
∆∆
∆ or ∇
∇∇
∇
keys until the upper display shows “on delay” time
and the lower display shows “On.d”.
3) Press the ∆
∆∆
∆ and ∇
∇∇
∇ keys to enter on-delay time for Set point 1 (Set point
2). The controller will delay activation for the number of seconds (0 to 2000)
you select.
4) Press the ENTER key to confirm your selection.
5) Proceed to 7.3.6 step 3, or return to Measurement mode by pressing
the ∆
∆∆
∆ and ∇
∇∇
∇ keys simultaneously (escape).
7.3.6 Setting an off-delay time lag
You can set a time delay for each relay, which delays the relay from
switching off the moment the value reaches the set point and hysteresis. The
controller allows a timer delay from 0 to 2000 seconds time delay before
deactivating.
1) Follow directions in 7.3.1 to enter Control
Relay mode.
2) Press the ENTER key. Scroll with the ∆
∆∆
∆ or ∇
∇∇
∇
keys until the upper display shows “off delay” time
and the lower display shows “OF.d”.
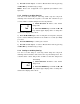
0
On.d
SETUP
HOLD
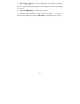
0
OF.d
SETUP
HOLD