
User Guide


Instruction Manual DO 100
14
5 MEASUREMENT
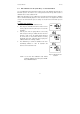
During measurement, care must be taken not to allow the membrane of the DO probe touch
any surface. It is always advisable to insert the probe guard (refer to Figure 33 and 34 on
pages 40 and 41). The probe can either be fully or partially immersed in the solution.
The READY indicator appears on the display when the readings stabilise. It will turn off if the
readings start to fluctuate.
NOTE: It is important that the sample is stirred constantly to allow it to flow past the
membrane for better readings.
5.1 Taking Measurement
1. Rinse the probe with deionised or distilled water
before use to remove any impurities adhering to the
probe body. If it is dehydrated, soak it for 30
minutes in tap water.
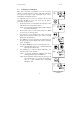
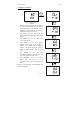
2. Switch on the meter. The MEAS annunciator
appears on the top of the LCD. The ATC indicator
appears in the lower right hand corner to indicate
Automatic Temperature Compensation. See figure
on right.
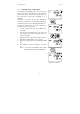
3. Dip the probe into the sample.
NOTE: When dipping the probe into the sample, make
sure the tip of the probe is completely immersed. Stir the
sample gently to create a homogenous sample. Be sure
to tap probe very gently to remove air bubbles. Air
bubbles will cause errors in the reading.
4. Allow time for the reading to stabilise. Note the
reading on the display. When the reading is stable,
the READY annunciator appears.
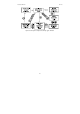
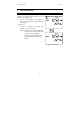
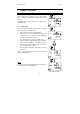
5. To toggle between % Saturation and mg/L
measurement mode, press the MODE key. See
Figure 11.
Figure 11: Taking Measurement