
Instruction manual


- 19 -
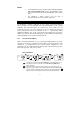
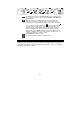
Press ENT key to confirm the reading.
3
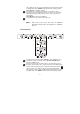
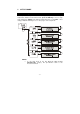
The pH Monitor moves to the second calibration point. The lower display
shows next standard buffer value (pH 4.01). Use ▲ and ▼ keys to select
your second buffer from one of the preset values: pH 4.01 or 1.68 or 10.01
or 12.45. Remove the electrode from the first buffer, rinse and then
immerse it into the second buffer. Allow the reading to stabilize. LCD shows
‘READY’ annunciator when the reading is stable.
Press ENT key (or CAL key) to confirm the reading.
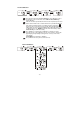
4
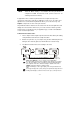
The calibration is completed. The pH Monitor re-calculates electrode
properties based on the calibration. The new slope (in mV) is shown in the
upper display and pH reading at 0mV (pH7.00 ± offset) is shown in the
lower display.
Press ENT key to exit from the calibration.
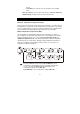
55
The pH Monitor reverts to pH measurement mode.
NOTES:
• To exit from pH calibration mode without confirming calibration, press
▲ and ▼ keys together.
• When confirming the buffer measurement, if measured pH value is not
within ±1.00pH from selected buffer value, the electrode annunciator
blinks and ERR indicator appears in the display. This error can also
occur if non-standard buffers are used or the electrode has worn out.
If this happens, press both ▲and ▼ keys together to restart the
calibration beginning from Step1.
• When calibrating with manual temperature compensation, the meter
automatically changes from the preset ‘process temperature’ to the
‘calibration temperature’. After leaving the calibration mode, the pH
Monitor reverts back to ‘process temperature’.
4.3.2 For NIST Buffer
Make sure that the pH Monitor is set to accept NIST standard buffer in the Setup
mode. (Refer Section 5.4 for Buffer Selection Settings) The factory default is USA
standard. It is recommended that you perform 2-point calibration at room
temperature (25
o
C), starting with the first buffer at pH 6.86 followed by any other
buffer value. (pH 4.01, 1.68, 9.18 or 12.45)