
Installation Guide

Revision 10-2018
For More Questions & Concerns Please Call: (800) 628-8815
Installation Instructions for Welded Wire with T-Posts
Welded Wire is designed with a rectangular mesh, typically 2” x 4” or 2” x 3”. This fencing
is often used to delineate property lines, confine pets, and keep out other animals. Welded
Wire can also be used for plant protection and support purposes, as well as for home crafts.
It is available in galvanized, PVC Coated Green, and PVC Coated Black configurations. It
is Class 1 zinc galvanized for long life.
Tools Recommended: Gloves, Post Driver, Side Cutters, Flathead Screwdriver, T-Post
Clips
For light duty or temporary fencing projects 4 foot tall or above, T-Posts are the best choice for
installing Welded Wire. For projects under 4 foot tall, U-Posts are the best choice. T-Posts are
designed for use with T-Post Clips to make installation of Welded Wire fences easy. Ensure that the
post selected is at least 1 foot taller than your selected Welded Wire. For example, if using 36” tall
Welded Wire, select a 48” tall T-Post. Each post is manufactured with an anchor plate welded toward
the bottom to prevent the post from freely moving once installed in the ground. The number of posts
needed depends on the length of Welded Wire selected.
1. Before starting, ensure the space in which you are installing your Welded Wire fencing does
not have any underground wires or pipe so as to avoid damaging them when installing the
T-Posts.
2. Measure your desired fence perimeter. Confirm that it is less than or equal to the total length
of your selected Welded Wire. The perimeter may be a straight line. It may also be an
enclosed area like a rectangle, square, or circle.
3. Install your first T-Post at the one end of the fence perimeter. T-Posts should be pounded in
with a Post Driver. Be sure to install T-Posts with the tabs facing in the same direction and
facing inward from the perimeter area. They will install about 12 inches into the ground
such that the anchor plate is below the dirt or grass line.
4. Allow for plenty of post to remain to install the fence. The T-Post may stick up slightly
higher than the Welded Wire.
5. Install a second post at the other end of the fence perimeter. If you are creating an
enclosed fence area, install a T-Post at the location of each corner or bend in the
fence.
6. Depending on the total length of your desired fence, install additional T-Posts at 5 to
7 foot intervals. Having your T-Posts at uniform intervals will make for a neater looking
fence.
7. Once the T-Posts are installed, at a total distance not to exceed the length of your
selected Welded Wire, you are ready to install your Welded Wire on the T-Posts.
8. Unwind the Welded Wire on the ground.
9. Starting at the first T-Post, secure the Welded Wire fencing to the T-Post using the T-
Post Clips. You may need to use a screwdriver to assist in securing the T-Post Clips
to the T-Post. Ensure that your Welded Wire fencing touches the grass.
10. Continue along your fence perimeter securing the Welded Wire fencing to each
consecutive T-Post using approximately 4 to 5 T-Post Clips on each T-Post. If your
perimeter has corners, carefully bend the Welded Wire fencing around the T-Post at
the corner.
11. Continue until the fence is in place and secured to each T-Post.
12. If your final fence design is less than the length of your selected Welded Wire, you
can carefully use a side cutter to cut your fence to size. Use caution as this can leave
sharp ends on your fence. Bending these cut ends over can mitigate this potential
problem.
2
3
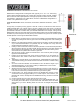
Post Driver
T-Post Clip