Please setup Gmail account during initial device setup. If you are going to use a password or a pattern unlock you must have a valid Gmail account setup in the event you forget either. Forgot lock pattern? Here's a way to reset it. With wrong pattern lock continues for 3 consecutive times ( first time is 5 consecutive times ) then wrong pattern reminder screen will appear “User name” and “password” Enter your Gmail account user name and password.
This device complies with part 15 of the FCC Rules. Operation is subject to the following two conditions: (1)This device may not cause harmful interference, and (2) this device must accept any interference received, including interference that may cause undesired operation. changes or modifications not expressly approved by the party responsible for compliance could void the user's authority to operate the equipment.
This manual contains important safety precautions and information for correct usage. Please be sure to read this manual carefully before use to avoid any damage to the device. Do not place the product in hot, wet or dusty environments. Do not place the product in hot environments. Especially in summer, do not place it in a car with all the windows closed or in the sun.
POWER SOURCE U Battery Recharge The device has Recharging a built-in DC follows: 3.7V rechargeable Lithium-ion batteries. Recharge as Insert the micro USB plug from the supplied USB connection cable to the Micro USB jack on the device. Plug the full-size USB jack of connection cable to supplied AC/USB Adaptor to wall outlet having AC 100-240V~, 50/60 Hz. During charging, the on screen charging icon will turn on. When finished, it will show fully charged icon.
Notes: A. Insert the card (Up to 32GB, not included) into the card slot on right side , The card metal chip for your face B. To take out the card, press the card until a “click” is heard then pulls out the card. C. Before replacing the storage card, make sure the unit has been powered off. D. When inserting the storage card, make sure the direction you select is correct. Never insert violently to avoid damaging the card or the unit. If the storage card doesn’t work, please check if the direction is correct.
Location of Controls 1) 2) 3) 4) 5) Power Headphone Jack Micro USB Port (For battery charging & OTG) Mini HDMI Port Micro SD Card Slot 6) RESET button (Inside the hole) 7) Front camera 8) Rear camera 9) Speaker 8
Connections: Connect to PC A. Connect the Device to the PC via the Micro USB port on the side of cabinet to the USB port on your PC by the supplied connection cable. B. Then the screen appear “Allow USB debugging”, Touch “OK”, the name “CMP821” disk will display on your computer. Earphone / Headphone jack: For private listening, connect an Earphone/Headphone to the Headphone jack on the right side of cabinet.
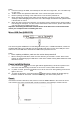
Getting Started On home page, touch the" appear on the screen: " button on the bottom middle, the following picture will Touch the Settings ( screen, then: Touch on the screen and move Up or down to show more selections. Choose the corresponding button you need to set. The sub-setting menu will appear on the screen, follow on screen instructions.
DISPLAY Brightness level: To adjust the screen brightness by moving the scaling bar. Wallpaper: To choose and set the wallpaper screen. Sleep: To enable sleep mode and select time to sleep while not in operation. Font size: To adjust the display Font Size.
Status Bar • The Status Bar lies at the bottom of the screen. Operation. Below are some advises on how to operate the operation zone: R • By touching the icon, you can get back to the previous screen. • By touching the in. icon, you can get back to the homepage wherever interface you are • By touching the icon, a window popup which shows the all apps in operation. • By touching the • By touching the icon, you can decrease the sound volume. icon, you can increase the sound volume.
A: Touch the “Explorer” icon on the apps page, will be shown in above picture. B: Select the file or folder you want to do action as below, touch and hold the file about 2 seconds, Pop-up menu will display different options File operation as Delete File, Rename File, Copy File, Move File, Email File and send by Bluetooth and Property etc. C; Touch the “Copy ” and touch “ card and USB storage ; Then touch “ ” skip to main directory.select “Internal Memory,SD ”.will be shown in above picture.
D: Touch the “Paste”, the file will copy and display on the screen. Google Play Music Using the pre-loaded “Play Music” Player to play audio files: ☆ Audio file formats supported: MP3 The “Play Music” player will automatically load the music files from the SD/USB/Local Disk to the playlist after turning on the “Play Music” player. Video ☆ Video file formats supported: H.264, VC-1, AVI and RMVB. In the main menu, touch the icon to enter “Video”.
Frequently Asked Questions Android Q: What Android OS version is on my Device? A: Android 6.0, Marshmallow Basic Device Functionary Q: Do I have to charge the battery before use? A: You should charge the battery for at least 4 hours, but you can use the device while it’s charging. Use the included power adapter to charge; this device charge via USB cable. Email Q: Can I use any of my personal email addresses to send/receive email? A: The device supports POP3 and SMTP accounts.