User’s Manual 1
Copyright ♦ Copyright © EVEREX Systems. Inc 2005. All rights reserved. ♦ Disclaimer: EVEREX Systems. Inc shall not be liable for technical or editorial errors or omissions contained herein; or for incidental or consequential damages resulting from furnishing this material, or the performance or use of this product. ♦ EVEREX Systems. Inc reserves the right to change product specification without prior notice; therefore, information in this document may change without notice.
d. If the product does not operate normally when the operating instructions are followed. Adjust only those controls that are covered by the operating instructions since improper adjustment of other controls may result in damage and will often require extensive work by a qualified technician to restore the product to normal condition. e. If the product has been dropped or cabinet has been damaged. f. If the product exhibits a distinct change in performance, indicating a need for service.
5. Danish Lithiumbatteri- Eksplosionsfare ved fejlagtig håndtering. Udskiftning må kum ske med batteri af samme fabrikat og type. Lever det brugte batteri tilbage til leverandoren. 6. Norwegian Ekspolsjonsafe ved feilaktig skifte av batteri. Benytt samme batteritype eller en tilsvarende type anbefalt av apparatfabriknten. Brukte batterier kasseres i henhold til fabrikantens instruksjoner. 7. Finnish Paristo voi räjähtää, jos se on virheellisesti asennettu.
Table of Contents Chapter 1 1 Welcome to eXplora PC! 1 Placement Tips................................................................................................. 2 Chapter 2 3 Unpacking the Box 3 Selecting a Site ................................................................................................ 3 Check List......................................................................................................... 3 Chapter 3 4 System Overview 4 Front Panel.........................
System Specifications 23 Product Features............................................................................................
eXplora PC User’s Manual Chapter 1 Welcome to eXplora PC! Congratulations on your purchase of eXplora PC! In addition to being the latest in small form factor computers, the Everex eXplora PC offers several distinctive features:: • Performance: State-of-the-art electronics created on an industry standard platform provides unparalleled system performance and flexibility.
eXplora PC User’s Manual Placement Tips Your eXplora PC should be set up correctly according to this user manual, and your own comfort and ergonomic needs. Please refer to the following tips to create a comfortable and healthy working environment for you: 1. Adjustable Seat: If you plan to use your eXplora PC for extended periods, select a highly adjustable office chair with a five-pronged base.
System Overview Chapter 2 Unpacking the Box Selecting a Site Before unpacking the eXplora PC, prepare a suitable workspace for your computer. Choose a steady, level and clean surface near an electrical outlet. Also ensure that the computer has enough space around it to allow for proper airflow, especially at the rear of the computer near the fan. If the computer does not have enough ventilation, internal components can become overheated and may become damaged.
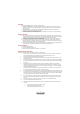
eXplora PC User’s Manual Chapter 3 System Overview Front Panel Features are shown in Figure 3.1, and are described as follows: Figure 3.1 Note: Depending on the model, your computer’s components may vary and look slightly different than those pictured.
System Overview 1. Power Button & Power Indicator: Use this button to turn the eXplora PC on and off. If the button is held down for one second, the system will enter Suspend mode. If held down for four seconds, system power will switch off. When lit, the Power indicator shows blue to indicate that system power is on. 2. Hard Disk Drive LED: This LED lights up to indicate that the hard drive is being accessed. 3. Optical Disc Drive: 5.25-inch optical disc drive for accessing multimedia contents. 4.
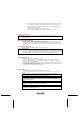
eXplora PC User’s Manual Rear Panel Features are shown in Figure 3.2, and are described as follows: Figure 3.2 1. Power Socket Voltage Toggle Switch: This toggle switch allows you to select the system voltage (115 / 230 V) appropriate to your area. 2. Power Socket: This toggle switch allows you to select the system voltage (115 / 230 V) appropriate to your area. Connect the system unit’s power cord to this socket; ensure that it is connected to a stable AC power source.
System Overview 4. 5. RJ45 LAN Connector (1): For connecting your LAN, allowing you to access network services or the Internet. Line-In Jack (light blue): Connect audio sources, such as external CD, players to this jack for recording on your computer or playback through the Line-Out device. 6. PS/2 Keyboard Connector (purple): Plug your PS/2 keyboard into this connector. 7. COM1 Port (turquoise): Connect serial (RS232) devices, such as a modem, to this port. 8.
eXplora PC User’s Manual Chapter 4 Computer Setup eXplora is easy to be set up. After remove the eXplora from shipping box, please follow the steps below to finish its setup. Setting up the AC Input voltage selection There are two settings for the system to operate. You may set the AC input voltage to 115V or 230V. The AC Input Voltage Selection can be found at the back of your computer. Note: Turn off your computer before setting up your computer. Improper voltage selection may cause system damage.
System Recovery Connect the Power Cord Connect the Power Cable to the computer and then plug into a power supply. Connecting your PS/2 Mouse and PS/2 Keyboard The PS/2 Mouse and PS/2 Keyboard ports are located at the back of your computer and can be identified by their colors. Plug the Mouse and Keyboard into their respective ports.
eXplora PC User’s Manual Connecting your Monitor The monitor port can be found at the back of your computer and can be easily identified by the color blue. Connecting the Modem Connect your telephone line to the port marked PHONE. Connect the supplied RJ11 cable between the port marked LINE and your wall jack.
System Recovery Connecting the Ethernet Connect an RJ45 cable (not supplied) to the 10/100 LAN port to get access to a network or external broadband modem. Connecting Your Printer Connect the printer cable to the printer port at the back of your computer. Please make sure that both printer and computer are turned off.
eXplora PC User’s Manual Chapter 5 Using the Computer The eXplora PC comes preinstalled with Microsoft® Windows® XP Home Edition. To navigate through the desktop environment, the computer mouse and keyboard are used to open and close programs of interest. Using the Mouse 1. Place the mouse on a clean, dry surface for optimal performance. Hint: A Mouse Pad (purchased separately) can greatly enhance the accuracy of the pointing device. 2.
System Recovery Setting up an Internet Connection All eXplora computers come equipped with a 56k modem for dial-up Internet access and a 10/100 Ethernet LAN port for simplified connection to a external broadband modem. Connecting to the Internet involves 3 separate steps. 1. Physically connecting your hardware and communication devices. 2. Subscribing to an Internet Service Provider (ISP) to allow communication from your computer to the Internet (additional charges may apply). 3.
eXplora PC User’s Manual To establish a broadband Internet connection connect an external broadband modem (not supplied) to the 10/100 Ethernet port. (figure 5.2) Figure 5.2 Subscribing to an ISP There are numerous third party Internet Service Providers available. If you did not choose to install Internet Service during the initial setup wizard complete the following procedure. 1. Using the mouse, double-click the MSN Installer icon to initialize the Installation Wizard.
System Recovery 2. For users already subscribing to an ISP choose I’m currently connected to the Internet. To establish a new MSN Internet account choose I’m not currently connected to the Internet (credit card required for activation). Click Next to continue the installation Wizard. 3. When asked “Do you have an MSN E-mail Address?”, click the appropriate response, then click Next.
eXplora PC User’s Manual 4. To establish a new dial-up Internet connection choose MSN dial-up Internet Access, then click Next. 5. Complete the Installation Wizard forms by carefully following the onscreen instructions and entering the appropriate information. Configure the Internet Browser The eXplora PC comes with Microsoft® Internet Explorer preinstalled. 1. To access the Internet double-click the Internet Explorer icon. 2. Use the mouse and keyboard to navigate through the Internet.
System Recovery Chapter 6 Help and Support Your eXplora PC includes general Help and Support documentation to answer questions regarding the Windows operating system and to help you explore the many useful features of your Everex computer. Access the Help and Support Documentation 4. Using the left button on your mouse, click the Start button on your computer screen. 5.
eXplora PC User’s Manual 3. To search for a topic, click the left mouse button inside the Search box then type in the word or phrase you wish to explore. Click the green arrow to begin the search process. 4. Each search will yield a list of Suggested Topics, Full-text Search Matches and a Microsoft Knowledge Base. To view further information regarding your search request, click on the topic of your choice.
System Recovery Definitions Recovery Partition (R-P): The R-P is preinstalled by the manufacturer on the hard disk drive to allow the user to restore the computer system back to its original state. This function is typically used in cases of a non-repairable computer virus or system malfunction. The R-P is hidden from the user. User Partition (U-P): The U-P stores the user data added to the original system.
eXplora PC User’s Manual Following the recovery process, the user is prompted with a CRC-check request. If the user clicks Yes, the CRC verification process will run. When the verification process is completed the system will reboot.
System Recovery In the Selecting Recovery Options window, choosing Advance (destructive mode), will destroy the R-P and U-P. This option should be used with caution. Following CRC verification, the user will be prompted. If Yes is chosen, the CRC check process will run.
eXplora PC User’s Manual Following the CRC check the system will reboot as normal. Technical Support Please complete the following information before contacting Everex Technical Support: User Name : _____________________________________ Model : Everex eXplora RS2800 Serial Number : _____________________________________ . Problem Description: _____________________________________ For the latest Drivers and Support Documents or to chat with a Live Technician visit http://www.everex.
eXplora PC User’s Manual Appendix System Specifications Product Features Drive bays Front Panel Back panel Expansion cards External • 5.25-inch standard optical drive x 1 • Standard Card Reader x 1 (optional) Internal • 3.5” standard HDD drive x 1 (hidden) • Switches: Power Button • Creative Window: • Front I/O USB 2.0 port x 2 Line-Out jack x 1 Microphone-In jack x 1 • LED Indicators: Power-On/Off & Suspend activity indicator HDD activity indicator • USB 2.