H.265 VANGUARD II Series User’s Manual Copyright © EverFocus Electronics Corp.
EVERFOCUS ELECTRONICS CORPORATION H.265 VANGUARD II Series User’s Manual 1995-2022 EverFocus Electronics Corp. www.everfocus.com.tw Disclaimer All the images including product pictures or screen shots in this document are for example only. The images may vary depending on the product and software version. Information contained in this document is subject to change without notice. Copyright All rights reserved.
TABLE OF CONTENTS 1. 2. 3. Introduction ............................................................................................................................ 1 Accessing the Web Interface of the System ........................................................................... 2 Getting Started........................................................................................................................ 5 3.1 Turning On / Off the Power .......................................................
.1.8.8 Video Tampering ................................................................................................... 55 4.1.8.9 Record Schedule ................................................................................................... 56 4.1.8.10 Cross-Counting Analysis ...................................................................................... 57 4.2 Record ...........................................................................................................................
4.6 Layout............................................................................................................................ 95 4.7 Playback ........................................................................................................................ 96 4.7.1 General Operation .................................................................................................... 96 4.7.2 Playback Control Panel ................................................................................
5. Remote Access to the DVR.................................................................................................. 137 5.1 Accessing the DVR on the Network ............................................................................ 137 5.2 Remote Live View Window ......................................................................................... 140 5.2.1 Camera List.............................................................................................................. 142 5.2.
H.265 VANGUARD II Series Chapter 1 1. Introduction This manual describes all the software functions on the user interface of the DVR system and can be applied to all of H.265 VANGUARD II series models listed as below: - VANGUARD II 4x2H - VANGUARD II 8x4H - VANGUARD II 4 Lite - VANGUARD II 8 Lite - VANGUARD II 16 Lite For more information on the product specifications, please refer to the datasheet of each product.
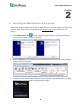
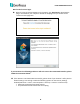
H.265 VANGUARD II Series 2 Chapter 2. Accessing the Web Interface of the System You can look up the IP address and access the Web interface of the NVR using the IP Utility (IPU) program. The IP Utility can be downloaded from EverFocus website (key word search: "IP Utility"). 1. Save IP Utility Setup .exe in your computer. Double click the .exe file and follow the on‐screen instructions to install the IP Utility. 2.
H.265 VANGUARD II Series Note for the first time login: When the Plug-in blocked appears on the browser, click download to download the plug-in and install to your computer. Reload the webpage and you should see the remote live view page now. If you encounter the following problem or still can’t access the remote Web interface, please follow the instructions below: If the ActiveX is not downloaded successfully, please check if your browser’s safety level or firewall setting is set too high.
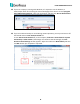
H.265 VANGUARD II Series If your PC or laptop is running with Windows, it’s required to run the browser as administrator when first entering the remote web page of the device. Go to C:\Program Files (x86)\Internet Explorer, right-click the browser and then click Run as administrator. If you are unable to backup or record during remote operation, you may need to turn off the firewall and turn User Account Control off.
H.265 VANGUARD II Series Chapter 3 3. Getting Started After pressing the power switch to turn on the DVR, the DVR will enter the System Initialization process. When the process is done, it’s required to set up a password for the administrator account immediately in order to protect your privacy. Language: Select an OSD language. Device ID: Input the device ID. The default ID is 000000. For more details about the Device ID, please refer to 4.9.1.1 General.
H.265 VANGUARD II Series After clicking the Apply button, the below Unlock page appears. Input the User Name, Password and then click Unlock. 3.1 Turning On / Off the Power Before powering on the DVR, please make sure the internal HDDs have been installed properly. Once you have completed the basic cable connections, you are ready to turn on the DVR. Simply plug in the power source and then press the Power Switch on the rear panel of the DVR to turn on the DVR.
H.265 VANGUARD II Series 3.2 Startup Wizard The Startup Wizard will guide you through some basic settings for the DVR. Please follow the onscreen instructions to proceed. Note: If you don’t want to run the startup Wizard to make any settings when you restart the DVR next time, you can go to OSD Menu > System > General > General and then uncheck the Start wizard function. 1. Click the Start Wizard button to start with the startup wizard. 2. Configure the Network settings. Click Next to proceed.
H.265 VANGUARD II Series 【Local Connection】 DHCP: For DHCP users, check DHCP, the router will automatically assign all the below IP parameters to the DVR. IP Address: The IP address of the DVR. The IP address consists of four groups of numbers, separated by periods. For example, “192.168.001.100”. Subnet Mask: Subnet mask is a network parameter which defines a range of IP addresses that can be used on a network. The subnet address also consists of four groups of numbers, separated by periods.
H.265 VANGUARD II Series 3. Configure the Date/Time settings. You can also configure the NTP and DST settings. Click Next to proceed. 【Date and Time】 Date: Click on the calendar icon to set the system date. Time: Click to set the system time. Date Format: Select a date format from the drop-down list. Time Format: Select a time format from the drop-down list. Time Zone: Select a time zone of your region. 【NTP】 NTP stands for Network Time Protocol.
H.265 VANGUARD II Series 【DST】 DST stands for Daylight Saving Time. Enable DST: Check the box to enable the Daylight Saving Time (DST) function. Time Offset: Select the amount of time to offset for DST. Daylight Saving Time: Choose to set up the daylight saving time in weeks or in days. Start Time/End Time: Set the start time and end time for DST. 4. This page is only available if the hybrid mode (HVR) is selected (refer to 4.9.1.1 General for more details).
H.265 VANGUARD II Series The DVR will automatically detect the IP cameras connected on the same network. You can also click the Search button to search for the IP cameras again. To add IP cameras to the DVR: a. Select the desired IP camera(s) on the left-side IP camera list. b. Click to add the selected IP camera(s) to the DVR. Input the User Name and Password of the IP camera(s). c. You can also click on the right-side list to add an individual IP camera to a single channel. Please refer to 4.1.1.
H.265 VANGUARD II Series 6. The DVR will apply the resolution best suit the connected monitor. If you want to change the output resolution, select an output resolution that matches your monitor. Click the Apply button. Click Next to proceed. 7. Mobile information. You can scan the QR code with EverFocus eFVMS App installed on your mobile device to add the DVR to your app and then remotely access the DVR (please refer to 4.9.5.1 System Info for more details). Click Next to proceed.
H.265 VANGUARD II Series 8. The setup information through this wizard will be displayed on the Summary page. Click Finish to close the wizard. Note: You can check “Do not show this window next time” if you do not want to run the startup Wizard to make any settings when you restart the DVR next time. 9. After clicking the Finish button, the system will enter the Live View window (refer to 3.4 Live View Window).
H.265 VANGUARD II Series 10. To start using the DVR, click any function and the Unlock window appears. Input the password of the DVR and then click the Unlock button to unlock the screen, the OSD Setup menu appears. You can start using the DVR. Please refer to 4. OSD Menu for more details.
H.265 VANGUARD II Series 3.3 General Operation on the OSD Menu 【OSD Menu】 1. On the Live View window, right click the mouse, the OSD Menu appears. 2. Click on any icons to enter the setup menus. 3. To exit the OSD menu, right click the mouse. You can also exit each sub menu by right clicking the mouse. 【Text Box】 Click on the box and an on-screen keyboard will appear. 【On-Screen Keyboard】 Click on a button to input that character.
H.265 VANGUARD II Series 【Drop-Down Box】 Click on the down arrow to see all selections, then directly click on an option to select it. 【Check Box】 Click on the box to enable it (checked) or disable it (unchecked). 【Button】 Click the button to execute the function. 【Slider】 Slide the bar to the left or right for adjusting the value.
H.265 VANGUARD II Series 3.4 Live View Window 1 2 No . Name 1 Camera Title 2 Live Channel Tool Bar 4 3 6 5 7 8 9 10 Description The word prefixed to the Camera Title represents: A-: The connected camera is an AHD camera. T-: The connected camera is a TVI camera. C-: The connected camera is a CVI camera. IP: The connected camera is an IP camera. Left click any channel can display its Live Channel Tool Bar to perform functions including Manual Record, Manual Snapshot, Quick Playback and etc..
H.265 VANGUARD II Series The wordings displayed on the channel represent: VIDEO LOSS: Analog camera is disconnected. No Camera: IP camera is disconnected. Username or password error: The device's username or password is wrong. 4 Channel State 5 System Date and Time Displays system date and time. To change system date and time, go to OSD Menu > System > General > Date and Time. 6 Drag Channel Icon You can drag and drop a channel to the desired position on the layout.
H.265 VANGUARD II Series 3.5 Live Channel Tool Bar You can left-click any channel on the Live View Window to bring up its Live Channel Tool Bar. 1 2 3 4 5 6 7 8 9 10 No . Name Description 1 Manual Record Click the button to start manual recording. During the process of manual recording, the icon will display in red. Click the button again to stop manual recording. Manual Snapshot Click to take a snapshot of the channel. You can then using the Playback panel to playback the snapshot images.
H.265 VANGUARD II Series 3.5.1 Digital Zoom (PIP) You can use the Digital Zoom function to have a close-up view on the desired locations of a live channel. Live full screen channel Preview Window Navigation Box To perform the digital zoom function: 1. On the Live View window, left-click on a channel to display its Live Channel Tool Bar and then click the Zoom icon, the channel will be displayed in full screen with a Preview Window on the bottom-right corner of the screen. 2.
H.265 VANGUARD II Series 3.5.2 PTZ Control Panel With the PTZ Control Panel, you can control the connected PTZ cameras or enter the analog camera OSD using the UTC panel. On the Live View window, select a PTZ camera by clicking on the channel, the selected channel will be highlighted with a red frame. Left-click on the channel to display its Live Channel Tool Bar and then click the PTZ icon to bring up the PTZ Control panel.
H.265 VANGUARD II Series 3.5.2.1 PTZ Control Click PTZ to display the PTZ Control panel. With this panel, you can control the connected PTZ camera. Note that before using this function, you have to connect the PTZ cameras to the DVR and configure the related PTZ settings. Please refer to 4.1.4 PTZ.
H.265 VANGUARD II Series 3.5.2.2 Preset Setting Click Preset to enter the Preset Setting panel. On this panel, you can set up Preset positions, perform the Go to Preset function and also perform the Tour function. Preset Setting Panel Select a channel Click to enter the Preset Setting panel Direction Buttons / Auto Pan Button Preset / Tour Setting Preset List To set up Preset Points: 1. Click on the No. input box and input a preset number (1-255). 2.
H.265 VANGUARD II Series To perform the Go to Preset Point function: 1. Set up the preset points in advance. Please refer to the steps of “To set up Preset Points” above. 2. Select a preset number (1-255) by clicking on the No. input box. 3. Click the Go To button 4. You can also click the Go To button of a specific preset number on the Preset List to go to the selected preset point. . To perform the Tour function: 1. Set up the preset points in advance.
H.265 VANGUARD II Series 3.5.2.3 UTC Control Click UTC to enter the UTC Control panel. On this panel, you can display the analog camera OSD menu and configure the camera OSD settings. Note: For EverFocus’ PTZ cameras, only the UTC-supported PTZ cameras support the UTC function. Select a channel Click to enter the UTC control panel Select a Protocol Operation Keys To perform the UTC Control function: 1. Select a camera and then select UTC1 or UTC2 from the Protocol drop-down list. 2. Click the 3.
H.265 VANGUARD II Series Chapter 4 4. OSD Menu You can use the OSD Menu to configure system settings. To bring up the OSD Menu, right click on the screen.
H.265 VANGUARD II Series 4.1 Channel In this section, you are allowed to configure the settings including analog cameras, IP cameras, live view display, PTZ setup, motion setup and more. 4.1.1 Channel 4.1.1.1 Analog Channels This page is only available for 4CH and 8CH models. If you want to add more IP cameras to the DVR, you can disable the analog cameras in order to release more channels for adding IP cameras.
H.265 VANGUARD II Series 4.1.1.2 IP Channels This page will only appear when HVR hybrid mode is selected (OSD < System < General). You can add IP cameras manually or automatically using this page. Search: Click to search for the IP cameras on the network. The searched IP cameras will be displayed on the upper list. Add: Click to manually add IP camera one by one to the DVR. The added IP camera will be displayed on the lower list.
H.265 VANGUARD II Series You can also use the buttons on the Added IP Camera list to perform the functions: Delete: Click to delete the IP camera. Add: Click to bring up the Add IP Camera window to add an IP camera from the local network. Please refer to 4.1.1.2.2 Manually Add IP Cameras for more details. Edit: Click Modify: Click to edit IP camera profile. to modify IP camera settings. State: Shows the status of the IP camera. indicates connection failed. indicates connection succeeded.
H.265 VANGUARD II Series 4.1.1.2.2 Manually Add IP Cameras 1. Click Add to bring-up the Add IP Camera page. 2. Click Search to search for the IP cameras on the network. Note that the IP cameras that have been added to the DVR will not be displayed. 3. To select an IP camera, click an IP camera on the list, the clicked IP camera will be highlighted with a blue background. 4. Configure the IP camera settings at the lower section. IP Address/Domain: Input the IP address or domain name of the IP camera.
H.265 VANGUARD II Series 4.1.1.3 Manage Protocol On this page, you can edit RTSP (Custom 1-16) protocol for IP camera connection. Custom Protocol: Select a custom RTSP protocol profile from the drop-down list to be configured. Up to 16 profiles can be configured. Protocol Name: Input a name for this RTSP protocol profile. Stream Type: Indicates Main Stream and Sub Stream are supported. You can separately configure the Main Stream and Sub Stream settings below.
H.265 VANGUARD II Series 4.1.2 Live You can configure camera OSD or image settings on this page. Channel: Displays the channel number. Setup: Click to enter the OSD and image setup page. You can use the left-side panel to adjust the parameters. After configuring the settings, click Apply to apply the settings. Select a channel Optional input a channel name IP cameras only. Select a date format. IP cameras only. Select a time format. Signal Format 50Hz IP cameras only. Select a video signal type.
H.265 VANGUARD II Series Date Format: For supported IP cameras only. Select a date format. Time Format: For supported IP cameras only. Select a time format. Record Time: Check the box to enable recording the time to the recording files. Signal Format: For supported IP cameras only. Select a system format (50Hz or 60Hz). Camera Type: Analog cameras only. Select a camera type (Auto, TVI, AHD). Copy: Analog cameras only. You can apply the same configurations from one channel to other channels.
H.265 VANGUARD II Series 4.1.3 Image Control You can configure the image settings for supported IP cameras. Channel: Displays the channel number. Setup: Click to enter the setup page. You can use the left-side panel to adjust the parameters. The system will automatically save the settings. Channel: Select a channel number. Day/Night Mode: Select a Day/Night mode for the camera to display the color or B/W images. GPIO Auto: Select GPIO Auto for the camera to automatically switch to day or night mode.
H.265 VANGUARD II Series Mirror: Check the box to enable the Mirror function. The image will be rotated horizontally around a vertical axis. Hallway Mode: Check the box to enable the Hallway display function (9:19). Angle Rotate: Select a rotate angle. Backlight: Select Enable to enable the BLC (Backlight Compensation) function. - BLC Level: Adjust the level for the BLC function. - BLC Area: Select an area to apply the BLC function.
H.265 VANGUARD II Series 4.1.4 PTZ Please connect the PTZ cameras to the DVR and then configure the below PTZ settings. After configuring the PTZ settings, you can start using the PTZ Control panel to control the PTZ camera. Please refer to 3.5.2.1 PTZ Control. Channel: Displays the channel number. Signal Type: Analog for analog channels; Analog /Digital for IP channels. Protocol: Select a communication protocol between the PTZ camera and DVR.
H.265 VANGUARD II Series 4.1.5 Privacy Mask This function is only available for analog cameras. The Privacy Mask can block out sensitive areas from view. This feature is useful when users don’t want the sensitive information visible. Up to four Privacy Masks can be configured. To configure privacy masks: 1. Select a channel from the Channel drop-down list. 2. Select Enable Privacy Mask to enable the function. 3. Select the areas (masks) to be configured.
H.265 VANGUARD II Series 4.1.6 Motion You can configure the motion settings and motion event notifications on this page. You can also enable the Push Notification function to send motion event alerts to your mobile devices (with eFVMS App installed). For more details on Push Notification, please refer to Appendix A: Push Notification. To configure the Motion Detection settings: 1. Click to bring-up the Motion Area Setup page. a. Select a channel from the Channel drop-down list. b.
H.265 VANGUARD II Series 4.1.7 Deterrence This function is only available when the supported analog/IP cameras with PIR function are connected. For the supported cameras, please contact EverFocus (ts@everfocus.com.tw). When the camera detects an object move in or out of the PIR sensor range, the DVR will start recording or send alert notifications. To configure the PIR Detection settings: 1. Click to bring-up the PIR Area Setup page. a. Select a channel from the Channel drop-down list. b.
H.265 VANGUARD II Series 4.1.8 Intelligent The optional intelligent functions, including Perimeter Intrusion Detection, Line Crossing Detection, Foreign/Missing Object Detection, Pedestrian Detection, Face Detection, Cross Counting, Sound Detection and Tamper Detection. 4.1.8.1 Perimeter Intrusion When objects (people, vehicle or other objects) enter in or out of a pre-defined region, the Perimeter Intrusion Detection event will be triggered.
H.265 VANGUARD II Series 4.1.8.1.1 Configuring Perimeter Intrusion Areas Click the Setup button to enter the Area setup page. 1. Select a channel to configure the function. 2. Select 1 from the Rule Number drop-down list to configure the first area. 3. Click the Rule Switch button to enable this rule. 4. Define a type for this rule: AB: Detects movement from A to B. BA: Detects movement from B to A. AB: Detects both movements from A to B and from B to A. 5. To draw an area: a.
H.265 VANGUARD II Series 4.1.8.2 Line Crossing When objects (people, vehicle or other objects) cross a pre-defined line, the Line Crossing Detection event will be triggered. You can configure some event actions like event recording, Email alert or pop-up full screen when an event is triggered. To configure the Line Crossing settings: 1. Check the Switch checkbox to enable the function of the channel. 2. Select a Sensitivity value from the drop-down list. The larger the value, the higher the sensitivity. 3.
H.265 VANGUARD II Series 4.1.8.2.1 Configuring Line Crossing Detection Lines Click the Setup button to enter the Line setup page. 1. Select a channel to configure the function. 2. Select 1 from the Rule Number drop-down list to configure the first line. 3. Click the Rule Switch button to enable this rule. 4. Define a type for this rule: AB: Detects movement from A to B. BA: Detects movement from B to A. AB: Detects both movements from A to B and from B to A. 5. To draw a line: a.
H.265 VANGUARD II Series 4.1.8.3 Foreign/Missing Object When camera detects foreign (unattended) or missing objects in a pre-defined area, the Foreign/Missing Object event will be triggered. You can configure some event actions like event recording, Email alert or pop-up full screen when an event is triggered. To configure the Foreign/Missing Object settings: 1. Check the Switch checkbox to enable the function of the channel. 2. Select a Sensitivity value from the drop-down list.
H.265 VANGUARD II Series 4.1.8.3.1 Configuring Foreign/Missing Areas Click the Setup button to enter the Area setup page. Missing & Foreign 1. Select a channel to configure the function. 2. Select 1 from the Rule Number drop-down list to configure the first area. 3. Click the Rule Switch button to enable this rule. 4. Define a type for this rule: Foreign: Only detect the unattended objects. Missing: Only detect the missing objects. Missing & Foreign: Detect both missing objects and unattended objects. 5.
H.265 VANGUARD II Series Note: For foreign/missing object, please draw an area slightly larger than or equal to the detected object, and the detected object cannot be covered. 1 Lost & Legacy 6. To return to the Foreign/Missing Object setup page, right-click the mouse.
H.265 VANGUARD II Series 4.1.8.4 Pedestrian Detection When camera detects moving people or vehicle in a pre-defined area, the Pedestrian Detection event will be triggered. You can configure some event actions like event recording, Email alert or pop-up full screen when an event is triggered. To configure the Pedestrian Detection settings: 1. Check the Switch checkbox to enable the function of the channel. 2. In the Level field, select among Far, Middle and Near.
H.265 VANGUARD II Series 4.1.8.4.1 Configuring Pedestrian Detection Area Click the Setup button to enter the Area setup page. Channel: Select a channel to configure the settings. Snapshot Mode: Select a Snapshot Mode. Realtime: System will take two snapshot images. One is when alarm triggered. The other will be an optimal image that system recognized. Default: System will take one snapshot images that is recognized as the optimal one.
H.265 VANGUARD II Series 4.1.8.5 Face Detection When camera detects faces of moving people in a pre-defined area, the Face Detection event will be triggered. You can configure some event actions like event recording, Email alert or pop-up full screen when an event is triggered. To configure the Face Detection settings: 1. Check the Switch checkbox to enable the function of the channel. 2. In the Setup field, click to set up the detection areas. Please refer to 4.1.8.5.
H.265 VANGUARD II Series 4.1.8.5.1 Configuring Face Detection Area Click the Setup button to enter the Area setup page. Channel: Select a channel to configure the settings. Snapshot Mode: Select a Snapshot Mode. Realtime: System will take two snapshot images. One is when alarm triggered. The other will be an optimal image that system recognized. Optimal: System will take one snapshot images that is recognized as the optimal one.
H.265 VANGUARD II Series Line: You can draw a line to detect for human faces crossing the line. If Line is selected, please further set up the rule type below: A > B (line crossing from A to B) or B > A (line crossing from B to A). Area: You can draw an area to detect for human faces enter in the area. If Area is selected, please further set up the area by selecting a Detection Range below: Full Screen or Customize.
H.265 VANGUARD II Series 4.1.8.6 Cross-Counting Detection The DVR will count the times when objects (people, vehicle or other objects) cross a predefined line, and the Cross-Counting event will be triggered. You can configure some event actions like event recording, Email alert or pop-up full screen when an event is triggered. You can search and view the statistical result of cross counting on the Intelligent Analysis page. Please refer to 4.1.8.10 Cross-Counting Analysis.
H.265 VANGUARD II Series 4.1.8.6.1 Configuring Cross-Counting Detection Line Click the Setup button to enter the Line setup page. 1. Select a channel to configure the function. 2. Select 1 from the Rule Number drop-down list to configure the line. 3. Click the Rule Switch button to enable this rule. 4. Select a Rule Type: AB: Detects movement from A to B. BA: Detects movement from B to A. 5. To draw a line: a. Use your mouse to click 2 points to draw a line. b.
H.265 VANGUARD II Series 4.1.8.7 Sound Detection This function is only available when the supported analog/IP cameras with sound detection function are connected. For the supported cameras, please contact EverFocus (ts@everfocus.com.tw). To configure the Sound Detection settings: 1. Check the Switch checkbox to enable the function of the channel. 2. In the Rise field, select Enable to enable the Sound Rise detection. And then further set up the Rise Sensitivity and Sound Intensity. 3.
H.265 VANGUARD II Series 4.1.8.8 Video Tampering To configure the Tamper Detection settings: 1. Check the Switch checkbox to enable the function of the channel. 2. Select a Sensitivity value from the drop-down list. The larger the value, the higher the sensitivity. 3. Click the Apply button to save the settings. 4. To further set up the alarm notifications, click the Alarm button to enter the Alarm setup page. Please refer to 4.3.3 Intelligent Alarm. 5.
H.265 VANGUARD II Series 4.1.8.9 Record Schedule In order to active the intelligent recording function, you need to configure the schedule recording for Intelligent events. The schedule will be activated 24 hours a day, 7 days a week. 1. Select a channel and then move your mouse cursor over the schedule time blocks. 2. Click and drag on the schedule time blocks to draw the blocks with blue color, which will be applied with intelligent event recording function.
H.265 VANGUARD II Series 4.1.8.10 Cross-Counting Analysis On this page, you can search and view the statistical result of Cross-Counting Detection. For more details on Cross-Counting Detection, please refer to 4.1.8.6 Cross-Counting. Select the criteria and then click the Search button, the results will be listed at the lower section. You can display the report in Bar Chart or Line Chart. To export the report, insert an USB storage stick to the system and then click the Export button.
H.265 VANGUARD II Series 4.2 Record You can configure the recording settings on this page. 4.2.1 Stream On this page, you can configure the recording video/audio or network transmission picture quality.
H.265 VANGUARD II Series Bitrate Mode: Select User-defined to set up bitrate manually; or Predefined to auto-select bitrate. Bitrate: The Bitrate corresponds to the speed of data transfer that the DVR will use to record video. Recordings that are encoded at higher bitrates, will be of better quality. Audio: Select this option if you want to record audio along with video. Please ensure the camera supports audio function and a microphone has been connected to the DVR.
H.265 VANGUARD II Series 4.2.1.2 Sub Stream Sub stream defines the video quality which is being viewed via remote access, for example web client and CMS. Channel: Displays channel number. Stream Type: Displays the stream type. Resolution: Select a recording resolution. FPS: Select a FPS (frames per second) for the recording. Video Encode Type: This option is only for IP cameras. Select H.264 or H.265 based on your IP cameras.
H.265 VANGUARD II Series 4.2.1.3 Mobile Stream Mobile stream defines the video quality which is being viewed via remote access through mobile devices. Note that Mobile Stream is only available for IP cameras. Channel: Displays channel number. Switch: Check the box to enable the Mobile Stream function. Stream Type: Displays the stream type. Resolution: Select a recording resolution. FPS: Select a FPS (frames per second) for the recording. Video Encode Type: This option is only for IP cameras. Select H.
H.265 VANGUARD II Series 4.2.1.4 Audio This page is only available for IP cameras. You can configure audio settings for recordings. Channel: Displays channel number. Enable: Check the box to enable the audio settings. Output Volume: Select an output volume. Input Volume: Select an input volume. Type: Select an audio codec. Copy: You can apply the same configurations from one channel to other channels.
H.265 VANGUARD II Series 4.2.2 Record On this page, you can configure the recording parameters and recording schedule for each channel. 4.2.2.1 Record Channel: Displays channel number. Enable Channel: Check the box to enable the function of the channel. Record Stream: Select a recording stream for the channel. If you select Dual Streams, the system will record both Main Stream and Sub Stream. If you select Main Stream, the system will only record Main Stream.
H.265 VANGUARD II Series 4.2.2.2 Record Schedule On this page, you can configure the recording schedule for Normal, Motion, I/O or PIR recordings. Channel: Select a channel from the drop-down list. Normal: Click the Normal button on the right-side and then move your mouse cursor over the schedule time blocks. Click and drag on the schedule time blocks to draw the blocks with green color, which will be applied with normal recording function.
H.265 VANGUARD II Series 4.2.3 Snapshot On this page, you can configure the snapshot parameters or set up the snapshot schedule. 4.2.3.1 Snapshot On this page, you can configure the snapshot parameters. Channel: Displays the channel number. Auto Snapshot: Check the box to enable the Auto Snapshot function. For this function to work, you will have to configure the Snapshot Schedule. Please refer to 4.2.3.2 Snap. Schedule. Stream Type: Select main stream or sub stream for the snapshot image.
H.265 VANGUARD II Series 4.2.3.2 Snap. Schedule On this page, you can configure the snapshot schedule. Channel: Select a channel from the drop-down list. Normal: Click the Normal button on the right-side and then move your mouse cursor over the schedule time blocks. Click and drag on the schedule time blocks to draw the blocks with green color, which will be applied with normal snapshot function.
H.265 VANGUARD II Series 4.3 Alarm You can configure the alarm settings on this page. 4.3.1 Motion After configuring the Motion Detection settings, you can further configure the Motion Alarm settings. To configure the Motion Detection setting, click the Motion button to enter the Motion Detection setup page (please refer to 4.1.6 Motion). Channel: Displays the channel number. Buzzer: Select a time for DVR buzzer to sound when a motion event is triggered. Select Disable to disable the function.
H.265 VANGUARD II Series FTP Picture Upload: When an event is triggered, the DVR will upload alarm images to FTP server. Note that for this function to work, you have to set up FTP configurations in advance. You can also configure the snapshot image resolution and quality, please refer to 4.4.4.1 FTP. FTP Video Upload: When a motion event is triggered, the DVR will upload alarm videos to FTP server. Note that for this function to work, you have to set up FTP Schedule in advance, please refer to 4.4.4.
H.265 VANGUARD II Series 4.3.2 IO After connecting the external IO devices to the DVR or IPCam, you can further configure the IO Alarm settings. Alarm In: Displays the alarm input number. Alarm Type: Select an alarm type for the alarm input. Options include Normally-Open, Normally-Close and Off. Buzzer: Select a time for DVR buzzer to sound when an IO event is triggered. Select Disable to disable the function.
H.265 VANGUARD II Series FTP Video Upload: When a motion event is triggered, the DVR will upload alarm videos to FTP server. Note that for this function to work, you have to set up FTP Schedule in advance, please refer to 4.4.4.2 FTP Schedule. Picture to Cloud: When an event is triggered, the DVR will upload alarm images to Cloud (Dropbox or Google Drive). Note that for this function to work, you have to set up Cloud in advance, please refer to 4.5.2 Cloud.
H.265 VANGUARD II Series 4.3.3 Intelligent Alarm After configuring the Intelligent functions settings, you can further configure the Alarm settings for each intelligent function. To configure the Intelligent functions, click the Intelligent button to enter each intelligent function setup page (please refer to 4.1.8 Intelligent). The Intelligent Alarm setup configurations for each intelligent function are similar. Here we use Perimeter Intrusion alarm setup page for example.
H.265 VANGUARD II Series for this function to work, you have to set up the Email function in advance (refer to 4.4.3 Email). FTP Picture Upload: When an event is triggered, the DVR will upload alarm images to FTP server. Note that for this function to work, you have to set up FTP configurations in advance. You can also configure the snapshot image resolution and quality, please refer to 4.4.4.1 FTP. FTP Video Upload: When a motion event is triggered, the DVR will upload alarm videos to FTP server.
H.265 VANGUARD II Series 4.3.4 PTZ Linkage You can associate an alarm trigger (motion or I/O) with a specific camera and then activate a PTZ camera to go to a preset position when the alarm is triggered. Channel: Displays the channel number. Switch: Check the box to enable the PTZ Linkage function. Motion: Check the box to trigger the PTZ Linkage function when a motion event occurs. IO: Check the box to trigger the PTZ Linkage function when an IO event occurs.
H.265 VANGUARD II Series 4.3.5 Exception You can configure the system alarm settings on this page. Event Type: Displays the event types. No Space on Disk: When an HDD is full. Disk Error: When the HDD is not detected properly. Video Loss: When a camera is not connected properly. Switch: Check the box to enable the function. Buzzer: Set up the time for buzzer to sound when an event is triggered. To disable the Buzzer function, select Disable.
H.265 VANGUARD II Series 4.3.6 Alarm Schedule You can configure the schedule to activate the alarm functions including IO Alarm Output, Push Notification, FTP Upload, Cloud Upload and Buzzer.
H.265 VANGUARD II Series 4.4 Network You can configure the network settings on this page. 4.4.1 General This page allows you to configure network parameters, such as DHCP, Static IP and PPPoE. 4.4.1.1 General The DHCP setting lets the system use an automatically assigned (dynamic) IP address. This address can change under certain circumstances, for instance, when the DVR’s network switch/hub has to be rebooted. DHCP server in LAN will automatically assign an IP configuration for the network connection.
H.265 VANGUARD II Series Gateway: This address allows the DVR to access the Internet. The format of the Gateway address is the same as the IP Address. For example, “192.168.001.001”. IPv6 Address: The IPV6 address of the DVR. IPv6 Gateway: This address allows the DVR to access the Internet. DNS: DNS1 is the primary DNS server and DNS2 is a backup DNS server. Usually, it’s enough to just enter the DNS1 server address. Default: Click to apply the default setting. Apply: Click to save the settings. 4.4.1.
H.265 VANGUARD II Series 4.4.1.3 Port Configuration On this page, you can configure the port settings or enable/disable the UPnP or P2P function. Web Port: The Web port can be used to remotely login the DVR (e.g. using the Web Client). If the default port 80 is already taken by other applications, please change it. Client Port: The Client port can be used to send information through (e.g. using the mobile app). If the default port 8000 is already taken by other applications, please change it.
H.265 VANGUARD II Series 4.4.2 DDNS You can configure the DDNS setting on this page. DDNS (Dynamic Domain Name System) is a service used to map a domain name to the dynamic IP address of a network device. You can set up the DDNS service for remote access to the DVR. DDNS assigns a domain name (URL) to the DVR, so that the user does not need to go through the trouble of checking if the IP address assigned by DHCP Server has changed.
H.265 VANGUARD II Series EverFocus DDNS Please follow the steps below to set up EverFocus DDNS. 1. In order to allow remote access to the DVR from outside of the local network, enable either the Port Forwarding or DMZ function of your router. Please refer to the manual of your router for more details. 2. Go to http://www.everfocusddns.net to check an available host name for the DVR.
H.265 VANGUARD II Series a. Check DDNS to enable the DDNS function. b. Select EVERFOCUS DDNS from the Server drop-down list. c. Input the host name in the DVR Name field. d. Click the Apply button. 4. Configure the DVR Network settings, keep Web port “80” and enable the UPnP function. Click the Apply button. 5. The DDNS setup is now complete. Open a browser and enter the domain name (http://[host name].everfocusddns.net) in the address field. The Web interface of the DVR should be displayed.
H.265 VANGUARD II Series 4.4.3 Email You can configure the email settings for email alerts, or configure the Email schedule on this page. 4.4.3.1 Email Configuration You can configure the email settings for email alerts. When events occur, the DVR will send Email alert with a snapshot image (.jpg) to the receiver(s). Email: Check the box to enable the Email function. Encryption: Select an encryption if your Email server requires the SSL or TLS verification. Select Auto if you are not sure.
H.265 VANGUARD II Series 4.4.3.2 Email Schedule You can configure the email schedule on this page. The selected event Email alerts will be sent out by the scheduled time. For example, if you set up Motion on Sunday between 68am, the Motion Email alerts will only be sent out between 6-8am on Sunday. Channel: Select a channel to configure the email schedule individually. Motion: Click the Motion button on the right-side and then move your mouse cursor over the schedule time blocks.
H.265 VANGUARD II Series 4.4.4 FTP 4.4.4.1 FTP You can configure the FTP server setting on this page. When there is a Motion or I/O event occurs, the system will send an instant snapshot image to the FTP. For system alarm such as HDD lost and Video loss, the system will send alarm log to the FTP as well. FTP Enable: Check the box to enable the function. Server IP: Input the FTP server IP. Test FTP: Click to test the FTP server connection. Port: Keep the port 21.
H.265 VANGUARD II Series 4.4.4.2 FTP Schedule You can configure the FTP schedule on this page. The selected event recordings will be uploaded to the FTP by the scheduled time. For example, if you set up Motion on Sunday between 6-8am, the Motion recordings will be uploaded to FTP between 6-8am on Sunday. Note that for the FTP Schedule function to work, you have to enable FTP Video Upload function on the related alarm setup page (Motion, IO, Intelligent).
H.265 VANGUARD II Series 4.4.5 IP Filter You can configure the IP Filter settings on this page. This function allows you to allow or deny some specific IP address to access the Web interface of the DVR. By default, all IP addresses are allowed. To set up IP Filter: 1. Check the Enable box and then select either one from the two options below. You can only activate one option for the DVR. Enable Whitelist: Enable the whitelist configured below. Enable Blacklist: Enable the blacklist configured below. 2.
H.265 VANGUARD II Series 4.5 Device You can configure the internal HDD and Cloud storage function on this page. 4.5.1 Disk 4.5.1.1 Disk You can configure the HDD settings on this page. Please connect the HDD(s) to the DVR in advance and ensure the power and SATA cables are properly connected between the DVR and HDD(s). After connecting the HDD(s) to the DVR, the DVR will automatically detect the connected HDD(s) and listed all the connected HDD(s) in the below field.
H.265 VANGUARD II Series Overwrite: Select Auto to enable the overwrite function; Off to disable the overwrite function. If Auto is selected, the system will overwrite the oldest files on the HDD when HDD is full. If Off is selected, please check the HDD status regularly, to make sure the HDD is not full. The 1/3/7/14/30/90 Days stands for the max. number of recording days.
H.265 VANGUARD II Series 4.5.1.2 Disk Group You can assign the HDDs to different groups. HDD groups allow you to balance recordings across multiple hard drives. For example, you can record channels 1~4 to one hard drive and 5~8 to a second hard drive. This can reduce the amount of wear on the hard drives and may extend the life of the hard drives. Disk Group Type: Select a Disk Group type. The Disk Group Type has to be pre-configured on the Disk page (please refer to 4.5.1.1 Disk).
H.265 VANGUARD II Series 4.5.1.3 S.M.A.R.T You can check the S.M.A.R.T. info of each HDD on this page. To check the S.M.A.R.T. info of the HDD, select an HDD from the HDD ID drop-down list, select a check type from the Self-Check Type drop-down list, and then click the Check button. The S.M.A.R.T. info will be listed in the S.M.A.R.T. info field. If the evaluation is not passed but you still want to use the disk for recording, you can check the checkbox of Whole evaluation not passed.
H.265 VANGUARD II Series 4.5.2 Cloud You can configure the Cloud settings (Dropbox or Google Drive) on this page. After configuring the settings, the system will automatically send the Motion and I/O alarm snapshot images (.jpg) or video clips (.avi) to the associated Dropbox or Google Drive when alarm events occur. 4.5.2.1 Activating Dropbox Follow the steps below to activate the Dropbox function: 1.
H.265 VANGUARD II Series 7. Go to your email box and click on the provided link. Sign in Dropbox and the below message appears. Input the IP address of the DVR and keep the 80 port. Click Authorize. 8. Input the user name and password of the DVR and then click Log In. 9. The Cloud activation is complete. You should now receive the alarm snapshot images or videos from the DVR.
H.265 VANGUARD II Series 4.5.2.2 Activating Google Drive Follow the steps below to activate the Google Drive function: 1. Ensure the Video to Cloud or Picture to Cloud functions on the related alarm setup page (Motion, IO, Intelligent) has been enabled. 2. Register an account on Google Drive website. It’s recommended to create the account with the same Email address and password used for your DVR. 3. Ensure the DVR network is working properly. 4. Configure the SMTP function (refer to 4.4.3 Email). 5.
H.265 VANGUARD II Series 8. Click Allow for the DVR to connect to Google Drive. The connection has been established. 9. You should now receive the alarm snapshot images or videos from the DVR.
H.265 VANGUARD II Series 4.6 Layout You can select the desired Layout or activate the Auto Sequence function on this page. To select a layout, directly click on the layout icon. To start displaying the sequence mode, click the Auto Sequence button, the Auto Sequence function will automatically start. To stop the sequence mode, right-click the mouse. To configure the sequence settings, please refer to 4.9.1.3 Video Output.
H.265 VANGUARD II Series 4.7 Playback 4.7.1 General Operation You can search and then play back the recordings on this page. 1 2 3 4 5 6 7 8 9 No. Name Description 1 Search Mode Click to enter each Search mode (General, Events, Time-period, Smart, Tag, External File, Snapshot and Slice) to search and play back the recordings. Please refer to 4.7.3 Search Mode for more details.
H.265 VANGUARD II Series 4.7.2 Playback Control Panel You can use the playback control panel to operate the below functions: 1 2 3 4 14 5 6 7 8 9 10 11 12 13 15 16 17 18 19 Click to display the Playback Layout in full screen. To exit full screen, right-click the mouse or click the Full Screen button again. Please refer to 4.7.2.1 Full Screen on Playback Window. Click to rewind (x2, x4, x8, x16).
H.265 VANGUARD II Series 12 Add Default Tag Click to add a default tag to the current playback time, which will be applied with a default Tag Name “Tag”. You can then search for the tag on the Tag window. Please refer to 4.7.3.5 Tag. 13 Add Customized Tag Click to add a customized tag to the current playback time, which can input a tag name to the tag. You can then search for the tag on the Tag window. Please refer to 4.7.3.5 Tag.
H.265 VANGUARD II Series 4.7.2.1 Full Screen on Playback Window On the Playback Control Panel, click the Full Screen button to display the Playback Layout in full screen. To exit the Full Screen, right click the mouse or click the Full Screen button again. Under Full Screen mode, you can move your mouse to the bottom side to display the Playback Control Panel.
H.265 VANGUARD II Series 4.7.2.2 Backup Video Clips To backup video clips: 1. Ensure the USB storage device has been inserted to the DVR. 2. On the Playback Control Panel, click the Video Clip button . The button will then change to a Copy button , and a copy range will be displayed on the time bar. 3. Check the left-side channel box if you want to back-up with the same start time and end time of the selected channel(s). 4.
H.265 VANGUARD II Series 4.7.3 Search Mode 4.7.3.1 General You can use this page to search, play back and backup all types of recordings. Click the General tab to enter the General Playback mode. 1. Click the Calendar button to select a date. 2. Select the desired Search Type(s). 3. Select a Stream Type. For this function to work, you will have to configure the record stream setting to Dual Streams (please refer to 4.2.2.1 Record). 4. Select the desired channel(s). 5.
H.265 VANGUARD II Series 4.7.3.2 Events You can use this page to search, play back and backup the event recordings to the USB storage device. The Event Playback page gives you a summary of all events on the list. You can display the events with Thumbnail, List or Details list type. Event Search and Backup 1 2 3 4 Date 5 6 7 No. Name Description 1 Event Tab Click to enter the Event Playback page. 2 Event List The searched events will be listed on the Event List.
H.265 VANGUARD II Series 5 Function Bar Descending order: Click to display the events in descending order. Select: Check the box to select all the events on the list. Uncheck the box to deselect all the events on the list. Copy: Select the event(s) on the Event List and then click the Copy button to backup the selected event recordings to the USB storage device. Play: Click an event on the Event List and then click the Play button to play back the clicked event recording.
H.265 VANGUARD II Series List: Click Details: Click display the events in list. display the events in detailed list. Playback: Click the Playback icon can play back the event. Lock: Click the icon to lock or unlock the event. The locked events will be stored in the hard disk and will not be overwritten. i. 2. On the Event List, click on an event and its information will be displayed at the lowerright corner. To back up event recordings to the USB storage device: a.
H.265 VANGUARD II Series Event Playback page Playback View Event List Playback Control Panel Event Info 【Event List】 You can perform the below functions using the Event List. Playback: There are two ways: Double-click on an event can start playing back the event recording. Click on an event and then click the Playback button to start playing back. Copy: Check the event boxes to select the events and then click the Copy button back-up the event recordings to the USB storage device.
H.265 VANGUARD II Series 4.7.3.3 Time-Period Click the Time-Period tab to enter this page. Time-Period function allows you to divide a recording into several segments with equal time-length; and then play back the segments simultaneously. For example, for a 60-minute recording, if you select 4 split-screen, the recording will be divided into 4 segments with 15-minute in length each. 1. Click the Sub-period tab on the top to enter the Sub-Period Playback page. 2.
H.
H.265 VANGUARD II Series 4.7.3.4 Smart Smart Playback allows you to easily search and play back the motion events in one or more specific areas of a channel. To perform the Smart Playback function: 1. Click the Calendar button to select a date. 2. Click the Time column to select a time range. 3. Select the Search Type. 4. Select a channel by checking the checkbox of the channel. 5. Click the Play button on the Playback Control Panel to start playing back. 6.
H.265 VANGUARD II Series Defining Smart Areas: 1. Follow Step 1 ~ Step 6 above to enter the Smart Area Define page. Apply All Click and hold it to drag it to other location Clear All Return Search 2. To define the smart area(s), click the mouse and drag it to draw an area. The area applied with the smart function will be shown with red grids. You can follow this method to draw several areas. To clear a certain area, use the same method to draw on the same area again, the smart area will be erased. 3.
H.265 VANGUARD II Series 4.7.3.5 Tag You can search for the tagged recordings and then play back the recordings. After adding tags to the recordings, you can use the Tag playback window to search for the tagged recordings. There are two ways to add a tag: 1. On the Live View window, click the Add customized Tag icon on the Live Channel Toolbar. Please refer to 3.5 Live Channel Toolbar for more details. 2.
H.265 VANGUARD II Series To play back the tagged recordings: 1. On the Tag playback window, select a Start Time and End Time. 2. Optionally input a keyword of the tag if you want to find the tags with customized names. 3. Select the desired channel(s). 4. Click the Search button , the searched tags will be displayed on the list. 5. To play back the tagged recordings, you can either double-click on the tag recording or select a tag recording and then click the Play button on the lower-left corner.
H.265 VANGUARD II Series 4.7.3.6 External File You can play back the recordings (.avi) stored in the USB storage device using the External File Playback window. To play back the recordings (.avi) stored in the USB storage device: 1. Ensure the USB storage device has been inserted to the DVR. 2. Select the USB device from the Device Name drop-down box. 3. Double-clicking the recordings on the right-side panel, the recording will be played back.
H.265 VANGUARD II Series 4.7.3.7 Snapshot You can use this page to search and play back the snapshot images and backup the images to a USB storage device. 2 1 5 3 6 4 7 No. Name Description 1 Snapshot Click to enter the Snapshot Playback window. 2 The searched snapshot images will be listed on the Snapshot List. You Snapshot List can display the Snapshot List in Thumbnail, List or Details mode. Please refer to No.6.
H.265 VANGUARD II Series 5 Function Bar Descending order: Click to display the snapshots in descending order. Select: Check the box to select all the snapshots on the list. Uncheck the box to deselect all the snapshots on the list. Copy: Select the snapshot(s) on the list and then click the Copy button to backup the selected snapshot images to the USB storage device. Play: Click a snapshot on the list and then click the Play button to play back the snapshot images starting from the clicked one.
H.265 VANGUARD II Series Details: Click display the snapshots in detailed list. Playback: Click the Playback icon in the Playback column can display the snapshot image. You can then click the buttons to display the next or previous snapshot image. g. On the Snapshot List, click on a snapshot image and its information will be displayed at the lower-left corner. 2. To back up snapshot images to the USB storage device: a. Ensure the USB storage device has been inserted to the DVR. b.
H.265 VANGUARD II Series 【Snapshot List】 You can perform the below functions using the Event List. Image Display: Click a snapshot image on the list can display the image on the viewing window. Continuous Playback: Click a snapshot image on the list and then click the Play button on the Playback Control Panel, the snapshot images will be automatically playing back continuously starting from the clicked one to the last one.
H.265 VANGUARD II Series 4.7.3.8 Slice Slice Playback allows you to easily and quickly search for recordings within a specific date and time of a single channel and then play back. 1. Select a Stream Type. For this function to work, you will have to configure the record stream setting to Dual Streams (please refer to 4.2.2.1 Record). 2. Select a layout type, Time or Channel from the drop-down list. 3. Select a channel by clicking on it. 4.
H.265 VANGUARD II Series 4.8 Express 4.8.1 Quick Playback You can configure the start playback time for the Quick Playback function. Select a time from the drop-down box to set up playing back from how many time ago. After the configuration, you can activate the function by clicking the Quick Playback icon on the Live Channel Tool Bar on each channel (please refer to 3.4 Live Channel Tool Bar). f 4.8.2 Stream Switch This function is only available for IP cameras.
H.265 VANGUARD II Series 4.9 System You can configure most of the system settings on the Main Menu. 4.9.1 General 4.9.1.1 General You can configure the general system settings on this page. Device Name: Input a desired name for your DVR. The name can include both letters and numbers. Device ID: Enter the desired ID for your DVR. The device ID is used to identify the DVR, and can only be composed of numbers.
H.265 VANGUARD II Series 4.9.1.2 Date and Time 【Date and Time】 Date: Set up the date for the system. Time: Set up the time for the system. Date Format: Select a format for the date. Time Format: Select a format for the time. Time Zone: Select a time zone relevant to your region. 【NTP Settings】 The NTP (Network Time Protocol) function allows your DVR to automatically sync its clock with a time server.
H.265 VANGUARD II Series Enable DST: Check the box to enable the DST function. Time Offset: Select the amount of time that Daylight Saving has increased by in your time zone. This refers to the difference in minutes, between Coordinated Universal Time (UTC) and the local time. Daylight Saving Time: Select Week or Date to configure the start/end time below. Week: Select a month, a particular day and time when Daylight Saving starts and ends. For example, 2am on the first Sunday of a particular month.
H.265 VANGUARD II Series 4.9.1.3 Video Output You can configure the Main monitor and Call monitor settings on this page. Main Monitor Setting Video Output: Select Live Output (Main Monitor) and then configure the below settings. Sequence Layout: Select a layout for the sequence mode. For example, if you select Layout4, the DVR will display a quad view layout for all channels in sequence order. To start the sequence mode, go to OSD menu > Layout and then click the Auto Sequence button.
H.265 VANGUARD II Series Transparency: Slide the bar to the left or right to adjust the transparency for the OSD Setup menu. Default: Click to apply the default setting. Apply: Click to save the settings. Call Monitor Setting Video Output: Select Call Monitor Output and then configure the below settings. CVBS Call Monitor: Check the box to enable the Call Monitor function. Sequence Mode: Select Enable to enable sequence mode or Disable to disable sequence mode.
H.265 VANGUARD II Series 4.9.2 User Account You can configure the user settings on this page. Up to 7 user accounts (1 administrator and 6 users) can be configured. Default User: Select an user account as the default account. User Edit: Click to bring-up the User Edit window. You can edit the user name/password in this window. Input the user name with alphabetic or numeric characters; and the passwords have to be numeric (0-9) and at least 5 characters.
H.265 VANGUARD II Series Log Search: Allow users to check all the system logs. Settings: Allow users to set all the parameter settings. Auto Reboot: Allow users to auto reboot the device. Manual Record: Allows users to manually start/stop recording. Disk: Allow users to manage and control the HDD and USB storage device. Remote Login: Allow users to login the system remotely. Sequence Control: Allow users to use the sequence function.
H.265 VANGUARD II Series 4.9.3 Maintenance On this page, you can search and view the system log, load default settings, upgrade the system, export and import system parameters and manager system auto reboot. 4.9.3.1 Log You can search for logs on this page. Select the start time, end time, log type and then click the Search button, the searched logs will be displayed on the list below. Double-click on a log from the list can bring up the Log Details window.
H.265 VANGUARD II Series Copy: Click to save all the searched logs to the USB storage device. Click the Copy button, the Copy window appears. You can also create a directory for the video clip(s) by clicking the Directory button on the upper-right corner. Click the OK button, the copy process begins. After the copy process is complete, click the Cancel button to return to the Log page.
H.265 VANGUARD II Series 4.9.3.2 Load Default Select the desired items to be restored to factory default and then click Apply. Restoring default settings will not delete recordings and snapshots saved to the hard drive. 4.9.3.3 Upgrade You can upgrade system firmware using this page. 1. Restore the firmware file (.sw) in a USB storage device and insert the USB storage device to the DVR. 2. Click the Select File button to select the firmware file from the USB storage device. 3.
H.265 VANGUARD II Series 4.9.3.4 System Parameter You can export the system parameters you have configured to a USB storage device, or import a system parameters file from USB storage device to the DVR. Save Settings: Click to save the DVR current system settings to the USB device. You will be required to input the Admin password to authenticate. Load Settings: Once you have exported system parameters file, you can import the file on another DVR.
H.265 VANGUARD II Series 4.9.4 IPCam Maintain This menu allows you to upgrade the IP camera’s firmware and restore default settings of IP camera. 4.9.4.1 Upgrade This menu allows you to upgrade the IP camera’s firmware. 1. Select the desired IP cameras you want to upgrade firmware by checking the checkbox. 2. Click the Select File button to select the update file from your USB storage device. 3. Click the IPCam Upgrade button to start upgrading the selected IP camera.
H.265 VANGUARD II Series 4.9.4.3 Reboot IPC On this page, you can reboot the IP cameras. 1. Select one of the IP cameras you want to reboot by checking the checkbox. 2. Click the Reboot IPC button to start rebooting. You will be required to input the Admin password to authenticate. 4.9.4.4 System Parameter You can export the IP camera parameters to a USB storage device, or import the IP camera parameter file from USB storage device to the IP camera.
H.265 VANGUARD II Series 4.9.5 System Info This menu allows you to view the system information, channel information, record information and network status. 4.9.5.1 System Info View system information such as device ID, device model name, IP address, MAC address, firmware version and more. VANGUARD II 8x4H If P2P function is enabled, a QR code will be displayed on the Info page. You can scan the QR code with EverFocus eFVMS App installed on your mobile device to add and remotely access the DVR.
H.265 VANGUARD II Series 2. To add a DVR through P2P, tap Menu > Device List, and then tap the “+” button on the upper-right corner. 3. Scan the DVR’s QR code on the System Info page of the DVR OSD menu. Input the DVR ID, password and Media Port 9000. Tap the Save button.
H.265 VANGUARD II Series 4. The DVR is now added and connected to the App. You can start accessing the DVR. VANGUARD II 8x4H VANGUARD II 8x4H VANGUARD II 8x4H 4.9.5.2 Channel Info You can see the channel info on this page.
H.265 VANGUARD II Series 4.9.5.3 Record Info You can see the record info on this page. 4.9.5.4 Network Info You can see the network state on this page. Total Bandwidth: It shows the DVR’s total input bandwidth for IP cameras. Used Bandwidth: It shows the used bandwidth of IP cameras.
H.265 VANGUARD II Series 4.10 Exit You can Shutdown, Reboot or Logout the system using this page.
H.265 VANGUARD II Series 5 Chapter 5. Remote Access to the DVR 5.1 Accessing the DVR on the Network Follow the steps below to access the DVR through a Web browser. 1. Open a Web browser and in the address bar type the IP address of the DVR. Local connection: http:// (IP address from the DVR’s Network Menu): IP port used e.g. http://192.168.1.163:2468 Internet connection: http:// (IP address given by your Internet Service Provider): IP port used e.g. http://57.182.67.204:2468 2.
H.265 VANGUARD II Series Note for the first time login: To display live streams, click Download and install the player to install the plug-in. After installing the plug-in, allow the player in your browser.
H.265 VANGUARD II Series If you encounter the following problem or still can’t access the remote Web interface, please follow the instructions below: If the ActiveX is not downloaded successfully, please check if your browser’s safety level or firewall setting is set too high. Enable the following options on the Security Settings window (IE Browser < Tools < Internet Options < Security < Internet < Custom Level).
H.265 VANGUARD II Series 5.2 Remote Live View Window 1 7 2 5 No. Name 3 4 6 4 Description Camera List Button Click to hide or display the Camera List. Please refer to 5.2.1 Camera List. 2 Live Channel You can perform the following functions on each channel: a. Double-click on a channel can display the channel in full screen. To exit the full screen mode, double-click on the channel again. b. You can drag and drop a channel to the desired position on the layout.
H.265 VANGUARD II Series The Status Icons displayed on the bottom-left of each channel are designed to alert users when any of the following situations occur: 7 Status Icon R H M M I I S S C The channel is on normal recording. No HDD / HDD error / HDD not formatted Motion event is triggered. Motion event is triggered. Motion event is recording. Alarm event is triggered. Alarm event is triggered. Alarm event is recording. Intelligent event is triggered. Intelligent event is triggered.
H.265 VANGUARD II Series 5.2.1 Camera List The Camera list lists the analog and IP camera channels. You can use the camera list icons to perform some functions. If the channel is not connected or the channel has been disabled, the icons will be gray-out. Click to Collapse/Expand camera list Play Record Capture Talkback Bitrate Play: Click to display / hide the camera stream on the Live window.
H.265 VANGUARD II Series 5.2.2 Live View Function Icons You can perform some functions for all the cameras on the Live View window. 1 2 3 4 5 6 7 8 9 10 11 12 13 14 No. 1 2 3 4 5 Name Divide Screen Play Stop Original Aspect Ratio Stretch Description Click to select a layout. Click to display all camera streams on the Live window. Click to close all camera streams displayed on the Live window. Click to display all the live streams with original aspect ratio.
H.265 VANGUARD II Series Click to take a snapshot (.jpg) of all channels on the Live window, a message window appears on the bottom-right corner of the screen. Click Folder to open the folder to find the snapshot images. To change the manual snapshot storage path, on the 11 12 13 14 Snapshot Menu Bar, click Digital Zoom Click to enable the Digital Zoom mode. To exit the Digital Zoom mode, click the button again. To perform the Digital Zoom function: a.
H.265 VANGUARD II Series 5.2.3 PTZ Setting Panel For PTZ cameras, you can use this panel to control the PTZ (analog and IP) camera. On the Live View window, click the PTZ Setting button to display the PTZ Setting Panel. Click the PTZ Setting button again can hide the PTZ Control Panel. R For PTZ cameras, select a PTZ camera by clicking on the PTZ channel, the selected channel will be highlighted with a red frame. You can double-click to display the channel in full screen for operation.
H.265 VANGUARD II Series On the PTZ Panel, click PTZ Model to display the Preset/Tour Control panel. To set up Preset Points: 1. Select a PTZ camera by clicking on it on the Live View window. 2. Use the direction buttons or Zoom/Focus/Iris buttons to search for a preferred location. 3. Click the + button to add this location as a preset point, the preset point should be added on the list below. 4. Follow Step 2-3 to set up multiple preset points. 5.
H.265 VANGUARD II Series 5.2.4 Color Panel You can adjust Hue, Brightness, Contrast and Saturation value for each channel on the Live View window using the Color Panel. Click the Default button to restore all the value to factory default. On the Live View window, select a camera by clicking the channel, the channel will be highlighted with a red frame. Click the Color button to display the Color Panel and then you can start adjust color settings. Click the Color button again can hide the Color Panel.
H.265 VANGUARD II Series 5.2.5 Manual Alarm Panel You can manually trigger alarm output of the selected channel. R 1. Click on a channel on the Live View window. 2. Click Manual Alarm and then turn on the Local button to manually trigger the alarm output device connected to the DVR; or turn on the IP_CH button to manually trigger the alarm output device connected to the IP camera.
H.265 VANGUARD II Series 5.3 Playback Click the Playback icon on the top navigation bar, the Playback window displays. You can use the Playback window to playback General Recordings or Snapshot Recordings. Up to 4 multi-channel playback is supported. 5.3.1 General Playback You can use this page to search, play back and backup all types of recordings. 1. On the left-side panel, select General from the top dropdown list. 2.
H.265 VANGUARD II Series 5.3.2 Picture Playback You can use this page to search and play back the snapshot images or download the snapshot images or recordings to your computer. 1. On the left-side panel, select Picture from the top dropdown list. 2. Select the date on the calendar (the date with an orange bar on the bottom indicates there are snapshots on the date). 3. Select a time range. 4. Select the desired snapshot type(s). The options include Manual, Normal, Motion, I/O and all. 5.
H.265 VANGUARD II Series 5.3.2.1 Snapshot Playback Mode On the Picture Playback page, double-click on a Snapshot thumbnail can enter the Snapshot Playback Mode. To return to the Picture Playback Page, click the Return button on the Playback Panel. Snapshot Playback Panel 1 2 3 4 5 6 7 10 11 8 9 12 13 14 15 No. Name Description 1 Return Click to return to the Picture Playback Page. 2 Play / Pause Click to start or pause playing back. 3 Stop Click to stop playing back.
H.265 VANGUARD II Series 9 Audio Scroll the slider bar to increase or decrease volume. Fisheye If the snapshot channel is connected with a fisheye camera, the Fisheye icon will appear. Click the Fisheye icon to display the Fisheye panel on the right side. To exit the Fisheye window, click the icon again. On the Fisheye panel, you can select the mounting type based on your fisheye installation, and then you can choose the display mode to suit your needs.
H.265 VANGUARD II Series 5.3.3 Playback Panel You can use the Playback Panel to operate the below functions: 1 2 3 4 5 6 7 8 9 10 11 12 13 14 15 16 17 18 19 No. Name Description 1 Play/Pause Click to Play or Pause playing back. Quad view with separate playback: If multiple channels (up to 4ch) are searched, after clicking the Play button, only the selected channel (channel highlighted with red frame) will be playback.
H.265 VANGUARD II Series Click to take a snapshot (.jpg) of a channel, a message window appears on the bottom-right corner of the screen. Click Folder to open the folder to find the snapshot images. To change the manual snapshot storage path, on the Menu Bar, click setup page. to enter the 6 Snapshot 7 Download Click to download recordings for a single channel. To perform the Download function, please refer to 5.3.4 Download. 8 Playback Speed Click to select a playback speed.
H.265 VANGUARD II Series 15 Digital Zoom Click to enable the Digital Zoom mode. To exit the Digital Zoom mode, click the button again. To perform the Digital Zoom function: a. Select a channel you want to perform the digital zoom by clicking on the channel. b. Click the Digital Zoom button to enable the function. c. Use your mouse to draw an area where you want to have a close-up view on the channel. The area will be zoom-in. d. Right-click to return to the original view.
H.265 VANGUARD II Series 5.3.4 Download You can download the searched recordings for a single channel on the Playback window. 1. Select a channel you want to download the recordings by clicking on the channel. The selected channel will be highlighted with a red frame. 2. Click the Download button, the corresponding recordings to this channel will be displayed. 3. Select the desired recordings you want to download, and then click Start Download.
H.265 VANGUARD II Series Chapter 6 6. Troubleshooting If you have problems with the system, run through the following checklist to see if you can solve the problem. 1. Q: What can I do if the system does not detect the HDD? A: Check if the power supply system is properly connected and power cord and power cables are securely connected, and if something wrong with the HDD interface. Or you may check if your HDD is supported by referring to the specifications or descriptions. 2.
H.265 VANGUARD II Series A: In consideration of the file security, you may not clear part of records. If you want to remove all the records, you can format HDD. 9. Q: Why can’t I log in DVR client? A: Please check if the network connection settings are correct and RJ-45 port is with good contact. And check if your account and password are correctly input. 10. Q: Why can’t I find any records during playback? A: Please check if the data line connection for HDD is OK and system time is properly adjusted.
H.265 VANGUARD II Series Appendix A Appendix A: Push Notification You can enable the Push Notification function to send motion or I/O event alerts to your mobile devices (with eFVMS App installed). To use the Push Notification function, you have to set up the motion detection settings or I/O alarm settings and enable the Push Notification function on the EverFocus eFVMS App. Please refer to the below instructions.
H.265 VANGUARD II Series To enable the Push Notification function: 1. On the DVR end, configure the motion alarm settings (refer to 4.3.1 Motion) or I/O alarm settings (refer to 4.3.2 I/O). 2. On your mobile device, install eFVMS App. For Android users, go to Google Play Store. For iOS users, go to Apple Store. After the installation process is complete, start the eFVMS App. EverFocus eFVMS eFVMS by EverFocus a.
H.265 VANGUARD II Series c. You can tap on the alarms on the Alarm List to enter the Live page or Playback page.
EverFocus Electronics Corp. EverFocus Taiwan: 2F., No.12, Ln. 270, Sec. 3, Beishen Rd., Shenkeng Dist., New Taipei City 222, Taiwan TEL: +886 2 2662 2338 FAX: +886 2 2662 3632 www.everfocus.com.tw marketing@everfocus.com.tw EverFocus China - Shenzhen: 3F, Building 7, Longcheng Industrial Park, No.39, Longguan No.7 Road, Dalang Street, Longhua, Shenzhen, Guangdong, China TEL: +86 755 2765 1313 FAX: +86 755 2765 0337 www.everfocus.com.cn marketing@everfocus.com.