EXCELL PRECISION CO., LTD. DIGITAL HIGH PRECISION WEIGHING SCALES USER INSTRUCTIONS © Excell Precision Limited 2004. All rights reserved Worldwide. The information contained herein is the property of Excell Precision Limited and is supplied without liability for errors or omissions. No part may be reproduced or used except as authorised by contract or other written permission. The copyright and the foregoing restriction on reproduction and use extend to all media in which the information may be embodied.
EXCELL PRECISION CO., LTD. TABLE OF CONTENTS BEFORE USING THE SCALE.....................................................................................................3 PREPARING TO USE THE SCALE.............................................................................................3 INTRODUCTION..........................................................................................................................4 1. FEATURES ........................................................................
EXCELL PRECISION CO., LTD. 2. RELAY OUTPUT .................................................................................................................23 (1) Relay Output..................................................................................................................23 (2) Relay Pin Description ....................................................................................................23 (3) Connection Illustration ...............................................................
EXCELL PRECISION CO., LTD. BEFORE USING THE SCALE To enable you to use this scale correctly, we suggest that you read this manual carefully. 1. Do not use scale in areas with excessive water and don’t spray the scale or indicator with water when cleaning. Remove all water from the scale and indicator with a clean dry cloth. 2. The load placed on the platform must not exceed the maximum weighing capacity of the scale. 3. Keep the scale away from high temperatures and damp conditions. 4.
EXCELL PRECISION CO., LTD. INTRODUCTION 1. FEATURES 1. Dual-weighing units: Kilogram (kg) and pound (lb). 2. Multi-function operation: Full range tare; Pre-tare; Hold function; Net / Gross weight display; Simple counting; Preset weight value and quantity value; Adjustable noise filter setting from 01 ~ 15 (≥15,000 division configuration only); Check-weighing configuration. 3. 4.
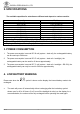
EXCELL PRECISION CO., LTD. 2. SPECIFICATIONS The available capacities for selection are different and depend on various models: Capacity Division 3 kg (6 lb) 0.2 g (0.0005 lb) 6 kg (12 lb) 0.2 g (0.0005 lb) 7.5 kg (15 lb) 0.5 g (0.001 lb) 15 kg (30 lb) 1 g (0.002 lb) 30 kg (60 lb) 2 g (0.005 lb) 75 kg (60 lb) 5 g (0.01 lb) 150 kg (150 lb) 10 g (0.02 lb) 300 kg (600 lb) 20 g (0.05 lb) 600 kg (1200 lb) 50 g (0.
EXCELL PRECISION CO., LTD.
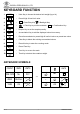
EXCELL PRECISION CO., LTD. KEYBOARD FUNCTION UNITS 1. 2. ^/ 3. 5. Units Key to choose the desired unit weight (kg or lb). : Preset High & Low Limit value. : /↵ 4. : Pcs ∧ ⇒ Data Entry Key, ⇒ Backlight Key. ⇒ Print Key to print the total data ; : ↵ ⇒ Confirmation Key. : Sample Key to set the sample quantity. 6. M+ : Accumulation Key to add the displayed value into memory. 7. R : Re-call accumulated or preset high & low limit values or preset tare value. 8.
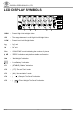
EXCELL PRECISION CO., LTD. OPERATION 1. DISPLAY BACKLIGHT Press the ^/ key to choose the desired display backlight mode: . ⇒ “Auto Backlight” mode. When the weight is over 10 divisions or any key is pressed, the display backlight will be switched on. When the weight returns to zero or the weight on platform is less than 10 divisions, the display backlight will switch off after 5 seconds. . . ⇒ Display backlight is on all the time. ⇒ Display backlight is off. 2.
EXCELL PRECISION CO., LTD. I. Weight Totalising DISPLAY ACTION 6 Place the object onto the scale. The display shows the weight value Press the M+ . kg STABLE . 6 kg STABLE key The display shows the total number of additions The total weight totalised shows and the 3rd “6” 6 flashes on the display . 6 kg STABLE M+ v The totalising function can be used up to a maximum of 9999 times before it must be reset. The totalising display is limited to 6 digits maximum. II.
EXCELL PRECISION CO., LTD. (3). Deduction of the Container Weight I. The weight of the container is unknown ( Tare ) DISPLAY ACTION kg Place the container onto the scale . 6 STABLE T Press the key when the weight is stable. The weight value becomes zero and the (Net) symbol is displayed Place the object into the container and the display shows the net weight value of the object. kg . Net 6 STABLE kg . Net 6 STABLE II.
EXCELL PRECISION CO., LTD. IV. The weight of the container is known (Pre-set tare) Press the PT DESCRIPTION DISPLAY ACTION key kg Use the ∧ key to enter the weight value of the container followed by pressing the ↵ key . 6 STABLE . Net 6 6 kg The display shows the weight value of the container with the negative sign and the (Net) symbol. The second “6” above the (PT) icon indicates the tare is active STABLE PT Place the object with the container onto the weight pan.
EXCELL PRECISION CO., LTD. (4). Check Weighing Press the key to enter the check weighing function. Press the UNITS key to return back to the weighing mode. I. Pre-set the “Low limit value”, “High limit value”, and “the buzzer” operation Press the ^ / key to enter the value required and step to the next digit by pressing the /↵ key. DESCRIPTION DISPLAY ACTION Press the key to select the check weighing function Set the “Low limit value” Press the ∧ key to enter the Low limit value.
EXCELL PRECISION CO., LTD. II. Pre-set the Low limit value only After completing the Low limit value setting, the display shows . key to complete the setting, and the display shows 6 . Press the . kg STABLE When users only pre-set the Low limit value, the buzzer setting is fixed at: v III. High/OK/Low indications LOW OK HIGH ïïïïïïïïïïïïððððððððððð Low limit value 10d High limit value IV. Recall the check weighing setting 1.
EXCELL PRECISION CO., LTD. 4. COUNTING FUNCTION Press the . . . . . . . . . . key to enter the counting function. Press the UNITS key to return back to the weighing mode. (1). Sampling DISPLAY ACTION . . . . . . . . . . Press the key to enter the counting function Pcs 6 STABLE Press Pcs to choose the number of desired items in the sample (10, 20, 50 or 100) Pcs 6 STABLE Place the sample on the scale and press the key . . . . . . . . . .
EXCELL PRECISION CO., LTD. CONFIGURATION SETTINGS Switch on the scale. While the scale is counting backward to zero, press and hold the →0← key until the display shows the software program version number: “ ”. Release the is displayed. →0← key, the scale enters the configuration setting mode.
EXCELL PRECISION CO., LTD. 1. CHECK-WEIGHING CONFIGURATION ♦ F8 (Hold) affects access to F4. Press the ^ / or If F8 is set, access to F4 is denied. key to select the F4 function⇒ the display shows T DESCRIPTION DISPLAY ACTION Press the ↵ key to enter the check weighing configuration Press the ∧ key to enter the low limit value. Press the ↵ key to confirm the setting kg . 6 STABLE . 6 Press the ↵ key for 5 times to clear the configuration settings 6 kg .
EXCELL PRECISION CO., LTD. 2. RS-232 SETTING ♦ J1 and J3 on the RS-232 interface are connected together (short), when the RS-232 interface is connected to a computer. ♦ J2 and J4 on the RS-232 interface arte connected together (short), when the RS-232 interface is connected to a printer.
EXCELL PRECISION CO., LTD. 3. EXIT CONFIGURATION SETTINGS Press the ^ / or ACTION Press the ↵ T key to select the F6 function⇒ the display shows DISPLAY key Scale reverts back to the weighing mode V1.
EXCELL PRECISION CO., LTD. RS-232 AND RELAY OUTPUT 1. RS-232 OR SERIAL PRINTER OUTPUT (1) RS-232 (25 Pin ‘D’ type) Pin Description ˙ J1 - J3 SHORT ; J2 - J4 OPEN (default setting) Pin 2 ⇒ RXD Pin 3 ⇒ TXD Pin 7 ⇒ GND ˙ J2 - J4 SHORT ; J1 - J2 OPEN Pin 2 ⇒ TXD Pin 3 ⇒ RXD Pin 7 ⇒ GND v Please refer to F5 function settings for transmission mode, baud rate setting and data format. (2) RS-232 Interface Format I . Mode : EIA-RS232 C’s II . Format : 1. 2. 3. 4. 5. Start bit V1.
EXCELL PRECISION CO., LTD. (3) Data Format Stable transmission ( ↵ Press the 1 2 HEAD 3 1, ) / Continuous transmission ( key to transmit ( 4 5 HEAD 6 7 8 ) 9 2 , 10 11 12 13 14 15 16 17 18 kg/lb DATA HEAD 1 ( 2 BYTES ) OL Overload , Under load ST Display is Stable US Display is Unstable ) UNIT CR LF HEAD 2 ( 2 BYTES ) TR - TARE Mode NT NET Mode GS GROSS Mode DATA (8 or 9 BYTES) 2D ( HEX ) = “ – ” ( MINUS ) 2E ( HEX ) = “ .
EXCELL PRECISION CO., LTD. Press the ↵ key to transmit (simple mode) S/N WT/UNIT ( kg / lb ) -------------0001 1.0000 E Press the ↵ key or the M+ key 0002 1.0000 E Press the ↵ key or the M+ key 0003 1.0000 E Press the ↵ key or the M+ key 0004 1.0000 E Press the ↵ key or the M+ key 0005 1.0000 -------------- E Press the ↵ key or the M+ key 0005 E Press the ↵ key for 2 times to printout the total 5.
EXCELL PRECISION CO., LTD. EZ-2 printing mode (Baud rate must be set to 9600). Press the ↵ key to transmit (complete mode) TICKET G T PT N NO .0001 1.000kg 0.000kg 0.000kg 1.000kg E Press the ↵ key or the M+ key E Press the ↵ key or the M+ key E Press the ↵ key or the M+ key E Press the ↵ key twice to print out the total (Blank line x 3) TICKET G T PT N NO .0002 1.000kg 0.000kg 0.000kg 1.000kg (Blank line x 3) TICKET G T PT N NO .0003 1.000kg 0.000kg 0.000kg 1.
EXCELL PRECISION CO., LTD. 2. RELAY OUTPUT (1) Relay Output Relay’s function acts as signal output in the check-weighing mode. When an object’s weight value reaches one of the setting points (HI, OK, LOW), the relay outputs a signal through PIN 1, PIN2, or PIN 3. To set the check-weighing configuration by pressing the key (in TW & AW models) or enter F4 (please refer to page 12 or 16 for operations).
EXCELL PRECISION CO., LTD. (4) Power Source Illustration The relay circuit board can be supplied either by the external AC power or internal DC power. • Relay powered by external AC power PIN4 and PIN5 are connected with AC power source; J1 and J2 OPEN ‚ Relay powered by internal DC power No power source input to PIN4 and PIN5; J1 and J2 SHORT (5) Connection Setting OK, High, Low can be set at NO (normal open status) or NC (normal close status) respectively.