
Manual


Table Of Contents
- Certification Information
- 1 Introducing the AXS-100 Series OTDR
- 2 Safety Information
- 3 Getting Started with Your OTDR
- 4 Customizing Your OTDR
- 5 Setting Up Your OTDR
- 6 Testing Fibers
- 7 Managing Test Results
- 8 Using Your OTDR as a Light Source
- 9 Measuring Power or Loss
- 10 Identifying Fiber Faults Visually
- 11 Inspecting Fibers with the FIP
- 12 Testing Network Connections
- 13 Maintenance
- 14 Troubleshooting
- 15 Warranty
- A Technical Specifications
- B Description of Event Types
- Index
Inspecting Fibers with the FIP
OTDR 93
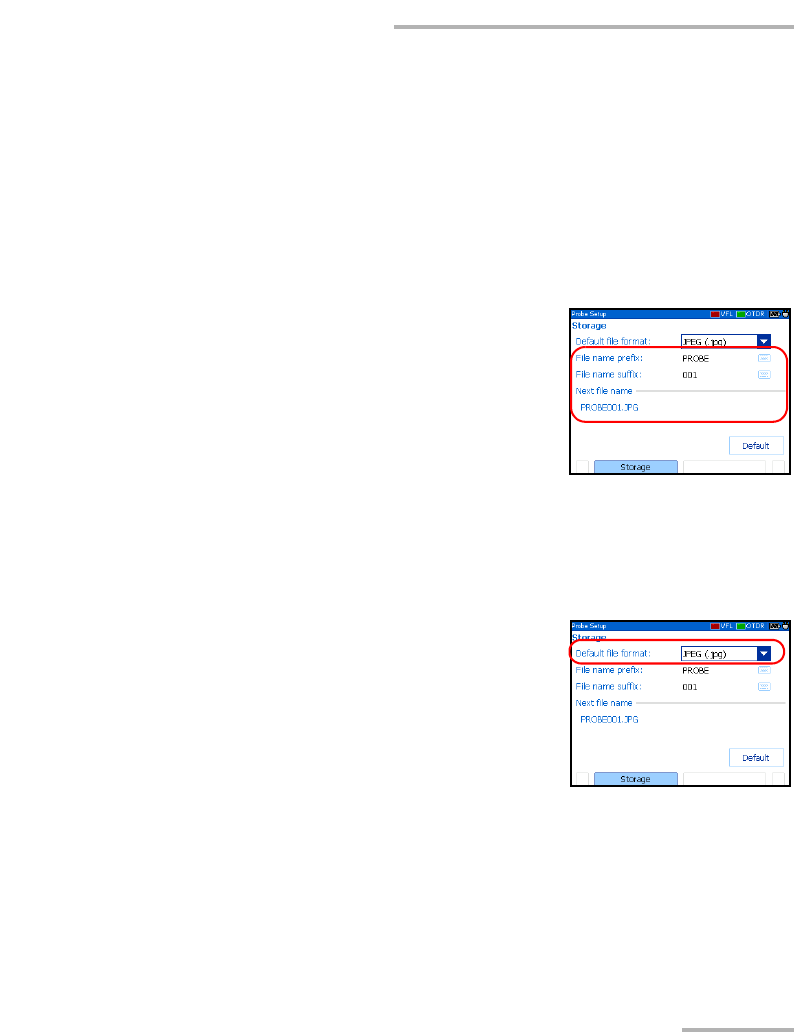
Setting Storage Parameters for Images
Setting Storage Parameters for Images
Each time you save an image, the unit suggests a file name based on
autonaming settings. After saving a file, the unit prepares the next file name
by incrementing the suffix.
File names: maximum 20 characters for prefix, 3 digits for number.
By default, traces are saved in .jpg format, but you can configure your unit
to save them in .bmp format.
To set the probe image autonaming
scheme:
1. Press Menu, select Setup > Probe, and then
press Enter.
2. Use the arrows to select the file name prefix,
or file name suffix.
3. Press Enter to display the on-screen keyboard (for details about using
keyboards, see Using Menus and Keypad on page 13).
4. Set the name/value, and then press OK (F1/F2 key) to hide the
keyboard.
To set the file format:
1. Press Menu, select Setup > Probe, and then
press Enter.
2. Use the arrows to select Default file format,
and then press Enter to open the list.
3. Use the up/down arrows to select the
desired format, and then press Enter to confirm.
To revert the autonaming scheme and file format to the
factory-default settings:
1. Press Menu, select Setup > Probe, and then press Enter.
2. From the Storage pane, use the arrows to select Default, and then
press Enter to confirm.