M216KA / M216KASP For Serial Nos. 440,000 & Higher CONGRATULATIONS on the purchase of your new Exmark mower. This product has been carefully designed and manufactured to give you a maximum amount of dependability and years of trouble–free operation. If additional information is needed, or should you require trained mechanic service, contact your authorized Exmark equipment dealer or distributor.
IMPORTANT When the mower is used or operated on any California forest-, brush- or grass-covered land, a working spark arrester must be attached to the muffler. If not, the operator is violating state law, Section 4442 Public Resource Code. To acquire a spark arrester for your unit, see your Engine Service Dealer. WARNING POTENTIAL HAZARD • This product is a piece of power equipment. WHAT CAN HAPPEN • Failure to follow safe operating practices can result in serious operator injury or even death.
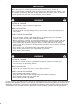
EXMARK PARTS PLUS PROGRAM EFFECTIVE DATE: September 1,1995 Program If your Exmark dealer does not have the Exmark part in stock, Exmark will get the parts to the dealer the next business day or the part will be FREE* Guaranteed!! How the Program Works 1. If dealer does not have part in stock for a "down" unit at the time of request by customer, the dealer contacts his distributor by 1:00 p.m. local time, and requests Exmark Parts Plus shipment of six line items or less. 2.
CONGRATULATIONS on the purchase of your Exmark Mower. This product has been carefully designed and manufactured to give you a maximum amount of dependability and years of trouble-free operation. OPERATOR’S MANUAL This manual contains assembly, operating, maintenance, adjustment and safety instructions for your Exmark mower. BEFORE OPERATING YOUR MOWER, CAREFULLY READ THIS MANUAL IN ITS ENTIRETY.
Contents Specifications . . . . . . . . . . . . . . . . . . . . . . . . . . . . . . . Introduction . . . . . . . . . . . . . . . . . . . . . . . . . . . . . . . . Safety . . . . . . . . . . . . . . . . . . . . . . . . . . . . . . . . . . . . . General Lawn Mower Safety . . . . . . . . . . . . . . . . Exmark Lawn Mower Safety . . . . . . . . . . . . . . . . Safety and Instruction Decals . . . . . . . . . . . . . . . Assembly . . . . . . . . . . . . . . . . . . . . . . . . . . . . . . . . . .
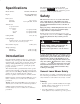
Specifications Model Number: M216KA, M216KASP Engine: Kawasaki 6.0HP OHV 3300 RPM (No load) Fuel System: Capacity: Fuel filter: This manual uses two other words to highlight information. Important calls attention to special mechanical information and Note: emphasizes general information worthy of special attention. Safety This lawn mower meets or exceeds the CPSC blade safety requirements for walk-behind rotary lawn mowers and the B71.
• Never allow adults unfamiliar with these instructions to operate the lawn mower. – If you must drain the fuel from the fuel tank, do it outdoors. • Replace faulty mufflers. • Never mow while people (especially children) or pets are nearby. Stop the lawn mower if anyone enters the area. • Before using, always visually inspect the blades, blade bolts, and cutter assembly for wear or damage. Replace worn or damaged blades and bolts in sets to preserve balance.
– before clearing blockages or unclogging the chute; • Replace worn or damaged parts. – before checking, cleaning, or working on the lawn mower; • Use extra care when handling gasoline; gasoline vapors are explosive. – after striking a foreign object. Inspect the lawn mower for damage and make repairs before starting and operating the lawn mower; and • Never tamper with safety devices. Check their proper operation regularly. • Keep the lawn mower free of grass, leaves, or other debris buildup.
• Do not mow in reverse unless it is absolutely necessary. Always look down and behind before and while backing up. • Keep hands, feet, hair and loose clothing away from the attachment discharge area, the underside of the lawn mower, and any moving parts while the engine is running. • Be aware of the lawn mower discharge direction and do not point it at anyone. Do not operate the lawn mower without either the grass catcher or the guard in place.
Assembly Note: Determine the left and right sides of the machine from the normal operating position. 77-0500 Installing the Handle 1. Mount the handle to the outside of the lawn mower housing (using the bottom hole) with 2 5/16–18 x 1–1/4 in. cap screws, washers, and thin nylon insert locknuts. 2. Secure the handle latches to the handle with 2 cap screws (5/16–18 x 1-1/2 in.), washers, and nylon insert locknuts (Fig. 1). 82-9152 2 3 1 4 98-8017 m-534 Figure 1 1. Handle latch 2.
Installing the Starter Rope 2. Hook the plastic clips on the front of the fuel tank onto the fuel tank bracket (Fig. 3). Pull the starter rope through the rope guide on the handle (Fig. 2). 3. Secure the fuel tank to the tank base with the two self-tapping screws (Fig. 3). Do not overtighten the screws. 4. Remove the red cap from the end of the fuel line and from the end of the elbow fitting on the fuel tank (Fig. 4). 2 1 2 m–210 Figure 2 1. Starter rope 3 2.
2. Since the plug is slightly wider than the discharge tunnel opening, rotate the plug clockwise slightly while inserting it (Fig. 5). Before each use, ensure that the oil level is between the Add and Full marks on the dipstick (Fig. 7). Note: Ensure that the arrow on the plug decal points upward. 3. Push the plug all the way in until the spring clip on the bottom of the plug clicks into place, locking the plug securely into the discharge tunnel (Fig. 6). 2 3 1 m-7277 m-7278 Figure 7 1. Dipstick 2.
Filling the Fuel Tank with Gasoline Danger When fueling, under certain circumstances, a static charge can develop, igniting the gasoline. A fire or explosion from gasoline can burn you and others and damage property. For best results, use clean, fresh, lead-free gasoline with an octane rating of 87 or higher. To ensure freshness, purchase only the quantity of gasoline that you expect to use in 30 days. Using unleaded gasoline results in fewer combustion deposits and longer engine life.
Starting the Engine 3. Fill the fuel tank with unleaded gasoline to within 1/4 to 1/2 inch (6 to 13 mm) from the top of the tank. Do not fill into the filler neck. 1. Connect the wire to the spark plug (Fig. 10). Important Do not fill the tank more than 1/4 inch (6 mm) from the top of the tank because the gasoline must have room to expand. 1 4. Install the fuel tank cap and wipe up any spilled gasoline.
Operating the Blade and the Self-Propel Drive Using the Discharge Tunnel Plug Note: The self-propel features are for the self-propel model only. 1. Stop the engine and wait for all moving parts to stop. 2. Insert the plug; refer to Installing the Discharge Tunnel Plug on page 7. 1. Have the blade control bail in the A position (Fig. 12). 3. To remove the plug, move the discharge door handle rearward and lift up the spring clip on the bottom of the plug.
Mowing with the Grass Bag Using the Grass Bag Occasionally, you may wish to use the grass bag for bagging extra long grass, lush grass, or leaves. Warning A worn grass bag could allow small stones and other similar debris to be thrown in the operator’s or bystander’s direction and result in serious personal injury or death to the operator or bystanders. Installing the Grass Bag 1. Stop the engine and wait for all moving parts to stop. 2.
Operating Tips Cutting Grass • Review the safety instructions and read this manual carefully before operating the lawn mower. • Grass grows at different rates at different times of the year. In the summer heat, it is best to cut grass at the 2 inch (51 mm), 2-1/2 inch (64 mm), or 3 inch (76 mm) cutting height settings. Cut only about a third of the grass blade at a time. Do not cut below the 2 inch (51 mm) setting unless the grass is sparse or it is late fall when grass growth begins to slow down.
Maintenance Note: Determine the left and right sides of the machine from the normal operating position. Recommended Maintenance Schedule Maintenance Service Interval Maintenance Procedure Each Use • Check the engine oil level. • Check the stopping time of the blade brake. The blade must stop within 3 seconds of releasing the bail; if it does not, contact an Authorized Service Dealer for repair. • Remove grass clippings and dirt from under the housing.
Caution If you leave the wire on the spark plug, someone could accidently start the engine and seriously injure you or other bystanders. Disconnect the wire from the spark plug before you do any maintenance. Set the wire aside so that it does not accidently contact the spark plug. Checking the Engine Oil Level Note: The blade will draw in water and wash out clippings. Let the water run until you no longer see clippings being washed out from under the housing.
Cleaning the Discharge Tunnel and Plug 4. Remove the cover and clean it thoroughly (Fig. 18). 5. Remove the paper air filter and discard it as required (Fig. 19). Remove the plug from the discharge tunnel and clean it after each use. 1 Always be sure that the discharge tunnel door closes securely when you release the handle. If the debris prevents the discharge door from closing securely, clean the inside of the discharge tunnel and the door thoroughly.
Inspecting the Blade 6. Raise the left side of the lawn mower to drain the oil into the drain pan. Carefully examine the blade for sharpness and wear, especially where the flat and the curved parts meet (Fig. 21A). Because sand and abrasive material can wear away the metal that connects the flat and curved parts of the blade, check the blade before using the lawn mower. If you notice a slot or wear (Figs. 21B and 21C), replace the blade; refer to Removing the Blade on page 17.
Sharpening the Blade 3. Connect the wire to the spark plug. File the top side of the blade to maintain its original cutting angle (Fig. 22A) and inner cutting edge radius (Fig. 22B). The blade will remain balanced if you remove the same amount of material from both cutting edges. Emptying the Fuel Tank and Cleaning the Fuel Filter A B 1 The fuel filter (screen) element is located inside the fuel tank. Clean the fuel filter element every 100 operating hours. 2 1.
2. Rotate the control knob clockwise / turn if the lawn mower does not self-propel. If the lawn mower creeps forward, rotate the knob / turn counterclockwise to loosen the belt (Fig. 26). 4. Lift off the cover and brush out all the debris around the belt area. 5. Install the belt cover. 6. Connect the wire to the spark plug. Lubricating the Pivot Arms Self-propel Model only After every 50 operating hours or when the season ends, lubricate the pivot arms. 1.
Servicing the Spark Plug Warning Check the spark plug after every 100 operating hours. Use an NGK BPR5ES spark plug or equivalent. Oil may be hot after the engine has been run, and contact with hot oil can cause sever personal injury. 1. Stop the engine and wait for all moving parts to stop. 2. Disconnect the wire from the spark plug (Fig. 10). Avoid contacting the hot engine oil when you drain it. 3. Clean around the spark plug. 4. Remove the spark plug from the cylinder head. 2.
Lubricating the Gear Case Hand-push Model only A. Loosen the jam nut on the blade brake cable (Fig. 32). After every 100 operating hours, grease the gear case. 1. Remove the grass bag. 1 2. Install a grease gun onto the fitting through the belt cover opening (Fig. 31). 1 2 2 3 4 6 5 483 Figure 32 1. Handle 2. Brake lever 3. 3/16 to 1/4 in. (5 to 6 mm) m-224 Figure 31 1. Belt cover 4. Cable adjuster 5. Jam nut 6. cable conduit 2. Grease fitting B. Insert a 3/16 to 1/4 in.
Servicing the Wheels 6. Install the 2 cap screws and 2 locknuts previously removed in the remaining holes in the wheel halves and tighten. Remove the 2 long screws or bolts and replace them with 2 cap screws and 2 locknuts (Fig. 34). Removing the Wheels 1. Stop the engine and wait for all moving parts to stop. 7. Install the wheel to the pivot arm with the cap screws, a spacer, and a locknut. Ensure that the spacer is positioned between the wheel hub and the pivot arm (Fig. 34). 2.
Preparing the Engine Removing the Lawn Mower from Storage 1. While the engine is still warm, change the oil from the crankcase. Refer to Changing the Engine Oil on page 16. 1. Check and tighten all fasteners. 2. Remove the spark plug and spin the engine rapidly using the starter to blow excess oil from the cylinder. 2. Remove the spark plug (Fig. 10). 3. Using an oil can, add about one tablespoon of oil to the crankcase through the spark plug hole. 3.
Troubleshooting Exmark designed and built your lawn mower for trouble-free operation. Check the following components and items carefully, and refer to Maintenance on page 14 for more information. If a problem continues, contact an Authorized Service Dealer. Problem Engine does not start Engine starts hard or loses power Engine runs rough Possible Causes Corrective Action 1. The fuel tank is empty or the fuel system contains stale fuel. 1. Drain and/or fill the fuel tank with fresh gasoline.
Problem Lawn mower or engine vibrates excessively Uneven cutting pattern Discharge chute plugs Lawn mower does not self-propel (Self-propel model only) Possible Causes Corrective Action 1. The blade is bent or is out of balance. 1. Balance the blade. If the blade is bent, replace it. 2. The blade mounting bolt is loose. 2. Tighten the blade mounting bolt. 3. The underside of the lawn mower deck contains clippings and debris. 3. Clean the underside of the lawn mower deck. 4.
Limited Warranty Exmark Turf Equipment Conditions and Products Covered Exmark Mfg. Co. Inc. and its affiliate, Exmark Warranty Company, pursuant to an agreement between them, jointly warrant on the terms and conditions herein, that we will repair, replace or adjust any part manufactured by Exmark and found by us (in the exercise of our reasonable discretion) to be defective in factory materials or workmanship. This warranty applies to Exmark turf equipment sold in the US or Canada.
SERVICE RECORD Date Description Work Done Service Done By
SEE EXMARK’S COMPLETE LINE OF PRODUCTS FOR TURF CARE LAZER Z LAZER Z HP LAZER Z XP LAZER Z CT TURF RANGER TURF TRACER TURF TRACER HP VIKING HYDRO METRO METRO HP ULTRA VAC ULTRA VAC QDS GRASS CATCHER SELF STEERING SULKY MICRO-MULCH ACCESSORY Warning CALIFORNIA Proposition 65 Warning The engine exhaust from this product contains chemicals known to the State of California to cause cancer, birth defects, or other reproductive harm. 2003 EXMARK MFG. CO. INC.