
Owner's manual
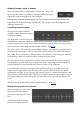


Buffer size controls
These controls together set the size of the record-
ing buffer.
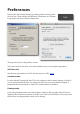
The first control ‘Size’ simply sets the buffer size
in seconds. The range of this control is a prefer-
ences setting - see below.
The ‘Sync’ control has four settings - ‘Off’, ‘Off (Adaptive)’, ‘On’ and ‘On (Adaptive)’.
In the ‘Off’ modes, the buffer size is set via the ‘Size’ control. In the ‘On’ modes, the re-
maining controls set the buffer size in terms of the host’s tempo. ‘Divisor’ chooses a beat
length to use as the basis for the size (e.g. a setting of 1/4 chooses quarter notes) and the
‘Beats’ control sets how many of those beats to use for the buffer length. ‘Triplet’ modifies
the chosen beat length to its triplet version.
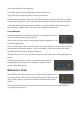
The ‘(Adaptive)’ modes take into account the loop start, end and crossfade settings, so that
the net length of the loop, rather than the actual buffer size, matches the size chosen with
the size or beats controls.
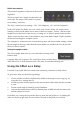
Saving the sample to disk
The ‘Save Sample’ button lets you save the audio currently in the
buffer to disk.
Currently there are no options. The saved file is always a 24 bit stereo
AIFF (Mac OS X) or WAV (Windows) file. The audio is normalised during save.
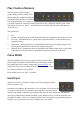
Using the E"ect as a Delay
Crossfade Loop Synth Effect can create some interesting variations on delay effects.
To get a basic delay, try the following settings:
•
Choose a buffer size that is rhythmically related to the tempo of your song (e.g. by
using the ‘Sync’ settings above).
•
Set the loop start and end points to the start and end of the buffer, and the crossfade
to zero.
•
Set the record mode to Gated By Notes With Reset.
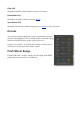
•
Activate the middle drone (which by default plays at MIDI note 60, the same as the
default sample root note).
From there, try varying the loop mode, the loop start and end points etc. Try adding the
other two drones to get audio an octave below and above the pitch you recorded.