
User Manual


10
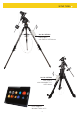
EXPLORE STARS APP
Welcome to ExploreStars!
Designed specifically for the PMC-Eight™, the intuitive ExploreStars app will streamline your
observing experience by making it easy to align your equipment, navigate the stars and learn specifics
about tens of thousands of celestial objects. It also leaves room for manual operation.
Installing The ExploreStars APP
The free ExploreStars application can be downloaded from the Windows app store onto your Windows
device. Once you install ExploreStars, you will need to download the object database that provides the
content for the application. To do this, go to
www.explorestars.com
and follow the instructions on the
website to download the extensive object database.
Operating The ExploreStars APP
When you first open ExploreStars, you will need to make sure your location (latitude and longitude),
date/time and other vital information are correct.
1. Go to the menu in the upper left corner of the screen, open Settings and select Preferences. If the
latitude and longitude coordinates or the date/time for your current location are not correct,
update the information in the appropriate boxes.
2. You will then need to select your mount — Losmandy G-11 or Exos II — in order to ensure that the
step counts for both Right Ascension and Declination are correct.
Once these preferences are set, exit to the home screen. On the right, you will see the manual control
buttons that are used to select speed and motion direction. The top menu bar will have your object
catalogs. The bottom menu bar will have alignment options.
Alignment
After confirming your preferences, you will need to perform an alignment to ensure that the
telescope, the PMC-Eight™ system and the sky are in sync. The ExploreStars application has three
options for aligning your system — 2 Star Alignment, 3 Star Alignment and Alignment Tour. To start
the alignment process, press or click on the “Reset Alignment” button in the lower right corner of the
home screen and then select your preferred alignment option from the list in the bottom left.
To Perform A 2 Star Alignment:
1. Select the 2 Star Alignment option from the bottom menu bar. The app will pull up a suggested
target that should be the first visible alignment star closest to the western horizon. If this star is
not visible, select “Try Next Star,” and the program will bring up another choice.
2. Once it pulls up a star that is visible from your location, select “Align to this Star.” This will bring
up the alignment screen.
3. At this point, you will need to center the target star in your eyepiece. Using the buttons on the
right side of the screen, you can move the telescope up, down, left and right. The numbers are
used to determine motor speed with 0 being the slowest and 9 being the fastest. During this
centering process, you should probably make bigger adjustments using a speed in the 3 to 5 range
and then fine tune using the 1 or 2 speeds. The higher speeds (6-9) are for larger movements, so
they will not be useful during this part of the alignment process.
4. Once you have centered the selected star in the eyepiece, press or click on “Sync,” which is located
under the number 7.
5. After you have synced to this star, the display will show you the next available star and you can
begin the same process with the second star. Based on your first selection, the program will select
the next star beginning on the eastern horizon. If this selection is not visible, select “Try Next Star”
until you arrive at a target that will work.
NOTE: The 3 Star Alignment and Alignment Tour Options Follow The Same Process Only
With An Extra Star To Align To.