
User manual


Because the designs of computers are different, only general installation instructions are
given. Please refer your computer’s reference manual whenever in doubt.
1. Connect the USB cable to the USB B Connector of the module.
2. Now connect the other end from the USB cable ( A-Plug) to the A-Connector at
your PC.
HARDWARE INSTALLATION :
6 5
EXEXEX
-
-
-134513451345
EnglishEnglishEnglish
EXEXEX
-
-
-134513451345
EnglishEnglishEnglish
1
Die EX-1345 USB zu Parallel ist zur Umsetzung von USB auf Parallele Schnitt-
stelle für den Anschluss von Drucker geeignet. Wird im Betriebssystem Windows
als „USB Drucker Unterstützung“ installiert. Die EX-1345 ist Hot Plug & Play
fähig. Für die Einstellungen der I/O Adressen und Interrupts sind keine Jumper
und Einstellungen notwendig. Sie werden vom System und beim Installieren des
Betriebssystems automatisch vorgenommen.
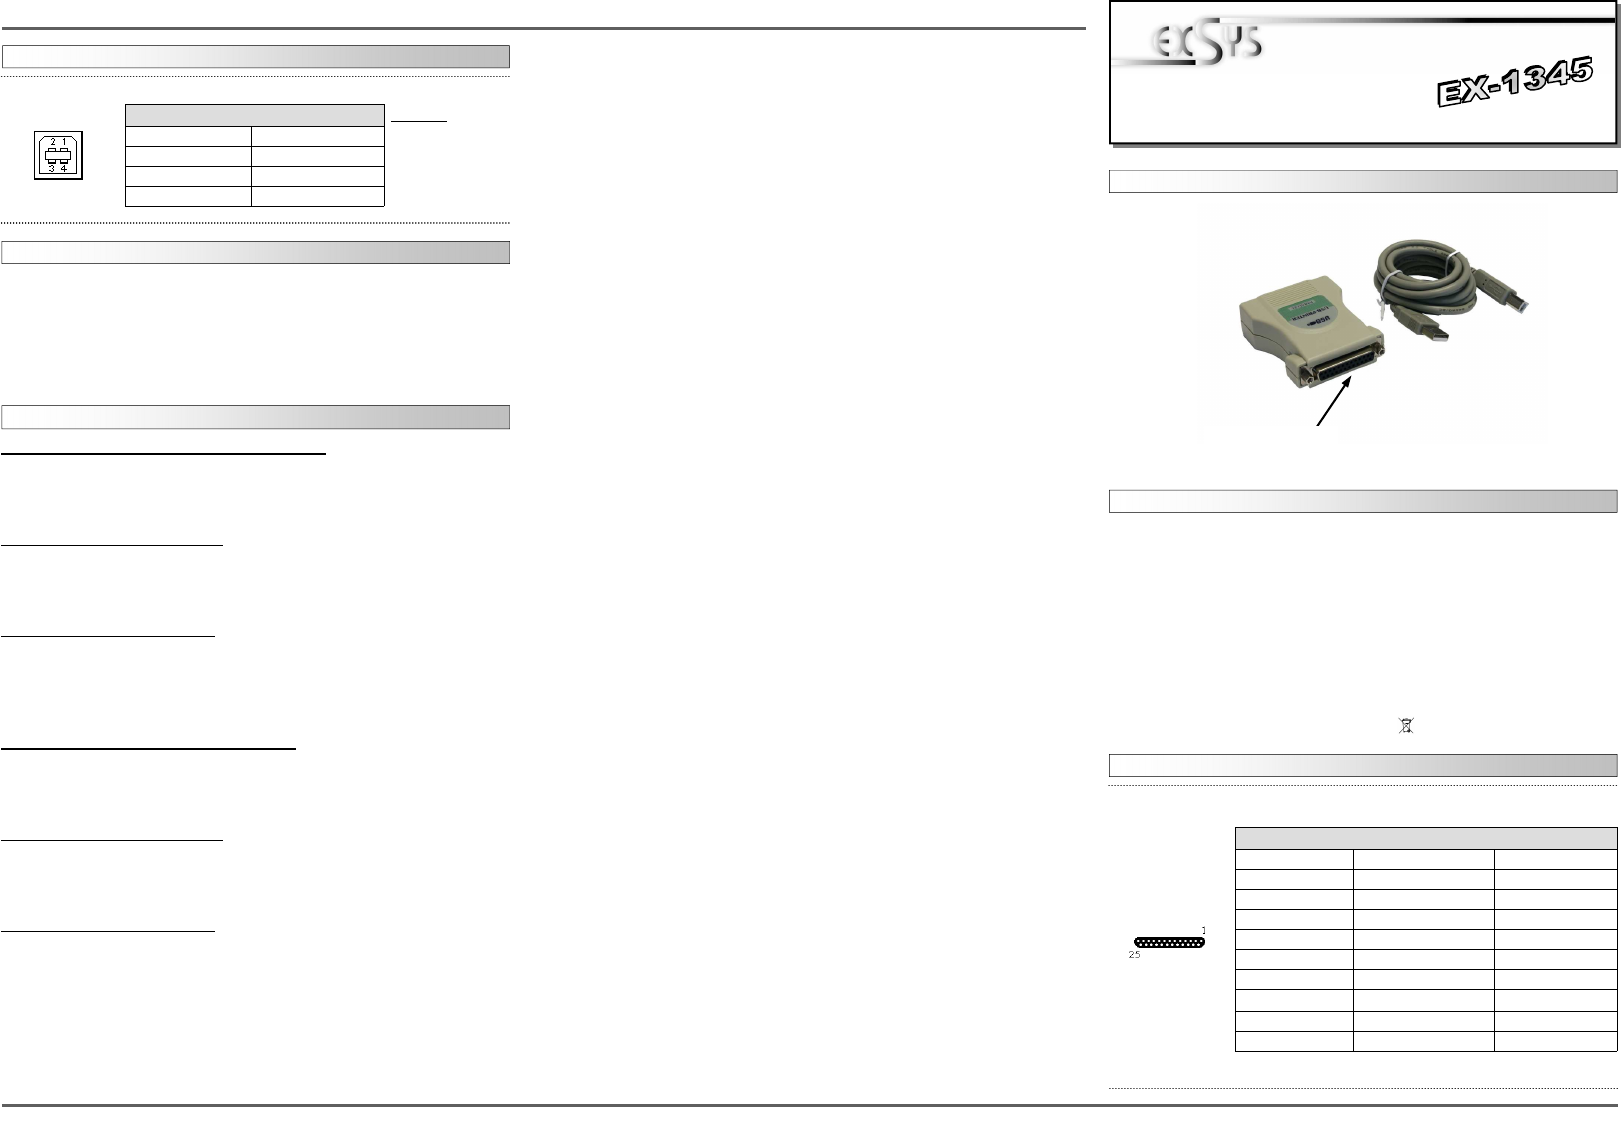
BESCHREIBUNG & TECHNISCHE DATEN :
AUFBAU :
Kompatibilität: USB 1.1 & 2.0 Anschluss
Betriebssysteme: WIN XP/Server 2003/Vista/Win 7/MAC
Anschlüsse: 25 Pin Sub-D Buchse, 1 x USB B-Buchse
Lieferumfang: 1 x EX-1345, Anleitung, CD, USB Kabel
Zertifikate:
CE
CECE
CE
/ FCC / RoHS / WEEE DE97424562
DRIVER INSTALLATION :
JUMPER EINSTELLUNG & ANSCHLÜSSE:
Windows XP and Server 2003 (32 & 64-bit):
Windows will recognize a new “USB Parallel Device“ and open the hardware assistant.
Windows will recognize the device automatically and install it. Follow the hardware
assistant and finish the installation. Restart Windows in any case after installing the
drivers.
CHECK THE INSTALLED DRIVER:
Click at Start<>Run< then enter “compmgmt.msc“ and click at >OK<. In the windows
that open select >Device Manager<. And open „Universal Serial Bus Controller“ you
should find the entry „USB Parallel Converter“. If you see this or similar entries the
module is installed correctly.
INSTALL THE PRINTER DEVICE:
To install a printer please proceed with the following steps:
Click at >Start< >Settings< >Printer and Fax devices< >Add printer< >Next< >Local
printer<. Select one of the new ports “USB 001 or USB 002 (Virtual printer port for
USB)” to install a new printer to the module. Now follow the Hardware assistant to
complete the Installation of your printer.
Windows Vista and Win 7 (32 & 64-bit):
Windows will recognize a new “USB Parallel Device“ and open the hardware assistant.
Windows will recognize the device automatically and install it. Follow the hardware
assistant and finish the installation. Restart Windows in any case after installing the
drivers.
CHECK THE INSTALLED DRIVER:
Click at the “Start Windows Logo< then enter “compmgmt.msc“ at the “search box”
and select it on the top under “Programs”. In the windows that open select >Device
Manager<. And open „USB Controller“ there you should find the entry „USB Parallel
Converter“. If you see this or similar entries the module is installed correctly.
INSTALL THE PRINTER DEVICE:
To install a printer please proceed with the following steps:
Click at >Start< >Settings< >Printer and Fax devices< >Add printer< >Next< >Local
printer<. Select one of the new ports “USB 001 or USB 002 (Virtual printer port for
USB)” to install a new printer to the module. Now follow the Hardware assistant to
complete the Installation of your printer.
BedienungsanleitungBedienungsanleitung
Vers. 1.0 / 19.09.12
JUMPER SETTING & CONNECTORS:
P1
25 Pin Buchse
Parallel Port
Pin Signal Pin Signal Pin Signal
1 STROBE 10 ACKNOWLEDGE 19 GROUND
2 DATA 0 11 BUSY 20 GROUND
3 DATA 1 12 PAPER EMPTY 21 GROUND
4 DATA 2 13 SELECT 22 GROUND
5 DATA 3 14 AUTO FEED 23 GROUND
6 DATA 4 15 ERROR 24 GROUND
7 DATA 5 16 INIT 25 GROUND
8 DATA 6 17 SELECT INPUT
9 DATA 7 18 GROUND
Parallel 25 Pin Buchse :
DB 25F:
USB B-Connector:
USB 2.0 B-Connector:
Pin Signal Pin Signal
1 VCC 4 GND
2 DATA-
3 DATA+
Attention!
Never plug in with
force or in wrong
direction.