
manual


4-Port SATA3 RAID/HyperDuo PCIe(x2) Card
8
7. When completed, you can see the new array under
Topology\Virtual Disks.
8. Save the Settings and Exit. After you complete the RAID
configuration and before you exit the configuration screen, be
sure to press <F10> in the main screen. Press <Y> to confirm or <N>
to cancel.
9. Now, you may proceed to create the SATA driver diskette (for
AHCI mode) and the installation of the SATA driver and operating
system
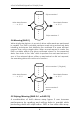
6.2 Delete the Disk Array:
To deleted the existing array, select the array on the main menu
(example: VD 0: New_VD) and press <Enter> to display the Delete
option. Press <Enter>. When prompted, press <Y> to confirm or <N> to
cancel.
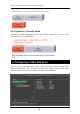
With the Marvell Storage Utility (RAID GUI), you can setup a disk array
or view the current array status in the operating system. Before
installing the MSU utility, you have to install the drivers first, the
Windows Hardware Installing Wizard will invoke the drivers when you
first time power up the system with the RAID card installed in the PCIe
slot, you need to insert the supplied driver CD (folders as the following
picture), and browse to the correct folder to complete the
installation.
Please follow the following steps:
1. While Windows Hardware Wizard asking for the drivers, browse to
the correct folder \SATA3\88SE9230\Drivers\amd64 (or i386 for
32-bit Windows) to install the RAID drivers
7. Installing RAID Drivers and GUI (MSU)
For 64-bit Windows
Platforms
For 32-bit Windows
Platforms