
User Guide
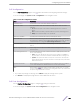

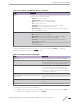
Table Of Contents
- Table of Contents
- Preface
- 1: Getting Started
- 2: Getting Started with Stacking
- Understanding Switch Stacks
- Switch Stack Software Compatibility Recommendations
- Incompatible Software and Stack Member Image Upgrades
- Switch Stack Configuration Files
- Switch Stack Management Connectivity
- General Practices
- Initial Installation and Power-up of a Stack
- Removing a Unit from the Stack
- Adding a Unit to an Operating Stack
- Replacing the Stack Member with a New Unit
- Renumbering Stack Members
- Moving a Manager to a Different Unit in the Stack
- Removing a Manager Unit from an Operating Stack
- Initiating a Warm Failover of the Manager Unit
- Merging Two Operational Stacks
- Preconfiguration
- 3: Configuring System Information
- Viewing the Dashboard
- Viewing ARP Cache
- Viewing Inventory Information
- Viewing MAC Addresses
- Viewing System Resources
- Defining General Device Information
- System Description
- Switch Configuration
- IP Address Conflict Detection
- Service Port IPv4
- Service Port IPv6
- Service Port IPv6 Neighbors
- Network Port DHCPv6 Client Statistics
- Network Connectivity Configuration
- Network Port IPv6 Neighbors
- DHCP Client Options
- System Connectivity
- Telnet Session
- Outbound Telnet Configuration
- Serial Port Configuration
- CLI Banner Configuration
- HTTP Configuration
- HTTPS Configuration
- SSH Configuration
- Management Access Control and Administration List
- User Accounts
- Authentication Server Users
- User Domain Name
- Accounting List Configuration: Accounting List
- Accounting List Configuration: Accounting Selection
- Authentication List Summary
- Select Authentication List
- Authorization List Configuration
- Line Password
- Enable Password
- Password Rules
- Last Password Result
- Denial of Service
- Managing the DHCP Server
- Configuring DNS
- Configuring Email Alerts
- Configuring and Viewing ISDP Information
- Configuring Link Dependency
- Configuring Link Local Protocol Filtering
- Configuring sFlow
- Configuring SNTP Settings
- Configuring Time Ranges
- Configuring the Time Zone
- Managing SNMP Traps
- Managing CPU Traffic Filters
- Viewing the System Firmware Status
- Managing Logs
- Configuring and Searching the Forwarding Database
- Configuring Power Over Ethernet (PoE) and PoE Statistics
- Viewing Device Port Information
- Configuring and Viewing Device Slot Information
- Defining SNMP Parameters
- Viewing System Statistics
- Using System Utilities
- 4: Configuring Switching Information
- Managing VLANs
- Configuring UDLD
- Private VLAN
- Voice VLAN Configuration
- Voice VLAN Interface
- Port Auto Recovery
- Creating MAC Filters
- Configuring Dynamic ARP Inspection
- GARP Configuration
- Configuring DHCP Snooping
- Global DHCP Snooping Configuration
- DHCP Snooping VLAN Configuration
- DHCP Snooping Interface Configuration
- DHCP Snooping Static Bindings
- DHCP Snooping Dynamic Bindings
- DHCP Snooping Persistent Configuration
- DHCP Snooping Statistics
- DHCP L2 Relay Global Configuration
- DHCP L2 Relay Interface Configuration
- DHCP L2 Relay VLAN Configuration
- DHCP L2 Relay Interface Statistics
- Configuring IPv6 DHCP Snooping
- Configuring IGMP Snooping
- Configuring IGMP Snooping Querier
- Configuring MLD Snooping
- Configuring MLD Snooping Querier
- Creating Port Channels
- Viewing Multicast Forwarding Database Information
- Multicast VLAN Registration
- Configuring Protected Ports
- Configuring Spanning Tree Protocol
- Mapping 802.1p Priority
- Configuring Port Security
- Managing LLDP
- Loop Protection
- Multiple Registration Protocol Configuration
- 5: Configuring Routing
- 6: Managing Device Security
- 7: Configuring IPv6
- 8: Configuring Quality of Service
- A: Configuration Examples
- Configuring VLANs
- Configuring Multiple Spanning Tree Protocol
- Configuring VLAN Routing
- Configuring 802.1X Network Access Control
- Configuring Authentication Tiering
- Configuring Differentiated Services for VoIP
- IGMP and MLD Snooping Switches
- Configuring Port Mirroring
- Bidirectional Forwarding Detection
- Glossary
- Index

Table 108: PoE Port Configuration Fields (continued)
Field Description
Status The status of the port as a provider of PoE. Such devices are referred to as PSE.
The status can be one of the following:
•
Disabled: The PSE is disabled.
•
Delivering Power: The PSE is delivering power.
•
Fault: The PSE has experienced a fault condition.
•
Test: The PSE is in test mode.
•
Other Fault: The PSE has experienced a variable error condition.
•
Searching: The PSE is transitioning between states.
•
Requesting Power: The PSE is currently not able to deliver power because
power is unavailable to the port.
Fault Status The error when PSE port is in fault status, which can be one of the following:
•
None: PSE port is not in any error state.
•
MPS Absent: PSE port has detected absence of main power supply.
•
Short: PSE port has detected a short circuit condition.
•
Overload: PD connected to PSE port tried to draw more power than
permissible by the hardware.
•
Power Denied: PSE port has been denied power due to administrative action
or shortage of power.
To display additional PoE interface information, select an entry and click Details. The following
information describes the fields in the Details window.
Table 109: PoE Port Entry Details Fields
Field Description
High Power Whether high power mode is enabled or disabled.
Max Power If Power Limit Type for the port is set to User (user
defined), this field displays the configured power limit. If
Power Limit Type is set to Class, this field is blank.
Class If Power Limit Type is set to Class, this field displays the
class of the connected device, as learned in LLDP
messages. Possible values are Unknown and Class 0
through Class 4. A higher class value indicates that the
device requires higher power.
Output Voltage The voltage being applied to the connected device.
Output Current The current in milliamps being drawn by the powered
device.
Output Power The power in mWatts being drawn by the connected
device.
Temperature The temperature measured at the PoE port.
Use the buttons to perform the following tasks:
•
To configure the settings for one or more interfaces, select each entry to modify and click Edit.
•
To apply the same settings to all interfaces, click Edit All.
Configuring
System Information
ExtremeSwitching 200 Series: Administration Guide for version 1.02.04.0007 124