ExtremeLocation Quick Start Guide 9036447-00 Rev AB Published September 2019
Copyright © 2019 Extreme Networks, Inc. All rights reserved. Legal Notice Extreme Networks, Inc. reserves the right to make changes in specifications and other information contained in this document and its website without prior notice. The reader should in all cases consult representatives of Extreme Networks to determine whether any such changes have been made. The hardware, firmware, software or any specifications described or referred to in this document are subject to change without notice.
Table of Contents Preface......................................................................................................................................... 4 Conventions............................................................................................................................................................................. 4 Providing Feedback to Us........................................................................................................................................
Preface ExtremeLocation is a massively scalable, enterprise grade, resilient, cloud-based location and analytics solutions from Extreme Networks. With real-time location and analytics, you can engage with your customers providing personalized experience for guests and visitors. ExtremeLocation can also be used to monitor your work flows and assets to improve your overall operation and efficiency.
Preface Table 1: Notice Icons (continued) Icon New! Notice Type Alerts you to... Caution Risk of personal injury, system damage, or loss of data. Warning Risk of severe personal injury. New Content Displayed next to new content. This is searchable text within the PDF. Table 2: Text Conventions Convention Description Screen displays This typeface indicates command syntax, or represents information as it appears on the screen.
Preface Extreme Portal Search the GTAC (Global Technical Assistance Center) knowledge base, manage support cases and service contracts, download software, and obtain product licensing, training, and certifications. The Hub A forum for Extreme Networks customers to connect with one another, answer questions, and share ideas and feedback. This community is monitored by Extreme Networks employees, but is not intended to replace specific guidance from GTAC.
Preface Training Extreme Networks offers product training courses, both online and in person, as well as specialized certifications. For more information, visit www.extremenetworks.com/education/.
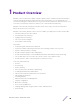
1 Product Overview ExtremeLocation is a massively scalable, enterprise grade, resilient, cloud-based location and analytics solutions from Extreme Networks. With real-time location and analytics, you can engage with your customers providing personalized experience for guests and visitors. ExtremeLocation can also be used to monitor your work flows and assets to improve your overall operation and efficiency.
Product Overview • • Vertical Customization Integrating with ExtremeCloud and ExtremeCloud Appliance ExtremeLocation Quick Start Guide 9
2 ExtremeLocation Quick Setup Before You Start Step 1: Create the ExtremeLocation Account Step 2: Activate the ExtremeLocation Account Step 3: Generate and Apply the License Step 4: Configure the Access Points Step 5: Configure a Category Step 6: Configure the ExtremeLocation Service Step 7: Create your First Experience Step 8: Configure the ExtremeLocation Dashboard Step 9 (Optional): Device Classification Introduction ExtremeLocation can be deployed as a stand alone installation or in a mixed environment
ExtremeLocation Quick Setup 2 Apply the license to your account. Once you have applied the license to your ExtremeLocation account, do the following: 1 Configure the Access Points. 2 Configure the Extreme Location Service and its Dashboard.
ExtremeLocation Quick Setup 1 Click on the Sign up link below the Login button. The Sign Up screen loads. Figure 1: Sign Up Window 2 Enter a valid name for this account in the Name field. This is a mandatory field. 3 Enter a valid email id in the Email ID field. This email ID will serve as the log in user name for this account with ExtremeLocation. This is a mandatory field.
ExtremeLocation Quick Setup 4 From the Industry drop-down list, select one of the listed industry verticals. If your industry is not listed here, choose Others. When you select an industry vertical from this list, some of the terms used in ExtremeLocation are customzied to display terms that are used in the selected industry. For more information on fine-tuning ExtremeLocation for your industry vertical, see the topic Vertical Customization on page 61. Note You can change this customization anytime.
ExtremeLocation Quick Setup account. From that email, select the activation link. You are directed to ExtremeLocation's log in page. You cannot use your account without activating it through the link sent to your registered email ID. Use the registered email ID and the system generated password for your new account (sent to you by email to your registered email ID) to log in to ExtremeLocation. The ExtremeLocation Server URL is: • https://manage.extremelocation.
ExtremeLocation Quick Setup Figure 2: ExtremeLocation Log In Screen To successfully log in, you should have the credentials that were sent to you at the time you signed up with ExtremeLocation. Your User Id will be the email ID that you registered with. To log in to ExtremeLocation: 1 Provide the user name in the User Id field (typically the email ID that you registered with). 2 Provide the password for the user name in the Password field.
ExtremeLocation Quick Setup 7 Select Change Password to save your changed password. Select Back at any time to exit without changing your password. The ExtremeLocation Dashboard displays. You have successfully logged in to your account. Since this is the first log in, no licenses are available for this account. The following message is displayed: Figure 3: No License Message You must purchase and add licenses to your ExtremeLocation account before you can use it.
ExtremeLocation Quick Setup Generate License You should have the credentials to log in to the Extreme Networks License Portal. If you do not have the credentials, please use the Extreme Networks License Portal - New Accounts link to create your credentials for the License Portal. You should also have the following information at hand to create the license: • The account number of your ExtremeLocation account. • The Voucher ID received from Extreme Networks sent at the time of purchase of the subscription.
ExtremeLocation Quick Setup 3 Select Log In to enter the License Portal. If the correct credentials are provided, the following screen appears. Figure 5: License Portal Welcome Screen An error message is displayed if wrong credentials are provided. To retrieve a forgotten password or to reset it, select the Reset Password/Forgot Password link at the bottom of the log in screen. 4 Select Generate License. The following dialog appears.
ExtremeLocation Quick Setup 6 Select Next. The following screen appears. Figure 7: Activate Voucher Screen 7 Enter the ExtremeLocation account number in the HW Serial Number text box. 8 Select the You must check this box... check box to agree to the terms and conditions of the service. We recommend that you select the Terms & Conditions link to read the service's Terms and Conditions before creating your license. 9 Select Submit to create the license.
ExtremeLocation Quick Setup 10 To view the license string, select the appropriate Voucher ID in the table at the bottom of the main screen. You can use the filter controls to limit the number of rows displayed in this table. Figure 8: License Portal Welcome Screen The screen refreshes to display detailed information about the selected Voucher ID. 11 Use the Copy link to copy the License Key to the PCs clipboard.
ExtremeLocation Quick Setup Figure 9: ExtremeLocation Login Screen To log in into ExtremeLocation: 1 Provide the user name in the User Id field (typically the email ID that you registered with). 2 Provide the password for the user name in the Password field. 3 Select the Login button to login to the ExtremeLocation user interface. AP License AP Licenses are required for you to use ExtremeLocation locationing services.
ExtremeLocation Quick Setup This dialog displays the following information: 4 Field Description Total Displays the total number of available licenses for this account. For a new account - without any licenses - this value is zero. Used Displays the number of licenses in use out of those available as shown in the Total field. For a new account, this value is zero. Expiry Date Displays the date on which the license expires.
ExtremeLocation Quick Setup Field Description Enter License Key Paste the license key in this space. Ensure that you do not inadvertently paste any non-printable characters in this space. 5 Select Apply to apply the license key. If the license is valid for this account, the license is added to the list of licenses available for this account. The table displays a list of all licenses (valid and expired) for this account.
ExtremeLocation Quick Setup Licenses in this screen are classified as Active and Pending. All active licenses - short visit and long visit licenses - are displayed within this heading. At any time, only one (1) short visit license and one (1) long visit license can be active. The Pending heading lists all short visit and long visit licenses that are added to this account but are yet to be activated.
ExtremeLocation Quick Setup 3 Field Description Used Displays the number of licenses used till now. When this value reaches the value in the Limit column, the license becomes inactive and service is stopped. You must add a license of the same type to continue using ExtremeLocation service. Import Date Displays the date on which the license was imported into this account. Expiry Date Displays the expiry date for this license. Unused licenses cannot be used after the license expires.
ExtremeLocation Quick Setup 1 Select Settings from the main menu. 2 Select License from the sub menu. 3 Select Asset from the Licensesub menu. If you have already accepted the terms of the Asset Tracking License, the License Details pane displays. Figure 10: License Details screen Note You cannot modify any fields in this screen This screen displays the following information: Field Description Total Displays the total number of available licenses for this account.
ExtremeLocation Quick Setup Figure 11: Asset Tracking License Agreement screen Please read and understand the Asset Tracking License Agreement displayed in the window. Select Terms and Conditions link to open the terms of service for ExtremeLocation. This is a PDF file that opens in a separate tab or window of your browser. Important Please read and understand the Terms and Conditions for using the ExtremeLocation service.
ExtremeLocation Quick Setup Step 4: Configure the Access Points ExtremeWireless WiNG Access Points The following ExtremeWireless WiNG access points are supported by ExtremeLocation. AP7522 AP7532 AP7562 AP7602 AP7622 AP7612 AP7632 AP7662 AP8432 AP8533 • • • • • • • • • • Note It is assumed that you have a running WiNG instance and have access to configure the required WiNG devices.
ExtremeLocation Quick Setup • • • • Add or update the Sensor Policy configuration. Set the Location Server Configuration. Set the Extreme AirDefense Server Configuration. Set the Country of Operation. 3 Set the Radio mode in the device's profile: • Configure a radio to be a dedicated sensor or multitask as a sensor along with sending and receiving traffic.
ExtremeLocation Quick Setup Note To successfully import access points into your ExtremeLocation managed sites, the access points must be online and must be reporting to ExtremeLocation.
ExtremeLocation Quick Setup Categories ExtremeLocation enables you to categorize your physical areas and assets into logical groupings for ease of management. Use the Engagement Category grouping to create zones within your sites and use them to engage with your customers. You can use these categories to run analysis and for improving your business intelligence. Engagement Category is also defined as a logical region on a floor on which you can run user engagement activities.
ExtremeLocation Quick Setup Enter the following information for the new category: Field Description Name Enter a name for this category. The name should be such that it identifies the category among other similar ones. Description Enter a brief description about this category. Use this space to provide more information about this category. Crowding Threshold Use this spinner to set the crowding threshold for this category. When this threshold exceeds, a crowding event is generated for this category.
ExtremeLocation Quick Setup Field Description Site Wide Select this switch to enable the category to be marked as Sitewide . When marked as Site Wide , any experience that is attached to this category is triggered when a user's device sees any beacon at the site or if the device is within the Geofence boundary set for this site. Use the following values to control when the experience is triggered.
ExtremeLocation Quick Setup Field Description UUID The ExtremeLocation solutions configures twelve (12) unique regions for identifying beacons. Each beacon must be assigned one of these twelve regions. This unique value is used to facilitate the identification of a beacon within multiple categories that are next to each other. Use the drop-down list to select an appropriate region for the category. We recommend that the beacons that are near each other be assigned different UUID values.
ExtremeLocation Quick Setup The following information is displayed: Field Description Name Displays the name of the site attached to this category. Site Group If the site is associated with a site group, then that site group name or names are listed in this field. Latitude Displays the latitude of the physical location of this site. Longitude Displays the longitude of the physical location of this site. Time Zone Displays the local time zone at this site.
ExtremeLocation Quick Setup Field Description Name Displays the name assigned to this beacon. MAC Address Displays the MAC address of this beacon. Site Displays the name of the site where this beacon is deployed. Category Displays the name of the category to which this beacon is associated. Interval Displays the configured beacon broadcast interval for this beacon. Radius Displays the Radius value for this beacon. This indicates the broadcast strength of the beacon.
ExtremeLocation Quick Setup Field Description Last Seen Displays the timestamp when this access point was last seen by ExtremeLocation system. Status This field provides a visual indication about the access point. A Green dot indicates that the Access Point is active. Note You cannot add or modify access points using this screen. No access points are displayed for this category as they have not been added to your ExtremeLocation account. 11 Select the Experiences menu item.
ExtremeLocation Quick Setup Add an Asset Category To create a new asset category: 1 From the Asset Categories screen, use the icon to add a new asset category. A new Asset Category is created and the following screen displays. Enter the following information for the new category: Field Description Name Enter a name for this asset category. The name should be such that it identifies this category among other similar ones. Description Enter a brief description about this category.
ExtremeLocation Quick Setup Select the following: icon to update this category's Beacon Defaults configuration. Configure the Field Description Advertisement Interval (ms) Set the duration in milliseconds between two consecutive beacon broadcasts. Radius This value configures the strength of the beacon's broadcast. Use the spinner to set the strength in the range 1-8 where 8 is the strongest signal with maximum broadcast range.
ExtremeLocation Quick Setup The following information is displayed: Field Description Name Displays the name of the site attached to this category. Site Group If the site is associated with a site group, then that site group name or names are listed in this field. Latitude Displays the latitude of the physical location of this site. Longitude Displays the longitude of the physical location of this site. Time Zone Displays the local time zone at this site.
ExtremeLocation Quick Setup Field Description Name Displays the name assigned to this beacon. MAC Address Displays the MAC address of this beacon. Site Displays the name of the site where this beacon is deployed Category Displays the name of the category to which this beacon is associated. Interval Displays the configured beacon broadcast interval for this beacon. Radius Displays the Radius value for this beacon. This indicates the broadcast strength of the beacon.
ExtremeLocation Quick Setup into logical areas or categories. Categories (zones) are used to logically separate the floor into distinct areas that enable ease of locationing and visitor tracking. For each floor in a site, you must upload a floor map if you want to use the zone or position tracking feature. You need not upload a floor map if you only want to use the presence feature. Use the floor map to accurately mark the locations of the access points installed on the floor.
ExtremeLocation Quick Setup Figure 14: New Site Dialog 3 Use the site placement icon, site on the displayed map. , located at the center of the Maps screen to accurately place the Drag the site placement icon to a location nearest to the actual location on the map. Use the map's zoom control and drag feature to place the icon at the site's exact geo-location on the map. The exact coordinates (latitude and longitude) and the time zone for the location are automatically updated in the dialog.
ExtremeLocation Quick Setup Field Description Time Zone Use this field to set the time zone for the location. When a site is located using the site placement icon, this field is automatically populated with the correct time zone for the location. You can also use the drop-down list to select the correct time zone for this location. This is a mandatory field. Street Use this field to provide a street address for the site. This is a mandatory field.
ExtremeLocation Quick Setup 5 Select the Additional label. The label expands and displays the following fields. The AP Placement control assigns access points to the site using access point MAC addresses. Use the Upload CSV File Type control to upload a list of access points to be assigned to this site. The list of assigned access points must be placed in a Comma Separated Value (CSV) file before uploading to the site.
ExtremeLocation Quick Setup 6 Select the App Users Settings tab to expand it. Important Please note that user enagagement is configured on a per site basis. Before you provision BLE Beacons for a site, please ensure that you enable App User support for the site. This can be done by enabling Enable App User control from within the App Users tab for the site. You can enable this setting at the time you create the site or when you edit it. By default, App Users are not enabled for any site.
ExtremeLocation Quick Setup Use the Geofence around your site to run analytics on nearby devices and to find new engagement opportunities. Only one Geofence can be configured for your site. The following parameters can be configured: Field Description Geofence Name Provide a meaningful name for this Geofence. This Geofence is specific to this site and this information is not available for other sites managed by this ExtremeLocation account.
ExtremeLocation Quick Setup 8 Select the Settings heading to expand it. Configure the following settings: Field Description Dwell Time You can now configure the Dwell Time for each site. The App User Dwell Time slider has two knobs that control the Outside, Inside Bounce and Inside Engage durations. Use these knobs to set the appropriate durations for these visit types.
ExtremeLocation Quick Setup 10 Use the Maps view to locate your new site and select it. The site's information is displayed as a pop-up dialog. Figure 15: Site Information Pop-up The next step is to add a floor to the site. To add a new floor, see Add a Floor on page 49. Add a Floor A Floor is a physical division on the site. Each site must have one floor and can have many floors. For accurate presence, position and category (zone) tracking, you must upload a floor map for each floor in your site.
ExtremeLocation Quick Setup 2 Use the Map view to locate your site and select it. The site's information is displayed in a small dialog. Figure 17: Site Information Dialog 3 Select the Floors link on the pop-up. The Maps screen displays a floor that is already configured for this site. Figure 18: Floor Map If no floors are configured, the Maps screen displays the following.
ExtremeLocation Quick Setup 4 When the site has floors, use the new floor. icon located to the left of the Floors drop-down list to add a Figure 20: Add Floors Button If the site has no floors, use the above the screen to add the new floor. icon to add a floor or you can use the big green circle on The Add Floor dialog displays. Figure 21: Add Floor Dialog 5 Use the Name field to provide a name for this floor.
ExtremeLocation Quick Setup 6 Select the Select Floor Map label to add a floor map to be associated with this floor. You cannot add a floor without adding its floor map. This is a mandatory action. The Operating System's File Open dialog displays. Use this dialog to navigate to the image file containing the floor's map and add it. A thumbnail of the floor map is added to the dialog.
ExtremeLocation Quick Setup 8 In the Scale Floor dialog, select Draw Boundary. (The area within the boundary is used to determine device location.) To anchor the beginning of the boundary line, click a corner of the outside boundary. Click each corner to anchor the line. The drawing line zigzags across the image as you anchor each corner. When you reach the last corner (which is also your starting point), double-click the last corner to disable the pen tool.
ExtremeLocation Quick Setup 12 Select the Save button. The dialog briefly displays the scaling factor. The scaling factor is also displayed at the bottom left of the Floors screen. Figure 25: New Floor Place Access Points Access points provide the infrastructure for ExtremeLocation service. ExtremeLocation uses the access point's radio's sensor capability to provide locationing and tracking services within its service area.
ExtremeLocation Quick Setup 1 Select Sites from the main menu. The Sites screen displays. Figure 26: Sites Screen 2 Use the Map view to locate your site and select it. The site's information is displayed in a small dialog.
ExtremeLocation Quick Setup 3 Select the Floors link on the dialog. The Sites screen displays the default floor for this site. Figure 28: Floor Map 4 Select icon from the toolbar. The following screen displays.
ExtremeLocation Quick Setup By default, the Floor Preferences area displays a list of MAC addresses of all access points assigned to this site. Note Before you can place access points on a floor, they must be added to the site where the floor is located. For more information on adding access points to a site, see Step 4: Configure the Access Points on page 28. Once access points are added to this site, they are displayed in this screen. 5 Select the icon to unlock the floor map.
ExtremeLocation Quick Setup Add a Region Regions are locations on map that identify a physical area on a floor. For example, in a shop, the cosmetics aisle can be marked with the region 'Cosmetics'. Similarly, in an office, the area where the Accounts team is located can be marked with the region 'Accounts'. This segregation of the floor into logical regions enable you to get detailed insights of the visits in that particular region of the floor. To create a region: 1 Select Sites from the main menu.
ExtremeLocation Quick Setup 3 Select the Floors link on the dialog. The Sites screen displays the default floor for this site. Figure 32: Floor Map 4 Select the icon from the toolbar. The following screen displays. Figure 33: Regions Screen By default, the Region Preferences area displays the regions created for this site. 5 Select the icon to add a new region. The following dialog display.
ExtremeLocation Quick Setup 6 Use the Region Name field to provide a name for this region. The name should be such that you can identify this region among similar ones. This is a mandatory field.
ExtremeLocation Quick Setup 7 Use the Color drop-down control to select a unique color for this region. Selecting an unique color enables you to quickly identify a region in a floor with multiple regions. The following dialog appears. Figure 34: Region Color Picker Set the HEX, RGB, or the HSVA parameters to define your color. In this dialog, setting any value changes the values in the other fields to reflect the same color in their respective notations.
ExtremeLocation Quick Setup configured terms as a starting point for further customization. Also, the Others option provides you the base set of terms used by ExtremeLocation. Use this screen to configure the following ExtremeLocation visitor classification terms that are suitable for your industry. Device classification configuration is set in the Device Classification And Management screen. This screen can be accessed from Settings > System Settings > Device Classification.
ExtremeLocation Quick Setup Field Description Outside Visitor Enter the nomenclature specific to those devices which will be classified as Outside Visitor by ExtremeLocation. Associate Enter the nomenclature specific to those devices which will be classified as Associate by ExtremeLocation. 4 Select the Save button to save the changes made to your customizations. At any time, select the Reset button to exit without saving your customization changes.
ExtremeLocation Quick Setup For more information on creating and managing experiences, journeys, and payloads, refer to the ExtremeLocation User Guide. This document can be downloaded from Extreme Networks Documentation Site. About Experiences An Experience consists of configuration that control what payload delivered, when it is delivered, and to whom it is delivered. You must configure the following parameters to successfully create an experience.
ExtremeLocation Quick Setup 2 Select the icon located to the top right of this screen. The New Payload screen loads. For a new payload, provide the following information that identifies this payload. Name Provide a name for this payload. Payload name cannot be longer than 32 characters. Description Provide a description for this payload. The description should be such that you can easily identify the purpose of this payload and its contents.
ExtremeLocation Quick Setup The following fields have to be configured for a payload: ExtremeLocation Quick Start Guide 66
ExtremeLocation Quick Setup Field Description Content Type This field configures the type of the payload. The following payload types are available: • • • • • • • • Passive - A Passive payload is an event without an action. Use this option for tracking events that happen and to collect data for analytics and for tracking movements. Video - A Video payload delivers a video to the visitor when triggered. Image - An Image payload delivers a simple image to the visitor when triggered.
ExtremeLocation Quick Setup Create an Experience An Experience is used to deliver a payload when a set of conditions is satisfied. Use an experience to enhance the user's experience when they visit your site. You can do this by providing them targeted multimedia advertisements or discount coupons or other such information relevant to them. You can configure these experiences such that are only active and valid in particular regions of your site.
ExtremeLocation Quick Setup To create a new experience, select the icon located to the top right of the Experience screen. Add General Information When a new experience is created, the General Information screen displays.
ExtremeLocation Quick Setup 1 Provide the following information for the new experience. Field Description Name Provide a name for this experience. The name should be such that it identifies this experience uniquely among other experiences. Description Provide a detailed description for this experience. A detailed description could contain information such as the purpose of the experience, the payload it delivers, and other information that identifies the experience.
ExtremeLocation Quick Setup Field Description Maximum Allowed Use the spinner to set the number of times this experience is to be delivered. When this value is exceeded, delivery of this experience is stopped. Depending on the configuration of the Max Allowed Interval field, delivery of this experience may be restarted. Max Allowed Interval Use this drop-down list to configure a time duration within which the experience is to be delivered.
ExtremeLocation Quick Setup Note If you had saved your changed in the previous screen, use the 1 icon to edit this screen. Select the Payload tab from the left menu tree. The following screen displays. 2 Use the Add Payload button to select an existing payload. The Choose Payload screen displays. 3 Select the payload from the list to highlight it.
ExtremeLocation Quick Setup 4 Select OK button to confirm your selection. At any time use the Cancel button to exit without saving changes made to this screen. The selected payload is added to your experience. 5 Select the Save button to save the changes made to this screen. At any time select the Cancel button to exit without saving the changes made to this screen.
ExtremeLocation Quick Setup 1 Select the Targetting tab from the left menu tree. The following screen displays. 2 Provide the following information for the Event Type field: Field Description Event Type This field defines the event types that must occur for the experience to trigger. You can choose one or more of these values. • • • ExtremeLocation Quick Start Guide Enter - Select this option to indicate that the experience is triggered for the Enter event.
ExtremeLocation Quick Setup 3 Provide the following information for the Limit By App field: Field Description App Targeting Select include to indicate that the listed app can trigger this experience. Select exclude to indicate that the listed app cannot trigger this experience App Mode Select the App Mode value from any or firstin. • • Any - Select this option to indicate that any app can trigger this payload. The payload can also be triggered multiple times depending on then number of apps listed.
ExtremeLocation Quick Setup 1 Select the Categories tab from the left menu tree. The following screen displays. 2 Select the Add Categories button to add more categories to this list. 3 Select the Remove All button to remove all configured categories from this experience. 4 To remove a single category from this experience, select the icon under the Actions column for the category. 5 Select the Save button to save the changes made to this screen.
ExtremeLocation Quick Setup 1 Select the Schedules tab from the left menu tree. The following screen displays. 2 Select the Add Schedule button to add a schedule to this experience. The Add Schedule screen displays. Use the Schedules screen to configure the schedule. A schedule is a set of configurations consisting of a date range, a set of controls to restrict the time, and the days of week when this schedule can be run. 3 Select the icon inside the Start Date control.
ExtremeLocation Quick Setup 4 Select the icon inside the End Date control. A Calendar displays from where you can select the correct End Date for this schedule. 5 Select the Limit Time switch to enable setting the time range when this schedule is considered active. The Start Time and End Time controls are enabled. 6 Use the Start Time drop-down menu to select the schedule's start time. Start time can be configured with an accuracy of nearest half-hour.
ExtremeLocation Quick Setup 10 From the main screen, select the Remove All button to remove all configured schedules for this experience. 11 To remove a single schedule from this experience, select the icon under the Actions column for the schedule. 12 Select the Save button to save the changes made to this screen. At any time select the Cancel button to exit without saving the changes made to this screen.
ExtremeLocation Quick Setup Figure 36: The Dashboard Screen When No Dashboard is Available 2 When no dashboard exists, click the big green circle in the middle of the screen to create a new dashboard. 3 button from tool If dashboards are available for this account, select the bar. The button expands to display a drop-down list.
ExtremeLocation Quick Setup 4 Select Create Dashboard from the drop-down list. The following New Dashboard screen displays. Figure 38: New Dashboard Screen 5 Select one of the available widget categories. Widgets on the New Dashboard screen are classified into: • Site Analytics - Use the widgets in this category to display site analytics data. • Category Analytics - Use the widgets in this category to display category/zonal analytics data.
ExtremeLocation Quick Setup 6 Click the widget to select it. You can select multiple widgets to add to the dashboard at a time. A green check mark appears on the top right of the selected widget. Figure 40: A Selected and an Unselected Widget Note Each ExtremeLocation dashboard can contain a maximum of 12 widgets and these widgets can be from different widget categories. 7 Select Next located to the top right, above the New Dashboard screen.
ExtremeLocation Quick Setup 9 Select Save to save the final dashboard layout. At any time use Back to navigate to the previous screen. Similarly, use Cancel to exit without creating the dashboard. A small window appears. Figure 42: Name the New Dashboard 10 Provide a name for this dashboard and select Save. The dashboard is saved and displays the configured data. Load the Dashboard To display the ExtremeLocation dashboard: 1 Select the icon from the main menu to view the Dashboards screen.
ExtremeLocation Quick Setup 3 To manually refresh the data on the screen, select the bar. button from tool Note The dashboard is refreshed automatically every 30 seconds. 4 Select the button from tool bar. The button expands to display a drop-down list. Figure 44: Dashboard Download Options 5 Select the PDF button to save the current state of the dashboard as a Portable Document Format (PDF) file. Select the CSV button to save the current state of the dashboard as a Comma Separated Value (CSV) file.
ExtremeLocation Quick Setup 7 Use the Duration drop-down list to select a time duration to display the data for. The drop-down provides a set of pre-configured durations for filtering data. The available preconfigured durations are: • Today - Displays the data for the current date. Excludes data for all other dates. • Yesterday - Displays the data for the day before the current date. Excludes data for all other dates including data for the current date.
ExtremeLocation Quick Setup Dashboard Widgets Widgets are used to display the data of interest from a site's locationing data on the dashboard . Widgets on the New Dashboard screen are classified into: • Site Analytics - These widgets display site analytics data. • Category Analytics - These widgets display category analytics data. • Experience Analytics - These widgets display experience analytics data. • Journey Analytics - These widgets display journey analytics data.
ExtremeLocation Quick Setup • the site. Depending on other conditions, a device is re-classified to one of the other types from this classification. Associate Personal Device: This is a special classification reserved for those device that an Associate carries for personal use and which are different from those devices that is used for carrying out official tasks. You can choose to ignore devices that are classified in this type from being included in any analytics.
ExtremeLocation Quick Setup 2 Select the icon. The following menu displays. 3 Select the Add Device Rule menu item to add a new Device Classification and Management rule. The Configure Rule screen displays. 4 Configure the following to create a device classification rule: Select Visitor type Use the drop-down list to select the appropriate visitor type. The following options are available: • Asset • Associate • Associate Personal Devices Note You can create one rule per visitor type.
ExtremeLocation Quick Setup 5 Select Provide SSID to classify devices based on the SSID that the device associates itself to at the site. When classifying devices using SSIDs, you must manually provide the SSID that is used for the classification. Use the select the button. button to add SSIDs manually. The following field appears when you Enter a valid SSID into the SSID field and select Add to add the entered SSID to the list.
ExtremeLocation Quick Setup 9 Select Upload MAC Address menu item to add a list of device MAC addresses. The Upload MAC screen displays. 10 Use the Select Visitor Type drop-down list to select the visitor type for the devices in this list. 11 Use the Browse button to search for and upload a Comma Separated Value file to the ExtremeLocation account. Use the Sample CSV link to download a sample file to base your manual device classification data CSV file.
ExtremeLocation Quick Setup • When Associate Personal Devices is enabled, the priority is as follows, Associate > Asset > Associate Personal Devices > Visitor. • When Associate Personal Devices is disabled, the priority is as follows, Associate > Asset > Visitor.