
User guide
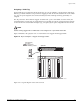


Configuring VLANs on the Switch
ExtremeWare 7.2e Installation and User Guide 93
• Quotation mark
VLAN names must begin with an alphabetical letter. Quotation marks can be used to enclose a VLAN
name that includes special characters, including single quotation marks or commas. Spaces may not be
included, even within quotation marks. For example, the names test, test1, and test_15 are acceptable
VLAN names. The names “test&5” and “joe’s” may be used if enclosed in quotation marks. Names such
as “5test” or “test 5” are not permitted.
VLAN names can be specified using the tab key for command completion.
VLAN names are locally significant. That is, VLAN names used on one switch are only meaningful to
that switch. If another switch is connected to it, the VLAN names have no significance to the other
switch.
NOTE
You should use VLAN names consistently across your entire network.
Default VLAN
The switch ships with one default VLAN that has the following properties:
• The VLAN name is default.
• It contains all the ports on a new or initialized switch.
• The default VLAN is untagged on all ports. It has an internal VLANid of 1.
Renaming a VLAN
To rename an existing VLAN, use the following command:
configure vlan <old_name> name <new_name>
The following rules apply to renaming VLANs:
• Once you change the name of the default VLAN, it cannot be changed back to default.
• You cannot create a new VLAN named default.
• You cannot change the VLAN name MacVlanDiscover. Although the switch accepts a name change,
once it is rebooted, the original name is recreated.
Configuring VLANs on the Switch
This section describes the commands associated with setting up VLANs on the switch. Configuring a
VLAN involves the following steps:
1 Create and name the VLAN.
2 Assign an IP address and mask (if applicable) to the VLAN, if needed.
NOTE
Each IP address and mask assigned to a VLAN must represent a unique IP subnet. You cannot
configure the same IP subnet on different VLANs.