
User Guide


Table Of Contents
- Front Cover
- Safety Information
- FCC Class
- FDA/IEC 60825-1 Requirements
- Conventions Used in this Guide
- Specifications Availability
- Contents
- Introduction
- Installation and Operation
- SIS Configuration and Control
- FOX Extenders Control Program
- Reference Information
- Extron Warranty
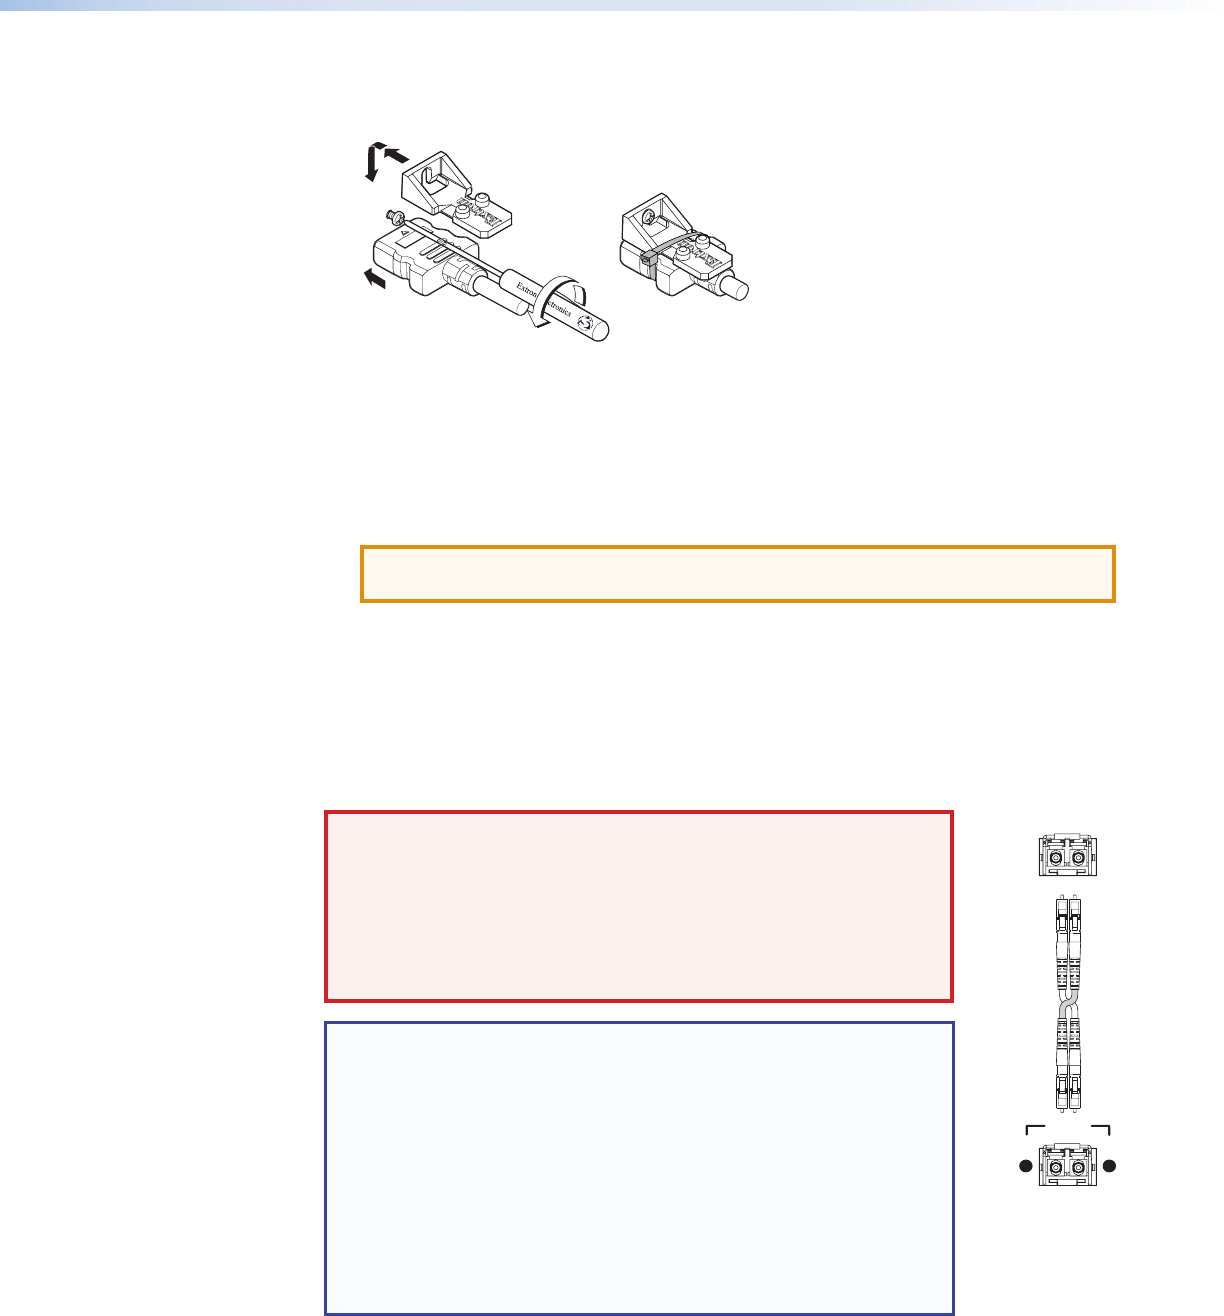
Connecting the HDMI Connector
Use an Extron LockIt Lacing Bracket to secure an HDMI cable to each device as follows:
3
a
b
c
d
e
Figure 7. Installing the LockIt Lacing Bracket
1. Plug the HDMI cable into the panel connection.
2. Loosen the HDMI connection mounting screw from the panel enough to allow the
LockIt lacing bracket to be placed over it. The screw does not have to be removed.
3. Place the LockIt lacing bracket on the screw and against the HDMI connector, then
tighten the screw to secure the bracket.
ATTENTION: Do not overtighten the HDMI connector mounting screw. The shield
to which it fastens to is very thin and can easily be stripped.
4. Loosely place the included tie wrap around the HDMI connector and the LockIt lacing
bracket as shown.
5. While holding the connector securely against the lacing bracket, use pliers or a similar
tool to tighten the tie wrap, then remove any excess length.
Wiring for Fiber Communication
WARNING: Risk of serious physical injury: This device outputs
continuous invisible light, which may be harmful to the eyes; use with
caution.
• Do not look into the rear panel fiber optic cable connectors or into
the fiber optic cables themselves.
• Plug the attached dust caps into the optical transceivers when
the fiber cable is unplugged.
NOTES:
• Ensure the proper fiber optic cable is used for the transmitter and
receiver. Typically, singlemode fiber optic cable has a yellow jacket
and multimode fiber optic cable has an orange or aqua jacket.
• Only one fiber optic cable, transmitter-Tx-to-reciever-Rx, is
required for video, audio, and serial command transmission.
However, for only one fiber optic cable, the HDMI signal output by
the receiver is not HDCP-compliant.
• To receive responses from the controlled device and for HDCP
compliance, install both fiber optic cables and leave link 2
enabled.
Transmitter
to
Receiver
OPTICAL
Rx
Tx
LINK
LINK
OPTICAL
Rx
Tx
FOX T UWP 302 Wallplate Transmitter • Installation and Operation 9