
Setup guide
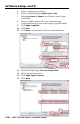
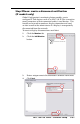
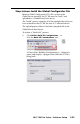
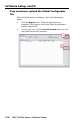
Table Of Contents
- Front cover
- Safety Precautions
- Safety Precautions (Chinese) and FCC Class A Notice
- Table of Contents
- Ch. 1: Introduction
- Ch. 2: Hardware Setup
- Ch. 3: Software Setup
- Creating a Global Configurator Project File
- Configuring a New Device
- Step six: configure e‑mail server (IP models only)
- Step seven: configure e‑mail messages (IP models only)
- Step eight: configure contacts (IP models only)
- Step nine: assign serial device drivers
- Step ten: assign IR drivers
- Step eleven: configure the front panel
- Step twelve: configure associated control modules
- Step thirteen: create a shutdown schedule
- Step fourteen: create a lamp hour notification (IP models only)
- Step fifteen: create a disconnect notification (IP models only)
- Step sixteen: build the Global Configurator file
- Step seventeen: upload the Global Configurator file
- Step eighteen: launch GlobalViewer (IP models only)
- Testing the GlobalViewer pages
- Warranty
- Back cover:checklist and contact information
MLC 104 Plus Series • Software Setup
3-33
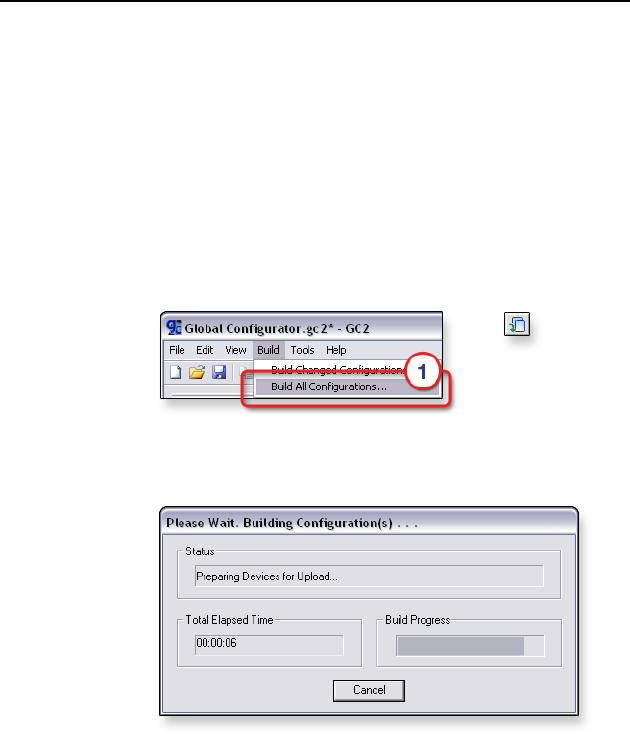
Step sixteen: build the Global Configurator file
Before a Global Congurator (GC) le is active in the
GlobalViewer interface, the GC le must be “built” and
uploaded to a GlobalViewer host device.
The “build” process compiles all of the conguration data you
have entered into the GC le for each A/V network device.
The upload process delivers the built (compiled) le to the
GlobalViewer host device.
To initiate a “Build (all)” process:
1. Click Build > Build All Configurations...
or
click the Build All Configurations icon.
A Please Wait. Building Conguration(s)... dialog box
opens and displays a progress bar while the GC le is
being built.