
User manual


3 Getting started
To give you a brief overview of Aladin, here's a typical scenario for visualizing images
and catalogues around an astronomical object:
1. Launching Aladin
2. Searching for an optical image of M51
3. Searching SIMBAD around this object
4. Loading NOMAD catalogue around this object
5. Visualizing data (panning, zooming…)
6. Browsing measurement and accessing original record
7. Saving
Let’s go through this scenario step by step.
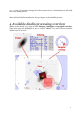
Launching Aladin (1)
The method to launch Aladin depends on
the type of hardware you have. On
Windows and Macintosh, double-click
the icon Aladin for starting the
application. With Linux and other Unix
stations, it will probably be necessary to
launch the application via this command
line:
Aladin
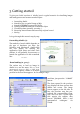
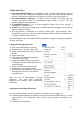
Data loading (2, 3 et 4)
The easiest way to load an image in
Aladin is to use the menu “File => Load
astronomical image=> DSS => DSS from
ESO", and to specify a name or an object
position in the form that appears. In our example “M51”.
And then, just press the “SUBMIT”
button.
The form opened in the previous
step displays the data servers that
Aladin can access. The image
servers appear on the left side. In
fact, the previous step has pre-
selected the corresponding form,
here “DSS from ESO”. On the right
side appear the tabular data
servers (SIMBAD, NED…) and
astronomical catalogues via
VizieR.
4