
Installation Guide


Stair Railing Helpful Hints & Apps
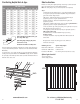
RUN (TREAD LENGTH)
RISE 10" 10.5" 11" 11.5" 12" 12.5" 13" 13.5" 14"
5" 27° 25° 24° 23° 23° 22° 21° 20° 20°
5.25" 28° 27° 26° 25° 24° 23° 22° 21° 21°
5.5" 29° 28° 27° 26° 25° 24° 23° 22° 21°
5.75" 30° 29° 28° 27° 26° 25° 24° 23° 22°
6" 31° 30° 29° 28° 27° 26° 25° 24° 23°
6.25" 32° 31° 30° 29° 28° 27° 26° 25° 24°
6.5" 33° 31° 30° 29° 28° 27° 27° 26° 25°
6.75” 34° 33° 32° 30° 29° 28° 27° 27° 26°
7” 35° 34° 32° 31° 30° 29° 28° 27° 27°
7.25" 36° 35° 33° 32° 31° 30° 29° 28° 27°
7.5" 37° 36° 34° 33° 32° 31° 30° 29° 28°
7.75" 38° 36° 35° 34° 33° 32° 31° 30° 29°
Tip#2: Smartphones and tablets have good
(free) angle finder apps
Tip#3: Elongating (enlarging) the picket
fastener holes on top
and bottom rails makes assembly easier
Stair runs may require elongated (enlarged) holes and/or shorter fasteners to
secure pickets efficiently (shorter 1” fasteners are included with the EZ Pivot
Mount Kits).
To elongate holes, use a 13/64" drill bit in an up and down motion within the
existing hole and parallel with the rail. IMPORTANT: elongate the hole towards
the point (tip) of the mitered picket to avoid any visible modifications. Do not
widen the holes side to side.
13
www.maddenmetals.com
C
C
B&D
Tread
Rise
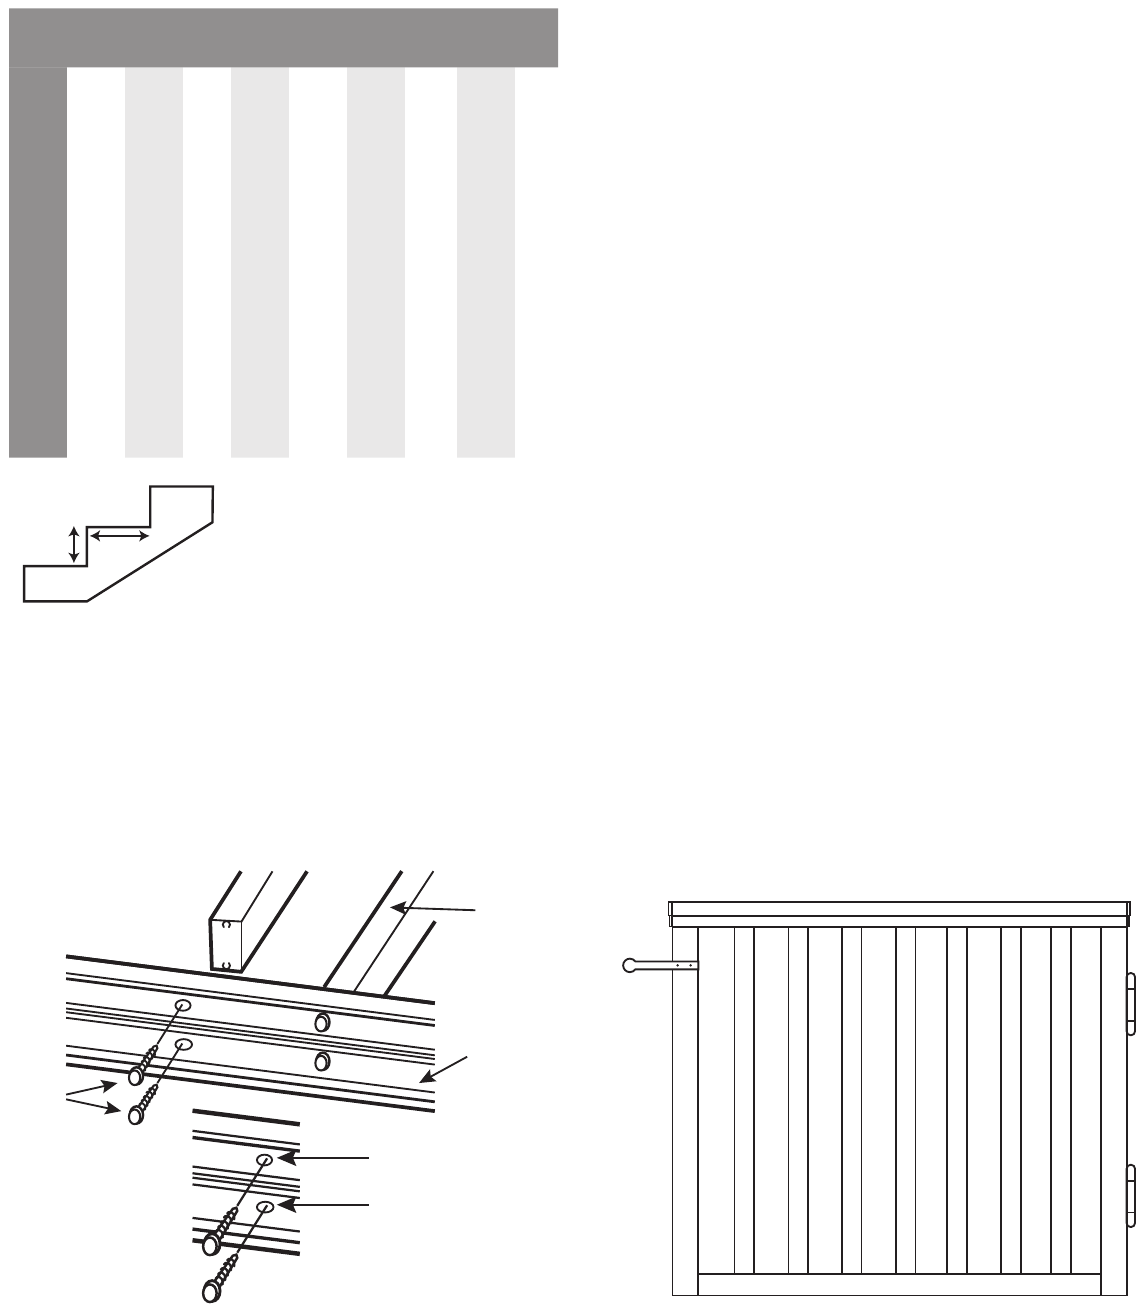
Gate Instructions
EZ Gates can swing left or right depending on the hinge location. Standard
hinges and gravity latch are included with all EZ Gates.
Note: Self closing hinges and pool child safety latch sold separately.
Step 1
1. Verify rough opening between posts is 1" greater than width of gate.
2. Set gate in opening and visually identify where hinges will attach to
gate for the desired swing direction.
3. Measure 3” down from the very top of gate and attach hinge to
appropriate gate face using the provided fasteners.
4. Attach 2nd hinge 3” above the very bottom of the gate to the
appropriate gate face.
5. Measure 4” down from the very top of gate and attach gate latch arm to
appropriate gate face using the provided fasteners.
6. Place (2) 2x4s on edge in the gate opening so the gate may rest in place
while attaching the hinges to the post.
7. Level gate in position and fasten top hinge to appropriate post face
with a single fastener only.
8. Confirm levelness and attach bottom hinge to post using
all three fasteners
9. Complete installation of top hinge with remain two fasteners and
remove 2x4’s.
Hold gate latch on latch arm, swing gate closed, mark holes
and fasten latch to post.
Available gate sizes: Typical railing Heights:
Residential: 36"W x 36"H Residential: 36"
Commercial: 36"W x 42"H Commercial: 42"
Pool Gate: 36"W x 48"H Pool Fencing: 48"-54" (check local codes)
Optional gate handrail
• Self closing hinges
• Child safety pool latch
14
For assistance call Madden Manufacturing
573-365-7085