
User's Manual


4
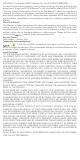
Installation
1. SD Card Installation (Optional)
1. Remove the cover on the camera.
2. Insert the micro SD card (sold separately) into the card slot
3. Place the cover back on.
After installing the micro SD card, you should initialize the card in the EZVIZ app
before using it.
4. In the EZVIZ app, tap the Storage Status in the Device Settings interface to
check the SD card status.
5. If the memory card status displays as Uninitialized, tap to initialize it.
2. Installation Location
Choosealocationwithaclear,unblockedeldofviewandwithagoodwireless
signal to the camera. Please keep the following tips in mind:
• Make sure the wall is strong enough to withstand three times the weight of the
camera.
• Camera cannot be installed in front of an air conditioner or facing direct sunlight.
• Setting up detection sensitivity on EZVIZ app when selecting location, thus you
can verify if motion can be detected and adjust the value of sensitivity based on
the size and distance of detected objects.
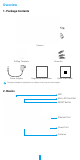
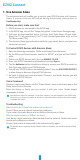
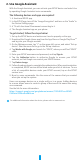
3. Installation Procedure
- Stickthedrillingtemplateontoacleanandatsurface.
- (For cement wall only) Drill screw holes according to the template, and insert
anchors.
- Usescrewstoxthecameraontheinstallationsurface.
- Loosen the fastener.
- Rotate the upper part of the camera to get an appropriate detection effect.
Installation
Surface
Drilling Template
Camera
Fastener
Anchor Screw