5 Rib Metal Roofing System Ordering & Installation Guide Specifications contained herein subject to change without notice or obligation to make changes in products previously purchased.
5 Rib Table of Contents 3-4 5 5-10 Basic Information Delivery, Handling and Storage Estimating and Ordering 11 New Roof Installation 12 Re-roof Installation 13 Fasteners 15 Flashing Details Overview 16 Eave Details 16-18 Valley and Gable Details 17 Ridge Details 17 Hip Details 18 Sidewall and Endwall Details 19 Gambrel Details 19 Pipe Flashings 20-21 Skylight Details 22 Chimney Details 23 Key Terms 2
5 RIB INSTALLATION GUIDELINES Caution: 5 Rib roofing panels must be applied on a minimum roof pitch of 2½:12 or greater. Important Notice: This guide must by read in its entirety before beginning installation. This guide is supplied by FABRAL, Inc. for use by its customers, and is intended to be a guide only. This does not replace local or state building codes. FABRAL, Inc.
MINIMUM RECOMMENDED TOOLS & EQUIPMENT Caulking Gun—Used for miscellaneous caulking and sealing to inhibit water infiltration. Chalk Line—Used to assist in the alignment of panels, flashings, etc. Electric Drill—Used to drill holes such as those required for pop rivet installation. Electric Nibblers or Metal Shears—Used for general metal cutting, such as cutting the panels in hip and valley areas. Some installers prefer using a circular saw with a metal cutting abrasive blade.
SAFETY CONSIDERATIONS Never use unsecured or partially installed panels as a working platform. Do not walk on panels until they are in place on the roof and all of the fasteners have been installed. Metal roofing panels are slippery when wet, dusty, frosty, or oily. Do not attempt to walk on a metal roof under these conditions. Wearing soft-soled shoes will improve traction and minimize damage to the painted surface. Always be aware of your position on the roof relative to your surroundings.
ESTIMATING & ORDERING A ROOF Step 1 A. Sketch a birds-eye view of the roof and label each section (see example below.) H F I D E G B C A B Sketch a diagram of each roof section. Show all measurements (see example below.) It is important to measure exact center of the ridge to the eave edge. Do not allow anything for overhang.
ESTIMATING & ORDERING A ROOF (cont.) Step 2 From the diagram you completed in Step 1, you are now ready to develop your roofing panel cut list. Each panel covers 36” of area so the only measurements you need are the distance from the eave to the ridge and the ridge length. You can then determine the number of panels needed by dividing the ridge length by the panel coverage. (See example Diagram A below.
ESTIMATING & ORDERING A ROOF (cont.) Start with section A. The eave length is 40’ and the ridge length is 30’, with a difference of 10’. You will need 30 ÷ 3 = 10 pcs. X 10’ to reach the area where the valley starts. Remember that you have 10’ remaining to cover the area. Calculate the length of each panel going into the valley by first determining the roof’s pitch. Pitch is how much rise your roof has in inches for every foot of horizontal run.
5 Rib Estimator/Order Guide Accessories Determine the total lineal feet of each condition listed below and then fill that number in on each line. Use the equations on previous pages to calculate the number of pieces for each item and circle the flashing design required. Eave ___________ Gable __________ Valley__________ Ridge__________ Sidewall Gambrel _______ Hip____________ Endwall__________ Skylight/Chimney width = ______ Eave: pcs.
ACCESSORY FASTENERS: Use #14 x 1” for Decking Use #9 x 1” for Purlins 1” Fasteners (_____ ft. EAVE x 1/ft.) + (_____ ft. GABLE x 2/ft) + (_____ ft. VALLEY x 3/ft.) + (_____ ft. SKYLIGHT/CHIMNEY perimeter x 2/ft) = ________ pcs. 1½” Fasteners Use #14 x 1½” for Decking Use #9 x 2” for Purlins (_____ ft. of RIDGE x 2.67/ft.) + (_____ ft. SIDEWALL x 2/ft.) + (_____ ft. ENDWALL x 1/ft) + (_____ ft. HIP x 4/ft) + (_____ ft. TRANSITION x 3/ft.) + (_____ ft. GAMBREL x 3/ft.) = ________ pcs.
SAMPLE E Panels: Section A Section B Trim: 9 pcs. X 12’ 9 pcs. X 12’ 6 pcs. 3 pcs. 6 pcs. 700 pcs. 200 pcs. 100 pcs. 4 Rolls 17 pcs. 1 Roll (100’) 1 pc. CE-1 Eave Trim 5/12p RR-1 Ridge Cap 5/12p WG-1 Gable Trim #14 x 1” Panel Screws #14 x 1” Trim Screws #14 x 1.5” Trim Screws Butyl Sealant Tape Inside Closure Profile Vent GR3/AT #3 Pipe Boot You are now ready to order your new metal roof. If you have any questions, or need you materials list checked, please contact your local FABRAL Distributor.
NEW ROOFS 1. Make sure there are no nails or other objects protruding from the substrate that might puncture the underlayment or damage the roof panels. Clean all debris from the deck. Check for any high or low spots in the deck, which will cause waviness in the metal panels. 2. Check all details for possible roof penetrations, which must be added to the deck prior to roof panel installation (vented ridge for example). 3.
EXISTING ROOFS In many cases, FABRAL’s Steel Roofing Panels can be installed over existing roofing without tear-off of the old roofing. Check with your local codes or building department for the specific requirements in your area. If the roof is to be stripped down to the existing decking, follow the procedures for new roofs on page 12. Be sure to check the existing roof and repair any damaged areas prior to installation of the new roof system.
5 RIB® FASTENERS Fasteners Note the diagram below for proper installation of gasketed fasteners. Description Use #9 x 1" Woodfast Roof Panels attached to Purlins and Trim; Siding attached to wood girts PROPER INSTALLATION OF GASKETED FASTENERS correctly driven Roof Panels attached to OSB or Plywood and Trim; Siding attached to plywood #14 x 1" Woodtite over-driven Load Span Tables for 29 ga. 5 Rib ALLOWABLE LIVE LOAD (psf) for 29 ga. 80 ksi PANELS Purlin Or Nailer Spacing (ft.
5 RIB INSTALLATION GUIDE GABL E/RAKE VAL LEY RIDGE/P EAK PIPE PE NETRATION SIDEWA LL E AVE GABL E/RAKE E NDWA LL HIP MONOSLOPE RIDGE CP-1 RESIDENTIAL GABLE RG-1 RIDGE AR-3 TRANSITION FLASH AT-1 DENVER EAVE CE-1 SIDEWALL/ENDWALL FLASH ASW-1 VALLEY RV-1 RESIDENTIAL GABLE WG-1 GAMBREL AT-2 VALLEY RV-2 RESIDENTIAL RIDGE/HIP FLASH RR-1 15
EAVE DETAIL Notes: 1. Roofing underlayment not shown. BUTYL TAPE TOP & BOTTOM OF CLOSURE 29 GA. AGRI PANEL 2. Tack the eave flashing in place under the underlayment using roofing nails. FASTENER CE-1 3. Install the panels and closures as shown, allowing ½” to 1” of hang at eave. ROOF STRUCTURE FASTENER @ 12" C/C INSIDE CLOSURE BUTYL SEALANT TOP & BOTTOM OF SEALER STRIP 29 GA.
RIDGE & GABLE DETAILS RIDGE RIDGE DETAIL SEALANT IS USED BETWEEN RIDGE & GABLE AND UNDER GABLE LAP RIDGE CAP RR-1 or AR-3 #14 x 1 1/2" LONG FASTENER 9" C/C MAX 29 GA. AGRI PANEL FASTENER ROOF STRUCTURE GABLE TRIM SEALANT TAPE TOP & BOTTOM OF OUTSIDE CLOSURE VENTED RIDGE Note: RX10 Versavent can be used instead of Profilevent (shown) RIDGE CAP AR-3 #14 x 1 1/2" LONG FASTENER 9" C/C MAX 29 GA. AGRI PANEL PROFILE VENT ROOF STRUCTURE 1. 2. 3. 4. 5. 6. Notes: Roofing underlayment not shown.
MONOSLOPE PEAK 2" LONG FASTENER AT EVERY RIB (9" O.C.) 29 GA. ARGI PANEL CP-1 30# ROOFING FELT OUTSIDE CLOSURE SEALANT TAPE TOP & BOTTOM OF CLOSURE OR SEALER STRIP ROOF STRUCTURE Notes: 1. Roofing underlayment not shown. 2. Apply sealant to the bottom of the foam closure and position it on the roof panel approximately ½” - 1” back from the edge of the flashing as shown. 3. Apply sealant to the top of the foam closure. 4. Install flashing as shown. 5.
GAMBREL DETAIL BUTYL SEALANT TAPE TOP & BOTTOM OF CLOSURE Notes: 1. Roofing underlayment not shown. 2. Bottom panels of the slope transition must be AT-2 installed first. FASTENER 3. Mark the location of the foam closure and place a bead of butyl sealant tape on the panels. Install the closures BUTYL SEALANT TAPE and a second bead of sealant on top of the closures. TOP & BOTTOM OF CLOSURE 4.
CRICKET FIELD FORMED Notes: 1. Trim both ends of the uphill and downhill sides of the skylight flashing as indicated. VERTICAL FLAT STOCK UNIT WIDTH BEND RIDGE 2" MIN. 2. Slide the uphill flashing into the slots cut into the roofing and apply a liberal amount of sealant. FLANGE CAP 2" MIN. 3. Assemble the skylight as indicated on pages 20-21. 4. Trim and assemble chimney flashing similarly. 2" MIN UNIT HEIGHT FLANGE CAP 2" MIN. VERTICAL FLANGE 2" MIN.
SKYLIGHT FLASHING PREPARATION ALTERNATE DETAIL A-A Detail A-A SEALANT TAPE BETWEEN FLASH AND ROOF PANEL SEALANT FLASHING ASW-1 - FIELD MODIFY AS REQUIRED FASTENER 29 GA. AGRI PANEL SEALANT SASH FRAME FLASHING -REVERSE AL FLASHING CONTINUOUS SIKAFLEX CAULK @ PERIMETER SCREEN ROOF SHEATHING JAMB FASTENER @ 6" C/C 29 GA. AGRI PANEL SEALANT ICE AND WATER SHIELD AND 30# FELT OR ROOFGUARD UNDERLAYMENT ROOF FRAMING Notes: 1. Trim and bend the right side skylight flashing to fit as necessary. 2.
CHIMNEY FLASHING Notes: 1. Procedures for the installation of Chimney Flashings are similar to the Skylight’s (refer to pages 20-21). 2. The saw-cut reglet shown provides the best weathertight installation for chimneys. Fill the reglet with sealant, insert trim and fasten as necessary w/masonry anchors. 3. Flashings may be field-formed from 40 13/16” x 10’ flat sheets.
STANDARD TRIM PARTS See page 15 for Illustration of Trim Conditions Key Terms CHIMNEY OR SKYLIGHT See pages 20-22 EAVE TRIM This piece is used at the eave or gutter edge of the building, and must be installed before any panels. ENDWALL This piece is used when the upper end of panel butts into a vertical wall. FASTENERS- OSB & Plywood #14 X 1” MILL POINT SCREW This fastener is used to attach trim to the panels, and also to attach panels directly to the roof deck.
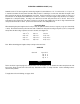
Headquarters: Lancaster Plant: 3449 Hempland Road Lancaster, PA 17601 (800)477-2741 Fax (800)283-4289 Other Manufacturing Facilities: Gridley Plant: Rt. 24 West Gridley, IL 61744 (800)451-3974 Fax (800)289-3383 Jackson Plant: 308 Alabama Blvd. Jackson, GA 30233 (800)884-4484 Fax (800)765-4484 Tifton Plant: Hwy 41 South & 55 Lamp Loop Tifton, GA 31793 (800)749-8144 Fax (800)380-4784 Idabel Plant: Rt.