
User Manual


10
*%
TRADITIONAL GRILLING
How to use the electric grill:
- preheat the oven by setting the maximum
temperature (250
0
C),
- put the dish in the oven,
- insert on the highest runner,
- insert the drip tray on the bottom runner,
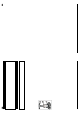
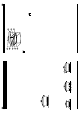
- fit the knob protection screen and keep
the oven door totally open (Fig. 12),
- set the function change-over switch knob
to position
- set the required temperature,
- after half of the grilling time, turn the grilled
portions over.
GRILLING WITH ROASTING-SPIT
Roasting-spit is used to rotary grilling such dishes as poultry, sausages, etc.
Procced as follows:
- remove all unnecessary outfit from the oven and slide in the roasting-spit frame;
- slide one fork onto the spit and stick meat onto it while paying attention it is symmetri-
cal along the stick; then slide in the second fork and secure it in its position by
tightening the set screw;
- insert the pointed end of spit into the roast-spit drive connection, push it home and
rest the other end of spit on the frame;
- screw out the handle, install the knob protection screen and keep the oven door to-
tally open;
- turn on the oven, adjust the temperature and, possibly, set the time of grilling.
OVEN
When the grilling is over - turn the oven off.
Fig. 12 Fitting the knob protection screen
WARNING !
While grilling, the appliance must not be left without supervision. Accessible parts
of the cooker are very hot ! Keep children well away.
7
(6
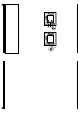
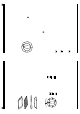
•· Los focos de la encimera vitrocerámica se encienden y se
apagan girando los mandos (figura 6) situados en el panel
de mandos. El mando puede girarse en ambos sentidos.
• Antes de poner el foco en marcha asegúrese si el mando
corresponde al foco que quiere activar.
• Girando el mando en sentido horario se consigue el aumento
gradual de potencia del foco del mínimo al máximo.
• El calentamiento de los focos, está marcado por el indicador
especial situado en la parte delantera de la encimera (figura
5).
• Cuando los focos están calientes, están también encendidos
los pilotos indicadores de calentamiento correspondientes
a cada foco.
• Los pilotos se encienden cuando la temperatura de los focos
supera los 50oC.
• En caso de que los pilotos se quemen y no señalicen el
calor, avise al servicio de asistencia técnica.
Fig. 5
Fig. 6
HORNO
3.3 INDICADOR DE CALENTAMIENTO
A
C
D
B
0
1
2
3
4 HORNO
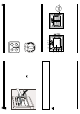
4.1 CONSTRUCCIÓN Y EQUIPAMIENTO
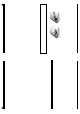
Fig. 7.
1 - resistencia superior, 2 - resistencia del grill; 3 - resistencia inferior; 4 - motor del
girapollos; 5 - guías; 6 - protectores laterales; 7 - lámpara del horno; 8 - detector de
temperatura.
• El horno está equipado con guías en cinco niveles [1], [2], [3], [4] y [5] destinadas
para colocar la bandeja o la rejilla con recipientes.