
Product Manual


Ventilation mode:
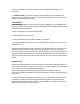
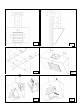
Fix the pipe-bearing stirrup (Fig.9) to the wall or ceiling by using the proper reinforcements and
screws supplied. Connect the cooker-hood flange with the evacuation hole by using a proper pipe.
Lift the lower pipe until the cable strap coming out of the ventilation unit is uncovered and connect it
to the display cable strap. Put down the lower pipe while paying attention it is being properly
introduced into the hood. Perform the electrical connections. The superior end of the pipe is to be
fixed laterally to the pipe bearing (Fig.9) by using the two self-threading screws. Now mount the
inferior chimney by inserting it through the front side of the hood and then turning it down until it is
fixed inside
Recirculation mode:
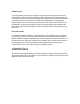
* In recirculation mode the air deviator is fixed through the screws supplied (Fig.10), by using the
holes which are on the back of the upper telescopic section. Connect the flange of the appliance
with the air deviator through an appropriate pipe. Connect the appliance with the electric mains. Lift
the lower pipe until the cable strap coming out of the ventilation unit is uncovered and connect it to
the display cable strap. Put down the lower pipe while paying attention it is being properly
introduced into the hood. Fix the upper chimney as indicated in (Fig.10).
4.Operation(Fig.11)
The Remote control supplied enables the function desired by touching the corresponding button. If
the electrical power supply to the product is cut, 15 seconds are required for the unit to perform self
diagnostics after functions are restored.