Cod. 110030250 (CAPPE A PARETE) LIBRETTO ISTRUZIONI INSTRUCTIONS BOOKLET BEDIENUNGSSANLEITUNG LIVRET D’INSTRUCTIONS MANUAL DE INSTRUCCIONES àçëíêìäñàü èé ùäëèãìÄíÄñàà INSTRUKCJE OBSŁUGI Ed.
Gentile Signora/Signore, congratulazioni! Lei ha acquistato una cappa di prestigio e di sicura qualità. Perché Lei possa ottenere le migliori prestazioni, Le suggeriamo di seguire con attenzione le istruzioni per l’uso e manutenzione che troverà in questo libretto; inoltre, per ordinare i filtri di ricambio al carbone attivo utilizzi l’apposito tagliando che troverà allegato alla copertina. Dear Sir/Madam, congratulations! You have purchased a prestigious range hood of guaranteed quality.
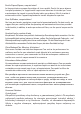
650 mm (25,6”) Fig. 1 Fig. 2 Fig.
Fig. 3 Fig.
Fig.
I A LIBRETTO ISTRUZIONI AVVERTENZE È molto importante che questo libretto istruzioni sia conservato insieme all’apparecchiatura per qualsiasi futura consultazione. Se l’apparecchio dovesse essere venduto o trasferito ad un’altra persona, assicurarsi che il libretto venga fornito assieme, in modo che il nuovo utente possa essere messo al corrente del funzionamento della cappa e delle avvertenze relative.
B CARATTERISTICHE TECNICHE I dati tecnici dell’elettrodomestico sono riportati su delle targhette, posizionate all’interno della cappa. C INSTALLAZIONE (parte riservata solo a persone qualificate per il montaggio della cappa) La distanza minima: distanza fra la superficie di supporto dei recipienti di cottura sul dispositivo di cottura e la parte più bassa della cappa da cucina. Quando la cappa da cucina è posta su un apparecchio a gas, questa distanza deve essere almeno 65 cm (vedi figura C1).
una adeguata spina di sicurezza. Se un apparecchio fisso non è provvisto di cavo di alimentazione e di spina, o di altro dispositivo che assicuri la disconnessione dalla rete, con una distanza di apertura dei contatti che consenta la disconnessione completa nelle condizioni della categoria di sovratensione III, le istruzioni devono indicare che tali dispositivi di disconnessione devono essere previsti nella rete di alimentazione conformemente alle regole di installazione.
Per il miglior rendimento si consiglia di utilizzare la terza velocità in presenza di forti odori e vapori, la seconda velocità nelle condizioni normali, la prima velocità per mantenere l’aria pulita con bassi consumi di energia elettrica. Si consiglia di mettere in funzione la cappa quando si inizia a cuocere e manteneria in funzione fino alla scomparsa degli odori. G FUNZIONAMENTO 1. COMANDO A 2 TASTI LUCE - Interruttore A Posizione 0: la luce sarà sempre spenta. Posizione 1: la luce sarà sempre accesa.
La velocità 1, 2 e 3 è visualizzata dal n° di led accesi escluso led luce e timer. Pulsante + Premendo il tasto si incrementa la velocità del motore. La velocità 1, 2 e 3 è visualizzata dal n° di led accesi escluso led luce e timer. (Nella versione a 4 velocità il tasto + presenta una luce intermittente. La 4° velocità o intensiva è temporizzata e dopo circa 15 minuti il motore passa automaticamente in 3° velocità). Pulsante modalità Funzione: accensione e spegnimento motore cappa.
A 2. FILTRI AL CARBONE ATTIVO Per la sostituzione dei filtri al carbone attivo si proceda come segue: togliere i filtri metallici come indicato sopra. A questo punto si accede facilmente ai due filtri che sono agganciati sul lato dx e sx del convogliatore. Per il montaggio/sostituzione vedi figura. Nel caso di cappa con camera motore il filtro è posizionato nella parte inferiore della camera stessa. Per il montaggio/sostituzione vedi figura.
ATTENZIONE! Lampade di forma e portata diverse da quella originale potrebbero danneggiare seriamente il vano illuminazione. 2. FARETTO Per sostituire la lampada del “Round halogen light”: a) Accertarsi che l’apparecchio sia scollegato dalla rete elettrica. b) Togliere, facendo leva con un cacciavite, l’anello di supporto del vetro A. c) Togliere il vetro B per accedere al vano lampada. d) Sostituire la lampada con una analoga (alogena max 20 W, 12 Volt attacco G4).
3. LAMPADA FLUORESCENTE (parte riservata solo a personale qualificato) Sostituzione del tubo fluorescente: a) Scollegare l’apparecchio dalla rete di alimentazione; b) Rimuovere l’eventuale pannello in acciaio svitando le viti di fissaggio; c) Togliere il tubo fluorescente ruotandolo di 90° e sostituirlo con uno di analoghe caratteristiche (8W-13W-21W-28W a seconda del modello); d) Ricollegare l’apparecchio alla rete di alimentazione.
Non usare prodotti contenenti abrasivi. Effettuare tutte queste operazioni scollegando preventivamente l’apparecchio dalla rete elettrica. M SICUREZZA AVVERTENZE L’impianto elettrico è munito di collegamento a terra secondo le norme di sicurezza internazionali; è inoltre conforme alle normative Europee sull’antidisturbo radio. Non collegare l’apparecchio a condotti di scarico dei fumi prodotti dalla combustione (caldaie, caminetti,ecc).
- Forare, inserire n° 2 tasselli ad espansione ø 8mm e fissare la barra con le relative viti. Fase 2 - Agganciare la cappa alla barra di sostegno (Fig. 2). - Regolare l’allineamento della cappa tramite le viti delle attaccaglie (Fig. 2). La vite superiore (B) regola la distanza dalla parete, quella inferiore (C) lo scorrimento verticale.
GB A INSTRUCTIONS BOOKLET WARNINGS This instruction booklet must be kept together with the appliance for future reference. If the appliance is sold or consigned to other parties, check that the booklet is supplied with it, to ensure that the new user has the correct information on the operation of the range hood and is aware of the warnings. These warnings have been provided for the your safety and the safety of others. As a result, please read them carefully before installing and operating the appliance.
C INSTALLATION (Section reserved for qualified installers of the range hood) Minimum distance: distance between the pan supports of the cooker and the bottom-most section of the hood. When the hood is positioned above a gas equipment this minimum distance must be at least 65 cm (see picture C1) or even more, if this is specified in the instructions for use of the gas cooker. In the outside exhaust version, the diameter of the fume discharge duct must be no smaller than the range hood connection.
E RANGE HOOD WITH OUTSIDE DISCHARGE (exhaust) In this version, the fumes and steam from the kitchen are conveyed outside through an exhaust duct. The exhaust conveyor that protrudes from the upper part of the range hood must be connected to a duct that carries the fumes and steam outside. In this version, the charcoal filters, if fitted, should be removed; to do this, see the instructions in point F.
2. FIVE BUTTON CONTROL PANEL LIGHT- button Pressed: the light is on Released: the light is off MOTOR button - 1, 2, 3, OFF 1: starts the motor at minimum speed 2: starts the motor at medium speed 3: starts the motor at maximum speed OFF: stops the motor 3. ELECTRONIC CONTROL PANEL Light pushbutton • ON: light on (the pushbutton is lit); • OFF: light off; Pushbutton Press to reduce motor speed Speed 1, 2 and 3 are indicated by the number of LEDs that light up (excluding the light and the timer LEDs).
– and + pushbutton: increase/decrease speed (to start the motor press either the + or the – pushbutton). Timer pushbutton: see instructions below. Timer and ‘filter clogged’ alarm pushbutton • This function allows the automatic turning off of the hood after running for 15 minutes at the speed previously set (the pushbutton shows a flickering light). • After about 30 hours of running the pushbutton indicates the need for washing the metal filters (the pushbutton shows a solid red light).
3. REMOVABLE PANEL Follow the instructions on fig. H3 to remove the panel. I LIGHTING ASSEMBLY AND REPLACEMENT 1. LIGHT BULB To replace the light bulb: a) Make sure the appliance is disconnected from the mains power supply. b) Unscrew the support screw A and remove the light cover. c) Replace the light bulb with the same model as the original (max 25 W, see the markings near the light).
How to replace the dicroic lamp: a) Check that the equipment is disconnected from the power supply. b) Remove the lamp with the help of a screwdriver (see figure) c) Replace the lamp with a similar one (dichroic, max 20 W, 12 Volt). Lamp Dicroic spot How to replace a square halogen light: a) Check that the equipment is disconnected from the power supply.
To remove and replace these filters, see the instructions in point H1. This operation should be performed at regular intervals. 2. CHARCOAL FILTERS These trap the odours present in the stream of air that passes through them. The air is purified by passing a number of times through the filters and being recirculated into the kitchen. The charcoal filters cannot be cleaned, and should be replaced on average every 3-4 months (according to use).
claims all liability for any damage that may be directly or indirectly caused to people, things and animals due to the failure to follow all the instructions provided in this booklet and above all the warnings relating to the installation, operation and maintenance of the appliance. N WARRANTY The new equipment is covered by warranty. The warranty conditions are provided by the distributor. The manufacturer is not liable for any inaccuracies in this booklet resulting from printing or transcription errors.
D A BEDIENUNGSANLEITUNG HINWEISE Diese Bedienungsanleitung muss unbedingt zusammen mit dem Gerät aufbewahrt werden, um in Zukunft nachgeschlagen werden zu können. Sollte das Gerät verkauft bzw. einer anderen Person übergeben werden, muss die Bedienungsanleitung unbedingt mitgeliefert werden, damit der neue Benutzer mit dem Betrieb der Dunstabzugshaube und den diesbezüglichen Hinweisen vertraut werden kann. Diese Hinweise sind für Ihre Sicherheit und die anderer Personen abgefasst worden.
B TECHNISCHE MERKMALE Die technischen Daten des Elektrogeräts sind an den Typenschildern im Innern der Dunstabzugshaube angegeben. C INSTALLATION (Dieser Abschnitt ist Fachpersonal mit der für die Montage der Dunstabzugshaube erforderlichen Qualifikation vorbehalten) Der Mindestabstand: der Abstand zwischen der Aufliegefläche der Kochtöpfe auf der Kochebene und dem unteren Dunstabzugshaubenteil.
- Am Netzkabel einen der Geräteleistung entsprechenden Stecker anbringen und diesen in eine Sicherheits- Steckdose stecken. Bei Geräten, die mit Kabel und Stecker ausgestattet geliefert werden, muss man sicherstellen, dass sie mit einem geeigneten Kreislauf verbunden werden. Sich an eine qualifizierte Person wenden (siehe technische Spezifikationen in Punkt B). Die Herstellerfirma ist nicht haftbar, wenn die Unfallverhütungsvorschriften nicht eingehalten werden.
G ARBEITSWEISE 1. ZWEI-SCHALTER-STEUERUNG LICHT - Schalter A Stellung 0: Licht immer ausgeschaltet. Stellung 1: Licht immer eingeschaltet. DREHZAHL - Schalter B Zum Einschalten und Einstellung der Betriebsdrehzahl des Motors, je nach Ausführung Drehzahlstufe 1 bis 3 oder mittels stufenlosem Drehzahlregler. KONTROLLLEUCHTE - C Betriebskontrollleuchte des Motors. 2.
zeitgesteuert und nach ca. 15 Minuten geht der Motor automatisch zur 3. Geschwindigkeit über). Modalität- Druckknopf Funktion: Ein- und Ausschaltung des Abzugshaubenmotors. Die Funktion “gewünschte Geschwindigkeit” gestattet die Einschaltung des Motors bei der Geschwindigkeit, die vor der letzten Ausschaltung gewählt worden war. Option: Ausführung mit Fernbedienung (nur für einige Ausführungen erhältlich).
A 2. AKTIVKOHLEFILTER Um die Aktivkohlefilter auszuwechseln, wie folgt vorgehen: die Metallfilter, wie zuvor erklärt, entfernen. Auf diese Weise kann man die zwei Filter, die an der rechten und linken Seite des Leitblechs befestigt sind, leicht erreichen. Für die Montage/das Auswechseln siehe Abb. Im Falle von Dunstabzugshauben mit Motorkammer befindet sich der Filter im unteren Kammerteil. Für die Montage/das Auswechseln siehe Abb.
ACHTUNG! Lampen mit anderer Form und Leistung als die Originallampe können das Beleuchtungsfach ernsthaft beschädigen. 2. LAMPE Die lampe “Round halogen light” zu ersetzen: a) Sicherstellen, dass das Gerät vom Stromversorgungsnetz getrennt ist. b) Den Haltering des Glasplättchens A durch eine leuchte Hebelbewegung mit einem Schraubenzieher entfernen c) Das Glasplättchen B entfernen, um Zugang um Lampenfach zu haben. d) Die Lampe durch eine neue desselben Typs ersetzen (Halogenleuchte, max.
3. LEUCHTSTOFFLAMPE (dem qualifizierten Personal vorbehalten) Auswechseln des Leuchtstoffrohrs: a) Das Gerät vom Stromnetz trennen; b) Die eventuelle Stahlplatte entfernen, indem man die Befestigungsschrauben ausdreht. Das Leuchtstoffrohr herausnehmen, indem man es um 90° dreht, und mit einem Rohr mit den gleichen Eigenschaften ersetzen (8W-13W-21W-28W je nach Modell); c) Das Gerät wieder an das Stromnetz anschließen.
4. REINIGUNG DER INNENFLÄCHE Die elektrischen Teile oder Teile des Motors im Innern der Dunstabzugshaube dürfen nicht mit Flüssigkeiten oder Lösemittel gereinigt werden. Keine Schleifmittel benutzen. Vor der Reinigung muss das Gerät vom Stromnetz getrennt werden. M SICHERHEITSBESTIMMUNGEN Die elektrische Anlage ist mit einer Erdung ausgestattet, die den internationalen Sicherheitsvorschriften entspricht; sie erfüllt außerdem die europäischen Entstörungsvorschriften.
O MONTAGEANLEITUNG DUNSTABZUGSHAUBE MIT BOX Schritt 1 - Die Befestigungsschiene (A–Abb. 1) in einer Höhe vom Kochfeld an die Wand halten, die sich aus der Summe der Maße X+Y+320 mm ergibt. - Mit einer Wasserwaage sicherstellen, daß die Befestigungsschiene waagerecht ausgerichtet ist und an den Enden der Schiene 2 Bohr-löcher anzeichnen. - Die Löcher bohren, 2 Spreizdübel ø 8 mm hineinstecken und die Schiene mit den dazugehörenden Schrauben befestigen.
F A LIVRET D’INSTRUCTIONS AVERTISSEMENTS Conserver cette notice avec l’appareil pour pouvoir la consulter en cas de besoin. Si l’appareil est vendu ou cédé à tiers, veiller à ce que la notice soit fournie en même temps pour que le nouvel utilisateur puisse avoir toutes les indications concernant le fonctionnement de la hotte et les avertissements correspondants. La notice a été rédigée pour votre sécurité et celle d’autrui.
C MONTAGE (partie réservée au personnel qualifié pour le montage de la hotte) Distance minimale: distance entre la surface de support des casseroles sur la table de cuisson et la partie la plus basse de la hotte. Quand la hotte est placée au-dessus d’un appareil à gaz, cette distance doit être d’au moins 65 cm (voir figure C1). Si la notice de l’appareil à gaz indique une distance supérieure, il faut en tenir compte.
- le système d’alimentation est muni d’un branchement à la terre efficace, conformément aux normes en vigueur ; - la prise ou l’interrupteur omnipolaire sont faciles à atteindre lorsque l’appareil est monté. Le fabricant décline toute responsabilité si les normes de sécurité ne sont pas respectées. E HOTTE VERSION À ÉVACUATION EXTÉRIEURE (aspirante) Dans cette version, les fumées et les vapeurs de cuisine doivent être acheminées vers l’extérieur par un tuyau d’évacuation.
selon les versions ou à l’aide d’un variateur continu de vitesse. VOYANT - C Voyant indiquant que le moteur fonctionne. 2. BOÎTIER DE COMMANDE À 5 TOUCHES LUMIÈRE - Bouton ON/OFF LUMIÈRE MOTEUR - Bouton 1, 2, 3, OFF 1: fait démarrer le moteur à la vitesse minimale 2: fait démarrer le moteur à la vitesse moyenne 3: fait démarrer le moteur à la vitesse maximale OFF: éteint le moteur 3.
interférer avec l’électronique de la hotte. Distance maximale de fonctionnement 5 mètres. Cette distance peut varier en fonction des interférences électromagnétiques d’autres appareils. Bouton lumière de la télécommande : on/off lumière. Bouton – et + réduction/augmentation de la vitesse (pour mettre le moteur en marche, appuyer indifféremment sur la touche + ou sur la touche -. Bouton minuterie : voir instructions ci-dessous.
Pour commander les nouveaux filtres à charbon s’adresser au distributeur/ revendeur. UNIQUEMENT POUR L’ITALIE: Télécharger le bon de commande du filtre en question sur le site: www.falmec.com (y accéder par le menu déroulant d’assistance). 3. PANNEAU REMOVIBILE Suivez les instructions sur l’image. H3 pour enlever le panneau. I ÉCLAIRAGE MONTAGE ET REMPLACEMENT 1. PLAFONNIER Pour remplacer l’ampoule: a) S’assurer que l’appareil est débranché. b) Dévisser la vis de soutien A.
Round halogen light Pour remplacer la lampe “Dicroic lamp”: a) S’assurer que l’appareil est bien débranché du réseau électrique. b) Enlever la lampe en utilisant un tournevis (voir figure) c) Remplacer la lampe par une lampe similaire (dichroïque max. 20 W, 12 Volt). Lamp Dicroic spot Pour remplacer la lampe du “Square halogen light”: a) S’assurer que l’appareil est bien débranché du réseau électrique.
L ENTRETIEN ET NETTOYAGE 1. FILTRES ANTI-GRAISSE MÉTALLIQUES Ils servent à retenir les particules de graisse en suspension. Il est donc conseillé de les laver chaque mois dans de l’eau chaude contenant un peu de détergent, en évitant de les plier. Attendre qu’ils soient bien secs avant de les remonter. Pour le démontage et le montage, voir les instructions au point H1. Répéter fréquemment l’opération. 2.
- S’assurer que le local est suffisamment aéré s’il faut faire fonctionner lahotte en même temps que certains appareils qui utilisent le gaz ou autrecomme combustible. - Ne pas allumer de flammes libres en dessous de la hotte. - Ne pas relier l’appareil aux conduits d’évacuation des fumées dues à la combustion (chaudières, cheminées, etc.). - S’assurer que les normes en vigueur sur l’évacuation de l’air à l’extérieur du local sont respectées avant d’utiliser la hotte.
Phase 4 - Insérer la rallonge (H) dans le chemin (G) et fixer l’ensemble au corps de hotte à l’aide de 8 vis (V1). - Faire coulisser la rallonge (H) jusqu’à atteindre la hauteur désirée. - Une fois la position optimale trouvée, appuyer les pattes contre la paroi (L), contrôler avec un niveau l’alignement horizontale et marquer aux extrémités n°2 points de percement. - Percer, insérer n°2 chevilles expansion ø 4mm et fixer la patte (L) avec les vis relatives.
E A MANUAL DE INSTRUCCIONES ADVERTENCIAS Es muy importante conservar este libro de instrucciones junto al aparato para cualquier consulta futura. Si el aparato tuviera que ser vendido o traspasado a otra persona, asegúrese que el libro vaya incluido, de modo que el nuevo usuario pueda ponerse al corriente del funcionamiento de la campana y de las advertencias correspondientes.
B CARACTERÍSTICAS TÉCNICAS Los datos técnicos del electrodoméstico están contenidos en las placas, situadas en la parte interior de la campana extractora. C INSTALACIÓN (Parte reservada exclusivamente a personas cualificadas). Distancia mínima: distancia entre la superficie del soporte de los recipientes de cocción y la parte más inferior de la campana. Si la campana se coloca encima de una aparato de gas, esta distancia debe ser como mínimo 65 cm (ver fig. C1).
conectar a una clavija de seguridad adecuada. El cable de tierra amarillo / verde no debe ser interrumpido por el interruptor. Antes de proceder a la conexión, controle que: - la tensión de alimentación corresponda a la indicada en la placa de las características técnicas. - la toma de tierra sea correcta y funcione. - el equipo de suministro esté equipado con una conexión de tierra eficaz según las normas en vigor.
G FUNCIONAMIENTO 1. MANDO DE 2 TECLAS LUZ – Interruptor A Posición 0: la luz permanecerá siempre apagada. Posición 1: la luz permanecerá siempre encendida. VELOCIDAD – Interruptor B Permite encender y regular las velocidades de ejercicio del motor, en función de las versiones de 1 a 3 o mediante un variador continuo de velocidad. PILOTO – C Gema piloto de funcionamiento de los motores. 2. BOTONERA DE 5 TECLAS LUZ – Pulsador Pulsado: la luz permanecerá siempre encendida.
Pulsador de modalidad Función: encendido y apagamiento del motor de la campana. La función velocidad deseada permite arrancar el motor con la última velo.cidad seleccionada antes del apagamiento anterior. Opcional: versión con telemando (sólo disponible en algunas versiones). ADVERTENCIAS: Posicionar el aparato lejos de fuentes electromagnéticas que podrían interferir con la electrónica de la campana. Distancia máxima de funcionamiento de 5 metros.
2. FILTROS DE CARBÓN ACTIVO Para sustituir el filtro de carbono proceder de la forma siguiente: saque el filtro metálico como se indica arriba. De este modo se accede fácilmente a los 2 filtros que están sujetos a los lados, derecho e izquierdo del motor. Para el montaje ver figúra. En el caso de campanas con cajón motor el filtro está posicionado en la parte inferior del mismo cajón. Para la sustitución ver figúra. Para solicitar los nuevos filtros de carbón, diríjase al distribuidor/revendedor.
b) Quite, haciendo palanca con un destornillador, el anillo de sujeción del cristal A. c) Quite el cristal B, para acceder al vano lámpara. d) Sustituya la lámpara por una análoga (halógena máx 20 W, 12 Volt enganche G4). e) Monte de nuevo el cristal de protección B fijándolo con el anillo específico A.
L MANTENIMIENTO Y LIMPIEZA Un mantenimiento constante garantiza un buen funcionamiento y un buen rendimiento a lo largo del tiempo. Preste una atención especial a los filtros metálicos antigrasa y a los filtros de carbón activo, en efecto la limpieza frecuente de los filtros y de sus soportes garantiza que no se acumulen grasas, que son peligrosas por la facilidad de incendio, en la campana extractora. 1.
compatibilidades electromagnéticas. No conectar el aparato a conductos de salida de humos derivados de combustión (calefacción, chimeneas, etc). Verificar que la tensión de la red eléctrica corresponde a la que indica la etiqueta localizada en el interior de la campana. La distancia mínima de seguridad desde la encimera a la campana debe ser de al menos 65 cm. No cocinar a fuego “abierto” bajo la campana. Controlar las freidoras durante su uso, el aceite recalentado puede incendiarse.
te, fíjela a la pared con un taco expansible y los correspondientes tornillos utilizando los agujeros adecuados ubicados en la parte posterior de la campana o las abrazaderas de la tapa. En el caso de la versión aspirante, conecte el empalme de salida del ventilador a la descarga externa a través de una tubería adecuada. - Realice la conexión eléctrica sólo después de haber desconectado la alimentación eléctrica de la campana.
RUS A àçëíêìäñàü èé ùäëèãìÄíÄñàà åÖêõ èêÖÑéëíéêéÜçéëíà é˜Â̸ ‚‡ÊÌÓ, ˜ÚÓ·˚ ‰‡ÌÌÓ êÛÍÓ‚Ó‰ÒÚ‚Ó ÔÓ ˝ÍÒÔÎÛ‡Ú‡ˆËË ı‡ÌËÎÓÒ¸ ‚ÏÂÒÚÂ Ò ‡ÔÔ‡‡ÚÛÓÈ ‰Îfl ‚ÓÁÏÓÊÌÓÈ ÌÂÓ·ıÓ‰ËÏÓÒÚË ÍÓÌÒÛθڇˆËË ‚ ·Û‰Û˘ÂÏ. èË ÔÓ‰‡Ê ÔË·Ó‡ ËÎË Ô‰‡˜Â Â„Ó ‰Û„ÓÏÛ ÎËˆÛ Í ÔË·ÓÛ Ó·flÁ‡ÚÂθÌÓ ‰ÓÎÊÌÓ ÔË·„‡Ú¸Òfl êÛÍÓ‚Ó‰ÒÚ‚Ó, ˜ÚÓ·˚ ÌÓ‚˚È ÔÓθÁÓ‚‡ÚÂθ ·˚Î ‚ ÍÛÒ ÚÓ„Ó, Í‡Í ÔÓθÁÓ‚‡Ú¸Òfl ‚˚ÚflÊÍÓÈ Ë Í‡ÍË ÒÓÓÚ‚ÂÚÒÚ‚Û˛˘Ë ÏÂ˚ Ô‰ÓÒÚÓÓÊÌÓÒÚË ÌÂÓ·ıÓ‰ËÏÓ Òӷβ‰‡Ú¸.
B íÖïçàóÖëäàÖ ïÄêÄäíÖêàëíàäà íıÌ˘ÒÍË ‰‡ÌÌ˚ ÔË·Ó‡ ÔË‚‰Ì˚ ̇ ˝ÚËÍÚÍ, ̇ıÓ‰fl˘ÈÒfl ‚ÌÛÚË ‚˚ÚflÊÌÓ„Ó ÛÒÚÓÈÒÚ‚‡. C åéçíÄÜ éëçéÇçõÖ áÄåÖóÄçàü (Ô‡‡„‡Ù ԉ̇Á̇˜Ì ‰Îfl Í‚‡ÎËÙˈËÓ‚‡ÌÌ˚ı ÏÓÌÚËÛ˛˘Ëı ‚˚ÚflÊÌÓ ÛÒÚÓÈÒÚ‚Ó) ÒԈˇÎËÒÚÓ‚, ꇷÓÚ‡˛˘ËÈ ÔË·Ó ‰ÓÎÊÌ ·˚Ú¸ ‚˚¯ ‡·Ó˜„Ó ÒÚÓ· Ì ÏÌ ˜Ï ̇ 65 ÒÏ. Ç ‚ÂÒËË ‚Ò‡Ò˚‚‡˛˘Â„Ó ÚËÔ‡ ‰˚ÏÓÓڂӉ̇fl ÚÛ·‡ ‰ÓÎÊ̇ ËÏÂÚ¸ ‰Ë‡ÏÂÚ Ì ÏÂ̸¯ËÈ, ˜ÂÏ Û Ô‡Ú۷͇ ‚˚ÚflÊÍË.
ÏËÌËχθÌ˚Ï ÓÚÍ˚ÚËÏ ÏÊ‰Û ÍÓÌÚ‡ÍÚ‡ÏË 3 ÏÏ, ‡ÒÒ˜ËÚ‡ÌÌ˚È Ì‡ ̇„ÛÁÍÛ Ë ÓÚ‚˜‡˛˘ËÈ ‰ÈÒÚ‚Û˛˘ËÏ ÌÓχÏ. ÜÎÚÓ-ÁÎÌ˚È ÔÓ‚Ó‰ Á‡ÁÏÎÌËfl Ì ‰ÓÎÊÌ Ô˚‚‡Ú¸Òfl ÔÍβ˜‡ÚÎÏ. ÑÓ ÔÓ‰Íβ˜ÌËfl ÔË·Ó‡ Í ÒÚË ˝ÎÍÚÓÔËÚ‡ÌËfl Û·‰ËÚÒ¸, ˜ÚÓ: - ̇ÔflÊÌË ÒÚË ÔËÚ‡ÌËfl ÒÓÓÚ‚ÚÒÚ‚ÛÚ Û͇Á‡ÌÌÓÏÛ Ì‡ ˝ÚËÍÚÍ Ò ÚıÌ˘ÒÍËÏË ı‡‡ÍÚËÒÚË͇ÏË. - Á‡ÁÏÎÌË ˝ÙÙÍÚË‚ÌÓ Ë ‚˚ÔÓÎÌÌÓ Ô‡‚ËθÌÓ. - ÎËÌËfl ˝ÎÍÚÓÔËÚ‡ÌËfl ÓÒ̇˘Ì‡ ˝ÙÙÍÚË‚Ì˚Ï Á‡ÁÏÎÌËÏ ÔÓ ‰ÈÒÚ‚Û˛˘ËÏ ÌÓχÏ. - ËÒÔÓθÁÛÏ˚ ÓÁÚ͇ ËÎË ÏÌÓ„ÓÔÓβÒÌ˚È ÔÍβ˜‡Úθ ΄ÍÓ ‰ÓÒÚÛÔÌ˚ ÔË ÛÒÚ‡ÌÓ‚ÎÌÌÓÏ ÔË·Ó.
àçÑàäÄíéêçÄü ãÄåèÄ - C à̉Ë͇ÚÓ̇fl ·ÏÔ‡ ‡·ÓÚ˚ ÏÓÚÓ‡. 2. èüíàäçéèéóçéÖ ìèêÄÇãÖçàÖ éëÇÖôÖçàÖ – ÍÌÓÔ͇ åéíéê – ÍÌÓÔ͇ 1, 2, 3, OFF 1: ÏÓÚÓ ‚Íβ˜‡ÚÒfl ̇ ÏËÌËχθÌÓÈ ÒÍÓÓÒÚË 2: ÏÓÚÓ ‚Íβ˜‡ÚÒfl ̇ Ò‰ÌÈ ÒÍÓÓÒÚË 3: ÏÓÚÓ ‚Íβ˜‡ÚÒfl ̇ χÍÒËχθÌÓÈ ÒÍÓÓÒÚË OFF: ÏÓÚÓ ‚˚Íβ˜‡ÚÒfl. 3. äçéèäà ë ùãÖäíêéççõå ìèêÄÇãÖçàÖå ä·‚˯‡ ÓÒ‚Â˘ÂÌËfl • ON: ÓÒ‚Â˘ÂÌË ‚β˜ÂÌÓ (ÍÌÓÔ͇ Ò‚ÂÚËÚÒfl); • OFF: ÓÒ‚Â˘ÂÌË ‚˚Íβ˜ÂÌÓ; ä·‚˯‡ èË Ì‡Ê‡ÚËË ˝ÚÓÈ Í·‚Ë¯Ë ÒÌËʇÂÚÒfl ÒÍÓÓÒÚ¸ ÏÓÚÓ‡.
ä·‚˯‡ – e + ÛÏÂ̸¯ÂÌËÂ/Û‚Â΢ÂÌË ÒÍÓÓÒÚË (‰Îfl Á‡ÔÛÒ͇ ÏÓÚÓ‡ ÏÓÊÌÓ Ì‡Ê‡Ú¸ Í‡Í Í·‚Ë¯Û +, Ú‡Í Ë Í·‚Ë¯Û -). ä·‚˯‡ Ú‡Èχ: ÒÏ. ÌËÊ ËÌÒÚÛÍˆË˛. ä·‚˯‡ Ú‡Èχ Ë Ì‡Ò˚˘ÂÌËfl ÙËθÚÓ‚ • ùÚ‡ ÙÛÌ͈Ëfl ÔÓÁ‚ÓÎflÂÚ ‡‚ÚÓχÚ˘ÂÒÍË ÓÚÍβ˜‡Ú¸ ‚˚ÚflÊÍÛ ÔÓÒΠ15 ÏËÌÛÚ ‡·ÓÚ˚ ̇ ‡Ì Á‡‰‡ÌÌÓÈ ÒÍÓÓÒÚË (Í·‚˯‡ Ò ÏË„‡˛˘ËÏ Ò‚ÂÚÓÏ). • èÓÒΠÔËÏÂÌÓ 30 ˜‡ÒÓ‚ ‡·ÓÚ˚ Í·‚˯‡ «Ô‰·„‡ÂÚ» ˜ËÒÚÍÛ ÏÂÚ‡Î΢ÂÒÍËı ÙËθÚÓ‚ (Í·‚˯‡ Ò‚ÂÚËÚÒfl ͇ÒÌ˚Ï).
3. СМЕННАЯ ГРУППА Следуйте за инструкциями на рис. H3, чтобы удалять группу. I éëÇÖôÖçàÖ ìëíÄçéÇäÄ à áÄåÖçÄ 1. ЛАМПОЧКА Для замены лампочки необходимо: а) убедиться, что прибор отключет от электросети; б) открутить крепежный винт А и снять плафон; в) заменить лампочку на другую такой же модели (макс. 25 Вт, см. маркировку у самой лампочки). A ÇçàåÄçàÖ! ã‡ÏÔ˚, ÙÓÏÓÈ Ë ÏÓ˘ÌÓÒÚ¸˛ ÓÚ΢Ì˚ ÓÚ ÓË„Ë̇θÌ˚ı, ÏÓ„ÛÚ ‚˚Á‚‡Ú¸ Ò¸ÁÌ˚ ÔӂʉÌËfl ‚ ÓÚÒÍ ÓÒ‚˘ÌËfl. 2.
а) Убедиться в том, что прибор отключен от электросети; б) извлечь лампочку с помощью отвертки (см. рисунок); в) заменить лампочку на аналогичную (дихроичную, макс. 20 Вт, 12 В). Dicroic Lamp Для замены лампочки “Square halogen light” необходимо: а) Убедиться в том, что прибор отключен от электросети; б) Полностью открыть панель на 90° (см. рисунок) нажатием на PUSH. в) заменить лампочку на аналогичную (галогеновую, макс. 20 Вт, 12 В, разъем G4). д) Закрыть панель.
2. îàãúíêõ ë ÄäíàÇàêéÇÄççõå ìÉãÖå è‰Ì‡Á̇˜Ì˚ ‰Îfl Á‡‰Ê‡ÌËfl Á‡Ô‡ıÓ‚, ÔËÒÛÚÒÚ‚Û˛˘Ëı ‚ ‚ÓÁ‰Ûı, ÍÓÚÓ˚È ˜Á ÌËı ÔÓıÓ‰ËÚ. é˜Ë˘ÌÌ˚È ‚ÓÁ‰Ûı ‚ÌÓ‚¸ ‚˚ÔÛÒ͇ÚÒfl ̇ ÍÛıÌ˛. îËθÚ˚ ̇ ‡ÍÚË‚ËÓ‚‡ÌÌÓÏ Û„Î Ì ÏÓ„ÛÚ ·˚Ú¸ ÔÓÏ˚Ú˚ Ë Á‡ÏÌfl˛ÚÒfl ‚ Ò‰ÌÏ Í‡Ê‰˚ 3-4 ÏÒflˆ‡ (Á‡‚ËÒËÚ ÓÚ ˜‡ÒÚÓÚ˚ ËÒÔÓθÁÓ‚‡ÌËfl). ÑÎfl Á‡ÏÌ˚ ÙËθÚÓ‚ Ò ‡ÍÚË‚ËÓ‚‡ÌÌ˚Ï Û„ÎÏ ÒΉÛÈÚ ËÌÒÚÛ͈ËflÏ, ÔÛÌÍÚ H2. 3.
è‰ Ôӂ‰ÂÌËÂÏ Î˛·˚ı χÌËÔÛÎflˆËÈ ÔÓ ˜ËÒÚÍ ËÎË ÛıÓ‰Û ‚˚Íβ˜ËÚ ÔË·Ó, ‚˚Ú‡˘Ë‚ ‚ËÎÍÛ ËÁ ÓÁÂÚÍË ËÎË Ò ÔÓÏÓ˘¸˛ Ó·˘Â„Ó ‚˚Íβ˜‡ÚÂÎfl. è‰ÔËflÚËÂ-ËÁ„ÓÚÓ‚ËÚÂθ Ì ÌÂÒÂÚ ÓÚ‚ÂÚÒÚ‚ÂÌÌÓÒÚË Á‡ ‚ÓÁÏÓÊÌ˚È ‚‰, Ô˘ËÌÂÌÌ˚È, ÔflÏÓ ËÎË ÍÓÒ‚ÂÌÌÓ, β‰flÏ, Ô‰ÏÂÚ‡Ï ËÎË ‰Óχ¯ÌËÏ ÊË‚ÓÚÌ˚Ï ‚ÒΉÒÚ‚Ë ÌÂÒӷβ‰ÂÌËfl Ô‰ÔËÒ‡ÌËÈ, Û͇Á‡ÌÌ˚ı ‚ êÛÍÓ‚Ó‰ÒÚ‚Â ÔÓ ˝ÍÒÔÎÛ‡Ú‡ˆËË, ÓÒÓ·ÂÌÌÓ ‚ ÚÓÏ, ˜ÚÓ Í‡Ò‡ÂÚÒfl Ô‡‚ËÎ ÛÒÚ‡ÌÓ‚ÍËË Ë ˝ÍÒÔÎÛ‡Ú‡ˆËË ÔË·Ó‡ Ë ÛıÓ‰‡ Á‡ ÌËÏ. N ÉÄêÄçíàà çÓ‚˚È ÔË·Ó Ì‡ıÓ‰ËÚÒfl ÔÓ‰ ‰ÈÒÚ‚ËÏ „‡‡ÌÚËË.
(L), проверить с помощью уровня выравнивание по горизонтали и отметить на концах 2 точки для сверления. - выполнить сверления, вставить два 2 дюбеля ø 4мм и прикрепить скобу (L) соответствующими винтами. - Привинтить винтами (M) удлинитель (H) к скобе (L). - Подать электрическое питание на вытяжку, придерживаясь норм действующего законодательства (разд. D).
PL A INSTRUKCJA OBSŁUGI OSTRZEŻENIA Ta instrukcja obsługi musi być przechowywana razem z urządzeniem w celu przyszłego wykorzystywania. Jeżeli urządzenie jest sprzedawane lub przesyłane innym stronom, sprawdzić, czy wraz z nim przekazywana jest ta instrukcja, dla zapewnienia, że nowy użytkownik posiada prawidłowe informacje o działaniu okapu kuchennego i zna ostrzeżenia. Te ostrzeżenia zostały podane dla Waszego bezpieczeństwa oraz ostrzeżenia innych osób.
B SPECYFIKACJE TECHNICZNE Dane techniczne dotyczące tego urządzenia elektrycznego są podane na tabliczkach znamionowych umieszczonych wewnątrz okapu kuchennego. C INSTALOWANIE (Rozdział zarezerwowany dla wykwalifikowanych instalatorów okapów kuchennych). Minimalna odległość: odległość pomiędzy rusztami kuchenki a najniższym elementem okapu.
Dla urządzeń, które przychodzą wyposażone w kabel i wtyczkę, proszę się upewnić, że są one włączane do obwodu odpowiedniego dla takiego urządzenia. Proszę poradzić się osoby wykwalifikowanej. (Patrz specyfikacje techniczne w punkcie B). Producent nie ponosi żadnej odpowiedzialności, jeżeli nie są przestrzegane normy bezpieczeństwa. E OKAP KUCHENNY Z WYPROWADZENIEM ZEWNĘTRZNYM (wyciąg) W tej wersji, dymy i para z kuchni są wyprowadzane na zewnątrz poprzez kanał wyciągowy.
PRĘDKOŚĆ – przełącznik B Jest używany do włączania i ustawiania prędkości silnika, od 1 do 3, lub regulatora prędkości, zależnie od wersji. ŚWIATŁO – Przełącznik C Lampka sygnalizacyjna działania silnika. 2. PULPIT STEROWANIA PIĘCIOPRZYCISKOWY ŚWIATŁO – przycisk Naciśnięty: światło włączone Zwolniony: światło wyłączone Przycisk SILNIKA – 1, 2, 3, OFF 1: uruchamia silnik z minimalną prędkością 2: uruchamia silnik ze średnią prędkością 3: uruchamia silnik z maksymalną prędkością OFF: zatrzymuje silnik 3.
silnika z prędkością, która została wybrana przed ostatnim wyłączeniem okapu. Opcjonalnie: wersja ze zdalnym sterowaniem (tylko niektóre wersje). OSTRZEŻENIE: Instalować okap daleko od źródeł fal elektromagnetycznych, ponieważ mogą one zakłócać prawidłowe działanie układu elektronicznego. Maksymalna odległość działania: 5 metrów. W przypadku zakłóceń elektromagnetycznych innych urządzeń, maksymalna odległość działania może być mniejsza, niż 5 metrów.
2. FILTRY Z WĘGLEM DRZEWNYM W celu wymiany filtrów z węglem drzewnym, postępować następująco: zdjąć filtry metalowe, jak opisano powyżej. Można teraz łatwo sięgnąć do dwóch filtrów umieszczonych na końcach silnika. Jak zakładać nowe filtry – patrz rysunek. W przypadku okapu ze skrzynką silnika, filtr jest umieszczony na dolnej części skrzynki silnika. Jak zakładać nowe filtry – patrz rysunek. Aby zamówić nowe filtry węglowe, należy skontaktować się z dystrybutorem/pośrednikiem.
a) b) c) d) Upewnić się, że urządzenie jest odłączone od zasilania sieciowego. Wyjąć, podważając wkrętakiem, pierścień utrzymujący A pokrywy szklanej. Zdjąć pokrywę szklaną B uzyskując dostęp do obudowy lampy. Wymienić lampę na lampę takiego samego typu (halogenowa max. 20 W, 12 V, mocowanie G4). e) Założyć pokrywę szklaną B i zamocować ją wykorzystując specjalny pierścień A.
– 13W – 21W – 28W, odpowiednio do modelu); d) Podłączyć urządzenie do sieci. L OBSŁUGA KONSERWACYJNA I CZYSZCZENIE Ciągła obsługa konserwacyjna zapewnia prawidłowe działanie i wydajność urządzenia przez długi czas. Należy zwracać szczególną uwagę na metalowe filtry zatrzymujące tłuszcz i filtry z węglem drzewnym. Częste czyszczenie filtrów i ich mocowań zapewni, że tłuszcze nie będą się gromadzić w okapie, co powodowałby zagrożenie pożarem. 1.
M OSTRZEŻENIA BEZPIECZEŃSTWA Układ elektryczny i podłączenie uziemienia jest zgodnie z międzynarodowymi normami bezpieczeństwa; ponadto są one zgodne z normą europejską dla zgodności elektromagnetycznej. Nie podłączać urządzenia do przewodów kominowych (od bojlerów, kominków, itp.). Upewnić się, że napięcie sieci odpowiada wartościom podanym na tabliczce znamionowej umieszczonej wewnątrz okapu kuchennego.
O INSTRUKCJE MOCOWANIA, OKAPY KUCHENNE ZE SKRZYNKĄ Krok 1 - Przyłożyć belkę nośną do ściany (A - Rys. 1) na wysokości od płyty kuchennej określonej przez sumę odległości X+Y+320 mm. - Sprawdzić ułożenie poziome poziomicą spirytusową i zaznaczyć 2 otwory do wywiercenia przy końcach belki. - Wywiercić otwory, wstawić 2 kołki rozporowe o średnicy 8 mm i zamocować belkę używając odpowiednich śrub. Krok 2 - Zahaczyć okap kuchenny na belce nośnej (Rys. 2).
Note
Note
Note
Decreto Legislativo del 30/06/2003 n. 196 - art. 7 Codice in materia di protezione dei dati personali. 1. L’interessato ha diritto di ottenere la conferma dell’esistenza o meno di dati personali che lo riguardano, anche se non ancora registrati, e la loro comunicazione in forma intelleggibile. 2.
Condizioni di garanzia 1) L’apparecchio è garantito dalla Casa costruttrice Falmec S.p.A (www.falmec.com) per un periodo di 24 mesi dalla data del suo acquisto comprovata da ricevuta fiscale o altro documento reso fiscalmente obbligatorio. 2) La garanzia sarà prestata con la sostituzione o riparazione gratuita delle parti che risultino difettose.
IMPORTANTE! La presente garanzia è valida solo per l’Italia (Guarantee conditions are valid only for Italy). Questo certificato di garanzia non deve essere spedito, ma conservato con la ricevuta fiscale, o altro documento reso fiscalmente obbligatorio, che comprovi la data d’acquisto della cappa.