
Install Instructions


5
fantech
Maintenance
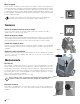
Air Filter (Fig. 7)
The air filter should be checked regularly. Operating the dehu-
midifier with a clogged filter will reduce efficiency. The filter can be
vacuum cleaned to remove dust. To access the filter media, slide
the filter frame up until it clears the dehumidifier cabinet. Remove
the filter media from behind the frame and vacuum. Reverse pro-
cedure to re-install the filter and frame into the dehumidifier.
Storage
Freezing temperatures and biological growth must be considered
before storing the dehumidifier. The dehumidifier should be
flushed with a biofungicide before storing. When storing the unit,
ensure that water has been removed from the reservoir and
hose. This will prevent damage caused by freezing temperatures
and to prevent biological growth. Use the pump purge button to
remove water and biofungicide chemicals from the dehumidifier.
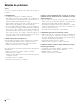
Stacking (Fig.9)
The dehumidifiers can be stacked on top of each other. The
wheels from the upper unit must be resting in the cradle of
the lower unit. DO NOT STACK MORE THAN TWO HIGH.
External Cleaning
Use a non-flammable mild, non-abrasive soap and clean
water solution to clean the dehumidifier. Wipe dry.
Internal Cleaning
Disconnect dehumidifier from power supply.
Light cleaning: Remove the air filter and spray evaporator
coil with water.Remove the two upper screws from the front
hood.
Heavy cleaning: Remove two upper screws from front hood.
Open hood. Spray water at coils. Close hood and replace
screws. (Fig. 8)
Fig. 7
Fig. 8
Electrical Shock Hazard
Plug into a grounded 3 prong outlet.
Do not remove ground prong.
Do not use an adapter.
WARNING
Disconnect power supply before cleaning.
Failure to follow these instructions can result in death,
fire, or electrical shock.
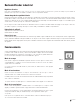
Venting / Ducting (Fig. 6)
Twin rear outlets can accommo-
date two individual 5” ducts or one
10” lay flat duct to be attached.
This allows for warm dry air to be
directed into different areas.
Fig. 6
Cleaning
Fig. 9
Service
A qualified refrigeration technician must service all refriger-
ant leaks.
WARNING: The dehumidifier uses a high pressure refrigerant
system and high voltage circuitry which could present a health
hazard resulting in death, serious bodily injury, and/or property
damage. Only qualified service people should service this unit.
CAUTION: Do not operate unit without the front hood secured in
place.
The serial data plate is located on the underside of the dehumid-
ifier. For service information contact 1-800-565-3548.
(2)
Figure 8
Troubleshooting
Service
A qualified refrigeration technician must service all refrigerant leaks.
The Unit is NOT working:
• Has the breaker tripped? – Reset breaker
• If in a wet area, is the unit plugged into a GFI protected circuit? – Excessive
moisture will trip GFI. Remove from area.
• Is the unit being run off a generator? - Check output does not fluctuate
as the unit will not operate at low voltage.
• If using an extension cord - Is the cord of the correct gauge for the
distance run? (14 AWG up to 25’ and 12 AWG over 25’). Note: Verify
voltage while unit is starting. Start up will cause the highest current draw
and largest voltage drop. Even if plugged directly to outlet there can be
a significant voltage drop. Never assume the voltage is ok without
verifying.
The unit shuts down and displays an error code.
ER 1: Overflow switch remaining closed for >2 minutes.
• Plugged or kinked drain hose – Remove obstruction
• Bad connection in pump circuit – Check connections
• Defective condensate pump – Replace
ER 2: Internal pressure switch indicates refrigerant pressure is too high.
• Air filter is dirty or plugged – Clean or replace air filter
• The coil is dirty – Clean the coil
• Loose or faulty electrical connections to pressure switch – check
connections
• Fan is not working – Replace
• Defective pressure switch – replace
The unit continually ices up: Note that some ice buildup on the evaporator coil
is normal but airflow should not be blocked.
• Is warm air blowing out the back of the unit? - No warm air, ambient
temperature may be too low. Raise temperature with supplementary
source.
• Is the air filter clean and airflow unobstructed? – Clean filter. Unit should
have a minimum of 10” clearance all around it.
• Dirty evaporator coil? – Clean coil.
Unit moves some water but not as much as expected:
• Air filter dirty or airflow obstructed - Unit should have a minimum of 10”
clearance all around it. Clean air filter and ensure adequate airflow/space
around unit.
• Evaporator coil dirty – Clean coil.
• Restrictive or kinked exhaust ducting (if used) – Straighten out ducting.
Fan does not run. Compressor runs briefly but cycles on/off:
• Loose connection in fan circuit – Check connections.
• Fan obstructed and not turning – Remove obstruction.
• Defective fan – Replace fan.
• Defective control board – Replace control board.
Cleaning
Disconnect power supply before cleaning
Failure to follow these instructions can result in death, fire, or electrical shock
External Cleaning
Use a non-flammable mild, non-abrasive soap and water solution. Wipe dry.
Internal Cleaning
Disconnect dehumidifier from power supply.
Light cleaning: Remove the air filter and spray evaporator coil with water.
Heavy cleaning: Remove two upper screws from front hood. Open hood. Spray water at coils. Close
hood and replace screws. (figure 8)
Care must be taken to insure coil fins are not damaged, as damaged fins can restrict airflow
and reduce the unit's ability to produce water.
Storage
Freezing temperatures and biological growth must be considered before storing the dehumidifier. To
prevent the biological growth, spray an evaporator cleaner on the coils and rinse into the drainage
system. You must also purge the excess liquid from the pump using the manual purge function to
prevent issues with freezing storage environments.