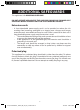
5 CUP COFFEE MAKER Model Number: 103743 UPC: 681131037433 Customer Assistance 1-855-451-2897 (US) Please consider the option to recycle the packaging material and donate any appliance you are no longer using. 5-cup Coffee Maker_103743_IM_US_V2_121212.
IMPORTANT SAFEGUARDS When using electrical appliances, basic safety precautions should always be followed, including the following: • Read all instructions before use. • Do not touch hot surfaces. Use handles or knobs. • To protect against electric shock do not immerse cord or plugs or the appliance in water or other liquid. • Close supervision is necessary when any appliance is used by or near children. • Unplug from wall outlet when not in use and before cleaning.
Additional Safeguards This appliance is for HOUSEHOLD USE ONLY. DO NOT OPERATE APPLIANCE IF THE LINE CORD SHOWS ANY DAMAGE OR IF APPLIANCE WORKS INTERMITTENTLY OR STOPS WORKING ENTIRELY. Extension cords • A short detachable power-supply cord is to be provided to reduce the risk resulting from becoming entangled in or tripping over a longer cord. Longer extension cords are available and may be used if care is exercised in their use.
Parts 1 16 3 4 2 15 5 14 5a 13 12 6 PRO G AUT O WA RM MIN 11 1. 2. 3. 4. 5. 5a 6. 10 Charcoal filter holder Charcoal filter Lid Drip head Water tank Water-level indicator Power cord with plug 98 7. 8. 9. 10. 11. 12. 13. Anti-slip feet Control panel Keep warm plate Carafe Carafe handle Carafe lid Drip stop 7 14. Filter housing 15. Permanent filter 16. Measuring scoop 4 5-cup Coffee Maker_103743_IM_US_V2_121212.
Parts POWER 18:88 pm 21 BREW 20 PROG auto HOUR AUTO 17 WARM MIN 18 19 Name 17. AUTO button Function Starts programmed operation / extend keep warm Sets minutes (time/program) Shows time/program time Sets hours (time/program) On/Off, starts manual brewing cycle 18. MIN button 19. Display 20. HOUR button 21. button 5 5-cup Coffee Maker_103743_IM_US_V2_121212.
ILLUSTRATIONS a b c d e f g h i k l j PROG POWER 18:88 pm BREW HOUR auto sec AUTO WARM MIN 6 5-cup Coffee Maker_103743_IM_US_V2_121212.
ILLUSTRATIONS m n o OPERATION Before first use • Remove all packaging materials, labels and/or stickers from your appliance. • Check package contents for completeness and damage. Do not operate the appliance if package content is incomplete or appear damaged. Return it immediately to the dealer. CAUTION: Danger of suffocation! Packaging materials are not toys. Always keep plastic bags, foils and Styrofoam parts away from babies and children.
OPERATION CAUTION: During operation, the appliance produces hot steam. Keep clear of the top of the appliance. CAUTION: Never touch the keep warm plate (9) during use (ill. l ) or remove accessories when the appliance is plugged in and switched on. CAUTION: Never use the appliance with the lid (3) open (ill. m ). • Let the appliance cool completely. • Clean the appliance ( Cleaning). Assembly • Place the appliance on a clean, flat and stable surface.
OPERATION • Fill the required amount of water into the carafe (10). Pour the water into the water tank (5) (ill. f ). Check the water-level indicator (5a) in the inside of the water tank (5) (ill. g ). • Close the lid (3) (ill. h ). • Place the carafe (10) on the keep warm plate (9) (ill. h ). NOTE: Ensure the appliance is assembled correctly and completely. NOTE: It is possible to place a paper filter into the filter housing (14) instead of the permanent filter (15).
OPERATION Brewing NOTE: Depending on the number of cups required to be brewed, the amount of ground coffee has to be adjusted. As a general rule, one measuring scoop (16) of ground coffee equals one cup. NOTE: The appliance will run until no water is left in the water tank (5). NOTE: During operation, the keep warm plate (9) will start to warm up and remain on until the appliance is returned to stand-by mode.
OPERATION AUTO function The appliance is equipped with an automatic brewing function, allowing you to set the time you would like freshly brewed coffee. NOTE: Using this function is only possible if the clock has been set. NOTE: The time set, is the time the coffee will be ready. Add the required amount of ground coffee in the permanent filter (15) (ill. c ). Fill the water tank (5) with the required amount of water (ill. f ). Place the carafe (10) on the keep warm plate (9).
Cleaning Proper maintenance will ensure many years of service from your appliance. Clean the appliance after every use. The appliance contains no user serviceable parts and requires little maintenance. Leave any servicing or repairs to qualified personnel. CAUTION: Disconnect the plug (6) from the wall outlet. Allow all parts of the appliance to cool down completely. NOTE: Do not immerse the power cord with plug (6) and appliance into water or any other liquid.
Troubleshooting PROBLEM CAUSE SOLUTION The appliance is not working Appliance not plugged Insert the plug (6) into the wall in outlet Wall outlet not energized Check fuses and circuit breaker Appliance not switched on Switch the appliance on by pressing the button (21) Water tank (5) is empty Refill water into the water tank (5) Water intake under charcoal filter holder (1) is clogged Clean the water intake The permanent filter (15) is blocked Clean the permanent filter (15) and try a coarser g
Troubleshooting PROBLEM CAUSE SOLUTION Coffee leaks around the filter housing (14) Filter housing (14) not aligned correctly Align filter housing (14) correctly (ill.
t Customer Assistance If you have a claim under this warranty, please call our Customer Assistance Number. For faster service, please have the model number and product name ready for the operator to assist you. This number can be found on the bottom of your appliance and on the front page of this manual.