HDPii High Definition Card Printer/Encoder User Guide (Rev. 1.
RESTRICTED USE ONLY Fargo Electronics, Inc. HDPii High Definition Card Printer/Encoder User Guide (Rev. 1.1), property of Fargo Electronics, Incorporated Copyright © 2008 by Fargo Electronics, Incorporated. All rights reserved. Printed in the United States of America. Exclusive permission is granted to authorized resellers of Fargo products to reproduce and distribute this copyrighted document to authorized Fargo customers.
RESTRICTED USE ONLY Fargo Electronics, Inc.
RESTRICTED USE ONLY Fargo Electronics, Inc.
RESTRICTED USE ONLY Fargo Electronics, Inc.
RESTRICTED USE ONLY Fargo Electronics, Inc.
RESTRICTED USE ONLY Fargo Electronics, Inc.
RESTRICTED USE ONLY Fargo Electronics, Inc.
RESTRICTED USE ONLY Fargo Electronics, Inc. Section 1: Printer Overview How to use the guide The HDPii High Definition Card Printer/Encoder User Guide is designed to provide installers and technicians with quick, efficient lookup of related procedures, components and terms. The Guide can be used effectively either in soft or hard copy, depending on the preference of the installer or technician.
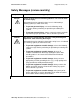
RESTRICTED USE ONLY Fargo Electronics, Inc. Safety Messages (review carefully) Symbol Critical Instructions for Safety purposes Danger: Failure to follow these installation guidelines can result in death or serious injury. Information that raises potential safety issues is indicated by a warning symbol (as shown to the left). Caution: • To prevent personal injury, refer to the following safety messages before performing an operation preceded by this symbol.
RESTRICTED USE ONLY Fargo Electronics, Inc. Process Flow (in table format) Reviewing the Boot-up Sequence Step Process 1 The Card feed stepper turns ON (to check for a card in the card path). 2 The Film transfer take-up Motor turns ON to take up any slack in the film. 3 The Print Headlift turns until head up position is returned from Headlift Sensor.
RESTRICTED USE ONLY Fargo Electronics, Inc. Reviewing the Sequence of Operations The following sequence describes a dual-sided, full color print job with magnetic encoding. Step Process 1 The File information is received from the PC. 2 The Heater warms up and/or maintains the heat on the hot Roller using the RTD (Resistive Thermal Device) to help maintain the desired temp.
RESTRICTED USE ONLY Fargo Electronics, Inc. Reviewing Card Printer Sequence of Operations (continued) Step Process 13 The Ribbon Drives, Film Drive and Print Platen Stepper turn ON and the Printhead burns the image data until the image data is depleted. All stop. (Note: The Ribbon Encoders and Film Encoders are active during this step.) 14 The Headlift Motor engages, moving the Printhead up until the Headlift Sensor is activated. All stop.
RESTRICTED USE ONLY Fargo Electronics, Inc. Section 2: Specifications The purpose of this section is to provide the User with specific information on the Regulatory Compliances, Agency Listings, Technical Specifications and Functional Specifications for the Printers. Safety Messages (review carefully) Symbol Critical Instructions for Safety purposes Danger: Failure to follow these installation guidelines can result in death or serious injury.
RESTRICTED USE ONLY Fargo Electronics, Inc. Introduction The purpose of this section is to provide the User with specific information on the Regulatory Compliances, Agency Listings, Technical Specifications and Functional Specifications for the Card Printer/Encoder.
RESTRICTED USE ONLY Fargo Electronics, Inc. Reviewing the Package These items are included with your Please see below: • Unpacking Instructions • Software Installation CD (includes Printer Driver) • Cleaning Roller • One (1) power supply with Printer HDPii High Definition Card Printer/Encoder User Guide (Rev. 1.
RESTRICTED USE ONLY Fargo Electronics, Inc. Reviewing the Card Printer Display - Printer with attached Output Hopper HDPii High Definition Card Printer/Encoder User Guide (Rev. 1.
RESTRICTED USE ONLY Fargo Electronics, Inc. Regulatory Compliances Term Description CSA The Printer manufacturer has been authorized by UL to represent the Card Printer as CSA Certified under CSA Standard C22.2 No. 60950-1-03. (cUL) File Number: E145118 FCC The Card Printer complies with the requirements in Part 15 of the FCC rules for a Class A digital device. UL The Card Printer is listed under UL IEC 60950-1 (2001) INFORMATION TECHNOLOGY EQUIPMENT.
RESTRICTED USE ONLY Fargo Electronics, Inc. FCC Rules This device complies with Part 15 of the FCC rules. Operation is subject to the following two conditions: (1) This device may not cause harmful interference. (2) This device must accept any interference received, including interference that may cause undesired operation. Note: This equipment has been tested and found to comply with the limits for a Class A digital device, pursuant to part 15 of the FCC Rules.
RESTRICTED USE ONLY Fargo Electronics, Inc. Technical Specifications Term Description Accepted Card Thickness • Print only: .030" (30 mil) to .050" (50 mil) / .762mm to 1.
RESTRICTED USE ONLY Fargo Electronics, Inc. Technical Specifications (continued) Term Description Card Sizes (Accepted Standard sizes) (See Card tab under Printer Adjustments): • CR-80: This selection is the default form size for the Printer. This will print a 2.125 in. W x 3.370 in. L (54mm W x 85.6mm L) image including a .04 over-bleed on each of the 4 sides. • CR-80 (default values): Card Size supported is 2.204 in. W X 3.452 in. L (56mm W X 87.7 mm L).
RESTRICTED USE ONLY Fargo Electronics, Inc. Technical Specifications (continued) Term Description Card Size (Custom selection) Sets Custom Card Size when closing dialog box. • Print Width default = 2.204, upper limit = 2.440, lower limit = 1.000, cannot be null • Print Length default = 3.452, upper limit = 3.704, lower limit = 3.000, cannot be null Changing back to CR-80 resets to CR-80 defaults.
RESTRICTED USE ONLY Fargo Electronics, Inc. Technical Specifications (continued) Term Description Colors (dpi) 300 dpi (11.8 dots/mm) Dimensions • Standard: 11.50"H x 12.25"W x 9.25"D / 292mmH x 313mmW x 235mmD • Dual-Sided Module: 11.50"H x 25.00"W x 9.
RESTRICTED USE ONLY Fargo Electronics, Inc. Technical Specifications (continued) Term Description Certified Supplies Card Printer/Encoder requires highly specialized media to function properly. To maximize printed card quality and durability, Printhead life and Printer/Encoder reliability, use only Certified Supplies, Fargo warranties are void, where not prohibited by law, when nonCertified Supplies are used.
RESTRICTED USE ONLY Fargo Electronics, Inc. Technical Specifications (continued) Term Description Mechanical Security Locking override: The locking solenoid has a mechanical lock override (that allows access to the secured areas of the Printer with the appropriate key). This lock has a barrel-type key.
RESTRICTED USE ONLY Fargo Electronics, Inc. Technical Specifications (continued) Term Description Print Area Over-the-edge on CR-80 cards.
RESTRICTED USE ONLY Fargo Electronics, Inc. Technical Specifications (continued) Term Description Print Speed Batch Mode Print Speed - Batch Mode: • 38 seconds per card / 95 cards per hour (YMC with transfer)* • 46 seconds per card / 78 cards per hour (YMCK with transfer)* • 70 seconds per card / 51 cards per hour (YMCKK with transfer)* • 70 seconds per card / 48 cards per hour (YMCKI with transfer)* Print speed indicates an approximate print speed.
RESTRICTED USE ONLY Fargo Electronics, Inc. Technical Specifications Term Description Supply Frequency 50 Hz / 60 Hz Supply Voltage 100-240 VAC, 3.8A Supported Printers/Models Please see below: System Requirements • Ethernet • USB • x86 based PC or compatible • Windows 2000, Windows XP, Windows 2003 • 500MHz computer with 256MB of RAM or higher • 500MB free hard disk space or higher Warranty Printer: Two year (including On-Call Express, U.S. only); optional Extended Warranty Program (U.S.
RESTRICTED USE ONLY Fargo Electronics, Inc. Functional Specifications The Card Printer utilizes two different, yet closely related printing technologies to achieve its remarkable print quality for dye-sublimation and resin thermal transfer. See previous section as needed. The following describes how each of these technologies works: Function Description DyeSublimation Dye-Sublimation is the print method the Card Printer uses to produce smooth, continuous-tone images that look photographic.
RESTRICTED USE ONLY Fargo Electronics, Inc. Printer Components: Resin Thermal Transfer to USB Interface Port Component Description Resin Thermal Transfer Resin Thermal Transfer is the print method the Printer uses to print sharp black text and crisp bar codes that can be read by both infrared and visible-light bar code scanners.
RESTRICTED USE ONLY Fargo Electronics, Inc. Printer Components: LCD and Softkey Control Pad The Printer provides a two line, thirty-two (32) character LCD Display that can communicate helpful information about the Printer's operation. The bottom line of the LCD Display will always be used to communicate the current function of the Printer's softkey buttons. This section describes how the LCD Display and Softkey Control Pad work together.
RESTRICTED USE ONLY Fargo Electronics, Inc. Printer Components: LCD and Softkey Control Pad (continued) Component Description Print Status Screen During operation, the LCD will indicate the current Print Status by showing you the area of the Printer that is active. It does this by displaying the following messages: • FEEDING: Indicates that cards are being fed into the Printer. • FLIPPING: Indicates that the card is being transported to the Output Module.
RESTRICTED USE ONLY Fargo Electronics, Inc. Printer Components: Print Ribbons The Card Printer utilizes both dye-sublimation and/or resin thermal transfer methods to print images (print to film and transfer film to card). • Since the dye-sublimation and the resin thermal transfer print methods each provide their own unique benefits, Print Ribbons are available in dye-sublimation-only and combination dye-sublimation/resin versions.
RESTRICTED USE ONLY Fargo Electronics, Inc. Printer Components: Blank Cards Caution: Never run cards with a contaminated, dull or uneven surface through the Printer. Printing onto such cards will ultimately lead to poor print quality. Always store the card stock in its original packaging or in a clean, dust-free container. Do not print onto cards that have been dropped or soiled. Type Description Card Size These Card Printers accept standard CR80 sized cards (3.375L x 2.125W / 85.
RESTRICTED USE ONLY Fargo Electronics, Inc. Printer Components: Blank Cards (continued) Type Description UltraCard stock Due to the importance of using high-quality blank cards, a factory-approved card stock called UltraCard™ is available and recommended for best results. • Two types of these cards are available: UltraCard and UltraCard III. • UltraCard stock has a PVC core and offers medium card durability. • Recommended: UltraCard III stock has a 40% polyester core and offers high durability.
RESTRICTED USE ONLY Fargo Electronics, Inc. Printer Components: Card Output Hopper and Reject Hopper Type Description Card Output Hopper All standard Card Printers provide a 100 card capacity Card Output Hopper (based on a standard 30 mil card thickness). (Note: This Hopper stores the cards after they are printed.) Shown in the lower left. • Once set in place, the Input Hopper is secured with a latch that is deactivated by a lever located in an area with restricted access.
RESTRICTED USE ONLY Fargo Electronics, Inc. Printer Components: Transfer Roller Danger: The Printer’s Transfer Roller can reach temperatures exceeding 350 degree F (175 C). Use extreme caution when operating the Transfer Roller. Never touch the Transfer Roller unless the Printer Power has been turned off for at least 20 to 30 minutes. Type Description Controls Both the Printer itself and the Printer’s software Driver control the built-in Transfer Roller.
RESTRICTED USE ONLY Fargo Electronics, Inc. Printer Components: Flipper Table Type Description Exception Feed The printer has a simple single card exception feed that can be initiated by an external command. Cards (fed from the exception feed slot) feed from a +90° inclination of the Flipper Table. In the Kiosk mode, cards can move from the exception feed slot to different positions for printing, magnetic encoding, and e-card encoding, using the OMNIKEY modules.
RESTRICTED USE ONLY Fargo Electronics, Inc. Section 3: Installation Procedures Safety Messages (review carefully) Symbol Critical Procedures for Safety purposes Danger: Failure to follow these installation guidelines can result in death or serious injury. Information that raises potential safety issues is indicated by a warning symbol (as shown to the left). Caution: • To prevent personal injury, refer to the following safety messages before performing an operation preceded by this symbol.
RESTRICTED USE ONLY Fargo Electronics, Inc. Introduction The following guide will walk you through the installation of the Fargo Driver. Time Requirement This software installation process will require approximately 2 to 6 minutes (depending on the speed of your PC). System Requirements The System Requirements are as follows: • IBM-PC or compatible, Windows® 32 bit 2K/XP, Pentium® class 500 MHz computer with 256MB of RAM or higher, 500MB free hard disk space or higher, USB 1.
RESTRICTED USE ONLY Fargo Electronics, Inc. Unpacking the Printer (continued) Display A – Included with your Printer HDPii High Definition Card Printer/Encoder User Guide (Rev. 1.
RESTRICTED USE ONLY Fargo Electronics, Inc. Choosing a Good Location Follow these guidelines: • Place the unit in a location with adequate air circulation to prevent internal heat build-up. • Use the Printer's dimensions as a guideline for the minimum clearances to the unit. (Note: Allow for adequate clearance above the unit to accommodate the height of the unit with its Covers open.
RESTRICTED USE ONLY Fargo Electronics, Inc. Module Installation Procedures Installing the Output Module Accessory Parts included: Output Module Accessory Kit, Torx tool and screws Tools needed: Torx Tool (included in kit) Estimated Repair Time: 20 minutes Step Procedure 1 Caution: Power off the Printer by unplugging the power cord from the Printer. 2 Remove all USB, Serial, and Ethernet communication connections. Remove the Card Output Hopper. Important: Do not remove the Covers for this procedure.
RESTRICTED USE ONLY Fargo Electronics, Inc. Output Module Accessory (continued) Display A - Slide the Output Module attachment tabs into the appropriate slots at the base of Printer Module. This picture shows the Printer and the Output Module. HDPii High Definition Card Printer/Encoder User Guide (Rev. 1.
RESTRICTED USE ONLY Fargo Electronics, Inc. Removing the Output Side Upgrade Cover (if applicable) Tools needed: Press the Release tab with a flat blade. Use the Snap and Clip process. Estimated Repair Time: 1 minute Important: This procedure only applies if the Printer comes equipped with the Output Side Upgrade Cover (D910139-XX). Step Procedure 1 Caution: Power off the Printer by unplugging the power cord from the Printer.
RESTRICTED USE ONLY Fargo Electronics, Inc. Printer Loading Procedures Loading the Print Ribbon Note: Card Printers require highly specialized supplies to function properly. • To maximize Printer life, reliability, printed card quality and durability, you must use only Certified Supplies. • For this reason, your Fargo warranty is void, where not prohibited by law, if you use nonCertified Supplies. Step 1 Procedure Load the Print Ribbon into the Print Ribbon Cartridge until the Rolls click.
RESTRICTED USE ONLY Fargo Electronics, Inc. Loading the Print Ribbon (continued) Step 2 Procedure Tighten the Print Ribbon. HDPii High Definition Card Printer/Encoder User Guide (Rev. 1.
RESTRICTED USE ONLY Fargo Electronics, Inc. Loading the Print Ribbon (continued) Step 3 Procedure Insert the Print Ribbon Cartridge into the Printer until it clicks. HDPii High Definition Card Printer/Encoder User Guide (Rev. 1.
RESTRICTED USE ONLY Fargo Electronics, Inc. Loading the Clear Transfer Film Step 1 Procedure Load the Film into the Film Cartridge until the rolls click. HDPii High Definition Card Printer/Encoder User Guide (Rev. 1.
RESTRICTED USE ONLY Fargo Electronics, Inc. Loading the Clear Transfer Film (continued) Step 2 Procedure Tighten the Film. HDPii High Definition Card Printer/Encoder User Guide (Rev. 1.
RESTRICTED USE ONLY Fargo Electronics, Inc. Loading the Clear Transfer Film (continued) Step 3 Procedure Insert the Film Cartridge into the Printer until it clicks. HDPii High Definition Card Printer/Encoder User Guide (Rev. 1.
RESTRICTED USE ONLY Fargo Electronics, Inc. Inserting the Card Cleaning Roller Step 1 Procedure Remove the Card Cleaning Roller from the Print Ribbon packaging and insert the Cleaning Roller onto the black spindle from the supply pack. HDPii High Definition Card Printer/Encoder User Guide (Rev. 1.
RESTRICTED USE ONLY Fargo Electronics, Inc. Inserting the Card Cleaning Roller (continued) Step 2 Procedure Remove the protective sleeve from the Card Cleaning Roller. HDPii High Definition Card Printer/Encoder User Guide (Rev. 1.
RESTRICTED USE ONLY Fargo Electronics, Inc. Inserting the Card Cleaning Roller (continued) Step 3 Procedure Insert the Card Cleaning Roller into the card input area. HDPii High Definition Card Printer/Encoder User Guide (Rev. 1.
RESTRICTED USE ONLY Fargo Electronics, Inc. Loading the Blank Cards Step 1 Procedure Load the blank cards into the Card Cartridge, as shown below. Important: The front of the card must face DOWN. The back of the card or the magnetic stripe on the card must face UP. The Smart Chip is loaded on the bottom. HDPii High Definition Card Printer/Encoder User Guide (Rev. 1.
RESTRICTED USE ONLY Fargo Electronics, Inc. Loading the Blank Cards (continued) Step 2 Procedure Place the Card Input Cartridge onto the Printer until it clicks. HDPii High Definition Card Printer/Encoder User Guide (Rev. 1.
RESTRICTED USE ONLY Fargo Electronics, Inc. Connecting Power to Printer Caution: Do not remove the red Warning sticker across the USB connection. Do not plug in the USB cable until prompted to do so during the installation of the Printer Driver. See the Installing the Printer Driver on Windows XP and Windows 2000 procedure. Step Procedure 1 The Printer connections are shown in the Displays A to D 2 Use the same procedure for both the Printer.
RESTRICTED USE ONLY Fargo Electronics, Inc. Connecting Power to Printer (continued) Display B - Connecting the other end of the AC power cable to a Surge Protector. See both notes below. Note No. 1: Instead of connecting the AC power cable directly into an AC outlet, it is recommended that a Surge Protector be used to protect against power surges. Note No. 2: Some buildings have surge protection built into the electrical outlets. Please consult your building supervisor regarding this feature.
RESTRICTED USE ONLY Fargo Electronics, Inc. Connecting Power to Printer (continued) Display C - Connecting the plug from the power supply to the Printer, as shown below. HDPii High Definition Card Printer/Encoder User Guide (Rev. 1.
RESTRICTED USE ONLY Fargo Electronics, Inc. Printer Driver Installation Procedures Installation Procedures Installing the Printer Driver Step 1 Procedure Close down all programs and insert the Software Installation CD into your computer’s CD drive. After a few seconds, the CD’s installer program will automatically open. Follow the CD’s on-screen Procedures to complete installation. (Note: If the CD does not automatically open, use “My Computer” or “Windows Explorer” to view the contents of the CD.
RESTRICTED USE ONLY Fargo Electronics, Inc. Installing the Printer Driver (continued) Step 2 Procedure Click on the Next button to continue with the installation. HDPii High Definition Card Printer/Encoder User Guide (Rev. 1.
RESTRICTED USE ONLY Fargo Electronics, Inc. Installing the Printer Driver (continued) Step 3 Procedure a. Read the License Agreement. Select the I accept the terms of the license agreement option. b. Click on the Next button to continue with the installation. HDPii High Definition Card Printer/Encoder User Guide (Rev. 1.
RESTRICTED USE ONLY Fargo Electronics, Inc. Installing the Printer Driver (continued) Step 4 Procedure a. Select Local to install a USB Printer. OR b. Select Network and enter an IP Address for the Printer. HDPii High Definition Card Printer/Encoder User Guide (Rev. 1.
RESTRICTED USE ONLY Fargo Electronics, Inc. Installing the Printer Driver (continued) Step 5 Procedure Click on the Next button to begin the installation. HDPii High Definition Card Printer/Encoder User Guide (Rev. 1.
RESTRICTED USE ONLY Fargo Electronics, Inc. Installing the Printer Driver (continued) Step 6 Procedure Wait during the installation. HDPii High Definition Card Printer/Encoder User Guide (Rev. 1.
RESTRICTED USE ONLY Fargo Electronics, Inc. Installing the Printer Driver (continued) Step 7 Procedure Applies to USB Printer installation: Connect the USB cable to both the PC and the Printer. HDPii High Definition Card Printer/Encoder User Guide (Rev. 1.
RESTRICTED USE ONLY Fargo Electronics, Inc. Installing the Printer Driver (continued) Step 8 Procedure Applies to USB Printer installation: a. Select the Printer Port. (Note: You have the option of selecting the port only IF you click the BACK button from the previous screen shot; otherwise, this is automatic.) b. Wait while the Driver components are being copied to your PC. HDPii High Definition Card Printer/Encoder User Guide (Rev. 1.
RESTRICTED USE ONLY Fargo Electronics, Inc. Installing the Printer Driver (continued) Step Procedure 9 Click the Finish button. 10 Reboot your computer. 11 You have completed this procedure. HDPii High Definition Card Printer/Encoder User Guide (Rev. 1.
RESTRICTED USE ONLY Fargo Electronics, Inc. Printing a Test Print Image Step Procedure 1 Install a YMCK, YMCKI or YMCKK Ribbon in the Printer for the Test Print. 2 Open the Driver settings. a. From your computer’s startup menu, select Settings > Printers and Faxes (Windows XP) or > Printers (Windows 2000). b. Double click on the Card Printer under the Printer’s window. c. Select Printing Preferences under the Printer drop-down menu. (Note: This will bring up the Printing Preferences window.) 3 a.
RESTRICTED USE ONLY Fargo Electronics, Inc. Printing a Test Print Image (continued) Step 4 Procedure This completes the High Definition Card Printer/Encoder Installation Guide. HDPii High Definition Card Printer/Encoder User Guide (Rev. 1.
RESTRICTED USE ONLY Fargo Electronics, Inc. Section 4: Accessory Procedures Safety Messages (review carefully) Symbol Critical Instructions for Safety purposes Danger: Failure to follow these installation guidelines can result in death or serious injury. Information that raises potential safety issues is indicated by a warning symbol (as shown to the left). Caution: • To prevent personal injury, refer to the following safety messages before performing an operation preceded by this symbol.
RESTRICTED USE ONLY Fargo Electronics, Inc. Using the Security Lock Slot Important: Compatible locks are not sold by Fargo Electronics; however, they are readily available from computer stores. HDPii High Definition Card Printer/Encoder User Guide (Rev. 1.
RESTRICTED USE ONLY Fargo Electronics, Inc. Using the Security Lock Slot on the (continued) The Printer has a Security Lock Slot located in the back lip of the metal chassis to accommodate a standard laptop security lock. • To prevent unauthorized removal of the Printer, attach an industry standard security cable to an immovable object and then lock the cable to the Security Lock Slot. (Note: Fargo does not sell any type of locking device, but provides this feature for your added security.
RESTRICTED USE ONLY Fargo Electronics, Inc. Section 5: General Troubleshooting The purpose of this section is to provide the User with specific procedures relating to the LCD Messages, Communication Errors, Card Feeding Errors, Encoding Errors, Printing Process Errors, Transfer Process Errors and Diagnosing the Image Problems for the Printer. Important! Card Printers require highly specialized print Ribbons to function properly.
RESTRICTED USE ONLY Fargo Electronics, Inc. Safety Messages (review carefully) Symbol Critical Instructions for Safety purposes Danger: Failure to follow these installation guidelines can result in death or serious injury. Information that raises potential safety issues is indicated by a warning symbol (as shown to the left). Caution: • To prevent personal injury, refer to the following safety messages before performing an operation preceded by this symbol.
RESTRICTED USE ONLY Fargo Electronics, Inc. Troubleshooting - LCD and Printer Error Message Tables This section provides two troubleshooting tables for the LCD error messages and the Printer error messages. Each table uses a 3-column presentation to present a specific LCD or Printer error message, its cause and its solution. • This allows the troubleshooter to identify the error and its cause, and then perform the procedure (provided in the solution column).
RESTRICTED USE ONLY Fargo Electronics, Inc. How to use the LCD Error Message Table (example provided) The PC Error Message in Column 1 (LCD Error Message) provides the Lower Left Corner Number. This number identifies the PC Error Message screenshot with its respective LCD Error Message. • Note the correlation between Column 1 (below) and the PC Error Message window (below).
RESTRICTED USE ONLY Fargo Electronics, Inc. Troubleshooting with the LCD Error Message Table LCD Error Message Cause Solution Calibrate Failed Film or Ribbon calibration has failed. Verify the film is installed correctly and there is not a Ribbon installed. If this problem persists, call for technical assistance. Film Sensors need to be calibrated. Select Cancel and then perform the Film calibration procedure. The print Ribbon Sensor is out of calibration.
RESTRICTED USE ONLY Fargo Electronics, Inc. Troubleshooting with the LCD Error Message Table (continued) LCD Error Message Cause Solution Card Jam: Smart A card is jammed in the smart card encoding area of the Printer. Clear the jam. Card became jammed in the Printer during transfer. Clear the jam. Card cannot be found in the Printer. Verify card not jammed in Printer and select Cancel. The film is not able to move correctly. Check for jams/breaks. Check for obstruction.
RESTRICTED USE ONLY Fargo Electronics, Inc. Troubleshooting with the LCD Error Message Table (continued) LCD Error Message Cause Solution Cover is Open The Cover was left open. Ensure that the Cover is properly closed. A problem was detected during Printer start-up. Reset the Printer and try again. If this problem persists, call for technical assistance. A problem was detected during Printer start-up. Reset the Printer and try again. If this problem persists, call for technical assistance.
RESTRICTED USE ONLY Fargo Electronics, Inc. Troubleshooting with the LCD Error Message Table (continued) LCD Error Message Cause Solution Empty Reject Bin The reject bin is full. Remove the large number of rejected cards from the reject bin. (PC Error Message No. 265) Click OK to clear the notification message. (Note: In some cases, rejected cards are incomplete or pose a security risk, and should be disposed of properly.) Failed To Initialize (PC Error Message No.
RESTRICTED USE ONLY Fargo Electronics, Inc. Troubleshooting with the LCD Error Message Table (continued) LCD Error Message Cause Solution Film: Wrong Material The Film is not installed properly or has been damaged. Verify the correct film is installed in the film Cartridge. A card is jammed in the card flipping area of the Printer. Open the Printer's Flipping Module Cover. (PC Error Message No. 173) Flipper Jam (PC Error Message Nos.
RESTRICTED USE ONLY Fargo Electronics, Inc. Troubleshooting with the LCD Error Message Table (continued) LCD Error Message Cause Solution Head Resistance The EE setting in Driver for head resistance is out of range. Enter a value for head resistance in the EE settings in the Driver. (PC Error Message No. 6) Reset the correct value according to the steps in the Troubleshooting Section. If this problem persists, call for technical assistance. Head Sensor Error (PC Error Message No.
RESTRICTED USE ONLY Fargo Electronics, Inc. Troubleshooting with the LCD Error Message Table (continued) LCD Error Message Cause Solution Invalid Film An unauthorized film is installed in the Printer. Get the correct Film from your dealer. Printing disabled at this time. Press Cancel to abort this print job and then check security settings at host computer. An unauthorized Ribbon is installed in the Printer. Get the correct Ribbon from your dealer.
RESTRICTED USE ONLY Fargo Electronics, Inc. Troubleshooting with the LCD Error Message Table (continued) LCD Error Message Cause Mag Encoder Paused The Magnetic Encoder is in a pause state. (PC Error Message No. 143) Mag Encoder Startup Error A problem was detected during Printer start-up. (PC Error Message No. 63 and 141) Mag Verify Error (PC Error Message No. 30) Multiple Feed Solution Reset the Printer and try again. If this problem persists, call for technical assistance.
RESTRICTED USE ONLY Fargo Electronics, Inc. Troubleshooting with the LCD Error Message Table (continued) LCD Error Message Cause Solution No E-card Encoder You are trying to send encoding data, but the Printer is not configured with this Encoder type. You are trying to send encoding data, but the Printer is not configured with this Encoder type. Film is not installed in the Printer. OR Film RFID tag is bad. Install the Film and press Resume. Two-sided job sent to a onesided Printer.
RESTRICTED USE ONLY Fargo Electronics, Inc. Troubleshooting with the LCD Error Message Table (continued) LCD Error Message Cause Solution No iClass Encoder You are trying to send encoding data, but the Printer is not configured with this Encoder type. You are trying to send encoding data, but the Printer is not configured with this Encoder type. (PC Error Message No. 177) No Mag Module (PC Error Message No. 31) No MiFare Encoder (PC Error Message No. 203) No Prox Encoder (PC Error Message No.
RESTRICTED USE ONLY Fargo Electronics, Inc. Troubleshooting with the LCD Error Message Table (continued) LCD Error Message Cause Solution No Smart Encoder You are trying to send encoding data, but the Printer is not configured with this Encoder type. To cancel, click on Cancel Print. Output Hopper Full The Sensor detects when the Output Hopper has been filled to prevent more cards from printing and causing a jam. Check the Hopper and remove cards as needed. Close the Output Hopper.
RESTRICTED USE ONLY Fargo Electronics, Inc. Troubleshooting with the LCD Error Message Table (continued) LCD Error Message Cause Solution Reinsert Ribbon The Ribbon must be reinserted for proper functioning of the Printer. Reinsert the Ribbon or press Resume. A card is jammed in the Print Station or card flipping area of the Printer. Clear the jam and press Cancel. The print Ribbon is not installed properly or has been damaged. Verify the correct Ribbon is installed in the Ribbon Cartridge.
RESTRICTED USE ONLY Fargo Electronics, Inc. Troubleshooting with the LCD Error Message Table (continued) LCD Error Message Cause Solution Ribbon Miscue The Ribbon is not able to find the next panel correctly. Check for jams/breaks. If jammed, clear the jam. If broken repair by taping the Ribbon back on to the take-up core. (PC Error Message No. 97) Press Resume to continue or Cancel to abort. Ribbon Out (PC Error Message No. 91, 100 and 101) Ribbon Tension (PC Error Message No.
RESTRICTED USE ONLY Fargo Electronics, Inc. Troubleshooting with the LCD Error Message Table (continued) LCD Error Message Cause Solution Unable to Feed The Printer is unable to feed a card from the Card Cartridge Verify there are cards in the Card Cartridge. Command resulted in an error. See Resolving the Communication Errors. The Printer has stopped receiving data from the PC. Reset the Printer and try again.
RESTRICTED USE ONLY Fargo Electronics, Inc. Troubleshooting with the Printer Error Message Table Printer Error Message Cause Solution General Error A general Printer error has occurred. Press Cancel on the printer or click on Cancel Print. Card Not Found The Printer is unable to find the card. Please check Printer for a card or other obstruction, remove the card and cancel the print by pressing the Cancel Print button from the Driver’s display dialog or the Cancel button, located on the Printer.
RESTRICTED USE ONLY Fargo Electronics, Inc. Troubleshooting with the Printer Error Message Table (continued) Printer Error Message Cause Solution Card Jam A Card has become jammed in the Printer. a. Open the Printer's Front Cover and remove the Print Ribbon and Film Cartridges. b. Clear any cards in the printer by using the Forward and/or Back Buttons located on the printer’s LCD display. c. Re-insert the Ribbon and close the Printer’s Front Cover. d.
RESTRICTED USE ONLY Fargo Electronics, Inc. Troubleshooting with the Printer Error Message Table (continued) Printer Error Message Cause Solution Card Jam (Output) A Card has become jammed in the Printer's Flipper Table. a. Open the Printer’s Front Cover and the Output Module Cover. b. Clear any cards in the Flipper Table by using the Forward and/or Back buttons located on the Printer's LCD display. c. Close the Printer’s Front Cover. d.
RESTRICTED USE ONLY Fargo Electronics, Inc. Troubleshooting with the Printer Error Message Table (continued) Printer Error Message Cause Solution Flipper Jam The Flipper Table has jammed while either aligning itself or flipping a card. a. Open the Printer's Output Module Cover. b. Clear any cards in the Output Module by using the Forward and/or Back buttons located on the Printer’s Front Cover. c. Ensure that the Flipper Table can rotate freely. Close the Printer's Output Module Cover. d.
RESTRICTED USE ONLY Fargo Electronics, Inc. Troubleshooting with the Printer Error Message Table (continued) Printer Error Message Cause Solution Ribbon RFID Error The ribbon tag information is corrupted or incorrect. Check that the Ribbon is installed properly. Cancel is the only option. Press the Cancel Print button from the Driver’s display dialog, or the Cancel button located on the Printer's LCD display.
RESTRICTED USE ONLY Fargo Electronics, Inc. Troubleshooting with the Printer Error Message Table (continued) Printer Error Message Cause Solution Ribbon Break/Jam A Ribbon break/jam has been detected inside the Printer. The printer has determined that the installed ribbon has either jammed or broken. a. Open the Printer Cover and remove the Print Ribbon. If ribbon is jammed, remove jam and tighten ribbon. b.
RESTRICTED USE ONLY Fargo Electronics, Inc. Troubleshooting with the Printer Error Message Table (continued) Printer Error Message Cause Solution Invalid Ribbon An incorrect Print Ribbon has been installed in the Printer. (This is if you are using a SecureMark Ribbon). A non-SecureMark Ribbon is installed in a SecureMark Printer. a. Replace with the appropriate SecureMark Ribbon and press the Resume button located on the Printer's LCD display to continue printing. b.
RESTRICTED USE ONLY Fargo Electronics, Inc. Troubleshooting with the Printer Error Message Table (continued) Printer Error Message Cause Solution Invalid Ribbon The ribbon installed does not match the SecureMark configuration of the printer. Install a Certified Print Ribbon and press the Resume button located on the Printer's LCD display to continue printing. To cancel the print, press the Cancel Print button from the Driver's display dialog and the Cancel button located on the Printer's LCD display.
RESTRICTED USE ONLY Fargo Electronics, Inc. Troubleshooting with the Printer Error Message Table (continued) Printer Error Message Cause Solution No Magnetic Encoder Installed A print job with Magnetic encoding was sent with no Magnetic encoder installed in the printer. Ensure that no encoding data is being sent with the print job and reprint the card. Mag Verify Error The printer is unable to verify encoded data. Check the Cards and click on Cancel Print.
RESTRICTED USE ONLY Fargo Electronics, Inc. Troubleshooting with the Printer Error Message Table (continued) Printer Error Message Cause Solution Print Film Out The Print Film installed in the printer is empty. Install new Film and press the Resume button to continue printing. To cancel the print, press the Cancel Print button or the Cancel button located on the Printer. Print Film is not Installed No Print Film is installed in Install the Film and press Resume. the Printer.
RESTRICTED USE ONLY Fargo Electronics, Inc. Troubleshooting with the Printer Error Message Table Printer Error Message Cause Solution Invalid Print Film Installed The Print Film installed does not match the SecureMark configuration of the printer. A non-SecureMark Film is installed in a SecureMark Printer. Replace with the appropriate SecureMark Film and press the Resume button on the Printer to continue printing. To cancel, press the Cancel Print button or the Cancel button on the Printer.
RESTRICTED USE ONLY Fargo Electronics, Inc. Communications Errors Resolving the Communication Errors Symptom(s): Incorrect output, communications error on PC or Printer, stalling, no response from Printer, no job printed, “paper out” error. Step 1 2 Procedure Confirm that the system meets the minimum requirements, as shown here: • IBM-PC or compatible.
RESTRICTED USE ONLY Fargo Electronics, Inc. Resolving the Communication Errors (continued) Step 4 Procedure Determine the problem with printing from the application. a. Print a self-test from the Printer by pressing Options -> Menu-> Select > Print on the printer’s LCD to ensure that the Printer (itself) is functioning properly. See the next procedure. b. Print the Windows test page that is located in the General tab of the Driver. c.
RESTRICTED USE ONLY Fargo Electronics, Inc. Printing a Test Image Step Procedure 1 Open the Diagnostic Tool from the Driver. Choose Run Tests to select a preset test image. Select Self Tests. See Displays A and B, below. (Note: These images help to determine if the Printer is functioning properly.) 2 Scroll to the desired Self Test image from the Choose Test window options and press the Run Test button. Display A – Click on the Diagnostic button.
RESTRICTED USE ONLY Fargo Electronics, Inc. Printing a Test Image Display B – Click on the Run Tests button. See the previous page. HDPii High Definition Card Printer/Encoder User Guide (Rev. 1.
RESTRICTED USE ONLY Fargo Electronics, Inc. Reviewing the Alignment Self Test Card Step 1 Procedure Use this card to determine Image Placement and confirm that the Printer is working properly. (Note: The image consists of sixteen (16) gray scale boxes and alignment arrows. The gray boxes are composed from a composite of YMC color panels.) Adjust the TOF and EOF settings to change image placement. HDPii High Definition Card Printer/Encoder User Guide (Rev. 1.
RESTRICTED USE ONLY Fargo Electronics, Inc. Reviewing the Color Bars Self Test Step 1 Procedure Use this card to confirm that image colors are properly reproduced. Image consists of sixteen graduated steps of RGB and YMCK. (Note: This print will provide maximum image size, giving complete card Coverage on a CR-80 sized card.) HDPii High Definition Card Printer/Encoder User Guide (Rev. 1.
RESTRICTED USE ONLY Fargo Electronics, Inc. Reviewing the Device Settings Self Test Step 1 Procedure Use this card to view the Printer settings and counts for Card Count (CC), Card Cleaning Count (TC) and others. The Card Count is the total number of cards the Printer has produced. HDPii High Definition Card Printer/Encoder User Guide (Rev. 1.
RESTRICTED USE ONLY Fargo Electronics, Inc. Reviewing the YMCK Self Test Step 1 Procedure Use this card to confirm that image colors are properly reproduced. Image consists of sixteen graduated steps of RGB and YMCK. (Note: This print will provide maximum image size, giving complete card Coverage on a CR-80 sized card.) HDPii High Definition Card Printer/Encoder User Guide (Rev. 1.
RESTRICTED USE ONLY Fargo Electronics, Inc. Reviewing the Magnetic Self Test Step 1 Procedure This option only applies if a Magnetic Encoding Module is installed in the Printer. (Note: The Printer will feed, encode and eject a card. Be sure to have high coercivity cards installed when running this test.) HDPii High Definition Card Printer/Encoder User Guide (Rev. 1.
RESTRICTED USE ONLY Fargo Electronics, Inc. Reviewing the Resin Self Test Step 1 Procedure Use this card to determine that the Resin Panel is printing properly. HDPii High Definition Card Printer/Encoder User Guide (Rev. 1.
RESTRICTED USE ONLY Fargo Electronics, Inc. Section 6: Ethernet Option Section Introduction The Ethernet option includes the Ethernet port and the internal Printer Server. • Printer Management: The Printer Driver provides bi-directional status information so you can monitor and manage the Printer just as you would any other networked Printer. • Compatibility: The Fargo Ethernet option provides compatibility with TCP/IP and 802.3 Ethernet protocols with an IEEE 802.
RESTRICTED USE ONLY Fargo Electronics, Inc. Technical Specification - Ethernet Option Here are the system requirements for Ethernet. Caution: For safety purposes, Ethernet is not intended for a direct connection outside of the building. Function Requirement Network An IEEE 802.3 10/100 Base-T Ethernet network is required. Printer A Fargo Printer with the Ethernet option installed is required.
RESTRICTED USE ONLY Fargo Electronics, Inc. Functional Specification - Ethernet Option The Fargo Ethernet option includes these features. Feature Description Simultaneous Printing Provides the ability to simultaneously print from multiple PCs to the network Printer. Printer Feedback Provides status information from the network Printer to the PC. Web Pages Provides easy Printer configuration with any web browser. Log Messages Provides logging of usage and error events via e-mail, UDP or TCP/IP.
RESTRICTED USE ONLY Fargo Electronics, Inc. Network Services - Overview The Ethernet option provides the services described in this section. (Note: Other additional services include a Ping client, address assignment and Printer discovery functions.) Reviewing the Print Server The Print Server provides printing services in the same manner as a Printer connected directly to a USB interface except that the Printer is connected through the local area network to the client PC.
RESTRICTED USE ONLY Fargo Electronics, Inc. Network Management Interface The SNMP interface is described below. Interface Description SNMP • The Ethernet interface is a fully-manageable SNMP agent that supports MIB-II. • The Ethernet interface is MIB II compliant, allowing SNMP managers to monitor protocol, network and routing statistics.
RESTRICTED USE ONLY Fargo Electronics, Inc. Reviewing the Telnet Command Table The following table describes available Telnet commands. (Note: You can enter partial fullword commands, and the Printer will respond with additional help. For example, you can enter “list”, and the Printer will respond with all subcommands to the list command.) Telnet Command Command Purpose Command Format ? Display help for Telnet commands. ? help reset Reset the Ethernet interface for the Printer/encoder.
RESTRICTED USE ONLY Fargo Electronics, Inc. Reviewing the Telnet Command Table (continued) Telnet Command Command Purpose Command Format list all Display all information about this Printer. list all diff Display all differences between current and stored network settings. list diff uptime Display how long since the interface was last reset. list uptime sysinfo Display information about the Printer (e.g., model, label, contact, location, Firmware version and date, and serial number).
RESTRICTED USE ONLY Fargo Electronics, Inc. Reviewing the Telnet Command Table (continued) Telnet Command Command Purpose Command Format lpq Display information about print jobs and their settings. list lpq Printer Display information about the Printer (e.g., model number, Firmware version and serial number). list printer Display information about the secure mark settings of the Printer. list printer sm Printer sm HDPii High Definition Card Printer/Encoder User Guide (Rev. 1.
RESTRICTED USE ONLY Fargo Electronics, Inc. Reviewing the Telnet Command Table (continued) Telnet Command set sysinfo syslog Command Purpose Command Format contact Set the contact string. set sysinfo contact [] location Set the location string. set sysinfo location [] label Set the label string. set sysinfo label [] from Set all strings from default or current settings.
RESTRICTED USE ONLY Fargo Electronics, Inc. Reviewing the Telnet Command Table (continued) Telnet Command set user add Command Purpose Command Format Add a new User definition. set user add The allows only two (2) User definitions. del Delete a User definition. set user del passwd Define a new password for a User. set user passwd [] type Specify a User as root or guest.
RESTRICTED USE ONLY Fargo Electronics, Inc. Reviewing the Telnet Command Table (continued) Telnet Command store net ifc Command Purpose Command Format addr Store a new IP address. store net addr
mask Store a new address mask. store net mask gateway Store a new default gateway. store net gateway dns Store a new DNS server address. store net dns domain Store a new DNS domain suffix.RESTRICTED USE ONLY Fargo Electronics, Inc. Reviewing the Telnet Command Table (continued) Telnet Command Command Purpose Command Format save Save all current settings as the stored settings in the permanent memory. save load Take the settings from the stored memory and make them the current settings. load lpstat Display information about the Printer status. lpstat This includes the status and device response. See the Printer web page description.
RESTRICTED USE ONLY Fargo Electronics, Inc. Logging In When a User attempts to change any setting, they are asked for a User name and password. (Note: The Guest Users can only view settings.) Step 1 2 Procedure Enter the correct User name: • The default administrative User name is root. • The default non-administrative User name is guest. • Non-administrative Users can only view settings. Enter the correct password: • The default password is an empty string.
RESTRICTED USE ONLY Fargo Electronics, Inc. Accessing the Home page Step Procedure 1 Open a window for your network browser application on your local PC. 2 Find the IP address of the Printer. (Note: See Accessing the IP Address as needed to get this from the LCD of the Printer.) 3 Enter the IP address of the Printer you want to access into the address bar of the browser. (Note: The IP address will change for your printer installation.) 4 Press Enter or click on GO. 5 View the Home page.
RESTRICTED USE ONLY Fargo Electronics, Inc. Reviewing the Home Page This section provides a display of the Home Page. HDPii High Definition Card Printer/Encoder User Guide (Rev. 1.
RESTRICTED USE ONLY Fargo Electronics, Inc. Reviewing the Home Page Categories and Fields (table) You can view these categories and fields in the following table. Category Field Purpose Fixed for Printer Serial Number Displays the unique fixed serial number of the Printer. Hardware Address Displays the unique fixed hardware address (MAC) of the Printer, which is the unique Ethernet device identifier. Set by User Label (May be configured via Telnet or from the Administration web page.
RESTRICTED USE ONLY Fargo Electronics, Inc. Accessing the Network Settings page The Network page displays the current network settings and allows the User to change the settings. Step 1 Procedure Select the Network link from any web page of the Printer. HDPii High Definition Card Printer/Encoder User Guide (Rev. 1.
RESTRICTED USE ONLY Fargo Electronics, Inc. Reviewing the Interface The Interface display indicates the network speed supported by the Printer. HDPii High Definition Card Printer/Encoder User Guide (Rev. 1.
RESTRICTED USE ONLY Fargo Electronics, Inc. Reviewing the Current Settings The Current Settings page section displays the current active network settings for the Printer. • These are also labeled as “Dynamic” if they were provided by DHCP or “Static” if they came from the Stored Settings. • The current settings will be “Dynamic” only if Obtain an IP address automatically was selected when the Printer was restarted last. HDPii High Definition Card Printer/Encoder User Guide (Rev. 1.
RESTRICTED USE ONLY Fargo Electronics, Inc. Switching to the Automatic IP Address Mode Step Procedure 1 Select the Network link from any web page of the Printer. 2 Select the Obtain an IP address automatically radio button to enable the DHCP/BOOTP, which automatically assigns the network settings. Even with this button selected, the User can enter Stored Settings, and the Stored Settings will remain in memory. See below. (Note: This is the default method.
RESTRICTED USE ONLY Fargo Electronics, Inc. Changing to the Static IP Address Mode Step Procedure 1 Select the Network link from any web page of the Printer. 2 Select the Use the following IP address radio button, which prepares the Printer to use network settings (that the User has manually set). These manual settings will then be used the next time the Printer is rebooted. 3 Enter the network settings which are required for Ethernet communications from within the same subnet.
RESTRICTED USE ONLY Fargo Electronics, Inc. Changing to the static IP address mode (continued) Step Procedure 7 Login as a root User if you are so prompted. (Note: Any change of setting will only be accepted after you have successfully logged in.) 8 Reboot the Printer to effect this change. See the Reviewing Web page security procedure. HDPii High Definition Card Printer/Encoder User Guide (Rev. 1.
RESTRICTED USE ONLY Fargo Electronics, Inc. Using the Clear Changes button Step 1 Procedure Click on the Clear Changes button to delete the information in the textboxes in Stored Settings area. See the lower left corner of this display. HDPii High Definition Card Printer/Encoder User Guide (Rev. 1.
RESTRICTED USE ONLY Fargo Electronics, Inc. Using the Media Information page This page displays Media information about the Ribbon and Film (currently installed in the Printer). Step Procedure 1 Select the Status link from any web page of the Printer. 2 Select the Media page link. 3 View currently-installed Ribbon information pertaining to the following: • Part Number • SecureMark Part Number • Percent Remaining • Ribbon Type HDPii High Definition Card Printer/Encoder User Guide (Rev. 1.
RESTRICTED USE ONLY Fargo Electronics, Inc. Using the TCP/IP page The TCP/IP page displays the TCP/IP Status of each Printer connection, which are not configurable. See the next two pages for displays. Step Procedure 1 Select the Status link from any web page of the Printer. 2 Select the TCP/IP page link. 3 View information on all current network connections in the TCP connections area. Continued on the next page HDPii High Definition Card Printer/Encoder User Guide (Rev. 1.
RESTRICTED USE ONLY Fargo Electronics, Inc. Using the TCP/IP page See the Using the TCP/IP page procedure. HDPii High Definition Card Printer/Encoder User Guide (Rev. 1.
RESTRICTED USE ONLY Fargo Electronics, Inc. Using the Printer page You can use the Printer page to review current information about the Printer device settings and print jobs. Device settings include the following: • The status which displays information about the current print job. • The device which displays information about the Printer. The fields are described below. See the next page to view the entire Printer page. Field Status Description status Idle Indicates that no print job is active.
RESTRICTED USE ONLY Fargo Electronics, Inc. Reviewing the Printer page (continued) See the previous page for descriptions of the fields. HDPii High Definition Card Printer/Encoder User Guide (Rev. 1.
RESTRICTED USE ONLY Fargo Electronics, Inc. Using the System Log page The System Log page displays the current system log settings and allows the User to change the settings. (Note: These settings configure how system logging occurs. There are two logs.) HDPii High Definition Card Printer/Encoder User Guide (Rev. 1.
RESTRICTED USE ONLY Fargo Electronics, Inc. Changing the Log Name By default the names are log1 and log2. However, you can rename them from this page. (Note: This also updates the link to the corresponding web page.) Step Procedure 1 Select the System Log link. 2 Select the link for the log name you want to view or configure (the default choices are log1 or log2). See the previous page. 3 Enter a new log name in textbox.
RESTRICTED USE ONLY Fargo Electronics, Inc. Changing the Log Name Step Procedure 4 Click on the Submit button to save this change. 5 Login as a root User if you are so prompted. (Note: Any change of setting will only be accepted after you have successfully logged in.) HDPii High Definition Card Printer/Encoder User Guide (Rev. 1.
RESTRICTED USE ONLY Fargo Electronics, Inc. Selecting the Log Type Step Procedure 1 Select the System Log link. See the next page. 2 Select the link for the log name you want to view or configure (the default choices are log1 or log2). 3 Select the Print Job Started checkbox to generate the log entries for each Print Job Started. Continued on the next page HDPii High Definition Card Printer/Encoder User Guide (Rev. 1.
RESTRICTED USE ONLY Fargo Electronics, Inc. Selecting the Log Type Step Procedure 4 Select the Printer Error checkbox to generate the log entries for each Printer Error. 5 Select the Submit button. 6 Login as a root User if you are so prompted. (Note: Any change of setting will only be accepted after you have successfully logged in.) HDPii High Definition Card Printer/Encoder User Guide (Rev. 1.
RESTRICTED USE ONLY Fargo Electronics, Inc. Selecting the Log Destination Specify one destination for the log. Step Procedure – No event logging. 1 Select the System Log link. 2 Select the link for the log name you want to view or configure (the default choices are log1 or log2). 3 Select the None radio button when no log is required. (Note: This is the default.) Continued on the next page HDPii High Definition Card Printer/Encoder User Guide (Rev. 1.
RESTRICTED USE ONLY Fargo Electronics, Inc. Selecting the Log Destination Step Procedure – No event logging. 4 Select Submit. 5 Login as a root User if you are so prompted. Any change of setting will only be accepted after you have successfully logged in. HDPii High Definition Card Printer/Encoder User Guide (Rev. 1.
RESTRICTED USE ONLY Fargo Electronics, Inc. Setting up Email Event logging Follow this procedure to enable logging using email notification: Step Procedure – Specify email logging. 1 Select the System Log link. 2 Select the link for the log name you want to view or configure (the default choices are log1 or log2). 3 Select the Email radio button to choose email log notification. Continued on the next page HDPii High Definition Card Printer/Encoder User Guide (Rev. 1.
RESTRICTED USE ONLY Fargo Electronics, Inc. Setting up Email Event logging Step Procedure – Specify email logging. 4 Enter a valid e-mail address in the associated textbox. 5 Select Submit. 6 Login as a root User if you are so prompted. (Note: Any change of setting will only be accepted after you have successfully logged in.) HDPii High Definition Card Printer/Encoder User Guide (Rev. 1.
RESTRICTED USE ONLY Fargo Electronics, Inc. Specifying UDP Event logging Follow this procedure to enable logging to a UDP Syslog program. Step 1 Procedure Select the System Log link. • The messages will be sent via UDP packets to the Syslog port (514) of the specified host. • It is up to the host program to listen to these messages for processing. • A syslog host program is necessary to use this method, such as, Kiwi Syslog Daemon or WinSysLog.
RESTRICTED USE ONLY Fargo Electronics, Inc. Specifying UDP Event logging Step Procedure 5 Select Submit. 6 Login as a root User if you are so prompted. (Note: Any change of setting will only be accepted after you have successfully logged in.) HDPii High Definition Card Printer/Encoder User Guide (Rev. 1.
RESTRICTED USE ONLY Fargo Electronics, Inc. Specifying TCP Event logging Follow this procedure to send logging messages to a pre-existing IP connection made on the TCP port. Step Procedure 1 Select the System Log link. 2 Select the link for the log name you want to view or configure (the default choices are log1 or log2). 3 Select the TCP Connection radio button. Continued on the next page HDPii High Definition Card Printer/Encoder User Guide (Rev. 1.
RESTRICTED USE ONLY Fargo Electronics, Inc. Specifying TCP Event logging Step Procedure 4 Select Submit. 5 Login as a root User if you are so prompted. Any change of setting will only be accepted after you have successfully logged in. HDPii High Definition Card Printer/Encoder User Guide (Rev. 1.
RESTRICTED USE ONLY Fargo Electronics, Inc. Specifying TCP Event logging (continued) Step 6 Procedure Use a host program such as Telnet to receive these TCP logging messages (Note: Other programs such as HyperTerminal are also used to monitor TCP connections). See below. • Telnet Client: You can use a Telnet client connected to the TCP port (log1 = 4010, log2 = 4011) rather than the default Telnet port (23). • Telnet Session: If there is a Printer at IP address 192.37.23.
RESTRICTED USE ONLY Fargo Electronics, Inc. Using the Administration pages The purpose of the Administration pages is to allow the User to upgrade, reboot, modify passwords and enter User-specified system information strings. Using the System Information page The System Information page displays the current system information and allows the User to change the system information (which appears on the Home page). See the Using the Home page for definitions.
RESTRICTED USE ONLY Fargo Electronics, Inc. Using the System Information page (continued) Step 3 Procedure To change an attribute, type the new entry in one of these boxes: • Label textbox • Location textbox • Contact textbox 4 Select the Submit button. 5 Login as a root User if you are so prompted. Any change of setting will only be accepted after you have successfully logged in. HDPii High Definition Card Printer/Encoder User Guide (Rev. 1.
RESTRICTED USE ONLY Fargo Electronics, Inc. Changing the Root Password The Passwords page allows the User to change the passwords needed to login as a User. Changes to all settings require a login. (Note: However, these changes are only protected by password after the password has been set. Users can only be added or removed using Telnet commands.) Step Procedure 1 Select the Administration link. 2 Select the Passwords link to get to the Password web page.
RESTRICTED USE ONLY Fargo Electronics, Inc. Using the Reboot pages Rebooting the restarts the complete Printer, which includes the Print Server. Rebooting the Printer The Reboot page allows the User to reboot or reset the Printer and/or enter the upgrade mode. Step Procedure 1 Select the Administration link. 2 Log in as a root User (using the password) if you are so prompted. (Note: Any change of setting will only be accepted after you have successfully logged in.) 3 Select the Reboot link.
RESTRICTED USE ONLY Fargo Electronics, Inc. Rebooting the Printer Step Procedure 4 Select the Reboot button. 5 Click Yes when prompted. 6 Wait for the Printer to reboot and display the home page. See the Reviewing the Home Page display. HDPii High Definition Card Printer/Encoder User Guide (Rev. 1.
RESTRICTED USE ONLY Fargo Electronics, Inc. Upgrading the Main Firmware The Upgrade page allows the User to upload new Firmware to the Printer. For the Printer/encoder, this Upgrade page provides for upgrading the main Printer Firmware which includes the Print Server Firmware. It is only available to the after the Printer has been rebooted into the upgrade mode. Step Procedure 1 Select the Administration link. 2 Go to Step 7 if the Upgrade link is shown.
RESTRICTED USE ONLY Fargo Electronics, Inc. Upgrading the Main Firmware (continued) Step Procedure 4 Select the Upgrade button to get Printer into the upgrade mode. 5 Select the Yes button and wait for reboot, as shown below in Displays A and B. Display A – Rebooting into the Upgrade Mode Display B – Waiting for the Upgrade Mode HDPii High Definition Card Printer/Encoder User Guide (Rev. 1.
RESTRICTED USE ONLY Fargo Electronics, Inc. Upgrading the Main Firmware (continued) Step Procedure 6 Select Administration when the Home page appears. See Display A below. 7 Select Upgrade to get to the upgrade page. See Display B below. Display A – Selecting Administration HDPii High Definition Card Printer/Encoder User Guide (Rev. 1.
RESTRICTED USE ONLY Fargo Electronics, Inc. Upgrading the Main Firmware (continued) Display B – Selecting Upgrade HDPii High Definition Card Printer/Encoder User Guide (Rev. 1.
RESTRICTED USE ONLY Fargo Electronics, Inc. Upgrading the Main Firmware (continued) Step Procedure 8 Select the Browse button. See Display A below. 9 Navigate to and select the appropriate file to upload. 10 Select the Upgrade button to start the Firmware upload. See Display A below. 11 Select Reboot when requested. See Display B below. Display A – Selecting the Browse and Upgrade buttons. HDPii High Definition Card Printer/Encoder User Guide (Rev. 1.
RESTRICTED USE ONLY Fargo Electronics, Inc. Upgrading the Main Firmware (continued) Display B – Continuing to reboot HDPii High Definition Card Printer/Encoder User Guide (Rev. 1.
RESTRICTED USE ONLY Fargo Electronics, Inc. Using the Print Path page The purpose of the Print Path page is to allow the User to view or change the TCP port numbers used to communicate to the printer. • If these settings are left to the default entry of 0 then the default ports of 9100, 5400 and 5402 will be used for the RawSocket TCP Port, the CPS Data TCP Port and the CPS Command TCP Port respectively.
RESTRICTED USE ONLY Fargo Electronics, Inc. Using the Print Path page (continued) Step Procedure 4 Select the Submit button to save these changes to stored settings in the memory of the Printer. (Note: These settings will not be lost if the power is removed from the Printer.) 5 Select the Clear Changes button to delete these changes from this page. HDPii High Definition Card Printer/Encoder User Guide (Rev. 1.
RESTRICTED USE ONLY Fargo Electronics, Inc. Using the Help page The Help page displays the Help information. Step Procedure 1 Open this web page at the appropriate location by clicking on the Help book icon at the top of each page. See previous page. 2 Review the web interface for the Ethernet-enabled Printer. Additional Procedures Accessing the Ethernet Status LEDs The Ethernet Status LEDs can be found on the back of Printers.
RESTRICTED USE ONLY Fargo Electronics, Inc. Upgrading the Main Firmware with the Fargo Workbench Printer Utility The Main Printer Firmware upgrades are done with the same procedure as the USBconnected Printer. • The PC doing the upgrade must have a Driver installed for the Fargo Printer to be upgraded. • Alternatively, a User can upgrade the Main Printer Firmware by using the Upgrade web page.
RESTRICTED USE ONLY Fargo Electronics, Inc. Upgrading the Main Firmware with the Fargo Workbench Printer Utility (continued) Step Procedure 3 Access the Upgrade Firmware window from the Actions Menu, as shown below. 4 Select the New Firmware File by clicking Browse and selecting the Firmware file from the appropriate folder. 5 Begin the upgrade by clicking Upgrade, as shown below. Refer to the Fargo Workbench Printer Utility User Guide at this time.
RESTRICTED USE ONLY Fargo Electronics, Inc. Restoring the Factory Settings for Ethernet There may be times when you are unable to use the current configuration of the Ethernet interface. (Note: This could be because you have lost the password for your Printer or you just cannot get it to work properly.) Resetting the settings The has a menu selection that allows the User names and passwords to revert to default. To reset these settings, select: Menu: Setup Printer : Network Settings : Reset Passwords.
RESTRICTED USE ONLY Fargo Electronics, Inc. Changing the DHCP Setting Step 1 Procedure See the Accessing the Network Setup Menu procedure to access the Network Settings menu : Options -> MENU -> Next -> Network Settings 2 Select Next on the LCD to view the DHCP menu entry. • DHCP Enabled indicates that the automatic IP assignment is selected. • DHCP Disabled indicates that the static IP assignment is selected. 3 Press the Change button to switch the DHCP setting.
RESTRICTED USE ONLY Fargo Electronics, Inc. Saving addresses Step 1 Procedure. See the Accessing the Network Setup Menu procedure to access the Network Settings menu: Options -> MENU -> Next -> Network Settings 2 Select Next on the LCD to view the Save Addresses menu entry. 3 Press the Select button to save the current network settings (IP address, GW, SN Mask) as the stored settings which will be used when automatic address assignment using DHCP is disabled.
RESTRICTED USE ONLY Fargo Electronics, Inc. Accessing the IP Address Follow this procedure: Step Process 1 Press Info in Display A (below) to continue with the procedure. 2 Press Next several times to access Display C (IP:). 3 Press Next one more time, and the IP: address LCD screen will appear. See Display D as an example. 4 Your IP address is identified in the final LCD screen. You have completed the procedure.
RESTRICTED USE ONLY Fargo Electronics, Inc. Ethernet Printer Troubleshooting Procedures Troubleshooting procedures If you are having trouble connecting to your Ethernet Printer or printing to it, you should go through each of the following procedures. Step Procedure 1 Follow the Verifying the Printer Connection procedure on the next page. 2 Follow the Verifying the Printer IP address procedure on the next page.
RESTRICTED USE ONLY Fargo Electronics, Inc. Verifying the Printer Connection Step Procedure 1 Ensure that your Printer has a valid network connection. 2 Verify that the has the green LED on solidly and the amber LED is flashing with network activity. 3 If the LEDs do not indicate connection, verify the network connection with another device. 4 If the connection is OK, then something may be wrong with the Ethernet option installation.
RESTRICTED USE ONLY Fargo Electronics, Inc. Verifying that your PC can access the Printer using the ping command Step 1 Procedure Follow these instructions to issue a ping command to the Printer: At a DOS prompt, enter ping [IP Address] Example: C:\>ping 210.1.10.240 • If the ping response is successful, move on to the next troubleshooting procedure. See Display A below. • If the ping response is not successful, continue to step 2 of this procedure. See Display B below.
RESTRICTED USE ONLY Fargo Electronics, Inc. Verifying that your PC can access the Printer using the ping command (continued) Step Procedure 2 Verify that the PC and the Printer are connected to the same network. 3 You may be on different subnets of your network and some of the network settings for the Printer are not correct. See your network administrator about this.
RESTRICTED USE ONLY Fargo Electronics, Inc. Reviewing Frequently-asked Questions Question Answer How do I know if my Printer has the Ethernet option installed? All models come with Ethernet installed as standard equipment. What PC operating systems work with my Ethernet Printer? The Windows 2000/ XP / Server 2003 operating systems work with your Ethernet Printer.
RESTRICTED USE ONLY Fargo Electronics, Inc. Reviewing Frequently-asked Questions (continued) Question Answer How can I find the IP address of my Ethernet Printer? You can find it in the LCD of the Printer if the Ethernet option is functioning properly. Can I print from my PC to multiple Ethernet Printers? Yes. Use the Windows “Add Printer Wizard” to create a new printer instance for the additional printer.
RESTRICTED USE ONLY Fargo Electronics, Inc. Reviewing Frequently-asked Questions (continued) Question How do I upgrade the Printer Firmware in my Ethernet-enabled Printer? Answer Follow this procedure. 1. Run the Fargo Workbench Printer Utility from the start menu: Go to the Start -> Programs -> Fargo -> Fargo Workbench Printer Utility -> Fargo Workbench. 2. Select the Fargo Printer to upgrade from the drop-down box. 3. Go to the Firmware Updates tab. 4.
RESTRICTED USE ONLY Fargo Electronics, Inc. Reviewing Frequently-asked Questions (continued) Question Answer What if I lose the password for my Printer or it is not accepted? The has a menu selection that allows the User names and passwords to revert to default: What do I do if the IP address of my Printer is being changed by my network? Follow this procedure: Options > Menu > Network Settings > Reset Passwords 1. Contact your network administrator.
RESTRICTED USE ONLY Fargo Electronics, Inc. Reviewing Frequently-asked Questions (continued) Question How do I reconfigure my PC Printer Driver to connect to a different Printer or different IP address? Answer Use the Windows “Add Printer Wizard” to create a printer instance to communicate to the printer at the new IP address. This may require adding a new “Remote TCP/IP Card Printer Port” configured to communicate to the printer at the proper IP address.
RESTRICTED USE ONLY Fargo Electronics, Inc. Reviewing Frequently-asked Questions (continued) Question How do I configure my Printer’s IP settings? Answer • By default, the Printer is configured for dynamic IP address assignment. That is, it will try to get its IP address and other settings from your network. If it is given valid network settings, it will use them.
RESTRICTED USE ONLY Fargo Electronics, Inc. Reviewing Frequently-asked Questions Question Answer What do the LEDs by the Ethernet connection on the back of the Printer indicate? • How do I print a test page from Windows to verify the Ethernet configuration of the Printer and Printer Driver? Follow this procedure. On the Printer: The green LED indicates a valid Ethernet connection. The amber LED indicates network activity. 1. Open the Printer Driver properties window. 2.
RESTRICTED USE ONLY Fargo Electronics, Inc. Glossary of Terms Term Purpose MAC (Media Access Control) The unique numeric value address associated with a network device that gives the device a unique identity. This address is assigned by the device manufacturer to ensure its uniqueness. TCP The Network protocol that allows reliable network communications (Transmission between devices.
RESTRICTED USE ONLY Fargo Electronics, Inc. Glossary of Terms (continued) Term Purpose SNMP (Simple Network Management Protocol) This is protocol for the network management services. This protocol provides a means for network compliant devices, called agents, to store data about themselves in Management Information Bases (MIBs) and return this data to the SNMP requesters.
RESTRICTED USE ONLY Fargo Electronics, Inc. Section 7: Printer Adjustments The purpose of this section is to provide the User with specific information on Printer adjustment procedures. Safety Messages (review carefully) Symbol Critical Instructions for Safety purposes Danger: Failure to follow these installation guidelines can result in death or serious injury. Information that raises potential safety issues is indicated by a warning symbol (as shown to the left).
RESTRICTED USE ONLY Fargo Electronics, Inc. Important! Card Printers require highly specialized Print Ribbons to function properly. To maximize Printer life, reliability, printed card quality and durability, you must use only Certified Supplies. For this reason, your Fargo warranty is void, where not prohibited by law, if you use non-Certified Supplies. To order additional materials, please contact your authorized reseller.
RESTRICTED USE ONLY Fargo Electronics, Inc.
RESTRICTED USE ONLY Fargo Electronics, Inc. Selecting the Appropriate Printer Driver settings For the cases where custom settings are required, the Printer Driver's Card Type option also includes Custom 1 and Custom 2 options. • Settings: These settings allow designating a unique Card Type name, which then saves custom Image Transfer settings. • Custom 1: For example, Custom 1 could be changed to read as My Cards.
RESTRICTED USE ONLY Fargo Electronics, Inc. Conducting the Tape Adhesion Test It is important to conduct tape adhesion tests because Fargo cannot be certain which transfer temperature and Dwell Time will work best (when printing cards other than UltraCard III). (Note: The optimal transfer settings may vary from card type to card type.) Caution: Inadequate time and temperature could produce cards that are more vulnerable to accelerated wear and dye migration.
RESTRICTED USE ONLY Fargo Electronics, Inc. Conducting the Tape adhesion Test (continued) See the previous page. HDPii High Definition Card Printer/Encoder User Guide (Rev. 1.
RESTRICTED USE ONLY Fargo Electronics, Inc. Conducting the Tape adhesion Test (continued) Step 4 Procedure Visually examine the card and the strip of tape pulled from the card, to see if any portion of the Film was removed from the card. • If any residue (e.g., oil or grease from fingertips) is present on the card surface, the evaluation results may be affected.
RESTRICTED USE ONLY Fargo Electronics, Inc. Printer Driver Options Installing Printer Driver Updates Occasionally, new Printer Driver versions are released which have new or updated features. • Before installing an updated Printer Driver version, always delete the existing Printer Driver version from the system. • To do this, select Start, Programs and point to the Fargo folder. • Then, select the Uninstall Printer Driver icon for the specific Printer model (as shown here).
RESTRICTED USE ONLY Fargo Electronics, Inc. Installing Printer Driver Updates Step Procedure 5 Follow the on-screen instructions to begin installation. See Printer Driver Installation. (Note: When prompted, click on the Have Disk button; the Install From Disk window will appear.) 6 Click on Browse, navigate to the folder containing the Printer Driver files you just downloaded and unzipped and click on OK. Click on OK again to close the Install From Disk window and then click on NEXT.
RESTRICTED USE ONLY Fargo Electronics, Inc. Setting Up the Printer Driver Once the appropriate Printer Driver for the computer has been installed, you will need to set the Driver up with the proper print options. To open the Printer Driver setup window, please refer to the following steps for the specific operating system: Setting up Windows 2000/XP/2003 Step Procedure 1 Click the Start button, point to Settings and select Printers. 2 Click on the icon with the right mouse button.
RESTRICTED USE ONLY Fargo Electronics, Inc. Using the Card tab Use this option to control specific Printer functions. HDPii High Definition Card Printer/Encoder User Guide (Rev. 1.
RESTRICTED USE ONLY Fargo Electronics, Inc. Selecting the Card Size Step 1 Procedure Select the appropriate card option: • CR-80: This selection is the default form size for the Printer. This will print a 2.125 X 3.374 image including a .04 over-bleed on each of the 4 sides making the overall form size 2.204 X 3.452 (56 X 87.7 mm). • Custom: This selection is used to create a custom form size from 1.0 x 3.0 to 2.204 to 3.452 (25.4 X 76.2 mm to 56 X 87.7 mm).
RESTRICTED USE ONLY Fargo Electronics, Inc. Selecting the Card Type Select the appropriate card type according to the composition of the card stock.
RESTRICTED USE ONLY Fargo Electronics, Inc. Selecting the Card Type See the previous page. HDPii High Definition Card Printer/Encoder User Guide (Rev. 1.
RESTRICTED USE ONLY Fargo Electronics, Inc. Selecting the Card Type (continued) Step 2 Procedure If using a card stock other than listed, use the Custom 1options to save custom Dwell Time and dwell temperature controls on the Image Transfer tab. a. Click on the Custom options and enter a name for the card stock. b. Click on the Image Transfer tab to adjust the Dwell Time and temperature sliders to the appropriate settings. See the next page.
RESTRICTED USE ONLY Fargo Electronics, Inc. Selecting the Card Type (continued) Please see Step 2b on the previous page. HDPii High Definition Card Printer/Encoder User Guide (Rev. 1.
RESTRICTED USE ONLY Fargo Electronics, Inc. Setting the Orientation Select either the Portrait or Landscape radio buttons for Orientation. Step 1 Procedure Select Portrait to cause the card to print in a vertical orientation. OR Select Landscape to cause the card to print in a horizontal orientation. HDPii High Definition Card Printer/Encoder User Guide (Rev. 1.
RESTRICTED USE ONLY Fargo Electronics, Inc. Specifying the number of Copies Specifies the number of copies to be printed. • The upper limit is 10000 and the lower limit is 1. HDPii High Definition Card Printer/Encoder User Guide (Rev. 1.
RESTRICTED USE ONLY Fargo Electronics, Inc. Selecting the Diagnostics button This will launch the Diagnostic tool (if installed). HDPii High Definition Card Printer/Encoder User Guide (Rev. 1.
RESTRICTED USE ONLY Fargo Electronics, Inc. Selecting the Test Print button When selected, a test PRN file will be sent to the Printer. See below. This file will print a Full Color plus Resin print on the front side of the card and a Resin or black only image on the backside. This image is the same as what is supplied in the Printer’s Supply Pack. • For YMCK, the PRN file is full color and resin on front only. • For YMCKK, the PRN file is full color front with resin on front and then the back is resin.
RESTRICTED USE ONLY Fargo Electronics, Inc. Selecting the About button Select the About button to open a dialog box containing the copyright information as well as the Driver’s version number and date code. HDPii High Definition Card Printer/Encoder User Guide (Rev. 1.
RESTRICTED USE ONLY Fargo Electronics, Inc. Selecting the Toolbox button Select the Toolbox button. See the Toolbox section for more information and procedures. HDPii High Definition Card Printer/Encoder User Guide (Rev. 1.
RESTRICTED USE ONLY Fargo Electronics, Inc. Using the Device Options tab This section describes the use of the Device Options tab. HDPii High Definition Card Printer/Encoder User Guide (Rev. 1.
RESTRICTED USE ONLY Fargo Electronics, Inc. Detecting Supplies at Print Time Function Step 1 Procedure Use the Supplies checkbox for auto detection of the consumables, which are the Ribbon. See below. • In the Firmware, the values (representing the installed Ribbon and installed Transfer Film) are updated on initialization (including each time the cover is closed). • The Firmware compares the Ribbon values in the PRN file to the values (it holds regarding the currently installed consumables).
RESTRICTED USE ONLY Fargo Electronics, Inc. Detecting Supplies at Print Time Function (continued) Step 3 Procedure When the Supplies checkbox is checked, the following takes place: • Ribbon and Film Type dropdown boxes are inactive and populated with values of installed supplies. Dual Sided and Options are set to defaults for detected supplies. • For example, no Dual Side options are available when no Output is installed.
RESTRICTED USE ONLY Fargo Electronics, Inc. Detecting Supplies at Print Time Function (continued) Step 4 Procedure When the Supplies checkbox is not checked or it is de-selected (cleared) from a selected state, the Ribbon and Film dropdown boxes become active and auto selected Ribbon and Film types remain (until manually changed). HDPii High Definition Card Printer/Encoder User Guide (Rev. 1.
RESTRICTED USE ONLY Fargo Electronics, Inc. Adjusting the Ribbon Type Use the Ribbon Type dropdown menu to match Ribbon type. (Note: The Inhibit or I designation under YMCI, YMCKI, and YMCKIKI indicates the ability to prevent the transfer of film to the card surface. Users can select these Ribbon types to prevent film from transferring over security features, signature panel or other areas of special interest on the card surface.
RESTRICTED USE ONLY Fargo Electronics, Inc. Adjusting the Ribbon Type (continued) See the procedure on the previous page. HDPii High Definition Card Printer/Encoder User Guide (Rev. 1.
RESTRICTED USE ONLY Fargo Electronics, Inc. Adjusting the Film Type Step 1 Procedure Allows you to select the film type option that is appropriate for the type of film currently loaded in the Printer. • Select the Clear option to automatically adjust the appropriate transfer time and temperature to pre-determined defaults. (Note: Select this option to automatically adjust the transfer temperature (175.0 Celsius) and the dwell times (2.
RESTRICTED USE ONLY Fargo Electronics, Inc. Using the Dual Sided Group Functions The Dual Sided group checkboxes (shown below) are grayed out if no Output is automatically found or if the Dual Sided is manually turned off. See the procedures in this section for more instructions. HDPii High Definition Card Printer/Encoder User Guide (Rev. 1.
RESTRICTED USE ONLY Fargo Electronics, Inc. Using the Dual Sided - Print Both Sides option Use this option to automatically print on both the front and backside of a card. Step Procedure 1 Select this option in conjunction with any application program that supports a multiple-page document, duplex printing. (Note: The program must be able to send down two or more separate pages to be printed within the same document.) 2 • Page 1 will be transferred to the front side of the card.
RESTRICTED USE ONLY Fargo Electronics, Inc. Using the Print Both Sides - Split 1 Set of Ribbon Panels option Use this option to provide the most economical means of printing a dual-sided card since a single set of Ribbon Panels will be split to print both the front and backside of a card. • This option becomes active when Print Both Sides is checked. • The Default is active and unchecked except for YMCKK, which is checked.
RESTRICTED USE ONLY Fargo Electronics, Inc. Using the Print Both Sides - Print Back Image on Front of Card option This option becomes active when Print Both Sides is checked. The Default is active and unchecked. Step 1 Procedure Select this option: • If you need to print the first page of a two-page document on the backside of the card. OR • If you need to print the resin black on the chip-side of the Smartcard. The second page of the document will be printed on the front side of the card.
RESTRICTED USE ONLY Fargo Electronics, Inc. Using the Dual Sided - Print Back Side Only option Use this option to print only onto the backside of cards. (Note: The Print Back Side Only checkbox default is active and unchecked.) Step 1 Procedure Select this option to print only onto the backside of preprinted cards that must have their Magnetic Stripe or smart card chip encoded. (Note: Load the cards in the usual fashion.
RESTRICTED USE ONLY Fargo Electronics, Inc. Using the Device Options Group The functions under the Options Group are described in this section. HDPii High Definition Card Printer/Encoder User Guide (Rev. 1.
RESTRICTED USE ONLY Fargo Electronics, Inc. Using the Rotate Front 180 Degrees or Rotate Back 180 Degrees options Use this option to change the position of the printed image in relation to the set location of a card's Magnetic Stripe or smart chip. Step 1 Procedure Select the Rotate Front 180 Degrees option to rotate the image on the front of the card by 180 degrees when printed. OR Select the Rotate Back 180 Degrees option to rotate the image on the back of the card by 180 degrees when printed.
RESTRICTED USE ONLY Fargo Electronics, Inc. Using the Disable Printing option Use this option to disable the printing capabilities of the Printer while still allowing the Printer to encode cards. (Note: This option is useful to encode or re-encode preprinted cards without wasting additional time or printing supplies.
RESTRICTED USE ONLY Fargo Electronics, Inc. Using the Image Color tab Use this tab to adjust color properties. (Note: The Printing Preferences window has the same Image Color tab functionality as the Printing Preferences window.) Step 1 Procedure Select the System Color Management color matching option to control the Sharpness, Contrast and Gamma of the printed image, as well as the individual color balance of Yellow, Magenta and Cyan. See both displays in this section.
RESTRICTED USE ONLY Fargo Electronics, Inc. Using the Image Color tab Display B – Image Color tab > Advanced Image Color window HDPii High Definition Card Printer/Encoder User Guide (Rev. 1.
RESTRICTED USE ONLY Fargo Electronics, Inc. Using the Quality – Color Matching dropdown Step 1 Procedure Select None (a) if interested in print speed rather than print color, (b) if color correcting the image for printing has already been done or (c) if using third party color matching software. OR Select System Color Management to allow the Printer Driver to make color corrections similar to the Algebraic option but through a more complex color matching algorithm.
RESTRICTED USE ONLY Fargo Electronics, Inc. Using the Quality – Color Matching dropdown (continued) Step 2 Procedure Control the overall darkness and lightness of the dye-sub printed image by adjusting the Dye-Sub Intensity slide by clicking and dragging the slide's box. • Move the slide to the left to cause less heat to be used in the printing process, thus generating a lighter print. OR • Move the slide to the right to cause more heat to be used, thus generating a darker print.
RESTRICTED USE ONLY Fargo Electronics, Inc. Using the Quality – Color Matching dropdown (continued) Step 3 Procedure Control the amount of heat the Printer uses when printing with the resin black Panel by adjusting the Resin Heat slide. • Move the slide to the left to cause less heat to be used in the printing process, causing resin images to be lighter or less saturated. OR • Move the slide to the right to cause more heat to be used, causing resin images to be darker or more saturated.
RESTRICTED USE ONLY Fargo Electronics, Inc. Using the Quality – Color Matching dropdown (continued) Step 4 Procedure As needed, return all options to their factory settings by clicking on the Default button. HDPii High Definition Card Printer/Encoder User Guide (Rev. 1.
RESTRICTED USE ONLY Fargo Electronics, Inc. Adjusting for the Resin Dither Select the appropriate dither method according to the type of image to be printed. (Note: This option only affects those objects printed on the backside of a card with the resin black Panel of a YMCK or YMCKK Print Ribbon. This is only enabled when using at least one K panel and dual sided enabled, splitting one set of panels.) Step 1 Procedure Select Optimized for Graphics when printing lower quality images (e.g.
RESTRICTED USE ONLY Fargo Electronics, Inc. Using the Advanced Image Color window Step 1 Procedure Click on the Advanced Settings button to bring up the Advanced Image Color window. See below. HDPii High Definition Card Printer/Encoder User Guide (Rev. 1.
RESTRICTED USE ONLY Fargo Electronics, Inc. Using the Advanced Image Color window (continued) Step 2 Procedure For the Image Quality slider bar controls, see below. • Click OK to accept any variance from the default (for this specific slider bar) and return to the Image Color tab window. • Click Cancel to negate any variance on the slide and return to the Image Color tab window. • Click on the Default button to clear changes back to the default settings for this window only.
RESTRICTED USE ONLY Fargo Electronics, Inc. Using the Advanced Image Color window (continued) See the previous page. HDPii High Definition Card Printer/Encoder User Guide (Rev. 1.
RESTRICTED USE ONLY Fargo Electronics, Inc. Using the Advanced Image Color window (continued) Step 3 Procedure For the Balance slider bar controls, see below. • Click OK to accept any variance from the default (for this specific slider bar) and return to the Image Color tab window. • Click Cancel to negate any variance on the slide and return to the Image Color tab window. • Click on the Default button to clear changes back to the default settings for this window only.
RESTRICTED USE ONLY Fargo Electronics, Inc. Using the Advanced Image Color window (continued) See the previous page. HDPii High Definition Card Printer/Encoder User Guide (Rev. 1.
RESTRICTED USE ONLY Fargo Electronics, Inc. Using the Advanced Image Color window Step 4 Procedure Click on the Default button to clear changes back to the default settings for this window only. See below. HDPii High Definition Card Printer/Encoder User Guide (Rev. 1.
RESTRICTED USE ONLY Fargo Electronics, Inc. Using the Default button on the Image Color tab Step 1 Procedure Click on the Default button to clear changes back to default setting for Image Color tab only and NOT for the Advanced Image Color dialog box. See below. HDPii High Definition Card Printer/Encoder User Guide (Rev. 1.
RESTRICTED USE ONLY Fargo Electronics, Inc. Using the Image Transfer tab Use this tab to adjust the Image Position, Transfer Dwell Time and Transfer Temperature. (Note: The Printing Preferences window has the same Image Color tab functionality as the Printing Preferences window.) HDPii High Definition Card Printer/Encoder User Guide (Rev. 1.
RESTRICTED USE ONLY Fargo Electronics, Inc. Adjusting the Image Position controls Use the Image Position controls to position the image on a card (to be adjusted). Step 1 Procedure Adjust the Image Position values by clicking on the Vertical and Horizontal adjustment arrows. • These values ensure that the Cards always remain in the same position as they travel through the Printer (regardless of image orientation).
RESTRICTED USE ONLY Fargo Electronics, Inc. Adjusting the Image Position controls (continued) The display (below) represents how the printed image will move in relation to the fixed card position as positive and negative image placement values are entered. Step 2 Procedure Follow these instructions: • Use the Vertical adjustment to move the image toward the front of the Printer if a positive number is entered and toward the rear of the Printer if a negative number is entered.
RESTRICTED USE ONLY Fargo Electronics, Inc. Adjusting the Transfer Dwell Time and Temperature Use the Image Transfer option to control of the Transfer Dwell Time and Transfer Temperature. • These settings control the speed and temperature at which printed images are transferred from the Film to the card. These settings may vary depending on the card type. • The Printer Driver automatically optimizes these settings according to the selection made in the Card Type option.
RESTRICTED USE ONLY Fargo Electronics, Inc. Adjusting the Transfer Dwell Time and Temperature (continued) Step 2 Procedure Transfer Temperature Sets temperature for InTM transfer in Celsius Lower limit = 150.0 Celsius, Upper limit = 190.0 Celsius • UltraCard III - Composite: Default = 175.0 seconds per inch • UltraCard- PVC: Default = 175.0 Celsius • Custom: Default = 175.0 Celsius HDPii High Definition Card Printer/Encoder User Guide (Rev. 1.
RESTRICTED USE ONLY Fargo Electronics, Inc. Adjusting the Transfer Dwell Time and Temperature (continued) HDPii High Definition Card Printer/Encoder User Guide (Rev. 1.
RESTRICTED USE ONLY Fargo Electronics, Inc. Adjusting the Transfer Dwell Time and Temperature Step Procedure 3 Return to the factory default settings for the selected Card Type by clicking on the Default button. If using cards (that differ from the Card Type GlossyPVC or Matte-PVC options), select one of the Card Type Custom options. 4 Adjust the dwell time and temperature settings to ensure proper image transfer.
RESTRICTED USE ONLY Fargo Electronics, Inc. Using the Default button Step 1 Procedure Use the Default button to reset the Transfer Dwell Time and Transfer Temperature to defaults for current Card Type choice. See below. HDPii High Definition Card Printer/Encoder User Guide (Rev. 1.
RESTRICTED USE ONLY Fargo Electronics, Inc. Using the Magnetic Encoding tab Use these options only if the Printer has an optional Magnetic Stripe Encoding Module installed. The Card Printer can be installed with one of two types of factory-installed Magnetic Stripe Encoding Modules: an ISO or JIS II Encoder Module. (Note: If no Encoder is detected, the tab is active but all functions are grayed out.
RESTRICTED USE ONLY Fargo Electronics, Inc. Using the Encoding Mode dropdown Use the Encoding Mode option to specify which magnetic encoding standard to use. This will change the encoding mode and coercivity setting or modify the ISO standards for Tracks 1, 2 and 3, by correctly modifying these Magnetic Encoding options.
RESTRICTED USE ONLY Fargo Electronics, Inc. Using the Encoding Mode dropdown list (continued) Category Description Custom Encoding selection (active and inactive functions) If you select Custom Encoding, all options are active. The Default is ISO Encoding. (Note: The defaults are the same as the ISO Encoding defaults. However, all functions on the Magnetic Track Options tabs are active.) HDPii High Definition Card Printer/Encoder User Guide (Rev. 1.
RESTRICTED USE ONLY Fargo Electronics, Inc. Using the Encoding Mode dropdown list (continued) Category Description Raw Binary Encoding selection (active and inactive functions) If you select Raw Binary Encoding, you send down a raw binary string rather than a formatted set of characters. (Note: The Coercivity dropdown function is active and the Shift Data Left checkbox is not active. All functions on the Magnetic Track Options tabs are inactive except for Bit Density.
RESTRICTED USE ONLY Fargo Electronics, Inc. Using the Encoding Mode dropdown list Category Description JIS II Encoding selection (active and inactive functions) If you select JIS II Encoding, specific standards are used. (Note: This selection disables all the Magnetic Track Options tabs. It also disables the Coercivity dropdown function and Shift Data Left checkbox option.) The default Coercivity is 600 Oe. HDPii High Definition Card Printer/Encoder User Guide (Rev. 1.
RESTRICTED USE ONLY Fargo Electronics, Inc. Selecting the Coercivity/Magnetic Track Use the Coercivity option to specify coercivity of the cards being used. Step 1 2 Procedure Select the Coercivity option (Oersted) to use the Magnetic Stripe type that matches the card type.
RESTRICTED USE ONLY Fargo Electronics, Inc. Reviewing the Shift Data Left Function Use the Shift Data Left option, which applies to all tracks when selected. (Note: When this option is unchecked, it is the default.) Step 1 Procedure Select this option to shift the recorded magnetic data to the left-hand side of the card's Magnetic Stripe. (Note: This is useful in situations that require cards to be readable with insert type readers.) HDPii High Definition Card Printer/Encoder User Guide (Rev. 1.
RESTRICTED USE ONLY Fargo Electronics, Inc. Reviewing the Magnetic Track Options Use these options to customize the ISO encoded data format for each of the Magnetic Stripe's three tracks. (Note: Click Default to reset the defaults for the current Magnetic Track Options tab only.) Step 1 Procedure Specify which of the three (3) tracks to customize by selecting one of the three track options.
RESTRICTED USE ONLY Fargo Electronics, Inc. Reviewing the Magnetic Track Options HDPii High Definition Card Printer/Encoder User Guide (Rev. 1.
RESTRICTED USE ONLY Fargo Electronics, Inc. Using the Magnetic Track Options Use the Magnetic Track options for these purposes: • Customize the ISO-encoded data format for each of the Magnetic Stripe's three tracks. • Customize each track independently of the other two. • Specify which track to customize by selecting one of the three track options.) • Click Default to reset the defaults for the current Magnetic Track Options tab only.
RESTRICTED USE ONLY Fargo Electronics, Inc. Using the Magnetic Track Options See the previous page. HDPii High Definition Card Printer/Encoder User Guide (Rev. 1.
RESTRICTED USE ONLY Fargo Electronics, Inc. Using the Character Size buttons Use this option to customize the Character Data Size (Bits per Character) used to encode the magnetic data on the currently selected track. (Note: This character size includes the parity bit (if enabled).) Step 1 Procedure • Select 5 Bits to change the bits per character to 5 BPC. (Note: This is the default for Tracks 2 and 3). OR • Select 7 Bits to change the bits per character to 7 BPC.
RESTRICTED USE ONLY Fargo Electronics, Inc. Using the ASCII Offset dropdown list Use this option to customize the Character ASCII Offset used to encode the magnetic data on the currently selected track. (Note: This character-offset value is subtracted from the ASCII value of each Magnetic Stripe data character prior to encoding on the track.) Step 1 Procedure • Select NULL to change the ASCII Offset to NULL. OR • Select SPACE to change the ASCII Offset to SPACE. (Note: This is the default for Track 1.
RESTRICTED USE ONLY Fargo Electronics, Inc. Using the Bit Density dropdown list Use this option to customize the Bit Recording Density (Bits per Inch) used to encode the magnetic data on the currently selected track. The default ISO Standard selections for this option are as follows: Step 1 Procedure • Select 75 BPI to change the bits per inch to 75 BPI. (Note: This is the default for Track 2.) OR • Select 128 BPI to change the bits per inch to 128 BPI.
RESTRICTED USE ONLY Fargo Electronics, Inc. Using the LRC Generation dropdown list Use this option to customize the LRC Generation Mode (used to encode the magnetic data on the currently selected track). Step 1 Procedure • Select No LRC to change the LRC Generation to none. OR • Select Even Parity to change the LRC Generation to Even Parity. (Note: This is the default for all tracks.) OR • Select Odd Parity to change the LRC Generation to Odd Parity.
RESTRICTED USE ONLY Fargo Electronics, Inc. Using the Encoding Mode dropdown list Use this option to customize the Encoding Mode (used to encode the magnetic data on the currently selected track). Step 1 Procedure • Select No Parity to change the Character Parity to none. OR • Select Even Parity to change the Character Parity to Even Parity. OR • Select Odd Parity to change the Character Parity to Odd Parity. (Note: This is the default for all tracks.
RESTRICTED USE ONLY Fargo Electronics, Inc. Reviewing the ISO Track Locations The magnetic Encoding Module encodes onto tracks in accordance with an ISO 7811-2 Magnetic Stripe. For track locations, review the display below. 0.223" 0.353" 0.493" TRACK1 0.110" 0.130" TRACK2 0.110" TRACK3 0.110" 0.140" HDPii High Definition Card Printer/Encoder User Guide (Rev. 1.
RESTRICTED USE ONLY Fargo Electronics, Inc. Sending the Track Information Magnetic track data is sent in the form of text strings from the application software to the Printer Driver. • In order for the Printer Driver to differentiate between Magnetic Track data and the rest of the printable objects, specific characters must be added to the magnetic data to be encoded. • These specify the data that is to be encoded, the tracks to encode and mark the start and stop of the data string.
RESTRICTED USE ONLY Fargo Electronics, Inc. Reviewing the Sample String • Track 1: ~1%JULIEANDERSON^1234567890? • Track 2: ~2;1234567890987654321? • Track 3: ~3;1234567890987654321? Track Start Sentinel End Sentinel Field Separator Track 1 % ? ^ Track 2 ; ? = Track 3 ; ? = Valid Characters ASCII 32-95 (See the table below.) ASCII 48-63 (See the table below.) ASCII 48-63 (See the table below.) HDPii High Definition Card Printer/Encoder User Guide (Rev. 1.
RESTRICTED USE ONLY Fargo Electronics, Inc. Reviewing the ASCII Code and Character Table ASCII Code Character ASCII Code Character ASCII Code Character 32 space 56 8 80 P 33 ! 57 9 81 Q 58 : 82 R 34 35 # 59 ; 83 S 36 $ 60 < 84 T 37 % 61 = 85 U 38 and 62 > 86 V 39 ' 63 ? 87 W 40 ( 64 @ 88 X 41 ) 65 A 89 Y 42 * 66 B 90 Z 43 + 67 C 91 [ 44 ' 68 D 92 \ 45 - 69 E 93 ] 46 .
RESTRICTED USE ONLY Fargo Electronics, Inc. Using the Default button (Image Transfer tab) Step 1 Procedure Use the Default button to reset defaults for the current Track tab only. See below. HDPii High Definition Card Printer/Encoder User Guide (Rev. 1.
RESTRICTED USE ONLY Fargo Electronics, Inc. Using the K Panel Resin tab Use this tab to adjust the Card Size, the Direction the Card Travels through the Printer, the Print All Black with K Panel (options) and the Defined Areas. Use this tab to control where the resin black (K) Panel of a full-color Ribbon is printed. (Note: When Disable Printing under the Device Options tab is selected, this tab will be active while all functions will be grayed out.
RESTRICTED USE ONLY Fargo Electronics, Inc. Using the Scroll controls Controls Description Horizontal changes the size of the area from left to right • Default = 0.200 inches (5.1 mm) • Upper Limit = 3.450 inches (87.6 mm) • Lower Limit = 0.200 (cannot be null) Vertical changes the size of the area from top to bottom • Default = 0.200 • Upper limit = 2.183 • Lower limit = 0.200 (cannot be null) Defines the X coordinate for the lower left corner of the area • Default = 0.
RESTRICTED USE ONLY Fargo Electronics, Inc. Using the Click and Drag capability Click and drag the corners and the sides of an area to change size and location of area. • The Horizontal, Vertical size and X, Y coordinates update accordingly. Click and drag the area to change the location. • The X, Y coordinates update accordingly. Selecting “inches or mm” radio button Select from the inches or mm radio button to change the measurement type. (Note: This is similar to the choice on the Card tab.
RESTRICTED USE ONLY Fargo Electronics, Inc. Selecting the Full Card Step 1 Procedure Select the Full Card option to print the resin black (K) Panel for all black found within all areas of the image, as shown below. • The Card image becomes fully black. • The resin prints anywhere for black. • The Add and Delete buttons become inactive and are grayed out. • The Defined Area object size and location scroll controls become inactive and are grayed out.
RESTRICTED USE ONLY Fargo Electronics, Inc. Selecting the Defined Area(s) Step 1 Procedure Select the Defined Area(s) option to print the resin black (K) Panel for all black found only in an area or areas defined, as shown below. • The card image becomes white with the grid and one area (available for the user to start with). • The defined areas print black with resin. HDPii High Definition Card Printer/Encoder User Guide (Rev. 1.
RESTRICTED USE ONLY Fargo Electronics, Inc. Selecting the Undefined Area(s) Step 1 Procedure Select the Undefined Area(s) option to print the resin black (K) Panel for all black found only in the space outside the areas defined, as shown below. • The card image becomes black with the grid and one area (available for the user to start with). • The defined area does not print black with resin. HDPii High Definition Card Printer/Encoder User Guide (Rev. 1.
RESTRICTED USE ONLY Fargo Electronics, Inc. Defining the Area to activate the Card Grid Step 1 Procedure Select on the appropriate Defined Area (see below) to activate the card grid in the upper half of the window. • It is through this card grid that up to five areas can be defined, as shown below. • When the card grid is first activated, then a small black square will appear at its default size of .2 x .2 (5mm x 5mm) and at its default location in the lower left-hand corner (0,0).
RESTRICTED USE ONLY Fargo Electronics, Inc. Measuring the Total Card area Step Procedure 1 Determine the area of the card to define. (Note: This area is indicated by the dashed outline, as shown below. The easiest way to determine the size of this area is to actually print a card and look at it in the same orientation as when it exits the Printer.) 2 Measure the total area and enter those dimensions into the dimension boxes. (Note: The minimum size an area can be is .2 x .2 (5mm x 5mm).
RESTRICTED USE ONLY Fargo Electronics, Inc. Measuring the Area to be positioned on the Card Step 1 Procedure Once the area is sized properly, measure the location where this area is to be positioned on the card. a. Measure from the lower left corner of the card up and over to the lower left corner of where the defined area is to begin. b. Enter these values into the X and Y boxes, as shown below. c. Note that the card grid lines are spaced at .2 (5mm) intervals.
RESTRICTED USE ONLY Fargo Electronics, Inc. Selecting the Print YMC under the K and Print K Only options Step 1 Procedure Use the Defined Area function. a. Define another area by clicking on the Defined Area. (Note: Another .2 x .2 (5mm x 5mm) area will appear in the lower left-hand corner. This is the location in which all newly defined areas will first appear. Up to 5 areas can be defined.) b. Delete an area by selecting the area and clicking on the Delete button.
RESTRICTED USE ONLY Fargo Electronics, Inc. Selecting the Print YMC under the K and Print K Only options HDPii High Definition Card Printer/Encoder User Guide (Rev. 1.
RESTRICTED USE ONLY Fargo Electronics, Inc. Using the Printer Supplies tab Use the options on this tab to view information about the Ribbon and Film installed in the Printer. (Note: The gauges are horizontal.) HDPii High Definition Card Printer/Encoder User Guide (Rev. 1.
RESTRICTED USE ONLY Fargo Electronics, Inc. Reviewing Information on the Supplies tab Here are the guidelines for automatic positioning on the Supplies tab. Step 1 Procedure Use this tab to determine the following information (see below): • Ribbon Level: Type, Reorder Number and Gauge Indicator. • Film Level: Type, Reorder Number and Gauge Indicator. HDPii High Definition Card Printer/Encoder User Guide (Rev. 1.
RESTRICTED USE ONLY Fargo Electronics, Inc. Reviewing Information on the Supplies tab Relates to the procedure on the previous page. HDPii High Definition Card Printer/Encoder User Guide (Rev. 1.
RESTRICTED USE ONLY Fargo Electronics, Inc. Section 8: Inhibit Panel Usage Using the Inhibit Panel (HDPII) You can use the Inhibit Panel (I designation under YMCI, YMCKI, and YMCKIKI) to define areas on the surface of the card, in order to prevent the transfer of film to the card surface. Examples of where the I Panel has potential use are to ensure that signature panels, security holograms or pre-printed graphics are not covered or obscured by print images or transfer film.
RESTRICTED USE ONLY Fargo Electronics, Inc. Using Inhibit Panel (via the Fargo Workbench Printer Utility (continued) Follow these instructions: • To create an inhibit area using the Fargo Workbench Printer Utility, see Using the Inhibit Panel Layout Applet in the Help file associated with the specific application.
RESTRICTED USE ONLY Fargo Electronics, Inc. Using Inhibit Panel (via the Fargo Workbench Printer Utility) (continued) Step Procedure 1 Create the Inhibit Panel Layout within the Fargo Workbench Printer Utility. 2 Save the file. Failure to save will not allow the Inhibit Panel to work 3 You are now ready to print from your application. Any image file will print with the inhibit panel until that image file is deleted. HDPii High Definition Card Printer/Encoder User Guide (Rev. 1.
RESTRICTED USE ONLY Fargo Electronics, Inc. Using Inhibit Panel with an Application Some applications can utilize the inhibit panel by using text objects containing a “~i” within the print job itself. The “~i” is followed by the file path and file name of a bitmap file, which is merged when the print job is rendered. • Rendering is the process which changes the application output to instructions that the printer understands.
RESTRICTED USE ONLY Fargo Electronics, Inc. Rendering Print Jobs Rendering of the print job occurs on the given local workstation if the Printer Driver is installed for use on that particular workstation. • Shared Instance: However, if the Printer Driver is a shared instance (e.g., shared from another workstation), the print job is rendered (converted to something that the printer understands) on the workstation where the Printer Driver is shared from while under Microsoft Windows 2000, XP and 2003.
RESTRICTED USE ONLY Fargo Electronics, Inc. Using the Inhibit Panel (via Application) The inhibit bmp file can be generated with any bit map editor. The following procedure explains how this is done with Microsoft Paint. Step 1 Procedure Create a bitmap file using Microsoft Paint. Note: The size for landscape orientation is 1035 pixels in width and 661 pixels in length. The size for portrait orientation is 661 pixels in width and 1035 pixels in length. Set this under Paint –Image –Attributes.
RESTRICTED USE ONLY Fargo Electronics, Inc. Using the Inhibit Panel with an Application (continued) Step 2 Procedure Place objects on the image, which correspond to the exact areas that are being inhibited. HDPii High Definition Card Printer/Encoder User Guide (Rev. 1.
RESTRICTED USE ONLY Fargo Electronics, Inc. Using the Inhibit Panel with an Application (continued) Step 3 Procedure Fill the inhibit areas with black color. HDPii High Definition Card Printer/Encoder User Guide (Rev. 1.
RESTRICTED USE ONLY Fargo Electronics, Inc. Using the Inhibit Panel with an Application (continued) Step 4 Procedure Save the file as a BMP from within Microsoft Paint. HDPii High Definition Card Printer/Encoder User Guide (Rev. 1.
RESTRICTED USE ONLY Fargo Electronics, Inc. Using the Inhibit Panel with an Application (continued) Step 5 Procedure Add the ‘~i’ command to the application file. (Note: In this case, Microsoft WordPad was used. With WordPad the ‘~’ must be left justified.) HDPii High Definition Card Printer/Encoder User Guide (Rev. 1.
RESTRICTED USE ONLY Fargo Electronics, Inc. Using the Inhibit Panel with an Application (continued) Step 6 Procedure Create the rest of the card using the application. HDPii High Definition Card Printer/Encoder User Guide (Rev. 1.
RESTRICTED USE ONLY Fargo Electronics, Inc. Using the Inhibit Panel with an Application (continued) Step Procedure 7 Print the card from within the application. (Note: In this case, use File -> Print.) If the ~i text object is printed on the card see Troubleshooting the Inhibit Panel 8 This completes the procedure. HDPii High Definition Card Printer/Encoder User Guide (Rev. 1.
RESTRICTED USE ONLY Fargo Electronics, Inc. Using the Test Print The printer has a test print file, which can be sent to the printer to verify the Inhibit Panel functionality. This test image uses a pre-formatted inhibit area and will not test a user-defined inhibit bitmap. To use this test of the inhibit panel perform these steps. Step Procedure 1 Bring up the Printer Preferences dialog via Start -> Settings -> Printers and Faxes.
RESTRICTED USE ONLY Fargo Electronics, Inc. Using the Test Print HDPii High Definition Card Printer/Encoder User Guide (Rev. 1.
RESTRICTED USE ONLY Fargo Electronics, Inc. Troubleshooting the Inhibit Panel If you are having trouble getting the Inhibit Panel to produce the expected results, verify the following information. • You have used a lower case “~i”, not an upper case “~I”. Some applications have an auto-correct feature that will change the case on the small ‘i’. • The bitmap file (being used) is at the location on the workstation (see notes above regarding shared printer instances) as specified by the text object.
RESTRICTED USE ONLY Fargo Electronics, Inc. Section 9: Toolbox This section describes the Toolbox function. Accessing the Toolbox Step 1 Procedure Select Toolbox to access the Toolbox window and its tabs, as shown throughout this section. • OK button: Closes the dialog box and saves the Driver configuration changes since the Driver dialog box has been opened. • Cancel button: Closes the dialog box and cancels the Toolbox changes since the Driver dialog box has been opened.
RESTRICTED USE ONLY Fargo Electronics, Inc. Selecting the Configuration tab Step 1 Procedure Select the Configuration tab. • Under Printer Features, select features by clicking on a check box or by clicking on the Auto Select button. See instructions provided under that heading. • Under Event Monitoring, select events to be monitored. (Note: The Driver will notify or prompt the User when the selected events occur.) • Under Set Language for Printer LCD Display, select a language.
RESTRICTED USE ONLY Fargo Electronics, Inc. Using the Configuration Tab Using the Optional Printer Features Group Box The Default setting is checked. • If checked, upon Configuration tab activation, the Driver retrieves the installed Printer features information from the Firmware and automatically checks the appropriate check boxes for Dual Sided, and Magnetic Encoder. • If checked, the Dual Sided and Magnetic Encoder checkboxes are read only.
RESTRICTED USE ONLY Fargo Electronics, Inc. Using the Event Monitoring Group Box This Event Monitoring group box displays the Low Supplies (Ribbon and Film). • The default setting is checked. If checked, the Ribbon Low message box is displayed with every print job when Printer reports low Ribbon to the Driver. • Do not show this message again: The check box allows the user to suppress message per Driver instance. Default = unchecked.
RESTRICTED USE ONLY Fargo Electronics, Inc. Using the Film Low message The default setting is checked. • If checked, Film Low message box is displayed with every print job when Printer reports low Ribbon to the Driver. • Do not show this message again. The check box allows the user to suppress message per Driver instance. Default = unchecked.
RESTRICTED USE ONLY Fargo Electronics, Inc. Selecting the Calibrate Film tab The two buttons for the Calibrate Film tab are described below. • Calibrate button: Sends calibrate film command to Printer. Follow the instruction on the page for setting up the Printer. • Help button: Launches help specific to this tab. Step 1 Procedure Select the Calibrate Film tab. a. Ensure that the Film Cartridge is installed. b. Ensure the Printer’s Cover is closed. c. Click on the Calibrate button.
RESTRICTED USE ONLY Fargo Electronics, Inc. Selecting the Calibrate Ribbon tab The two buttons for the Calibrate Ribbon tab are described below. • Calibrate button: Sends the Calibrate Ribbon Command to Printer. Follow the instructions below to set up the Printer. • Help button: Launches help specific to this tab. Step 1 Procedure Select the Calibrate Ribbon tab. a. Ensure that the Ribbon Cartridge is removed. b. Ensure the Printer’s Cover is closed. c. Click on the Calibrate button.
RESTRICTED USE ONLY Fargo Electronics, Inc. Selecting the Clean Printer tab The button for the Clean Printer tab is described below. • Clean Button: Launches cleaning routine. Follow the instruction on the page for setting up the Printer. • Help button: Launches help that is specific to this tab. Step 1 Procedure Click the Clean Printer tab. See the next page. a. Remove the Card Cartridges and close the covers. b. Remove the paper back from both sides of the Cleaning Card.
RESTRICTED USE ONLY Fargo Electronics, Inc. Selecting the Clean Printer tab (continued) See the procedure on the previous page. HDPii High Definition Card Printer/Encoder User Guide (Rev. 1.
RESTRICTED USE ONLY Fargo Electronics, Inc. Using the Clean Printer Group Box The default setting is checked. If checked, Printer Cleaning Notification dialog box is displayed when Firmware EE setting changes after 3000 cards. (Note: Firmware EE setting resets upon clean command being sent to the Firmware.) • Clean Now radio button: This is the default every time this message box launches. • Clean Now radio button: When this is chosen (and click OK), the Toolbox is launched open to Clean Printer tab.
RESTRICTED USE ONLY Fargo Electronics, Inc. Selecting the Advanced Settings tab Use the Advanced Settings tab for adjusting the internal Printer settings, which are customized for every Printer at the factory and saved directly within the Printer's memory. (Note: You can select the Restore Defaults to restore the internal default settings.) HDPii High Definition Card Printer/Encoder User Guide (Rev. 1.
RESTRICTED USE ONLY Fargo Electronics, Inc. Selecting the Advanced Settings tab (continued) These change values for Firmware settings. See below. • Setting Column: Displays label for setting • Default Column: Displays default value for setting • Current Column: Displays current value for setting • Change the value by clicking on the value to activate spin control or type. • Apply Button: Applies changed values. • Restore Defaults Button: Restores default values.
RESTRICTED USE ONLY Fargo Electronics, Inc. Reviewing the No Printer Connected error message If there is no Printer connected or if the Driver is unable to communicate with the Printer, the following error will be displayed and the grid will be blank. Reviewing the Value outside the Range error message If typing a value outside the range, an error message will display specific to the setting when leaving the spin control to click any other spin control, button or tab.
RESTRICTED USE ONLY Fargo Electronics, Inc. Section 10: Cleaning The Cleaning Kit part number for this Printer is 089200. For more detailed instruction, please refer to the Cleaning Kit Instruction Sheet in the kit. Important: The Printer should be cleaned on a regular basis to ensure that the Printer consistently produces high quality output. Danger: Be sure to disconnect the Printer's power cord whenever performing any type of maintenance procedure unless otherwise directed.
RESTRICTED USE ONLY Fargo Electronics, Inc. Safety Messages (review carefully) Symbol Critical Instructions for Safety purposes Danger: Failure to follow these installation guidelines can result in death or serious injury. Information that raises potential safety issues is indicated by a warning symbol (as shown to the left). Caution: • To prevent personal injury, refer to the following safety messages before performing an operation preceded by this symbol.
RESTRICTED USE ONLY Fargo Electronics, Inc. Accessing the Clean Printer tab See below. HDPii High Definition Card Printer/Encoder User Guide (Rev. 1.
RESTRICTED USE ONLY Fargo Electronics, Inc. Cleaning the Printer Platen Roller and Card Feed Rollers Perform this procedure approximately every 1,000 prints to maintain a consistent print quality. (Note: The Card Feed Rollers move the card throughout the print process. Rollers should be kept clean to prevent card jams and card contamination. This cleaning process will ultimately lead to better print quality and extended Printhead life.
RESTRICTED USE ONLY Fargo Electronics, Inc. Cleaning the Printer Platen Roller and Card Feed Rollers (continued) Display A – Clean Printer window HDPii High Definition Card Printer/Encoder User Guide (Rev. 1.
RESTRICTED USE ONLY Fargo Electronics, Inc. Cleaning the Printer Platen Roller and Card Feed Rollers Display B - Cleaning Card setup for Magnetic Encoder HDPii High Definition Card Printer/Encoder User Guide (Rev. 1.
RESTRICTED USE ONLY Fargo Electronics, Inc. Cleaning Procedures Cleaning inside the Printer Step Procedure 1 Open the Front Cover. 2 Remove the Print Ribbon and transfer Film from the Printer. 3 If you have a can of compressed air, blow out all visible areas of the Printer interior. (Note: Remove any debris that may be inside.) OR If you do not have a can of compressed air, use a cleaning pad from the Printer Cleaning Kit to wipe out all visible areas inside the Printer.
RESTRICTED USE ONLY Fargo Electronics, Inc. Cleaning the Printhead Clean the Printhead (every time the Print Ribbon is changed) to maintain consistent print quality, as instructed below. This procedure should also be performed approximately every 1000 prints in order to maintain consistent print quality. Caution: Never use a sharp tool or abrasive object of any kind to clean the Printhead. It will damage the Printhead.
RESTRICTED USE ONLY Fargo Electronics, Inc. Replacing the Card Cleaning Roller Caution: Replace the Card Cleaning Tape approximately every time the Print Ribbon is changed. Steps Procedure 1 Remove the Card Cartridge to access the Cleaning Roller. 2 Remove the cleaning roller as shown in Display A. 3 Replace with the new Card Cleaning Roller. HDPii High Definition Card Printer/Encoder User Guide (Rev. 1.
RESTRICTED USE ONLY Fargo Electronics, Inc. Cleaning the Magnetic Encoder Danger: Be sure to disconnect the Printer's power cord whenever performing any type of maintenance procedure unless otherwise directed. Step Procedure 1 Open the Front Cover and remove the Film Cartridge. 2 Remove the Magnetic Cover to access the Magnetic Head. 3 Remove the Magnetic Head. See Display A below. 3 Use an alcohol wipe from the cleaning kit to clean the Magnetic Head. See Display B below.
RESTRICTED USE ONLY Fargo Electronics, Inc. Cleaning the Magnetic Encoder Display A Display B HDPii High Definition Card Printer/Encoder User Guide (Rev. 1.
RESTRICTED USE ONLY Fargo Electronics, Inc. Section 11: Fargo Workbench Printer Utility Using the Inhibit Panel (HDPii) The Inhibit Panel (I designation under YMCI, YMCKI, and YMCKIKI) allows definition of areas on the surface of the card that will prevent the transfer of film to the card surface. • When Active: This feature is active when using the Ribbons (I designation under YMCI, YMCKI, and YMCKIKI).
RESTRICTED USE ONLY Fargo Electronics, Inc. Using Inhibit Panel (via the Fargo Workbench Printer Utility) Step 1 Procedure Create the Inhibit Panel Layout within the Fargo Workbench Printer Utility. HDPii High Definition Card Printer/Encoder User Guide (Rev. 1.
RESTRICTED USE ONLY Fargo Electronics, Inc. Using Inhibit Panel (via the Fargo Workbench Printer Utility) Step 2 Procedure Save the file. HDPii High Definition Card Printer/Encoder User Guide (Rev. 1.
RESTRICTED USE ONLY Fargo Electronics, Inc. Using Inhibit Panel (from an Application) The second way of using the Inhibit Panel is to have a TextOut command, containing a “~i” within the print job itself. The “~i” is followed by the file name of a bitmap file, which is merged when the print job is rendered or changed to instructions that the printer understands.
RESTRICTED USE ONLY Fargo Electronics, Inc. Using the Inhibit Panel (via Application) (continued) Step 1 Procedure Create a bitmap file using Microsoft Paint which is of size 1035 pixels width and 661 pixels length, of monochrome (Black and White) colors. HDPii High Definition Card Printer/Encoder User Guide (Rev. 1.
RESTRICTED USE ONLY Fargo Electronics, Inc. Using the Inhibit Panel (via Application) (continued) Step 2 Procedure Place objects on the image which correspond to the area which are to be inhibited. HDPii High Definition Card Printer/Encoder User Guide (Rev. 1.
RESTRICTED USE ONLY Fargo Electronics, Inc. Using the Inhibit Panel (via Application) (continued) Step 3 Procedure Fill the inhibit areas with black color. HDPii High Definition Card Printer/Encoder User Guide (Rev. 1.
RESTRICTED USE ONLY Fargo Electronics, Inc. Using the Inhibit Panel (via Application) (continued) Step 4 Procedure Save the file as a BMP from within Paint. HDPii High Definition Card Printer/Encoder User Guide (Rev. 1.
RESTRICTED USE ONLY Fargo Electronics, Inc. Using the Inhibit Panel (via Application) (continued) Step 5 Procedure Add the ‘~i’ command to the application file. In this case Microsoft Wordpad was used. HDPii High Definition Card Printer/Encoder User Guide (Rev. 1.
RESTRICTED USE ONLY Fargo Electronics, Inc. Using the Inhibit Panel (via Application) (continued) Step 6 Procedure Create the rest of the card using the application. HDPii High Definition Card Printer/Encoder User Guide (Rev. 1.
RESTRICTED USE ONLY Fargo Electronics, Inc. Using the Inhibit Panel (via Application) Step 7 Procedure Print the card from within the application. In this case, use File -> Print. HDPii High Definition Card Printer/Encoder User Guide (Rev. 1.
RESTRICTED USE ONLY Fargo Electronics, Inc. Using the Test Print The printer has a test print file which can be sent to the printer to verify the Inhibit Panel functionality. To test the I Panel, perform these steps. Step Procedure 1 Bring up the Printer Preferences dialog via Start -> Settings -> Printers and Faxes. Right click on the HDPii printer instance, then left click on Printer Preferences to select the Card tab. 2 Click the Test Print button.
RESTRICTED USE ONLY Fargo Electronics, Inc. Inhibit Panel Feature Operation The Inhibit feature allows the user to define areas on the card surface which will not accept any transfer of print data. With the reverse image transfer technology used in this printer, the color (dye-sublimation, for colors or resin thermal transfer, for black resin) is transferred first onto a transfer film then that transfer film is used to fuse the coloring material onto the surface of the card.
RESTRICTED USE ONLY Fargo Electronics, Inc. Using the Application For Inhibit Area Placement The second way of using the Inhibit Panel feature is to use application software together with control commands embedded within the application file. The application must support the functionality of the “TextOut” feature. • Not all applications provide this functionality. (Note: Applications which support TextOut include Corel Draw, Microsoft Word, and Microsoft WordPad.
RESTRICTED USE ONLY Fargo Electronics, Inc. Background Information - Windows Printing System Rendering is the conversion of the print job data from the application software into the various color “panels” that the printer can understand. • The rendering component of the Windows printing system looks for the inhibit bitmap file within the “~i” command to combine its information into the data that goes to the printer.
RESTRICTED USE ONLY Fargo Electronics, Inc. Inhibit Bitmap File Placement Examples For example placing a “~iC:\Test\inhibit.bmp” text object within a Corel Draw print job against a local HDPii printer instance under Windows XP causes the printer driver to look for a file with that name and location on the local workstation. The location of the inhibit area within the print job is the upper left hand corner of the page where the TextOut string is placed upon the drawing within the application.
RESTRICTED USE ONLY Fargo Electronics, Inc. Section 12: Packing the Card Printer The purpose of this section is to provide the User with a specific packing procedure for the Printer. Follow this instruction to pack the Card Printer for transport. Step Procedure 1 Clean the inside of the Printer with deionized air. Wipe it down with a lint-free cloth. 2 Clean the Printhead with a Printhead swab. 3 Pack the Printer in the original carton and packing materials.
RESTRICTED USE ONLY Fargo Electronics, Inc. Section 13: Firmware Updates The purpose of this section is to provide the User with information on the internal software or Firmware, which controls all aspects of the Printer's operation. New Firmware versions may be released containing enhancements, such as improved reliability, added features or better print quality. New Firmware updates can be downloaded from the Internet.
RESTRICTED USE ONLY Fargo Electronics, Inc. Performing the Firmware Updates Step 1 Procedure Type in: www.fargosupport.com to bring up the web site, as shown below. Display A – Card tab (Diagnostics button) HDPii High Definition Card Printer/Encoder User Guide (Rev. 1.
RESTRICTED USE ONLY Fargo Electronics, Inc. Performing the Firmware Updates (continued) Display B – Fargo Workbench Printer Utility (Printer Information tab) HDPii High Definition Card Printer/Encoder User Guide (Rev. 1.
RESTRICTED USE ONLY Fargo Electronics, Inc. Performing the Firmware Updates (continued) Step 2 Procedure This will launch the Technical Support page. • Click on the Firmware selection box. • Using the drop down menu, select the Printer. • Click on the Go button, as shown below. HDPii High Definition Card Printer/Encoder User Guide (Rev. 1.
RESTRICTED USE ONLY Fargo Electronics, Inc. Performing the Firmware Updates (continued) Step Procedure 4 Click on the Printer name under Printer Firmware to begin the download. 5 Click on the Save button to save the file. 6 Click on the Save button to save the file to the computer’s Desktop. 7 Click on the Close button to close this dialog when the download is completed. 8 From the computer’s desktop, double click on the Firmware .exe file to un-zip it.
RESTRICTED USE ONLY Fargo Electronics, Inc. Performing the Firmware Updates (continued) Step 12 Procedure Select Upgrade Firmware in the Actions dropdown menu, as shown below. This brings up the Upgrade Firmware window, as shown below. See the Fargo Workbench Printer Utility User Guide at this time. HDPii High Definition Card Printer/Encoder User Guide (Rev. 1.
RESTRICTED USE ONLY Fargo Electronics, Inc. Performing the Firmware Updates Step 13 14 Procedure • Select the Desktop from the Browse menu. • Click on the .frm file. • Click on the Open button. • Click on Upgrade to send the Firmware to the Printer. This completes the Firmware Update process. HDPii High Definition Card Printer/Encoder User Guide (Rev. 1.
RESTRICTED USE ONLY Fargo Electronics, Inc. Section 14: Fargo Technical Support The purpose of this section to provide the User with an efficient, step-by-step procedure to be used when contacting Fargo Technical Support as needed for the Printer. Contacting Fargo Technical Support Step 1 Procedure Read the suggested Sections of the Technical Service and Maintenance Manual in order to troubleshoot the Card Printer.
RESTRICTED USE ONLY Fargo Electronics, Inc. Reading the Serial Numbers on a Fargo Printer The purpose of this section is to provide updated instructions for reading serial numbers on a Fargo Printer. Finding out when a Card Printer was manufactured You can determine when your card Printer was manufactured by reading directly from the serial number (affixed to your card Printer). 1. Year Built: The first two digits in the serial number indicate the year that the Printer was manufactured. 2.
RESTRICTED USE ONLY Fargo Electronics, Inc. Section 15: Reviewing Spare Parts Lists Reviewing Spare Parts List for HDPii Series Recommended Spare Parts List Effective Date: To be added at a later date For current pricing see http://www.fargopartner.com/support_services/ HDPii High Definition Card Printer/Encoder User Guide (Rev. 1.
RESTRICTED USE ONLY Fargo Electronics, Inc. Section 16: Glossary of Terms Term Definition 24-bit color A color depth for an image that uses 8 bits for each color (red, blue, green) combining the possible 256 shades to provide a color depth of 16.7 million colors. AC - Alternating Current An electrical current that reverses its direction at regular intervals (typically 50 - 60 times a second).
RESTRICTED USE ONLY Fargo Electronics, Inc. Glossary of Terms (continued) Term Definition Barcodes A series of alternating black and white stripes, of varying widths (each character denoted by a set number and width of black stripes) that allows characters to be optically read by a computer. batch print A file sent down from the computer that contains commands to print a number of cards, sequentially.
RESTRICTED USE ONLY Fargo Electronics, Inc. Glossary of Terms (continued) Term Definition Cache A type of memory Buffer to store data temporarily, used to hold information that is most often exchanged between controller and peripheral, to expedite data transfer. Calibrating A procedure to adjust an electro-mechanical device so that it operates within established parameters. Cleaning Roller High tack Rollers positioned just after the input hopper to lift debris off the card as it rolls over it.
RESTRICTED USE ONLY Fargo Electronics, Inc. Glossary of Terms (continued) Term Definition CR-79 A card dimension standard of 2.0625 L X 3.3125 W (+/-0.002 W, +/-0.005 L) or 52.400 X 84.150 mm. CR-80 A card dimension standard of 2.125 X 3.370 (+/-0.002 W, +/0.005 L) or 53.975 X 85.598 mm. CR-90 A card dimension standard of 2.375 X 3.625 (+/-0.002 W, +/0.005 L) or 60.325 X 92.075 mm. CR-100 A card dimension standard of 2.625 X 3.875 (+/-0.002 W, +/0.005 L) or 66.675 X 98.425 mm.
RESTRICTED USE ONLY Fargo Electronics, Inc. Glossary of Terms (continued) Term Definition Direct-to-Card (DTC) Printing The Direct-to-Card printing process prints digital images directly onto any plastic card with a smooth, clean, glossy PVC surface. Dither A system of distributing dots to control the hue, brightness and/or saturation. In monochrome printing, this controls the brightness. In color printing, Dithering can supply a larger color gamut than non-Dithering.
RESTRICTED USE ONLY Fargo Electronics, Inc. Glossary of Terms (continued) Term Definition Dwell Time The speed at which the card moves across the Transfer Roller, measured in seconds/inch (sec/in). This can be adjusted in the Driver to ensure adhesion and card flatness. Dye Migration The diffusion of dye out of the card surface and into another receptive surface, such as a vinyl pouch card holder, resulting in a faded image.
RESTRICTED USE ONLY Fargo Electronics, Inc. Glossary of Terms (continued) Term Definition Encoder (wheel) An electromechanical device, attached to a shaft that detects the change in rotational position, incremented to count ticks per revolution. The Printer's Encoder wheel both detects motion and measures the amount of rotation in the movement of the Ribbon. Engine A generic term for a collection of systems and mechanisms that is dedicated to executing a specific function.
RESTRICTED USE ONLY Fargo Electronics, Inc. Glossary of Terms (continued) Term Definition Flash Memory A microchip based non-volatile memory device that holds its data when power is removed. This allows for field reprogramming of the Printer commands, such as Printer Firmware upgrades, without the necessity of changing chips. Font A character set similar in style and form. Fonts can be graphical or mathematical constructs, represented by a series of dots or an Assembly of curves and lines.
RESTRICTED USE ONLY Fargo Electronics, Inc. Glossary of Terms (continued) Term Definition Hard Drive A high capacity storage device in a PC consisting of nonremovable magnetically encodable platters. Hardware Physical components of a system such as the Printer, the PC, the power supply. (High Definition Printing™) The High-Definition Printing process prints full-color images onto clear transfer film (InTM). The film is then fused to the card through heat and pressure via a heated Roller.
RESTRICTED USE ONLY Fargo Electronics, Inc. Glossary of Terms (continued) Term Definition IEEE 1284 (Institute of Electrical and Electronics Engineers 1284) A standard method of signaling for a bi-directional parallel interface on personal computers. To ensure proper Printer communications and image output, Fargo recommends a parallel interface cable that complies with this specification. Image A collection of pictures or graphical elements that compose the visual features on a card.
RESTRICTED USE ONLY Fargo Electronics, Inc. Glossary of Terms (continued) Term Definition LAN (Local Area Network) An array of several computers connected through a series of data transfer cables for the sharing of data and peripherals. Landscape A document layout that is viewed with the document's long axis in a horizontal orientation. LCD (Liquid Crystal Display) A device that contains a liquid crystal between two pieces of polarized film through which reflected or ambient light can pass.
RESTRICTED USE ONLY Fargo Electronics, Inc. Glossary of Terms (continued) Term Definition MB (Megabyte) A unit of storage that equals 1,048,576 bytes. Memory A generic term for any device that stores digital information using magnetic media or digital chip storage device. Menu A descriptive list of headings above nested functions that aid navigation to a specific operation. These are found in computer applications, with the heading at the top of a subset of like functions.
RESTRICTED USE ONLY Fargo Electronics, Inc. Glossary of Terms (continued) Term Definition Oversized Cards Oversized cards are used for more efficient visual identification and are available in many non-standard sizes. The most popular sizes are CR-90 (3.63 x 2.37/92mm x 60mm) and CR-100 (3.88 x 2.63/98.5mm x 67mm). Overlaminate Protective clear or holographic material to increase security and durability applied over the printed surface with a hot Roller.
RESTRICTED USE ONLY Fargo Electronics, Inc. Glossary of Terms (continued) Term Definition Pinch Roller A free spinning (non-driven) Roller that presses the card against the drive Roller, on the opposite side, to ensure an adequate normal force for proper traction. Pixel Short for picture element. The smallest element of a graphic. Platen The hard rubber Roller that drives the media through the Printer, providing support to the backside of the media during printing or laminating.
RESTRICTED USE ONLY Fargo Electronics, Inc. Glossary of Terms (continued) Term Definition Printhead The device on a Printer that produces the image on the media. PVC Abbreviation for polyvinyl chloride, often called vinyl. PVC is the component of the 0.002 thick clear, dye receptive film on the surface of the identification card and is the primary component of the identification card cores. Queue A sequence of files or sets of data, awaiting transmission or processing.
RESTRICTED USE ONLY Fargo Electronics, Inc. Glossary of Terms (continued) Term Definition Resolution The number of individual pixels in a graphic, taken over a given length, used to indicate the sharpness of the picture and the level of detail. The number of elements in the Printhead determines Fargo Printer resolution. RFI (Radio Frequency Interference) Electromagnetic waves radiated by poorly shielded cables or electronic devices that interfere with the operation or data transfer of another device.
RESTRICTED USE ONLY Fargo Electronics, Inc. Glossary of Terms (continued) Term Definition Saturation A measure of the degree of color, from gray, with the same brightness. Self-test A pre-determined print file used to confirm Printer operation typically sent from the Driver or stored in the Printer's memory. Sensor An electro-mechanical/electro-optical device used to indicate a change in state in the Printer such as when a card reaches a certain location.
RESTRICTED USE ONLY Fargo Electronics, Inc. Glossary of Terms (continued) Term Definition Spooling Rather than moving a print job directly to the Printer, the job is written to the disk so that the user can access the application faster while Windows takes care of printing in the background. SS (Start Sentinel) The character denoting the end of a magnetic data string. Stacker The device that moves the finished cards onto the output column ordering them First In, First Out.
RESTRICTED USE ONLY Fargo Electronics, Inc. Glossary of Terms (continued) Term Definition Thermocouple A device for measuring temperature using a junction of two wires of dissimilar metals that produce a voltage when heated that varies proportionally with the temperature. Thin Film Overlaminate A 0.25-mil thick resin material that enhances card security and durability applied over the printed surface with a hot Roller. Available as clear or with embedded holographic-type security images.
RESTRICTED USE ONLY Fargo Electronics, Inc. Glossary of Terms (continued) Term Definition UPS (Un-interruptible Power Supply) An AC power supply, typically powered by batteries, which provides temporary power to the PC or Printer during an interruption of the supply voltage. USB (Universal Serial Bus) A 1.5M/sec (12Mbit/sec) serial communication interface that can support 127 separate devices consisting of 4 wires: power, ground, data in and data out.
RESTRICTED USE ONLY Fargo Electronics, Inc. Glossary of Terms (continued) Term Definition YMCI The designation of colored Ribbon by the panels of color in the order in which they are printed: Yellow (Y), Magenta (M), Cyan (C), and Inhibit (I). YMCKI The designation of colored Ribbon by the panels of color in the order in which they are printed: Yellow (Y), Magenta (M), Cyan (C), Black (K) and Inhibit (I).
RESTRICTED USE ONLY Fargo Electronics, Inc. ( (High Definition Printing™), 16-9 (Thin Film) Overlaminate, 16-19 . .2, 7-89 .
RESTRICTED USE ONLY D Darkness, 16-4 DB-9, 16-4 DC (Direct Current), 16-4 DC Motor, 16-4 Default, 16-4 Default button, 7-43 Defined Area(s) check box, 7-87 Defined Area(s) option, 7-85 Defrag, 16-4 Delete button – K Panel, 7-83 DIP switches (Dual In-line Package Switches), 16-4 Direct-to-Card (DTC) Printing, 16-5 direct-to-card printing, 7-2 disable printing, 7-37 disk cleanup utility, 5-31 Dither, 16-5 dither method, 7-44 DMA (Direct Memory Access), 16-3 Dongle, 16-5 Dot, 16-5 Dot pitch, 16-5 Download, 16
RESTRICTED USE ONLY ID (Identification), 16-9 ID format, 7-31 ID software applications, 7-77 IEEE 1284 (Institute of Electrical and Electronics Engineers 1284), 16-10 Image, 16-10 Image color tab, 7-43 Image orientation, 7-53 Image Position controls, 7-53 Image Transfer tab, 7-15 Inhibit panel, 2-20 Input, 16-10 Input Hopper, 16-10 Input Hopper Card Capacity, 2-11 Interface, 2-11 Intermediate Transfer Media (InTM), 16-10 IPC, 7-7 ISO, 16-10 ISO 7811-2 Magnetic Stripe, 7-76 ISO encoded data format, 7-68 ISO
RESTRICTED USE ONLY Print Area, 2-13 Print Back Side First option, 7-33 Print back side only, 7-34 print both sides, 7-31, 7-32 Print Both Sides option, 7-32, 7-34 Print Driver, 16-14 Print Job, 16-14 Print Length, 2-8, 7-12 Print Ribbon, 10-35 Print Ribbon Options, 2-13 Print Ribbons, 2-20 Print Server, 16-14 Print Speed, 2-14 Print Speed-Batch Mode, 2-14 Print Station, 10-36 Print Status Screen, 2-19 Print Test Image, 5-32 print the first page of a two-page document, 7-33 Print Width, 2-8, 7-12 Print YMC
RESTRICTED USE ONLY Thermocouple, 16-19 thicker cards, 7-2 thinner cards, 7-2 Through-hole, 16-19 Timeout, 16-19 TOF (Top of Form), 16-19 total card area, 7-88 Track, 16-19 Track Information, 7-77 track number (1, 2 or 3), 7-77 Transfer Count, 5-36 Transfer Dwell Time/Temperature, 7-55 transferred Film, 7-5 troubleshoot the Printer, 14-1 Troubleshooting, 5-1, 16-19 TrueType (TT), 16-19 TrueType black text and TrueType barcodes, 7-81 U UL, 2-5 UltraCard IIIs-Glossy PVC, 7-5 UltraCard IIIs-Glossy PVC + H Pa