© Fast & Fluid Management, EuroAT FAST & FLUID MANAGEMENT EuroAT ENGLISH p1
© Fast & Fluid Management, EuroAT p2
© Fast & Fluid Management, EuroAT Table of Contents EuroAT manual (UK) EU Declaration of conformity Introduction & Warranty Explanation of picture Safety Instructions Installation Operation Maintenance Troubleshooting Technical specifications Contributing to the Protection of the Environment 4 4 5 6 7 8 10 14 16 18 19 p3
© Fast & Fluid Management, EuroAT EuroAT manual (UK) EU Declaration of conformity Fast & Fluid Management, the Netherlands A Unit of IDEX Corporation Hub van Doorneweg 31 2171 KZ Sassenheim, the Netherlands declare that: Produkt: Automatic dispensers Model: Accutinter Types: AT7500 are in compliance with the following directives: Machinery Directive 98/37/EC Low Voltage Directive 73/23/EEC Electromagnetic Compatibility Directive 89/336/EEC according to the following harmonized standards: EN 292-1, EN
© Fast & Fluid Management, EuroAT Introduction & Warranty Introduction By selecting a Fast & Fluid Management Color Dispenser you have opted for a produc t which is the result of intensive research. Top-quality com ponents, craftsmanship and a modern ergonomic design all serve to guarantee a long service life and a high degree of user friendliness.
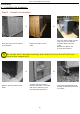
© Fast & Fluid Management, EuroAT Explanation of picture Dispenser 1. 2. 3. 4. 5. 6. 7.
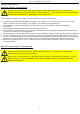
© Fast & Fluid Management, EuroAT Safety Instructions General safety instructions Attention! Before installing the equipment and setting it in operation, please read the instructions for use carefully. This is safer for yourself and prevents unnecessary damage to the machine. The manufacturer accepts no liability if the instructions below are not followed: 1. 2. 3. 4. 5. 6. 7. 8. If a machine has been damaged (during transport, for example), do not attem pt to set it in operation.
© Fast & Fluid Management, EuroAT Installation A - Installing the dispenser Step 1 - Unpack the machine > Place the crate near the place of installation. > Turn one off the sides up side down so you can ride the machine down from the crate. Remove the plastic foil around the machine. Remove the sides of the crate. Be careful not to damage the body and surfaces of your EuroAT with any tools while unpacking it. > Remove pac king clamps and bolds.
© Fast & Fluid Management, EuroAT B - Installing the computer and software Step 1 - Place and connect computer to dispenser > Place computer and monitor on top of dispenser module and the keyboard on the keyboard on support Connect dispenser con-nector to COM1 (default) and mouse, keyboard and other appliances to design-nated computer ports. Step 2 - Install dispenser software on computer > Install all necessary software provided by software supplier. Check software manual for details.
© Fast & Fluid Management, EuroAT Operation A - First time operation Step 1 - Switching ON the dispenser & computer > The machine is automatically switched on when the power connector at the back of the dispenser is plugged into a 220V or 100V-110V wall socket. * We recommend to keep the machine on at all times. Step 2 - Setting the stirring time > The stirring time and interval can be altered from its default settings*.
© Fast & Fluid Management, EuroAT Step 3 - Fill the nozzle closure. > Use the appropriate com- mand from the dispenser software to open the nozzle closure. Remove the cup holder. > Fill the cup with water or cleaning fluid until the pad is soaked. Use an normal cotton disc pad. Replace the cup holder in its original position. Use only cleaning fluids recommended by your paint supplier. Wrong materials can result in nozzle blockage and reduced accuracy.
© Fast & Fluid Management, EuroAT B - Dispensing Step 1 - Bring can to correct position > Place the can at the right place of the can table. Use the 3 LED-spots to check if the can is in the right position. > If the electrical can table option is installed: move the can table upward by pres-sing the can table switch on the keyboard support. > For safety reasons the can table will not move upwards without the nozzle guard in right position! The upward movement will stop automatically.
© Fast & Fluid Management, EuroAT Step 2 - Dispense colorant into base material > Ensure can opening is under the dispenser nozzle and at its optimal height . > Choose desired formula as shown in software manual. The dispenser will sub-sequently dispense the colorants. Lower can by pressing can table button on keyboard support and remove can. Dispensing is mainly a software issue. Please read your software manual thoroughly for all possible options.
© Fast & Fluid Management, EuroAT Maintenance A - Daily maintenance Clean the nozzle clusure, refill canisters and run morning program > Replace the pad. Refill the cup with water or c leaning fluid until the pad is soaked. Use a normal cotton disc pad. > Fill canisters if level is low and update levels in software. Stir colorant beforehand. Start software m orning program to purge valves and clean nozzles. Check your software manual for details.
© Fast & Fluid Management, EuroAT C - Monthly maintenance > Remove back panel. Check pump for possible malfunctions (e.g. leakage or blockage). Attention! MOVING PARTS CAN CAUSE INJURY. Always turn off power before accessing moving parts.
© Fast & Fluid Management, EuroAT Troubleshooting A - Introduction Before calling your machine supplier or Service Department, please check whether you can solve the problem yourself. If you cannot, then call the Servic e Department for advic e. Have the model number and serial number at hand (these can be found on the silver CE sticker at the service panel at the back of the m achine). Use the Problem Solving chart below to judge whether you c an solve a problem yourself or not.
© Fast & Fluid Management, EuroAT C - Service Department If necessary, you can get in touch with your supplier or the local service departm ent, or contac t the manufacturer directly. If you contact the m anufacturer, make sure that you have the m odel number and serial number to hand. They can be found on the nam e plate on the bac k of the machine. Fast & Fluid Management P.O.
A B C D 2 1 1 2 3 4 5 6 J4 1 2 3 4 5 6 5 SPFE240D25 1 2 F3--3AG 4A AGITATE F27831 AC POWER DISTRIBUTION TEST SW SPST SW1 MTG1 CON3 AC LOAD1 AC LOAD2 D1 LED AGITATE IN+ IN- U1 J1 Brown TO DC J12.
A B C TO PAC J5.1 1 2 3 1 2 3 1 2 3 1 2 3 1 2 3 1 2 3 1 2 3 1 2 3 1 2 3 1 2 3 1 2 3 1 2 3 1 2 3 1 2 3 1 2 3 1 2 3 TO MUX3_J30.11 FROM MUX4_J30.11 TO MUX3_J30.8 FROM MUX4_J30.8 TO MUX3_J30.5 FROM MUX4_J30.5 TO MUX3_J30.2 FROM MUX4_J30.2 TO MUX3_J29.17 FROM MUX4_J29.17 TO MUX3_J29.14 FROM MUX4_J29.14 TO MUX3_J29.11 FROM MUX4_J29.11 TO MUX3_J29.8 FROM MUX4_J29.8 TO MUX3_J29.5 FROM MUX4_J29.5 TO MUX3_J29.5 FROM MUX4_J29.2 TO MUX3_J28.217FROM MUX4_J28.17 TO MUX3_J28.
A B C D 5 MX4 MX4 MX4 MX4 J20.1 J20.2 J20.3 J20.4 J22.1 J22.2 J22.3 J22.4 MX4 MX4 MX4 MX4 MX1 MX1 MX1 MX1 J18.1 J18.2 J18.3 J18.
A B C D MX1 5 5 MX2 DISPENSE CONTROLLER (DC) 4 MX3 AC DISTRIBUTION (PAC) DC DISTRIBUTION (PDC) FRONT VIEW ELECTRONIC TRAY ASSEMBLY 4 MX4 3 3 DR1 DR2 DR2 2 DR4 DR5 Date: Size C Title 1 MX DC PAC PDC DR Monday, June 20, 2005 Document Number 1 Sheet Schematic, Euro DVX-32 Channels 4 Sim MULTIPLEXER ============> DISPENSE COORDINATOR====> AC POWER DISTRIBUTION====> DC POWER DISTRIBUTION====> STEPPER DRIVER===========> REFERENCE DESIGNATION TOP VIEW DR3 STEPPER DRIVE TRA
© Fast & Fluid Management, EuroAT Contributing to the Protection of the Environment Packaging Material The packaging protects the m achine against damage during transport. The pac kaging material was chosen based on its limited impact on the environment and its inherent possibilities for waste-disposal. The reuse of pac kaging material saves raw materials and produces less waste material. Generally speaking, your supplier will take the packaging off your hands.
© Fast & Fluid Management, EuroAT © Fast & Fluid Management, 2005 w w w .Fast-Fluid.