
Installation Instructions
3
1-800-888-2418 | www.feeneyinc.com
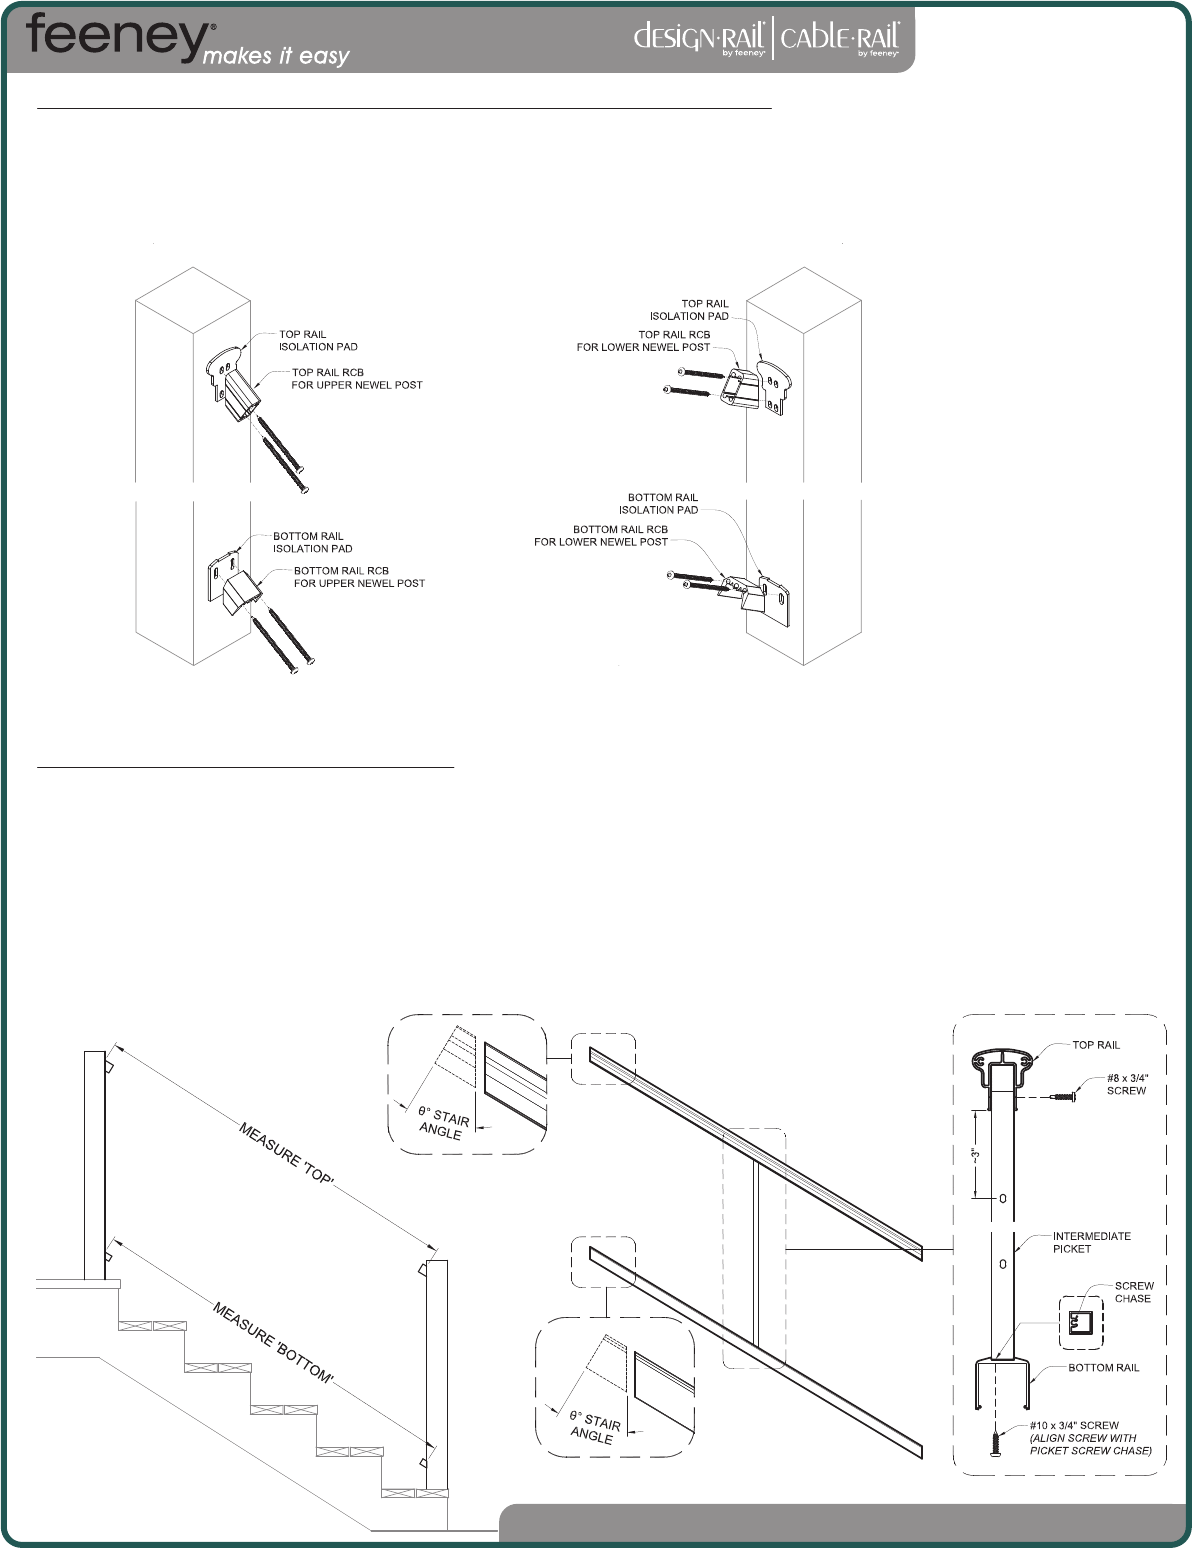
Stair Install: Step 3 – Assemble Rail Kits
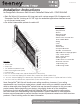
a) Measure the open width between each set of posts. (see Figure 3.1)
Note: Be sure to take two measurements: one just above the top RCBs for the top rail, and one
measurement just above the bottom RCBs for the bottom rail.
b) Trim the top and bottom rails to match the corresponding measurements, always miter the cuts on
both ends of the top and bottom rails to accommodate stair angle. (see Figures 3.1 & 3.2)
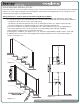
c) Attach the intermediate picket to the center of the top rail using a colored #8 x 3/4” screw and to the
center of the bottom rail using a #10 x 3/4” screw. (see Figure 3.2) Note: drill a 1/8” pilot hole for the #8
screw and a 1/4” pilot hole through the bottom rail for the #10 screw; the 1/4” hole must be drilled slightly
off center to align with the picket screw chase. The #8 and #10 screws require a #2 square drive bit.
(Figure 3.2)
(Figure 3.1)
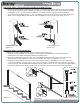
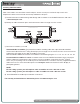
Stair Install: Step 2 – Attach Rail Connecting Brackets (RCBs) to Posts
a) Attach the top and bottom isolation pads and Rail Connecting Brackets to each post using the included
screws.
Note: Each stair RCB is different, be sure to use the proper RCB in the respective post loctaion.
(see Figures 2.1 & 2.2). The Rail Kits include #10 x 3” wood screws for attachment to wood posts
(as shown), also included are #10 x 1-3/4” self-tapping screws for attachment to non-ferrous metal posts.
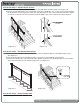
(Note: The recommended pre-drill size for a #10 self tapping screw is no less than 5/32" (0.157").
(Figure 2.1)
(Figure 2.2)
UPPER NEWEL POST LOWER NEWEL POST
(COLORED)