
Installation Instructions

6
Speeds Fan Controller
Model: TP50
Thank you and we are delighted you have chosen the 6 Speed
Fan controller for your home please read all instructions carefully
before assembly and use.
1
7. This product is for indoor use only.
8. This product requires 220 Vac 50/60Hz power supply.
9. This product is to be used only for controlling a ceiling fan with
an A.C. (Alternating Current) motor.
10. The remote controller receiver must be earthed during
installation.
11. Do not pull or cut short lead wires.
12. Do not drop or bump the remote controller set.
13. Do not use this remote controller in conjunction with any
variable (rheostat) wall controller.
14. Do not use the remote controller transmitter (handset) with
any other receiver.
15. Keep battery out of reach of children.
16. This manual is not intended to instruct or assist untrained or
unqualifi ed persons to install this remote controller.
17. It is the responsibility of qualifi ed, licensed installer and user to
apply common sense and care at all times during installation
and operation.
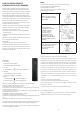
INSTALLATION INSTRUCTIONS
Make sure electricity is turned off at the main power box
before commencing work. Turn off the power by removing fuse
or turning off circuit breaker before installing remote controller.
3
SAFETY PRECAUTIONS
Please observe the following general safety precautions carefully
before and during all phases of handling, installation, removal,
operation and maintenance of this product. Failure to comply
with these precautions violates safety standards of design,
manufacture and intended use of the product.
We assumes no liability for customer’s failure to comply with these
requirements.
SAFETY WARNINGS
1. Read all instructions and safety information. Review assembly
diagrams provided before installing your new ceiling fan.
2. This remote controller must be installed according to local
authority regulations.
3. This product is not intended for use by persons (including
children) with reduced physical, sensory or mental capabilities,
or lack of experience and knowledge, unless they have
been given supervision or instruction concerning use of the
appliance by a person responsible for their safety.
4. Young children should be supervised to ensure that they do not
play with the appliance.
5. All electrical works must only be undertaken after disconnection
of the power by removing fuses or turning off the circuit
breaker, to ensure all pole isolation of the electrical supply.
6. Do not use outdoors where it could be exposed to water or
moisture.
2
READ BEFORE INSTALLATION
1. Power supply to input wires of remote controller receiver must
be connected through an isolation switch (e.g. wall switch).
2. Install remote controller receiver inside ceiling fan canopy to
ensure proper protection.
3. Set ceiling fan speed control rotary switch (if any) to HIGH
setting and control switch for light kit (if any) to ON position
before operating remote control functions.
4. For ceiling fan with pull chain switches, set pull chain switches
accordingly so that ceiling fan speed setting is at HIGH and fan
light setting (if any) is at ON position before operating remote
control functions.
5. Battery will weaken over time and should be replaced before
leaking takes place as this will damage the transmitter. Dispose
of used battery properly.
6. If remote controller is to be used for controlling a ceiling fan
(i) with a low profile (hugger) design, or (ii) that has a smaller
hanging bracket, then you should make sure the hanging
bracket will fit remote controller receiver. Otherwise, if the
receiver cannot be inserted into the hanging bracket due to
dimension limitations or because there is no hanging bracket
as may be in the case of a low profile (hugger design) ceiling
fan, then the receiver can be enclosed in an Electrical
Insulation Box (installation must comply to Australian wiring
regulations) and placed in the ceiling. Electrical Insulation Box
is not supplied. In this case, remember to draw the antenna /
aerial wire away from the insulation box through a small hole.
4